


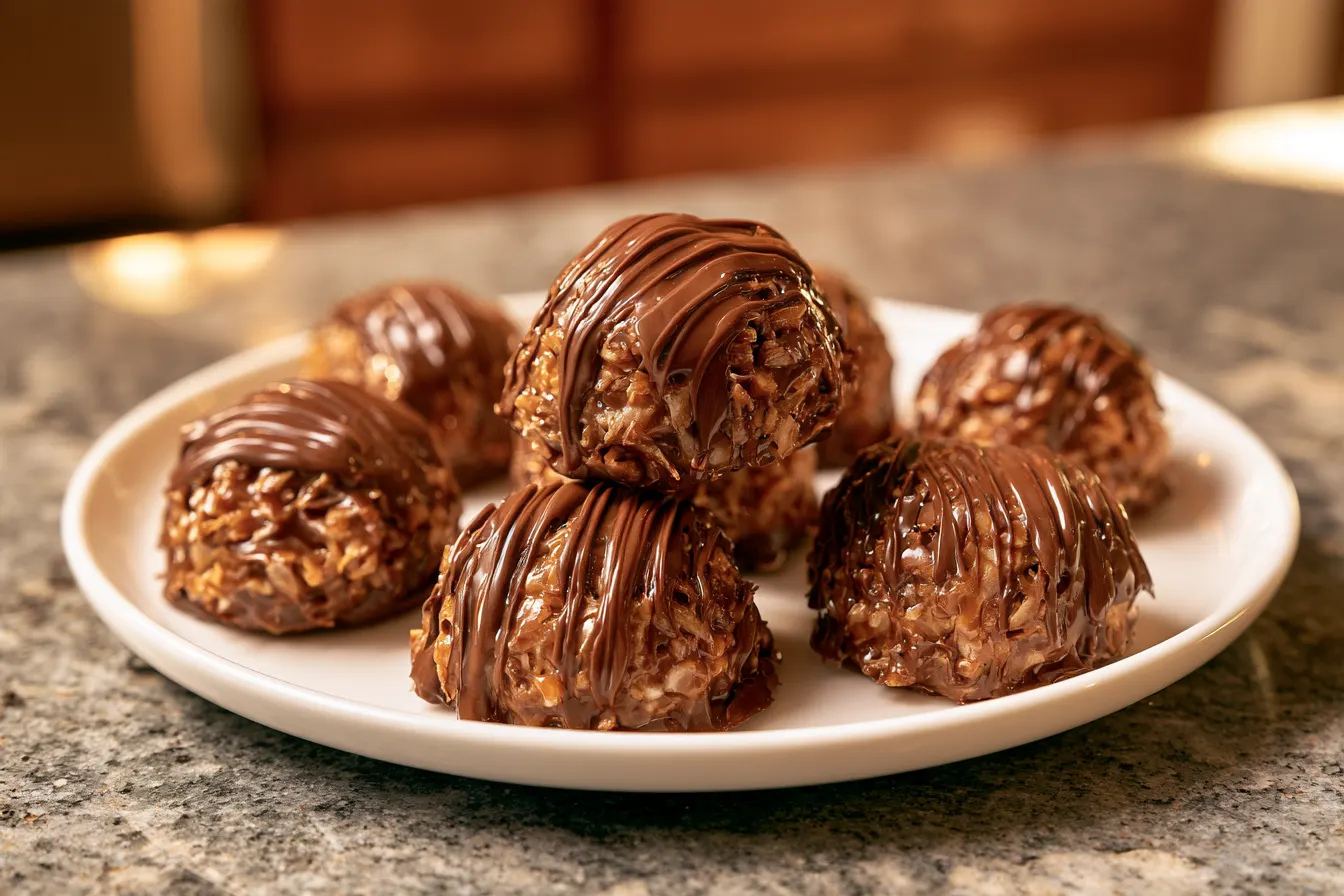
I once tried to recreate those iconic caramel-coconut-chocolate cookies from scratch, the ones that only appear for a few weeks a year, and let’s just say my kitchen ended up looking like a flour-and-coconut bomb went off. The dough was sticky, the chocolate seized, and the whole affair felt more like a science experiment gone wrong than a pleasant baking experience. That’s when I vowed to find a better, simpler way to get those unmistakable flavors without the headache, and lo and behold, these no-bake Samoa cookie bars were born. They capture all the chewy, toasty, rich magic you adore, but with zero oven time.

Why These No-Bake Wonders Will Become Your Go-To
Let’s be honest, sometimes you just need a dessert that delivers on taste without demanding hours of your precious time. These no-bake Samoa cookie bars fit that bill perfectly. They’re an absolute lifesaver for last-minute potlucks, holiday dessert tables, or simply when you need a little something sweet to get you through the afternoon slump. The combination of sweet, chewy, crunchy, and rich is just undeniable. The genius of this recipe lies in its simplicity. We’re building flavor with smart shortcuts, like using crushed shortbread cookies for our base, which gives us that classic Samoa cookie texture without the need for any baking. The result is a dessert that tastes incredibly decadent, yet comes together with surprising ease. It’s a true crowd-pleaser that always garners rave reviews.Gather Your Goodies: What You’ll Need
One of the best things about making these delightful bars is that the ingredient list is straightforward, mostly pantry staples you might already have on hand. Quality ingredients do make a difference here, especially with your chocolate and caramel, so splurge a little if you can!For the Crunchy Base
- 2 cups (about 250g) crushed shortbread cookies (or a similar plain cookie like Girl Scout Trefoils)
- 1/2 cup (113g) unsalted butter, melted
- 1/4 cup granulated sugar
For the Gooey Caramel Coconut Topping
- 1 (14-ounce) can sweetened condensed milk
- 1/2 cup (113g) unsalted butter
- 1/2 cup packed light brown sugar
- 1 teaspoon vanilla extract
- 3 cups shredded unsweetened coconut, toasted
For the Dreamy Chocolate Drizzle
- 1 1/2 cups semi-sweet chocolate chips (or dark chocolate for a richer flavor)
- 1 tablespoon coconut oil (or neutral oil, like vegetable or canola)
Crafting Your Caramel Coconut Bars: A Step-by-Step Guide
Ready to get started? This process is all about layering, and each step builds on the last to create a truly irresistible treat. No fancy equipment needed, just a little patience for chilling!Step 1: Laying Down the Foundation
First things first, we’re going to create our buttery, crunchy base. In a medium bowl, combine your crushed shortbread cookies, melted butter, and granulated sugar. Mix well until everything is evenly moistened. It should resemble wet sand.
Press this mixture firmly and evenly into the bottom of a 9×13-inch baking pan lined with parchment paper, leaving an overhang on the sides for easy removal later. Use the bottom of a flat glass or a measuring cup to really compact it. Pop this into the refrigerator while you prepare the next layer.
Step 2: Toasting That Coconut Just Right
While your base chills, let’s get that coconut golden and fragrant. Spread the shredded coconut in an even layer on a large baking sheet. Toast in a preheated oven at 300°F (150°C) for 8-12 minutes, stirring every few minutes, until golden brown. Keep a close eye on it, as coconut can go from perfectly toasted to burnt in a flash! Alternatively, you can toast it in a dry skillet over medium-low heat, stirring constantly, which is my preferred method for small batches. Once toasted, set it aside to cool.
Step 3: Whipping Up the Caramel Magic
In a medium saucepan, combine the sweetened condensed milk, butter, and brown sugar. Cook over medium heat, stirring constantly, until the mixture comes to a gentle boil. Reduce the heat to low and continue to simmer, stirring frequently, for 5-7 minutes, until the caramel thickens slightly and turns a rich, golden color. Remove from heat and stir in the vanilla extract.
Tip: Don’t rush the caramel. Low and slow heat, with consistent stirring, prevents it from burning and ensures a smooth, luscious texture. If it feels too thin after 7 minutes, give it another minute or two, but remember it will thicken considerably as it cools.

Step 4: Combining Caramel and Coconut Bliss
Once your caramel is ready and your toasted coconut has cooled slightly, gently fold the toasted coconut into the warm caramel mixture. Stir until the coconut is fully coated. This creates that iconic chewy, caramelly, coconutty topping we all adore.
Step 5: Layering It Up
Retrieve your chilled cookie base from the refrigerator. Evenly spread the warm caramel coconut mixture over the top of the shortbread crust. Use an offset spatula or the back of a spoon to ensure an even layer from edge to edge. Return the pan to the refrigerator and chill for at least 2 hours, or until the caramel is firm enough to handle.
Step 6: The Grand Finale: Chocolate Drizzle
Once your bars are firm, it’s time for the chocolate. In a microwave-safe bowl, combine the chocolate chips and coconut oil. Microwave in 30-second intervals, stirring well after each, until the chocolate is completely melted and smooth. The coconut oil helps to make the chocolate a bit thinner and easier to drizzle, giving it that perfect sheen.
Remove the chilled bars from the pan using the parchment paper overhang. Place them on a cutting board. Drizzle the melted chocolate over the top of the bars in a zig-zag pattern. You can use a spoon, a piping bag with the tip snipped off, or even a ziploc bag with a corner cut. Let the chocolate set at room temperature for a bit, or pop them back in the fridge for 10-15 minutes to speed things up.

Step 7: Slice and Serve
Once the chocolate has fully set, use a sharp knife to cut the bars into squares or rectangles. For clean cuts, wipe your knife clean between each slice, especially after the first few. Serve immediately and watch them disappear!
Frequently Asked Questions About No-Bake Samoa Bars
Got questions? I’ve got answers! These are some of the common queries that pop up when making these delightful treats.Can I use different types of cookies for the crust?
Absolutely! While shortbread gives that classic Samoa cookie vibe, you can experiment with other plain, crisp cookies like digestive biscuits, graham crackers, or even vanilla wafers. Just make sure they’re finely crushed.
How do I toast coconut if I don’t want to use an oven?
Toasting coconut in a dry skillet on the stovetop is super easy! Place your shredded coconut in a large, dry skillet over medium-low heat. Stir constantly with a spatula until it turns fragrant and golden brown. This usually takes 5-8 minutes. Just be vigilant, as it can burn quickly!
My caramel mixture didn’t thicken. What went wrong?
The most common culprit here is not cooking it long enough or not stirring consistently. Ensure you’re simmering it for the full 5-7 minutes (or even a little longer if needed) over low heat, and keep stirring. It will thicken considerably as it cools, but it should definitely feel like a thick sauce while warm.
Can I use milk chocolate instead of semi-sweet for the drizzle?
You can, but I highly recommend semi-sweet or dark chocolate to balance the sweetness of the caramel and coconut. Milk chocolate might make the bars a little too sweet for some palates. If you do use milk chocolate, you might want to use a little less sugar in the crust.
How long do these no-bake Samoa cookie bars last, and how should I store them?
These bars store wonderfully! Keep them in an airtight container at room temperature for up to 3 days, or in the refrigerator for up to a week. If refrigerated, let them sit out for 10-15 minutes before serving for the best texture.
Make-Ahead Magic & Storage Tips
These no-bake Samoa cookie bars are fantastic for making ahead, which is a huge bonus for parties or holiday gatherings. You can prepare the entire batch up to 2-3 days in advance and store them, covered, in the refrigerator. Just pull them out about 15-20 minutes before you plan to serve to allow them to soften slightly. If you want to freeze them, that’s an option too! Once the chocolate is completely set, cut the bars into individual portions. Place them in an airtight container, separated by parchment paper, and freeze for up to 2-3 months. Thaw them in the refrigerator overnight or at room temperature for a few hours before enjoying. They’re a fantastic treat to have stashed away for unexpected guests or sudden cravings.Variations to Keep Things Exciting
While the classic Samoa flavor is divine, there’s always room for a little creativity! Nutty Twist: Add a layer of finely chopped pecans or walnuts to the cookie crust for extra crunch and a different flavor profile. Salted Caramel: Sprinkle a pinch of flaky sea salt over the caramel coconut layer before chilling, or on top of the chocolate drizzle, for a sophisticated salted caramel kick. White Chocolate Drizzle: For a different look and flavor, swap out some or all of the semi-sweet chocolate for white chocolate for the drizzle. You can even do a mix of both! Coffee Infusion: Add 1/2 teaspoon of espresso powder to your melted chocolate for a subtle coffee undertone that pairs beautifully with caramel and chocolate. These no-bake Samoa cookie bars are more than just a dessert; they’re a little slice of joy that requires minimal effort but delivers maximum satisfaction. They hit all the right notes — sweet, salty, chewy, crunchy, and oh-so-chocolaty. Whether you’re a long-time fan of the original or just looking for an easy, impressive treat, these bars are sure to become a new favorite in your kitchen. Go ahead, whip up a batch, and let that delightful aroma of toasted coconut and melted chocolate fill your home!
No-Bake Samoa Cookie Bars
Indulge in these easy no-bake Samoa cookie bars with layers of crunchy shortbread, gooey caramel, toasted coconut, and rich chocolate drizzle.
📝 Ingredients
👩🍳 Instructions
- 1Line a 9x13-inch baking pan with parchment paper, leaving an overhang on the sides. Set aside.
- 2In a medium bowl, combine crushed shortbread cookies, melted butter, and granulated sugar. Mix until well combined.
- 3Press the cookie mixture firmly and evenly into the bottom of the prepared pan. Refrigerate while preparing the topping.
- 4Spread shredded coconut in an even layer on a baking sheet. Toast in a 300°F (150°C) oven for 8-12 minutes, stirring occasionally, until golden brown. Alternatively, toast in a dry skillet over medium-low heat, stirring constantly, until golden. Let cool.
- 5In a medium saucepan, combine sweetened condensed milk, 1/2 cup butter, and light brown sugar. Cook over medium heat, stirring constantly, until the mixture comes to a gentle boil. Reduce heat to low and simmer, stirring frequently, for 5-7 minutes, until thickened and golden.
- 6Remove from heat and stir in the vanilla extract.
- 7Fold the toasted coconut into the warm caramel mixture until fully coated.
- 8Retrieve the chilled cookie base from the refrigerator. Evenly spread the caramel coconut mixture over the crust. Return to the refrigerator and chill for at least 2 hours, or until firm.
- 9Once bars are firm, melt chocolate chips and coconut oil in a microwave-safe bowl in 30-second intervals, stirring until smooth. Alternatively, melt in a double boiler.
- 10Remove the chilled bars from the pan using the parchment paper overhang. Place on a cutting board.
- 11Drizzle the melted chocolate over the top of the bars in a zig-zag pattern. Let the chocolate set at room temperature or in the refrigerator for 10-15 minutes.
- 12Once chocolate is set, use a sharp knife to cut the bars into squares or rectangles. Serve and enjoy!
💡 Notes
For cleaner cuts, wipe your knife with a warm, damp cloth between slices. Store leftover bars in an airtight container at room temperature for up to 3 days, or in the refrigerator for up to a week.



