


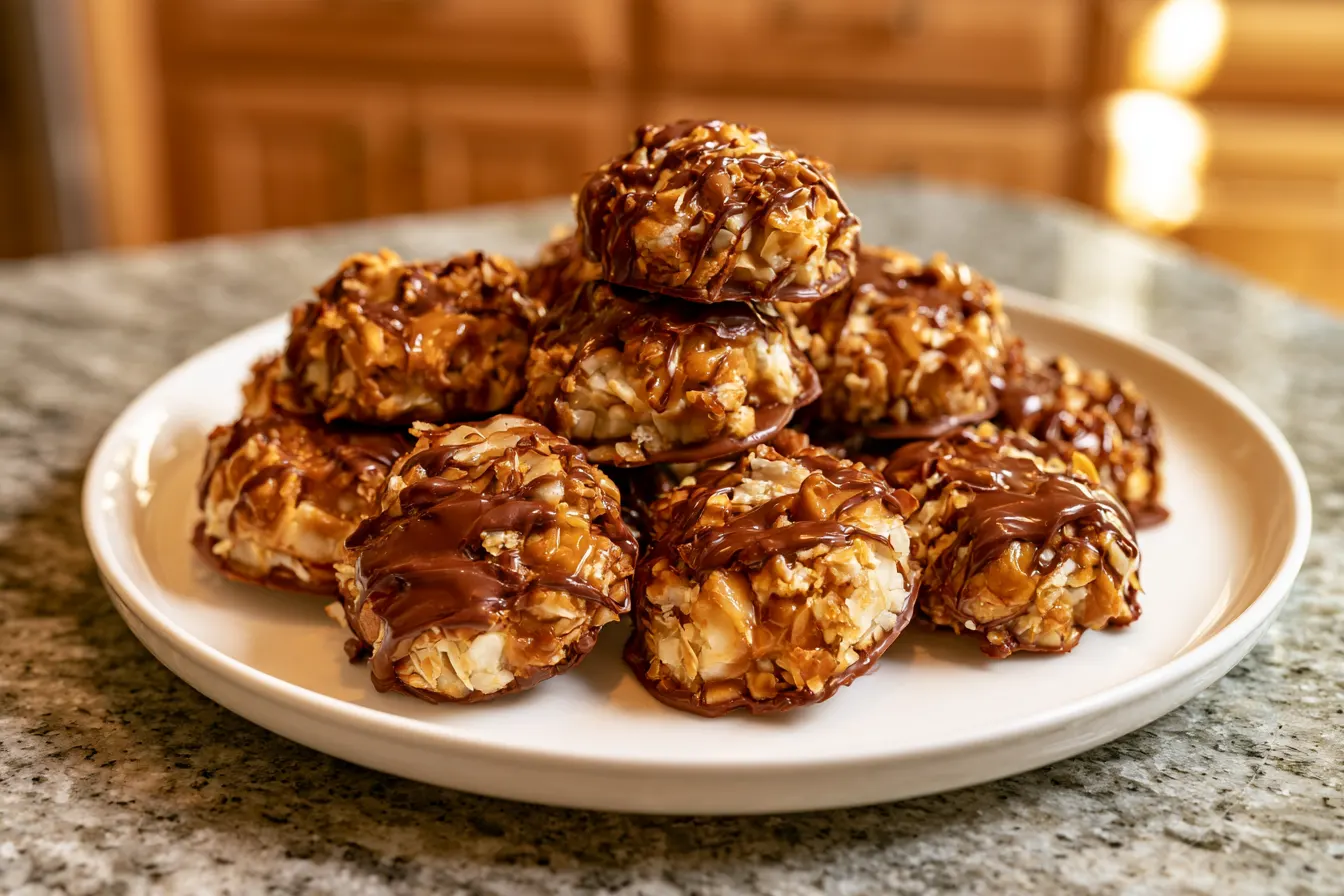
I’ll admit it: I have a soft spot for the iconic Girl Scout cookies. That annual moment when the boxes appear, promising pure joy in every bite, is something I look forward to. But what if you could capture that magic, specifically the irresistible combination of caramel, coconut, and chocolate from a Samoa, without waiting for cookie season or even turning on your oven? That’s the question that sparked this recipe for No-Bake Samoa Cookies, a delightful, fuss-free treat.

Cracking the Code: What Makes These No-Bakes So Good?
The genius of a good no-bake recipe lies in its ability to deliver maximum flavor with minimal effort. For these Samoa-inspired cookies, it’s all about the interplay of textures and the careful balance of sweet and salty. We’re not just throwing ingredients together; we’re building layers of deliciousness that mirror the original while adding our own unique, user-friendly spin. The base provides a sturdy foundation, the caramel is the gooey heart, the coconut brings that signature chew, and the chocolate is the elegant finish. It’s a carefully orchestrated culinary dance.The Foundation: Buttery Cookie Base
Every great cookie starts with a solid foundation. For our no-bake version, we’re using a blend of crushed shortbread cookies and melted butter. This creates a firm yet tender base that mimics the crispness of a baked cookie. The shortbread adds a lovely buttery note that complements the other flavors beautifully. Don’t skimp on pressing it firmly into your mold; this ensures your cookies hold their shape perfectly once chilled.Caramel Perfection, Simplified
The caramel layer is, arguably, the star of the show. We’re going for a soft, chewy caramel that melts in your mouth but still has enough body to hold its form. The secret here is using pre-made caramels (like Kraft squares) and melting them down with a touch of milk or cream. This creates an incredibly smooth, spreadable caramel that’s rich and buttery. It’s a shortcut that doesn’t compromise on flavor or texture.Toasted Coconut: The Essential Element
You can’t have a Samoa without toasted coconut. The toasting process is crucial; it deepens the flavor of the coconut, bringing out its natural sweetness and adding a wonderful nutty aroma. It also gives the coconut a more appealing golden hue and a slightly crispier texture, which contrasts beautifully with the soft caramel. Don’t rush this step – a few minutes in a skillet or oven can transform plain coconut into something truly special.The Chocolate Drizzle: A Touch of Elegance
Finally, the chocolate drizzle pulls everything together. We’re using a combination of melted chocolate chips and a tiny bit of coconut oil. The coconut oil helps the chocolate melt smoothly and gives it a beautiful sheen, making it easier to drizzle and preventing it from becoming too brittle when set. Dark chocolate is my preference here, as its slight bitterness provides a nice counterpoint to the sweetness of the caramel and coconut.
Gather Your Goodies: What You’ll Need
Getting all your ingredients prepped and ready before you start is key to a smooth no-bake process. This recipe uses readily available items, so you won’t need to hunt down anything exotic. Think of these as your building blocks for pure deliciousness.For the Cookie Base:
- 1 ½ cups (about 200g) Shortbread Cookies: Crushed finely. You can use a food processor for this, or a Ziploc bag and a rolling pin for a good arm workout.
- 6 tablespoons (85g) Unsalted Butter: Melted. This binds the crumbs together.
For the Caramel & Coconut Layer:
- 1 (11 oz) bag Soft Caramel Candies: Unwrapped. Think Kraft caramels or similar.
- 2 tablespoons Milk or Cream: To help melt and smooth the caramel.
- 1 ½ cups Shredded Sweetened Coconut: This is the star!
For the Chocolate Drizzle:
- 1 cup Semi-Sweet or Dark Chocolate Chips: High quality makes a difference here.
- 1 teaspoon Coconut Oil: Or a neutral oil, for smooth melting.
Crafting Your Cookies: Step-by-Step Indulgence
This is where the magic happens! Follow these steps, and you’ll have perfect no-bake Samoa cookies in no time. Precision isn’t as critical as in baking, but a little care goes a long way.Step 1: Prep the Coconut
Preheat your oven to 300°F (150°C). Spread the shredded coconut evenly on a baking sheet. Toast in the oven for 5-7 minutes, stirring once or twice, until it’s golden brown and fragrant. Keep a close eye on it, as coconut can burn quickly! Once toasted, remove from oven and let it cool completely. This step is non-negotiable for that authentic Samoa flavor.
Step 2: Build the Base
In a medium bowl, combine the finely crushed shortbread cookies with the melted butter. Mix until the crumbs are evenly moistened. Press this mixture firmly into the bottom of a greased 8×8 inch square baking pan or a silicone muffin pan if you prefer individual rounds. If using a square pan, you’ll cut them into rounds later. Pop the pan into the refrigerator to chill for at least 15 minutes while you prepare the next layer.
Step 3: Melt the Caramel Magic
In a microwave-safe bowl, combine the unwrapped caramel candies and milk (or cream). Microwave on high for 30-second intervals, stirring well after each, until the caramels are completely melted and smooth. This usually takes 1.5 to 2 minutes total. Be patient and stir thoroughly to avoid any lumps.
Tip: If you don’t have a microwave, you can melt the caramels in a double boiler over simmering water, stirring until smooth.

Step 4: Combine Caramel and Coconut
Once the caramel is perfectly smooth, fold in about ¾ of the toasted coconut. Save the remaining ¼ for sprinkling on top later. Stir gently until the coconut is evenly coated in the warm, gooey caramel. The aroma filling your kitchen right now should be incredible!
Step 5: Layer Up
Retrieve your chilled cookie base from the refrigerator. Carefully spread the caramel-coconut mixture evenly over the shortbread base. Use an offset spatula or the back of a spoon to ensure a smooth, level layer. Sprinkle the remaining toasted coconut over the top of the caramel layer, gently pressing it down so it adheres. Return the pan to the refrigerator for at least 30-45 minutes, or until the caramel is firm enough to cut.
Step 6: The Chocolate Finish
Once the caramel is set, remove the pan from the fridge. If using a square pan, carefully lift the block out using the parchment paper or by inverting it. Use a round cookie cutter (about 1.5 to 2 inches) to cut out individual cookies. If you used a muffin tin, simply pop them out. Place the cut cookies on a sheet of parchment paper.
In a small microwave-safe bowl, combine the chocolate chips and coconut oil. Microwave in 15-second intervals, stirring after each, until the chocolate is melted and smooth. Transfer the melted chocolate to a piping bag with a very small tip, or simply use a fork. Drizzle the chocolate decoratively over each cookie in the classic Samoa pattern. Let the chocolate set at room temperature or in the refrigerator for a few minutes before serving.
Questions You Might Be Chewing On
Even for a no-bake recipe, a few questions can pop up. Let’s tackle some common queries to ensure your Samoa cookie success!Can I use unsweetened coconut instead?
Yes, you can! However, keep in mind that sweetened coconut adds an extra layer of flavor and moisture. If you opt for unsweetened, your cookies might be slightly less sweet, which some people prefer. You could consider adding a tiny pinch more sugar to the caramel if you’re worried about the sweetness level.
How do I get clean cuts for my cookies?
The trick is to make sure your caramel layer is thoroughly chilled and firm. After pressing the coconut on top, give it ample time in the fridge. When cutting, use a sharp, thin cookie cutter or knife, and warm it slightly under hot water between cuts. Wipe it dry each time to prevent sticking and ensure crisp edges.
What if my caramel is too sticky or too hard?
If your caramel is too sticky, it might need a bit more time to chill. If it’s too hard to cut, it might have been overcooked slightly, or you used too little milk. For future batches, try adding a tiny bit more milk or cream when melting the caramels to ensure a softer set. Storing them at room temperature (if not too warm) can also help keep the caramel soft.
Can I make these ahead of time?
Absolutely! These no-bake Samoa cookies are fantastic for making ahead. They actually benefit from a day in the fridge, allowing the flavors to meld beautifully. They’re perfect for holiday platters or party prep. Just keep them stored properly, and they’ll be ready to impress.
What’s the best way to store these?
Store your finished cookies in an airtight container in the refrigerator. They will keep well for up to a week. If you need to stack them, place a piece of parchment paper between layers to prevent the chocolate from sticking. They also freeze beautifully for up to a month!
Sweet Substitutions & Flavor Twists
While the classic Samoa flavor profile is undeniably delicious, sometimes it’s fun to play around with variations. These cookies are quite forgiving, making them a great canvas for experimentation.Chocolate Choices
Instead of semi-sweet, try milk chocolate for a sweeter, creamier drizzle, or opt for a really dark, high-quality chocolate for a more intense, less sweet finish. You could even use white chocolate for a striking visual contrast! Swirls of two different chocolates would also look fantastic.
Nutty Nods
If you’re a nut lover, consider adding a thin layer of finely chopped pecans or almonds to the shortbread base before chilling. Or, sprinkle some toasted chopped nuts over the caramel-coconut layer for an extra crunch and depth of flavor. Just be mindful of any nut allergies if you’re serving these to a crowd.
Spice It Up
A tiny pinch of sea salt flakes sprinkled over the chocolate drizzle or even mixed into the caramel can really elevate the flavors, creating that beloved sweet and salty dynamic. You could also add a drop of vanilla extract to your caramel as it melts for an extra layer of warmth.
Different Bases
While shortbread is classic, you could experiment with other crushed cookies for the base. Graham crackers would lend a slightly different, more rustic flavor, or even vanilla wafers could work for a milder, sweeter base. Just ensure they are finely crushed and mix well with the butter.
Common Pitfalls and How to Dodge Them
Even the simplest recipes can have their little quirks. Here are a few things to watch out for when making your no-bake Samoa cookies, along with easy fixes.Burnt Coconut Catastrophe
Toasted coconut adds incredible depth, but it goes from perfectly golden to burnt in a blink. Keep a close eye on it! Stir frequently, and if you’re using the oven, don’t walk away. If you notice it starting to brown too quickly, pull it out immediately. It’s better to under-toast slightly than to burn it.
Sticky Situation with Caramel
If your caramel mixture feels too sticky to spread easily, it might be a little too cool. Gently rewarm it in the microwave for 10-15 seconds, stirring well. If it’s too runny, you might have added too much milk. A little extra powdered sugar could help thicken it in a pinch, but best to stick to the measurements.
Chocolate That Won’t Drizzle
If your melted chocolate is too thick for drizzling, add another tiny drop (¼ teaspoon) of coconut oil and stir until smooth. If it’s clumpy, it might have seized from getting water in it or being overheated. Unfortunately, seized chocolate is hard to salvage for drizzling. Next time, melt slowly and carefully.
Cookies That Won’t Hold Shape
This usually comes down to not enough chilling time for the base or the caramel layer. Each layer needs to be firm before the next step. Don’t rush the refrigeration! Also, make sure your cookie crumbs are finely crushed and well combined with the butter; this creates a sturdy base.
Why You’ll Adore These No-Bake Samoa Cookies
Beyond the sheer deliciousness, there’s a lot to love about these no-bake wonders. They’re a stress-free dessert that delivers on taste, texture, and visual appeal. This recipe is perfect for those times when you crave a homemade treat but don’t want to commit to a lengthy baking project. They make wonderful gifts, travel well to potlucks, and are always a hit with kids and adults alike. The combination of chewy caramel, crunchy toasted coconut, and rich chocolate is simply irresistible. Plus, the satisfaction of creating something so professional-looking with such minimal effort is a reward in itself. Get ready to impress everyone (including yourself!) with these easy, elegant, and utterly delicious no-bake Samoa cookies.
No-Bake Samoa Cookies: Chewy Caramel, Toasted Coconut, Chocolate Dreams
Enjoy the classic flavors of Samoa cookies with this easy no-bake recipe. Chewy caramel, toasted coconut, and rich chocolate come together for a delicious treat.
📝 Ingredients
👩🍳 Instructions
- 1Preheat oven to 300°F (150°C). Spread shredded coconut on a baking sheet. Toast for 5-7 minutes, stirring occasionally, until golden brown and fragrant. Let cool completely.
- 2In a medium bowl, combine crushed shortbread cookies and melted butter. Mix until evenly moistened. Press firmly into a greased 8x8 inch square baking pan or silicone muffin pan. Chill for at least 15 minutes.
- 3In a microwave-safe bowl, combine unwrapped caramel candies and milk. Microwave on high for 30-second intervals, stirring after each, until completely melted and smooth (1.5-2 minutes total).
- 4Fold ¾ of the toasted coconut into the melted caramel until evenly coated.
- 5Spread the caramel-coconut mixture evenly over the chilled cookie base. Sprinkle the remaining ¼ toasted coconut on top, gently pressing it down. Refrigerate for 30-45 minutes, or until firm.
- 6Remove from pan. Use a 1.5-2 inch round cookie cutter to cut out individual cookies. Place on parchment paper.
- 7In a small microwave-safe bowl, combine chocolate chips and coconut oil. Microwave in 15-second intervals, stirring after each, until melted and smooth. Drizzle chocolate decoratively over each cookie. Let set at room temperature or in the refrigerator before serving.
💡 Notes
For best results, ensure each layer is properly chilled before moving to the next step. Store cookies in an airtight container in the refrigerator for up to a week. For easier cutting, warm your cookie cutter or knife under hot water and wipe dry between each cut.



