


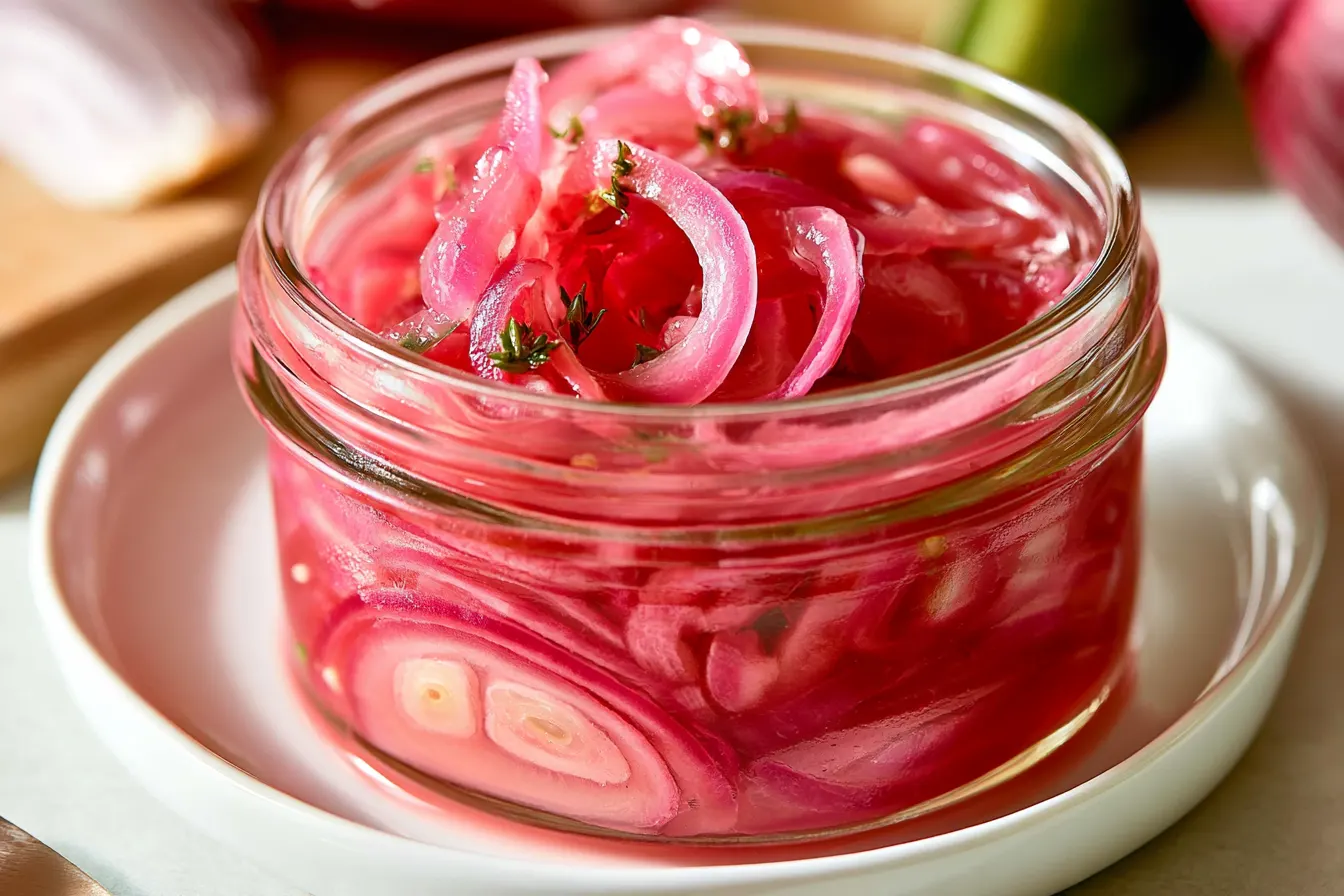
Ever had a dish that was *almost* there? You know, delicious, but missing that little spark, that je ne sais quoi? For me, that missing piece is often a punch of bright acidity, and nothing delivers it quite like a handful of quick pickled red onions. They transform everything from tacos to avocado toast with their vibrant color and tangy crunch.

Why These Pickled Onions Are Simply the Best
There are a lot of quick pickled red onion recipes out there, but this one has been perfected over countless batches to strike the ideal balance. What makes them stand out? First, the ratio of vinegar to water is spot on – not too harsh, not too weak. It allows the onion’s natural bite to mellow into a pleasant tang without becoming overwhelmingly sour. Secondly, a touch of sugar is crucial. It doesn’t make them sweet, but rather rounds out the sharp edges of the vinegar, creating a more harmonious flavor profile. Think of it like a perfectly balanced vinaigrette – you need that little bit of sweetness to achieve complexity. Finally, the thin slicing is key. It ensures the onions pickle quickly and evenly, becoming tender-crisp rather than soggy. This recipe consistently delivers that perfect snappy texture that makes them so addictive.Gather Your Simple Supplies
You really don’t need much to get started on this journey to flavor town. Most of these ingredients you likely already have on hand.The Essentials
- Red Onions: One medium-sized red onion is usually perfect for a small batch that lasts about a week. Look for firm, blemish-free onions.
- Vinegar: White vinegar is my go-to for its clean, neutral flavor, which allows the onion’s character to shine. Apple cider vinegar also works beautifully for a slightly fruitier note.
- Water: Plain old tap water is fine.
- Granulated Sugar: Just a teaspoon or two makes all the difference in balancing the acidity.
- Kosher Salt: A good pinch is essential for seasoning the brine.
Optional Flavor Boosters
While the basic recipe is fantastic on its own, sometimes I like to experiment with additional aromatics. It’s a great way to customize the onions for specific dishes.
- Whole Peppercorns: A few black peppercorns add a subtle warmth.
- Garlic Cloves: A smashed garlic clove or two can infuse a lovely savory undertone.
- Fresh Herbs: A sprig of thyme or a bay leaf can add complexity. Add these to the brine as it heats.
- Chili Flakes: For a little kick, a pinch of red pepper flakes is wonderful, especially if you’re serving these with spicy food.

Whip Up a Batch: Step-by-Step
This is where the magic happens, and it’s surprisingly quick!Step 1: Slice the Onion Thinly
First, peel your red onion. Then, using a sharp knife or a mandoline (carefully!), slice it as thinly as possible. We’re talking paper-thin if you can manage it. The thinner the slices, the faster and more evenly they’ll pickle. Plus, super thin slices have the best texture. You’ll want about 1.5 to 2 cups of sliced onion from one medium onion.
Tip: If you’re sensitive to onion fumes, try slicing it under cold running water or chilling the onion in the freezer for 15 minutes before slicing. It really helps reduce the tears!
Step 2: Pack into a Jar
Loosely pack the thinly sliced onion into a clean, heat-proof jar (a pint-sized Mason jar is perfect). Don’t pack them too tightly, as you want the brine to be able to circulate easily around all the slices.
Step 3: Prepare the Brine
In a small saucepan, combine 1/2 cup white vinegar, 1/2 cup water, 1 teaspoon granulated sugar, and 1/2 teaspoon kosher salt. Bring the mixture to a boil over medium-high heat, stirring until the sugar and salt are completely dissolved. This should only take a minute or two once it comes to temperature.
Note: If you’re adding optional aromatics like peppercorns or garlic, add them to the brine now so their flavors can infuse as it heats.

Step 4: Pour and Pickle
Carefully pour the hot brine over the onions in the jar, making sure they are fully submerged. If any onion pieces are floating, gently press them down with a spoon. You want them completely covered by the liquid. If you have extra brine, that’s fine; just ensure the onions are submerged.
Step 5: Cool and Chill
Allow the jar to cool at room temperature for about 15-20 minutes. As it cools, you’ll notice the onions starting to change color, turning that beautiful vibrant pink. Once cooled, secure the lid and transfer the jar to the refrigerator. They’ll be ready to enjoy in as little as 30 minutes, but they truly shine after an hour or two, or even better, overnight.
Serving Suggestions & Culinary Inspiration
These quick pickled red onions are incredibly versatile. They add a zesty crunch and a pop of color to almost anything. Here are some of my favorite ways to use them:- Tacos and Fajitas: Absolutely essential! They cut through the richness of meats and cheeses.
- Sandwiches and Burgers: Forget boring raw onion. These add a sophisticated tangy bite.
- Salads: Sprinkle them over green salads, potato salads, or grain bowls for an instant upgrade.
- Avocado Toast: A few rings on top of creamy avocado toast is pure perfection.
- Eggs: Fold them into scrambled eggs, or top your fried eggs for a bright breakfast.
- Grilled Meats: They balance rich brisket, pulled pork, or grilled chicken beautifully.
- Fish: A fantastic garnish for grilled salmon or seared white fish.
Common Questions About Quick Pickling
How long do quick pickled red onions last?
When stored in an airtight container in the refrigerator, quick pickled red onions will typically last for about 2-3 weeks. The vinegar acts as a preservative, keeping them fresh and vibrant.
Can I use a different type of onion?
While red onions are preferred for their beautiful color and slightly milder flavor, you can certainly quick pickle other varieties. Yellow onions will turn a less appealing pale yellow and have a stronger onion flavor, but they’ll still be tasty. Sweet onions like Vidalia also work well and will produce a milder pickled onion.
Do I have to use hot brine?
Using hot brine helps to soften the onions slightly and speeds up the pickling process significantly, allowing them to absorb the flavors faster. You can use cold brine, but the onions will take much longer to pickle (at least 24 hours) and will retain more of their raw onion crunch.
What if my onions don’t turn bright pink?
The intensity of the pink color can vary depending on the specific red onion and how much pigment it contains. Some onions are naturally paler than others. As long as they’ve been submerged in the brine and allowed to sit, they are pickling regardless of the exact shade of pink.
Can I reuse the pickling liquid?
It’s generally not recommended to reuse the pickling liquid. Once it’s been used, it will have absorbed some of the onion’s flavor and lost some of its acidity and preservative power. For best results and food safety, always use fresh brine for each batch.
Can I add other spices to the brine?
Absolutely! This is where you can get creative. Some popular additions include a pinch of dried oregano, a bay leaf, a few sprigs of fresh dill, or even a star anise for an unexpected twist. Just remember that strong spices will impart their flavor, so start with small amounts.
Storage and Meal Prep Tips
These onions are a meal prep hero. I usually make a double batch on Sunday, and they last me through the week, ready to jazz up any meal. Simply keep them in their pickling liquid in a sealed jar in the refrigerator. They actually get better after a day or two, as the flavors meld and the onions soften just a touch more while maintaining their delightful crunch. They are not suitable for canning or long-term pantry storage, as this is a “quick pickle” method designed for refrigeration.A Little Bit of History (and Chemistry!)
Pickling, at its core, is a preservation method. For centuries, before refrigeration, humans relied on techniques like salting, drying, and pickling to make food last. Acidic solutions, like vinegar, create an environment where spoilage-causing microorganisms can’t thrive. With quick pickling, we’re not aiming for long-term preservation in the traditional canning sense. Instead, we’re rapidly infusing the food with flavor and altering its texture. The hot brine helps break down the cell walls of the onion just enough to allow the tangy, salty, and sweet flavors to penetrate quickly, without fully cooking them. This is how you get that perfect “al dente” crunch. It’s a brilliant shortcut that gives you all the flavor benefits of pickling with none of the fuss. Next time you’re wondering how to add a little something extra to your plate, remember these quick pickled red onions. They’re proof that sometimes, the simplest additions can have the biggest impact.
Quick Pickled Red Onions
These quick pickled red onions are vibrant, tangy, and ready in 5 minutes, perfect for elevating any dish.
📝 Ingredients
👩🍳 Instructions
- 1Peel the red onion and slice it as thinly as possible using a sharp knife or mandoline. Loosely pack the sliced onion into a clean, heat-proof pint-sized jar.
- 2In a small saucepan, combine the vinegar, water, sugar, and kosher salt. If using, add any optional spices or aromatics now.
- 3Bring the mixture to a boil over medium-high heat, stirring constantly until the sugar and salt are completely dissolved. This should only take 1-2 minutes once boiling.
- 4Carefully pour the hot brine over the onions in the jar, ensuring all the onion slices are fully submerged. Gently press down any floating pieces with a spoon.
- 5Allow the jar to cool at room temperature for 15-20 minutes. Once cooled, secure the lid and transfer the jar to the refrigerator. The pickled onions will be ready to enjoy in 30 minutes, but are best after an hour or two, or even overnight.
💡 Notes
Store quick pickled red onions in their brine in an airtight container in the refrigerator for up to 2-3 weeks. They are excellent on tacos, sandwiches, salads, and avocado toast. For a slightly different flavor, try adding a sprig of fresh dill or a bay leaf to the brine.



