


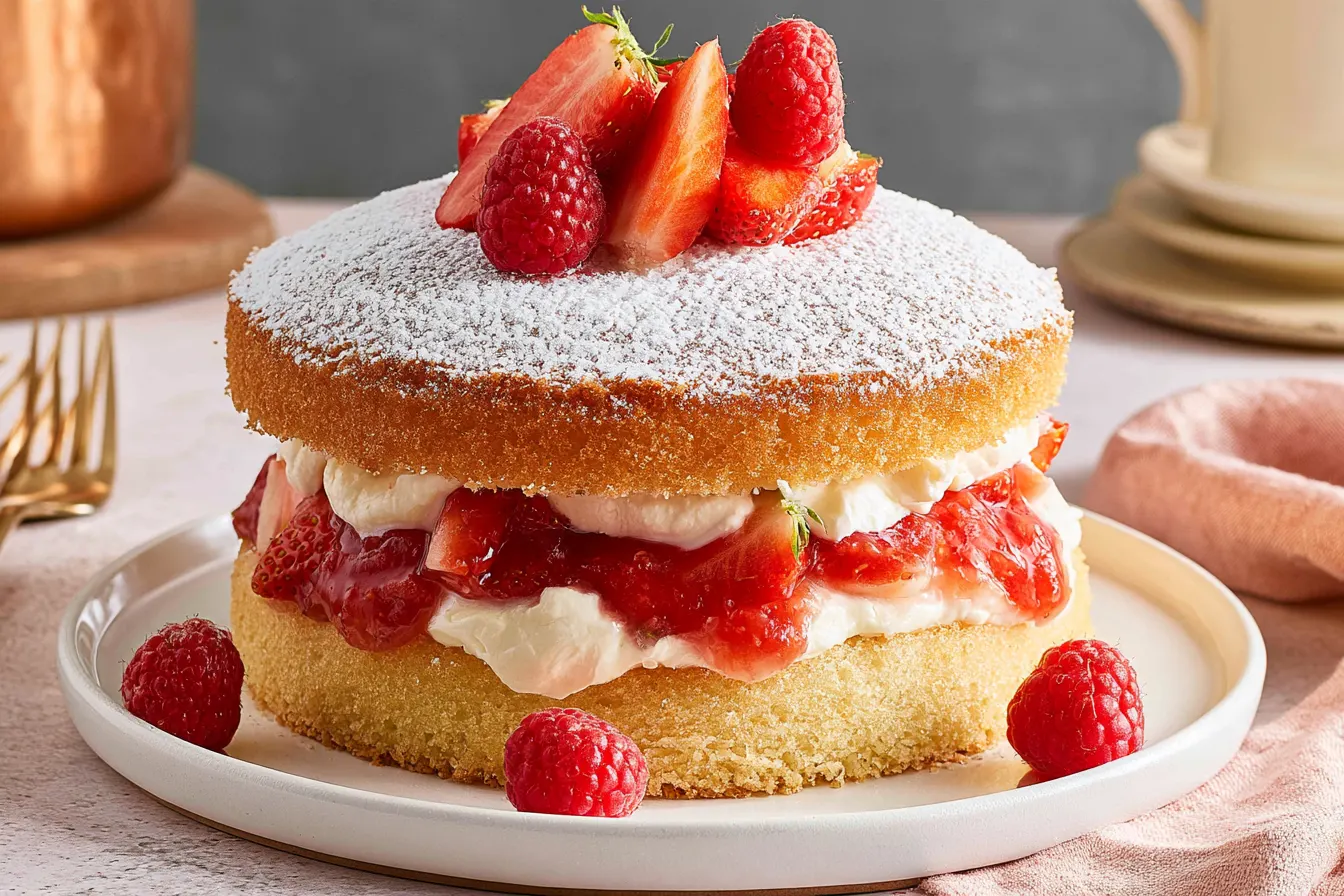
Ever wonder if that perfect fluffy sponge cake is truly achievable in your own kitchen? I did. For years, my attempts at a classic Victoria Sponge Cake were… well, let’s just say they were more like dense, slightly sad tea loaves than the airy, elegant layers I dreamed of. But through trial, error, and a few delightfully buttery revelations, I finally cracked the code to a truly light-as-air vanilla sponge, ready to embrace its strawberry jam and cream destiny.
- What Makes This Victoria Sponge Truly Special?
- Gather Your Supplies: Ingredients for Your Fluffy Sponge
- Crafting Your Masterpiece: Step-by-Step Instructions
- Common Pitfalls and How to Sail Past Them
- Your Burning Questions, Answered (Victoria Sponge Edition)
- Serving Up Your Sublime Sponge
- Final Thoughts on Your Baking Adventure
There’s something uniquely comforting about a Victoria sponge. It’s not overly fancy, doesn’t demand exotic ingredients, and yet it delivers pure, unadulterated joy with every forkful. It’s the kind of cake that makes you want to put the kettle on, invite a friend, and just enjoy a quiet moment.
This isn’t just a recipe; it’s a journey to sponge cake perfection. We’re going to dive into the nuances that elevate a good cake to a truly memorable one, ensuring your layers are consistently golden, tender, and just begging for that luscious filling.

Let’s be honest, few desserts evoke such a sense of gentle elegance as the Victoria sponge. Named after Queen Victoria herself, who was apparently quite fond of a slice with her afternoon tea, it’s a testament to simple ingredients coming together in delicious harmony. This cake isn’t about flashy decorations or complex flavors; it’s about the pure, unadulterated pleasure of a perfect vanilla sponge, complemented by sweet fruit and rich cream.
What Makes This Victoria Sponge Truly Special?
You might think all Victoria sponges are created equal, but oh, how wrong you’d be! What sets this recipe apart is the emphasis on technique, particularly in how we combine our ingredients. We’re aiming for a crumb that’s not just light but almost cloud-like, a texture that melts in your mouth rather than needing much chewing. It’s all about incorporating air at every stage and treating our batter with the respect it deserves.
I’ve tweaked and tested this recipe over countless baking sessions, focusing on the right ratio of fat to flour, and the perfect amount of leavening to give that characteristic lift without any chemical aftertaste. The result is a sponge that holds its shape beautifully, yet feels impossibly delicate. It’s the kind of cake that makes people ask for the recipe, even if they claim they “don’t usually like cake.”
Gather Your Supplies: Ingredients for Your Fluffy Sponge
Before we even think about turning on the oven, let’s make sure we have everything perfectly measured and ready. Baking, especially a delicate sponge, thrives on precision. Using room temperature ingredients is non-negotiable here, so pull out your butter and eggs well in advance.
For the Vanilla Sponge Layers:
- 225g (1 cup) unsalted butter, softened
- 225g (1 cup) caster sugar (superfine sugar)
- 4 large eggs, at room temperature
- 225g (1 ¾ cups) self-raising flour, sifted
- 1 teaspoon baking powder (even with self-raising, this gives an extra lift)
- 1 teaspoon vanilla extract, good quality
- 2-3 tablespoons whole milk, if needed
For the Classic Filling:
- 400g (1 ¾ cups) good quality strawberry jam
- 300ml (1 ¼ cups) double cream (heavy cream), chilled
- 1-2 tablespoons icing sugar (confectioners’ sugar), optional, for the cream
Finishing Touch:
- A dusting of icing sugar

Crafting Your Masterpiece: Step-by-Step Instructions
Baking a Victoria sponge is a delightful process, not a race. Take your time, enjoy each step, and you’ll be rewarded with a truly spectacular cake.
Prepping for Perfection
First things first, preheat your oven to 180°C (350°F) and grease and line two 20cm (8-inch) round cake tins with baking parchment. Make sure the parchment covers the bottom and comes up the sides slightly. This ensures an easy release and perfectly shaped cakes.
Creaming the Butter and Sugar
In a large mixing bowl, beat the softened butter and caster sugar together until the mixture is incredibly light, pale, and fluffy. This is a crucial step for a light sponge, so don’t rush it. You’ll want to beat it for at least 3-5 minutes with an electric mixer.
Adding the Eggs and Vanilla
Crack your eggs into a separate bowl, then gradually add them to the butter mixture, one at a time, beating well after each addition. If the mixture looks like it’s curdling, don’t panic! Add a tablespoon of your sifted flour and continue beating. Stir in the vanilla extract.
Folding in the Flour and Baking Powder
Gently fold in the sifted self-raising flour and baking powder using a large metal spoon or a spatula. Use a cutting and folding motion to keep as much air in the mixture as possible. Overmixing here will develop the gluten and result in a tough cake, so be gentle and stop as soon as no streaks of flour remain.
Tip: If your batter feels a little too stiff, add a tablespoon or two of whole milk until it reaches a soft dropping consistency. It should fall easily from your spoon when tapped.
Baking the Golden Layers
Divide the batter evenly between your two prepared cake tins. Smooth the tops gently with the back of a spoon. Bake for 20-25 minutes, or until the sponges are golden brown, spring back when lightly touched in the center, and a skewer inserted into the middle comes out clean.

Cooling Down
Once baked, let the cakes cool in their tins for about 5 minutes before carefully turning them out onto a wire rack to cool completely. Resist the urge to assemble until they are fully cold, otherwise, your cream will melt!
Assembling Your Classic Victoria Sponge Cake
While your sponges are cooling, prepare your filling. Pour the chilled double cream into a cold bowl and whip it until it forms soft peaks. If you like it a little sweeter, add 1-2 tablespoons of icing sugar and whip until just combined. Be careful not to over-whip, or you’ll end up with butter!
Once the cakes are cool, place one sponge layer onto your serving plate. Spread a generous layer of strawberry jam evenly over the top. Then, dollop the whipped cream over the jam and gently spread it out, leaving a small border around the edge.
The Grand Finale
Carefully place the second sponge layer on top of the cream. For that quintessential Victoria sponge look, dust the top generously with icing sugar using a small sieve. Slice, serve, and bask in the glory of your perfectly baked creation!
Common Pitfalls and How to Sail Past Them
Even the most seasoned bakers have a mishap or two. With a Victoria sponge, understanding potential issues can help you avoid them entirely. Let’s tackle a few common concerns.
Why is my sponge dry?
A dry sponge is often a sign of overbaking. Keep a close eye on your oven and use the skewer test rather than just relying on the timer. Also, make sure your measurements are accurate, as too much flour can also lead to dryness.
My cake sank in the middle! What happened?
Sinking can be caused by opening the oven door too early, underbaking, or an inaccurate leavening agent. Ensure your baking powder isn’t expired and resist peeking at your cakes before they’ve had at least 15-20 minutes in the oven. Sudden temperature changes are the enemy of a rising cake.
Why is my sponge dense and heavy?
This usually points to overmixing the flour. Once the flour is added, mix only until just combined. Developing the gluten too much will create a chewy, heavy texture rather than the desired light crumb. Also, ensure your butter and sugar are creamed until very light and fluffy, as this incorporates the initial air.
Your Burning Questions, Answered (Victoria Sponge Edition)
Got more questions bubbling up? Here are some of the most frequent queries I get about this classic cake.
Can I make this Victoria sponge cake ahead of time?
You absolutely can! The baked sponge layers can be stored, unfrosted, in an airtight container at room temperature for up to 2-3 days, or frozen for up to a month. Thaw at room temperature. Assemble with jam and cream just before serving for the best texture.
What’s the difference between caster sugar and granulated sugar?
Caster sugar (or superfine sugar) has finer crystals than regular granulated sugar. This allows it to dissolve more easily into the butter, creating a smoother, lighter batter. If you only have granulated sugar, you can pulse it briefly in a food processor to make it finer, but don’t turn it into powdered sugar.
Can I use different jams for the filling?
Of course! While strawberry jam is traditional, raspberry, cherry, or even a mixed berry compote would be absolutely delicious. Just make sure it’s a good quality jam that isn’t too runny.
How long does a Victoria sponge last once assembled?
Due to the fresh cream, an assembled Victoria sponge is best eaten on the day it’s made. You can store leftovers in an airtight container in the refrigerator for up to 1-2 days, but the sponge will start to dry out slightly, and the cream will soften.
My butter isn’t soft enough; can I microwave it?
While a quick zap in the microwave might seem tempting, it’s best to avoid it for butter. Microwaving can cause butter to melt unevenly, creating pockets of liquid that will affect the texture of your cake. Instead, cut the butter into small cubes and let it sit at room temperature for about 30-60 minutes, or place it near a warm (not hot) spot in your kitchen. Patience is a virtue here!
Serving Up Your Sublime Sponge
The beauty of the Victoria sponge lies in its simplicity, which means it doesn’t need much fuss when serving. A simple slice on a pretty plate, perhaps with an extra fresh strawberry on the side during berry season, is all it takes. It’s the perfect companion for a cup of tea or coffee, making any afternoon feel a little more special.
You could also get a little creative with your dusting sugar – a stencil can create a lovely pattern for a special occasion. But honestly, the classic plain dusting is always a winner.
Final Thoughts on Your Baking Adventure
Baking, at its heart, is an act of love. And this Victoria sponge cake, with its humble ingredients and impressive outcome, is a perfect example. It’s a reminder that sometimes the simplest things are truly the most satisfying. So go on, bake this cake, share it with loved ones, and savor every fluffy, jammy bite. You’ve earned it!

Classic Victoria Sponge Cake
A traditional British Victoria Sponge Cake with airy vanilla sponge layers, sweet strawberry jam, and luscious whipped cream.
📝 Ingredients
👩🍳 Instructions
- 1Preheat oven to 180°C (350°F). Grease and line two 20cm (8-inch) round cake tins with baking parchment.
- 2In a large bowl, cream together the softened butter and caster sugar until very light, pale, and fluffy (3-5 minutes with an electric mixer).
- 3Gradually beat in the eggs, one at a time, beating well after each addition. Stir in the vanilla extract.
- 4Gently fold in the sifted self-raising flour and baking powder using a large metal spoon or spatula, until just combined. If the batter is too stiff, add 2-3 tablespoons of whole milk until it reaches a soft dropping consistency.
- 5Divide the batter evenly between the two prepared cake tins and smooth the tops.
- 6Bake for 20-25 minutes, or until golden, springy to the touch, and a skewer inserted into the center comes out clean.
- 7Let the cakes cool in their tins for 5 minutes before turning them out onto a wire rack to cool completely.
- 8For the filling, whip the chilled double cream until it forms soft peaks. If desired, beat in 1-2 tablespoons of icing sugar.
- 9Once the cakes are completely cool, place one sponge layer on your serving plate. Spread generously with strawberry jam, then top with the whipped cream.
- 10Place the second sponge layer on top. Dust generously with icing sugar before serving.
💡 Notes
Ensure all ingredients are at room temperature for the best sponge texture. For a neater finish, use a piping bag to add the cream. This cake is best eaten on the day of assembly but can be stored in the fridge for up to 2 days.



