


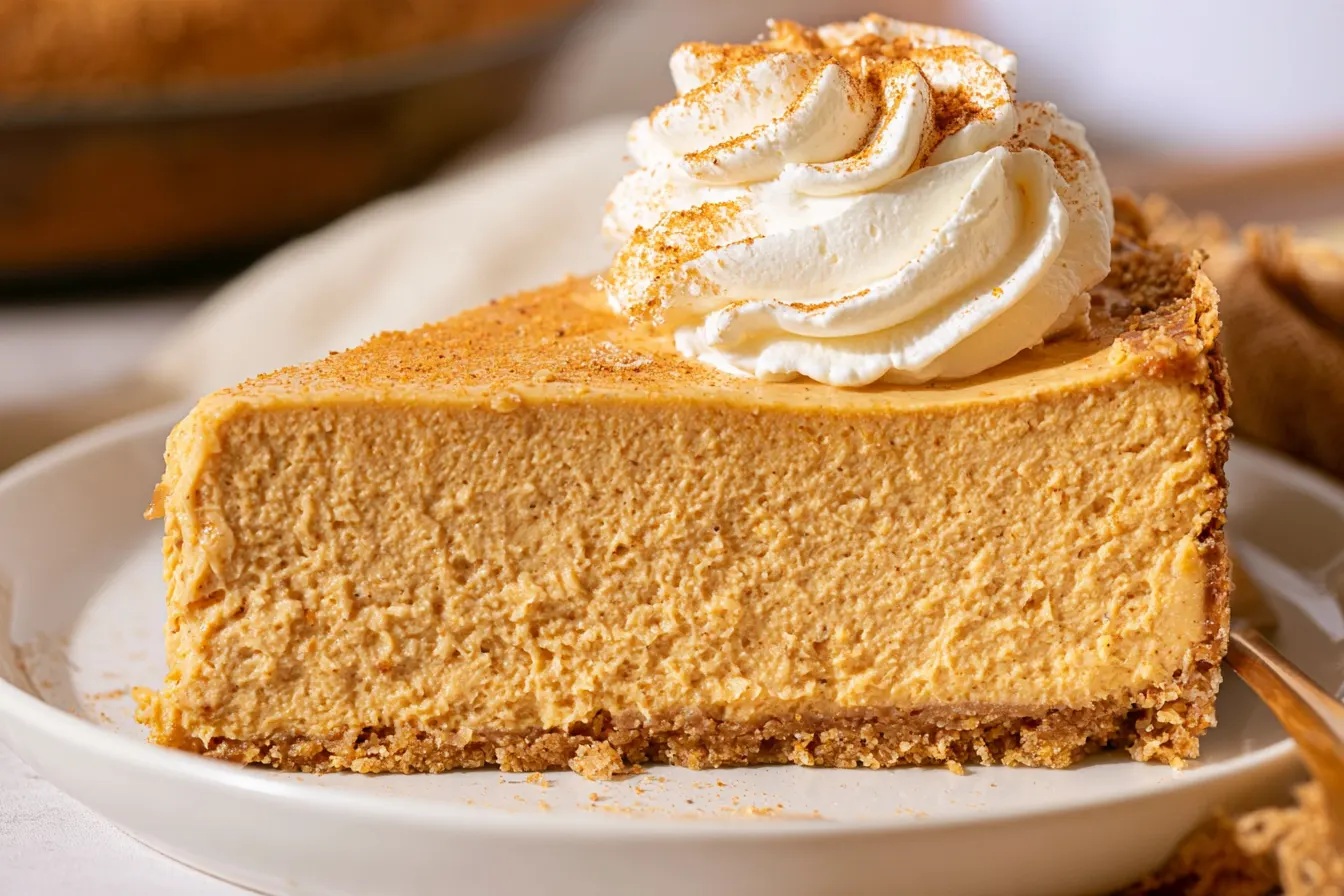
The crisp autumn air, the vibrant changing leaves, and that unmistakable scent of pumpkin spice wafting from every corner – it’s a symphony for the senses, isn’t it? For me, fall always brings a craving for something cozy and comforting, but sometimes, the thought of firing up the oven for a traditional cheesecake can feel a little… daunting. That’s precisely why this no-bake pumpkin cheesecake recipe has become my absolute go-to for those cooler evenings. It’s all the creamy, tangy, spiced goodness you adore, without any of the fuss.
Forget water baths, cracking tops, or hours of baking time. This recipe delivers a velvety smooth texture and a rich pumpkin flavor that truly sings, all held together by a buttery Graham cracker crust. It’s the kind of dessert that looks impressive enough for a holiday gathering but is simple enough to whip up on a Tuesday night when you just need a little sweet escape.
I promise, once you taste that luscious pumpkin filling, balanced perfectly with tangy cream cheese and a hint of warm spices, you’ll wonder why you ever bothered with the oven. It’s truly a celebration of fall in every single bite.

Why This No-Bake Wonder Wins Autumn
Let’s be honest, there are a million pumpkin desserts out there. So, what makes this no-bake pumpkin cheesecake stand out from the crowd? It boils down to a few key elements that elevate it from “just another dessert” to a true seasonal showstopper. First, the texture is simply divine. We’re talking melt-in-your-mouth creamy, a silkiness you usually only find in baked versions, but achieved here through a clever combination of ingredients and proper chilling.
Then there’s the flavor profile. It’s unmistakably pumpkin, but not overwhelmingly so. The tang of the cream cheese cuts through the sweetness beautifully, and a thoughtful blend of cinnamon, nutmeg, ginger, and cloves ensures a warm, inviting spice blend that feels just right for the season. It’s a harmonious balance that makes you want to go back for a second slice, and then maybe a third.
Finally, and perhaps most importantly, it’s the sheer ease. No oven means less kitchen heat, less stress, and more time enjoying the beautiful fall weather. It sets up perfectly in the fridge, making it an ideal make-ahead dessert for entertaining. You can assemble it the day before, pop it in the fridge, and then simply decorate and serve when you’re ready. It’s a dessert that works with your schedule, not against it.
Gathering Your Fall Flavors: The Ingredients
The beauty of this no-bake pumpkin cheesecake lies in its relatively simple, yet impactful, list of ingredients. Each component plays a crucial role in achieving that perfect texture and flavor. Take a moment to ensure everything is at room temperature for the filling – this is key for a smooth, lump-free result.
For the Crunchy Graham Cracker Crust
- 1 ½ cups Graham cracker crumbs (about 10-12 full sheets)
- ¼ cup granulated sugar
- 6 tablespoons unsalted butter, melted
For the Velvety Pumpkin Filling
- 16 ounces cream cheese (two 8-ounce blocks), full-fat, softened
- 1 cup pumpkin puree (not pumpkin pie filling)
- ½ cup granulated sugar
- ½ cup packed light brown sugar
- 1 teaspoon vanilla extract
- 1 teaspoon ground cinnamon
- ½ teaspoon ground ginger
- ¼ teaspoon ground nutmeg
- ⅛ teaspoon ground cloves
- Pinch of salt
- 1 ½ cups heavy cream, very cold
For the Whipped Cream Topping (Optional, but highly recommended!)
- 1 cup heavy cream, very cold
- 2 tablespoons powdered sugar
- ½ teaspoon vanilla extract
- Pinch of cinnamon for garnish

Crafting Your Creamy Autumn Dream
Creating this no-bake pumpkin cheesecake is a surprisingly straightforward process, broken down into three main stages: the crust, the filling, and the chilling. Take your time with each step, especially the mixing of the filling, to ensure that wonderfully smooth texture.
Step 1: Building the Sturdy Base
First, get your Graham cracker crumbs ready. You can crush them in a food processor for fine crumbs, or place them in a Ziploc bag and crush them with a rolling pin for a more rustic texture. In a medium bowl, combine the Graham cracker crumbs, granulated sugar, and melted butter. Mix thoroughly until all the crumbs are moistened and resemble wet sand.
Press this mixture firmly into the bottom of a 9-inch springform pan. Use the bottom of a flat glass or a measuring cup to really compact it evenly. This firm pressing is crucial to prevent your crust from crumbling when you slice it. Pop this into the refrigerator while you prepare the filling.
Step 2: Whipping Up the Silky Filling
In a large bowl, using an electric mixer, beat the softened cream cheese on medium speed until it’s completely smooth and free of any lumps. This might take 2-3 minutes. Scrape down the sides of the bowl frequently. Add the pumpkin puree, granulated sugar, brown sugar, vanilla extract, cinnamon, ginger, nutmeg, cloves, and salt. Beat on medium-low speed until just combined, then increase to medium and beat until the mixture is uniform and smooth.
In a separate, very cold bowl (chilling your bowl and whisk attachment in the freezer for 10-15 minutes helps here!), whip the 1 ½ cups of cold heavy cream on high speed until stiff peaks form. This means when you lift the whisk, the peaks hold their shape firmly. Gently fold about a third of the whipped cream into the pumpkin mixture to lighten it, then carefully fold in the remaining whipped cream until no streaks remain. Be careful not to overmix, as this can deflate the cream and make your filling less airy.
Tip: Ensure your cream cheese is truly at room temperature. If it’s too cold, it will be lumpy and difficult to incorporate smoothly, leading to a less desirable texture in your finished cheesecake.

Step 3: Assembling and Chilling to Perfection
Pour the pumpkin filling over the chilled Graham cracker crust in the springform pan. Use an offset spatula or the back of a spoon to spread the filling evenly and smooth out the top. Cover the pan loosely with plastic wrap and refrigerate for at least 6-8 hours, or preferably overnight. This extended chilling time is non-negotiable for the cheesecake to set properly and achieve its firm, sliceable consistency.
Step 4: The Grand Finale – Whipped Cream Topping
Once the cheesecake is fully set, it’s time for the crowning glory. In a cold bowl, combine the remaining 1 cup of cold heavy cream, powdered sugar, and vanilla extract. Whip on high speed until stiff peaks form. You can pipe this onto the cheesecake using a pastry bag with a star tip for a decorative touch, or simply spread it generously over the top. A final dusting of cinnamon or a sprinkle of toasted pecans adds a lovely finish. Carefully remove the springform pan sides before serving.
Troubleshooting Your No-Bake Cheesecake
While this recipe is incredibly forgiving, a few common hiccups can occur. Here’s how to avoid them or fix them if they happen:
Why is my cheesecake too soft or not setting?
This is almost always due to insufficient chilling time. The heavy cream needs ample time in the cold to stabilize the mixture. Make sure you’re refrigerating it for at least 6-8 hours, or better yet, overnight. Using full-fat cream cheese and whipping the heavy cream to stiff peaks are also crucial for structural integrity. Don’t skimp on the fat content!
My crust is crumbly, not firm. What went wrong?
The key to a firm crust is sufficient melted butter and, more importantly, pressing it down *very* firmly into the pan. Use the bottom of a glass or a flat measuring cup to really pack those crumbs in. If it’s still too crumbly, you might need a tiny bit more melted butter next time to bind it better.
How can I prevent lumps in the filling?
Always start with room temperature cream cheese. This is non-negotiable for a smooth filling. Beat it alone until it’s completely smooth before adding any other ingredients. Scrape down the bowl frequently to ensure everything is incorporated.
Can I make this cheesecake ahead of time?
Absolutely, and it’s highly recommended! This cheesecake benefits from chilling overnight, making it a perfect make-ahead dessert for parties or holidays. Just hold off on adding the whipped cream topping until an hour or two before serving for the freshest look and texture.
What if I don’t have a springform pan?
While a springform pan makes removal and presentation easiest, you can still make this. You could press the crust into a regular pie dish, in which case you’d serve it directly from the dish. Alternatively, you could line a regular cake pan with parchment paper, leaving an overhang on the sides to use as “handles” for lifting the chilled cheesecake out before slicing.
Storing Your Scrumptious Leftovers
If by some miracle you have any of this no-bake pumpkin cheesecake left, you’ll want to store it properly to maintain its deliciousness. Keep the cheesecake covered tightly with plastic wrap or in an airtight container in the refrigerator for up to 3-4 days. The crust might soften slightly over time, but the filling will remain wonderfully creamy.
Freezing is also an option! You can freeze individual slices or the whole cheesecake (without the whipped cream topping) for up to 1 month. Wrap it tightly in plastic wrap, then a layer of aluminum foil. To thaw, simply transfer it to the refrigerator overnight. Add fresh whipped cream just before serving.
A Few More Thoughts on Personalizing This Dessert
This no-bake pumpkin cheesecake is fantastic as is, but there are always ways to put your own spin on it. Consider adding a swirl of caramel sauce or a drizzle of melted white chocolate over the top before serving. Toasted pecans or walnuts would also provide a lovely textural contrast to the creamy filling. For an extra kick, a tablespoon of bourbon or rum could be added to the pumpkin filling mixture along with the vanilla extract, deepening those warm, autumnal notes.
You could also experiment with the crust. Instead of Graham crackers, try gingersnaps for a spicier base, or even crushed Biscoff cookies for a unique caramel-like flavor. The possibilities are endless when you start with such a versatile and delicious base.

No-Bake Pumpkin Cheesecake
A velvety smooth, spiced no-bake pumpkin cheesecake with a crisp Graham cracker crust and whipped cream topping.
📝 Ingredients
👩🍳 Instructions
- 1Prepare the crust: In a medium bowl, combine Graham cracker crumbs, ¼ cup granulated sugar, and melted butter. Mix until crumbs are moistened. Press firmly into the bottom of a 9-inch springform pan. Refrigerate while preparing the filling.
- 2Make the filling: In a large bowl, beat softened cream cheese with an electric mixer until smooth, about 2-3 minutes. Scrape down the bowl. Add pumpkin puree, ½ cup granulated sugar, brown sugar, 1 tsp vanilla, cinnamon, ginger, nutmeg, cloves, and salt. Beat on medium-low until combined, then medium until smooth.
- 3Whip heavy cream: In a separate, cold bowl, whip 1 ½ cups very cold heavy cream on high speed until stiff peaks form.
- 4Combine filling: Gently fold about one-third of the whipped cream into the pumpkin mixture to lighten it, then carefully fold in the remaining whipped cream until no streaks remain. Avoid overmixing.
- 5Assemble and chill: Pour the pumpkin filling over the chilled crust and spread evenly. Cover loosely with plastic wrap and refrigerate for at least 6-8 hours, or preferably overnight, until fully set.
- 6Prepare topping: When ready to serve, whip 1 cup very cold heavy cream, 2 tablespoons powdered sugar, and ½ tsp vanilla extract until stiff peaks form.
- 7Serve: Carefully remove the springform pan sides. Pipe or spread whipped cream over the cheesecake. Garnish with a sprinkle of cinnamon or toasted pecans if desired. Slice and enjoy!
💡 Notes
Ensure all dairy products for the filling are at room temperature for the smoothest result. Chilling the bowl and whisk for the heavy cream helps achieve stiff peaks faster. This cheesecake is best made a day ahead to allow for proper setting.



