


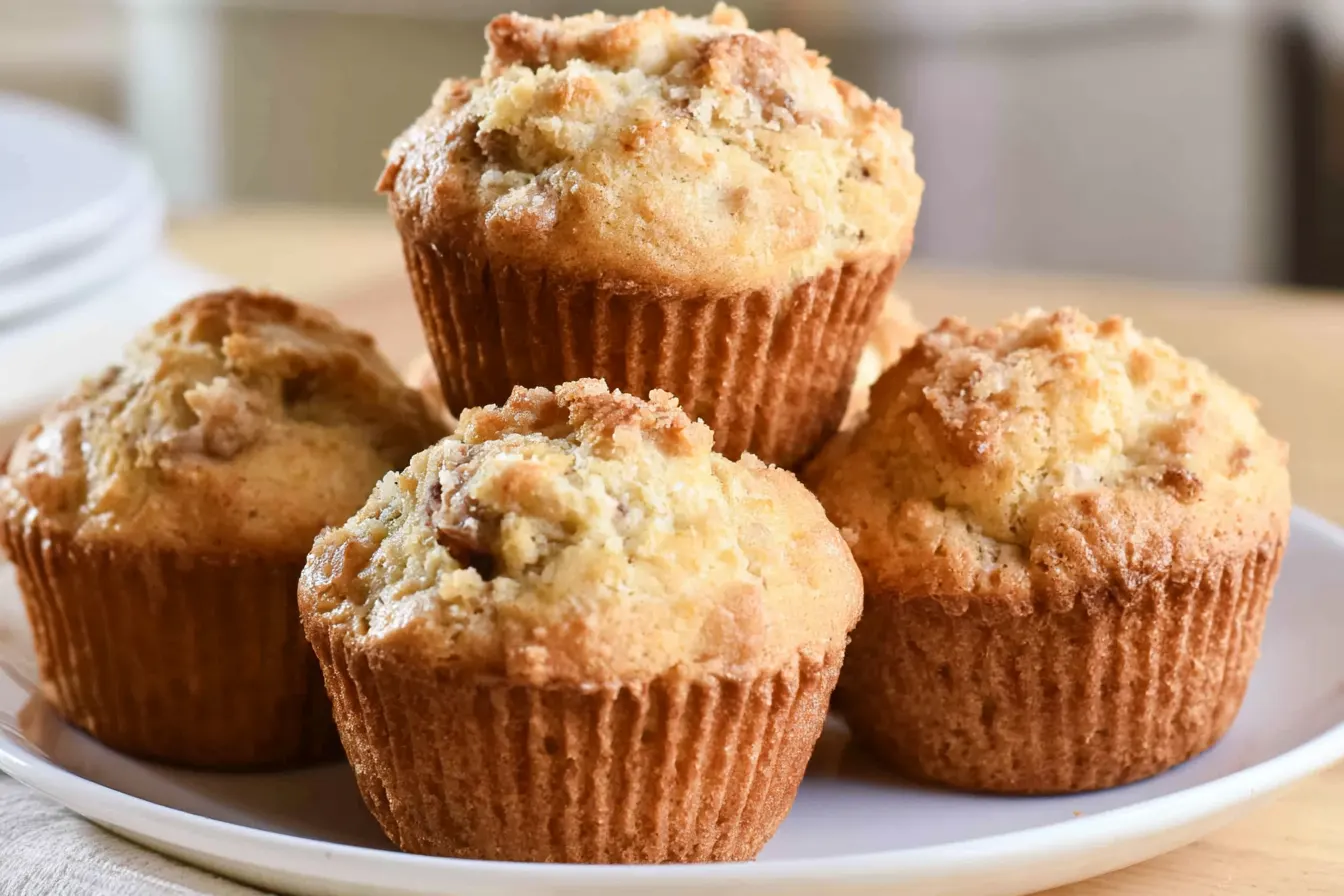
Have you ever walked past a bakery, caught a whiff of those freshly baked muffins, and just *had* to have one? I know I have. There’s something undeniably alluring about their sky-high domed tops, craggly edges, and the promise of a soft, tender crumb inside. The only downside? The price tag! A couple of those beauties can easily set you back what it costs to make an entire batch at home. Today, I’m sharing my secret weapon for achieving those coveted bakery-style muffins right in your own kitchen, without breaking the bank.

The Secrets to Bakery-Level Muffins
So, what makes these muffins stand out from your average homemade variety? It comes down to a few key principles I’ve refined over countless batches. Think of these as your personal cheat sheet to muffin glory.Chilling the Batter: A Game-Changer
This might sound counter-intuitive, but a cold batter is a happy batter when it comes to muffins. Letting your muffin batter chill in the fridge for at least 30 minutes, or even overnight, does wonders. It allows the flour to fully hydrate, resulting in a more tender crumb. Crucially, cold batter also helps create those magnificent domed tops because the cold fat takes longer to melt in the oven, giving the muffin structure time to set before it spreads. It’s a simple step that yields dramatic results.The Hot Start: Oven Dynamics for Lofty Tops
Another trick from the pros is to start your muffins in a very hot oven, then reduce the temperature partway through baking. The initial blast of high heat causes the baking powder and soda to react vigorously, creating a powerful lift that pushes the batter upwards. Once they’ve risen sufficiently, dropping the temperature allows them to bake through evenly without burning the tops. This dual-temperature method is fundamental for achieving those impressive, sky-high crowns that are the hallmark of bakery muffins.The Right Ingredients Matter, But Don’t Overthink It
While fancy ingredients aren’t strictly necessary, using good quality staples makes a difference. Fresh baking powder and soda are non-negotiable – old leavening agents lead to flat muffins. Similarly, using full-fat dairy like buttermilk or whole milk contributes to richness and moisture. And when it comes to add-ins, don’t be shy! Whether it’s fresh berries, chocolate chips, or a crumble topping, make sure there’s enough to carry flavor through every bite.
Gather Your Baking Arsenal: What You’ll Need
Before we dive into the mixing, let’s make sure you have everything ready. This recipe for truly irresistible muffins doesn’t call for anything exotic, just standard pantry items and a touch of enthusiasm!For the Muffin Batter:
- All-purpose flour: The foundation of our fluffy crumb.
- Granulated sugar: Provides sweetness and helps with browning.
- Baking powder & baking soda: Our dynamic duo for maximum lift. Ensure they’re fresh!
- Salt: Balances the sweetness and enhances flavor.
- Eggs: Room temperature, for better emulsification.
- Buttermilk: Adds tenderness and reacts with baking soda for extra rise. You can make your own if you don’t have it.
- Vegetable oil: For a moist crumb that stays soft longer than butter can.
- Vanilla extract: Essential for that warm, inviting flavor.
- Your favorite add-ins: (e.g., chocolate chips, fresh berries, chopped nuts).
Optional Streusel Topping (Highly Recommended!):
- All-purpose flour: For the bulk of the crumble.
- Brown sugar: Adds a caramelly sweetness.
- Unsalted butter: Cold and cubed, for that perfectly crumbly texture.
- Cinnamon: A warm spice that pairs beautifully with almost any muffin flavor.
Crafting Your Bakery-Style Muffins: Step-by-Step
Alright, let’s get down to business! Follow these steps carefully, and you’ll be pulling out a batch of glorious muffins in no time. Remember, patience with the chilling step is key here.Step 1: Prep Your Streusel (If Using) & Dry Ingredients
Start by preheating your oven to 425°F (220°C). If you’re making the streusel, combine the flour, brown sugar, and cinnamon in a small bowl. Cut in the cold, cubed butter with a pastry blender or your fingertips until coarse crumbs form. Set aside. In a large bowl, whisk together the all-purpose flour, granulated sugar, baking powder, baking soda, and salt. Make sure there are no lumps.Step 2: Combine Wet Ingredients
In a separate medium bowl, whisk together the eggs, buttermilk, vegetable oil, and vanilla extract until well combined and smooth. Ensure everything is incorporated evenly.Step 3: Gently Mix Batter & Add-ins
Pour the wet ingredients into the dry ingredients. Using a spatula or wooden spoon, mix until *just* combined. A few lumps are perfectly fine – overmixing develops gluten, leading to tough muffins. Fold in your chosen add-ins (chocolate chips, berries, etc.) until evenly distributed.Step 4: Chill Out!
Cover the bowl with plastic wrap and refrigerate the batter for at least 30 minutes, or ideally, overnight. This chilling period is crucial for developing flavor and achieving those magnificent domes. Don’t skip this step!Step 5: Fill and Top
Line a 12-cup muffin tin with paper liners or grease it thoroughly. Divide the chilled batter evenly among the cups, filling each one almost to the top. This generous filling is another secret to tall muffins. If using streusel, sprinkle a generous amount over the top of each muffin.
Step 6: The Two-Temperature Bake
Place the muffin tin into the preheated 425°F (220°C) oven. Bake for 5 minutes at this high temperature. This initial blast of heat helps the muffins rise quickly. After 5 minutes, reduce the oven temperature to 375°F (190°C) *without opening the oven door*. Continue baking for another 15-20 minutes, or until a wooden skewer inserted into the center of a muffin comes out clean. Tip: Don’t open the oven door during the first 10-12 minutes of baking, especially after you drop the temperature. This helps maintain the internal heat and prevents the muffins from deflating.Step 7: Cool and Enjoy
Once baked, remove the muffin tin from the oven and let the muffins cool in the tin for 5 minutes. Then, transfer them to a wire rack to cool completely. While they’re tempting straight from the oven, cooling slightly allows the flavors to meld and the crumb to set properly.Common Muffin Mistakes (and How to Avoid Them)
Even seasoned bakers can sometimes fall prey to muffin mishaps. Here are a few common pitfalls and how to steer clear of them to ensure your bakery-style muffins turn out perfect every time.Overmixing the Batter
This is probably the most common mistake. When you overmix muffin batter, you develop the gluten in the flour, which leads to a tough, chewy texture instead of a tender, soft one. Always mix until *just* combined; a few lumps are a good sign you haven’t overdone it.Using Cold Ingredients
While chilling the *batter* is good, starting with cold eggs and buttermilk isn’t. Room temperature ingredients emulsify better, creating a smoother, more uniform batter and a more consistent bake. Pull them out of the fridge about 30 minutes before you start.Forgetting to Fill the Muffin Cups Generously
If you underfill your muffin cups, you’ll end up with smaller, flatter muffins. To get those beautiful domed tops, you need to fill them almost to the brim. Don’t be shy with the batter!Not Using Fresh Leavening Agents
Baking powder and baking soda lose their potency over time. If yours have been sitting in the pantry for ages, they might not give your muffins the lift they need. Always check the expiry dates, or test them if you’re unsure.Flavor Twists & Add-In Ideas
While this base recipe for bakery-style muffins is fantastic on its own, it’s also incredibly versatile. Here are some ideas to spark your creativity and personalize your batch.Classic Combinations:
- Blueberry: Fresh or frozen blueberries (tossed in a little flour to prevent sinking) are always a hit.
- Chocolate Chip: Milk, dark, or white chocolate chips – can you ever go wrong?
- Cranberry Orange: Zest of an orange and fresh or dried cranberries for a bright, tangy muffin.
- Apple Cinnamon: Diced apples and a generous pinch of cinnamon, perhaps with a streusel topping.
Seasonal & Unique Ideas:
- Lemon Poppy Seed: Add lemon zest to the batter and a tablespoon of poppy seeds. Drizzle with a lemon glaze after baking.
- Pumpkin Spice: Replace some of the buttermilk with pumpkin puree and add pumpkin pie spice.
- Banana Nut: Mashed ripe bananas and chopped walnuts or pecans.
- Raspberry White Chocolate: The tartness of raspberries beautifully complements sweet white chocolate.
Storing Your Delicious Muffins
So you’ve baked a glorious batch of bakery-style muffins. Now, how do you keep them fresh and delicious for as long as possible?At Room Temperature:
Once completely cooled, store your muffins in an airtight container at room temperature for up to 3 days. To prevent the tops from getting soggy, you can place a piece of paper towel in the bottom of the container before adding the muffins, and another piece on top before sealing. This absorbs excess moisture.Freezing for Later:
Muffins freeze beautifully! Once cooled completely, place them in a single layer on a baking sheet and freeze for about an hour until solid. Then, transfer the frozen muffins to a freezer-safe bag or container. They’ll keep well for up to 3 months. To thaw, simply take them out at room temperature for a few hours, or pop them in the microwave for 30-60 seconds for a quick warm-up.Frequently Asked Questions About Muffins
Curiosity is a baker’s best friend! Here are some common questions I get about making muffins, especially those trying to achieve that professional bakery look and taste.Why do my muffins always come out flat?
There are a few culprits! Overmixing the batter is a big one, as it develops gluten and prevents a good rise. Old or inactive baking powder/soda will also lead to flat results. Finally, underfilling your muffin cups means less batter to rise upwards. Ensure your leavening agents are fresh, mix gently, and fill those cups generously!Can I use milk instead of buttermilk?
Yes, you can! If you don’t have buttermilk, you can easily make a substitute. For every 1 cup of buttermilk needed, measure 1 tablespoon of white vinegar or lemon juice into a liquid measuring cup, then fill the rest of the way with whole milk (up to the 1-cup line). Let it sit for 5-10 minutes until it curdles slightly.Why are my muffins tough or dry?
This usually points back to overmixing the batter, which develops too much gluten, making the muffins chewy rather than tender. Another reason could be overbaking; keep a close eye on them and remove them from the oven as soon as a skewer comes out clean. Using oil instead of butter can also help keep them moist longer.Can I add fresh fruit to the batter?
Absolutely! Fresh fruit adds wonderful flavor and moisture. If using very juicy fruits like berries, consider tossing them lightly in a tablespoon of flour before adding them to the batter. This helps prevent them from sinking to the bottom during baking.How do I get that perfect domed top like bakeries do?
The key here is a combination of a few techniques: chilling the batter, filling the muffin cups almost to the top, and using the high-heat-then-lower-heat baking method. The initial blast of high heat causes a quick burst of steam and leavening action, pushing the muffins upwards rapidly.
Bakery-Style Muffins with Streusel Topping
Achieve perfect, domed, and tender bakery-style muffins at home with this foolproof recipe, complete with an optional streusel topping.
📝 Ingredients
👩🍳 Instructions
- 1Preheat oven to 425°F (220°C). Line a 12-cup muffin tin with paper liners or grease thoroughly.
- 2If making streusel: In a small bowl, combine ½ cup (60g) all-purpose flour, ¼ cup (50g) brown sugar, ½ tsp cinnamon, and 3 tbsp (42g) cold unsalted butter, cubed. Cut with a pastry blender or fingers until coarse crumbs form. Set aside.
- 3In a large bowl, whisk together 2 ½ cups flour, granulated sugar, baking powder, baking soda, and salt.
- 4In a separate medium bowl, whisk together eggs, buttermilk, vegetable oil, and vanilla extract until smooth.
- 5Pour the wet ingredients into the dry ingredients. Mix gently with a spatula or wooden spoon until *just* combined. Do not overmix; a few lumps are okay. Fold in your chosen add-ins (e.g., chocolate chips, berries) until evenly distributed. If using fresh fruit, toss it in 1 tbsp flour first.
- 6Cover the bowl with plastic wrap and refrigerate the batter for at least 30 minutes, or up to 24 hours. This chilling step is crucial for texture and dome formation.
- 7Divide the chilled batter evenly among the 12 muffin cups, filling each almost to the top. Sprinkle generously with streusel topping, if using.
- 8Bake in the preheated 425°F (220°C) oven for 5 minutes. Without opening the oven door, reduce the temperature to 375°F (190°C) and continue baking for another 15-20 minutes, or until a wooden skewer inserted into the center comes out clean.
- 9Remove from oven and let cool in the muffin tin for 5 minutes before transferring to a wire rack to cool completely.
💡 Notes
For best results, ensure your baking powder and soda are fresh. If you don't have buttermilk, combine 1 cup whole milk with 1 tablespoon lemon juice or white vinegar and let sit for 5-10 minutes. Muffins are best enjoyed the day they are made but can be stored in an airtight container at room temperature for up to 3 days, or frozen for up to 3 months.



