


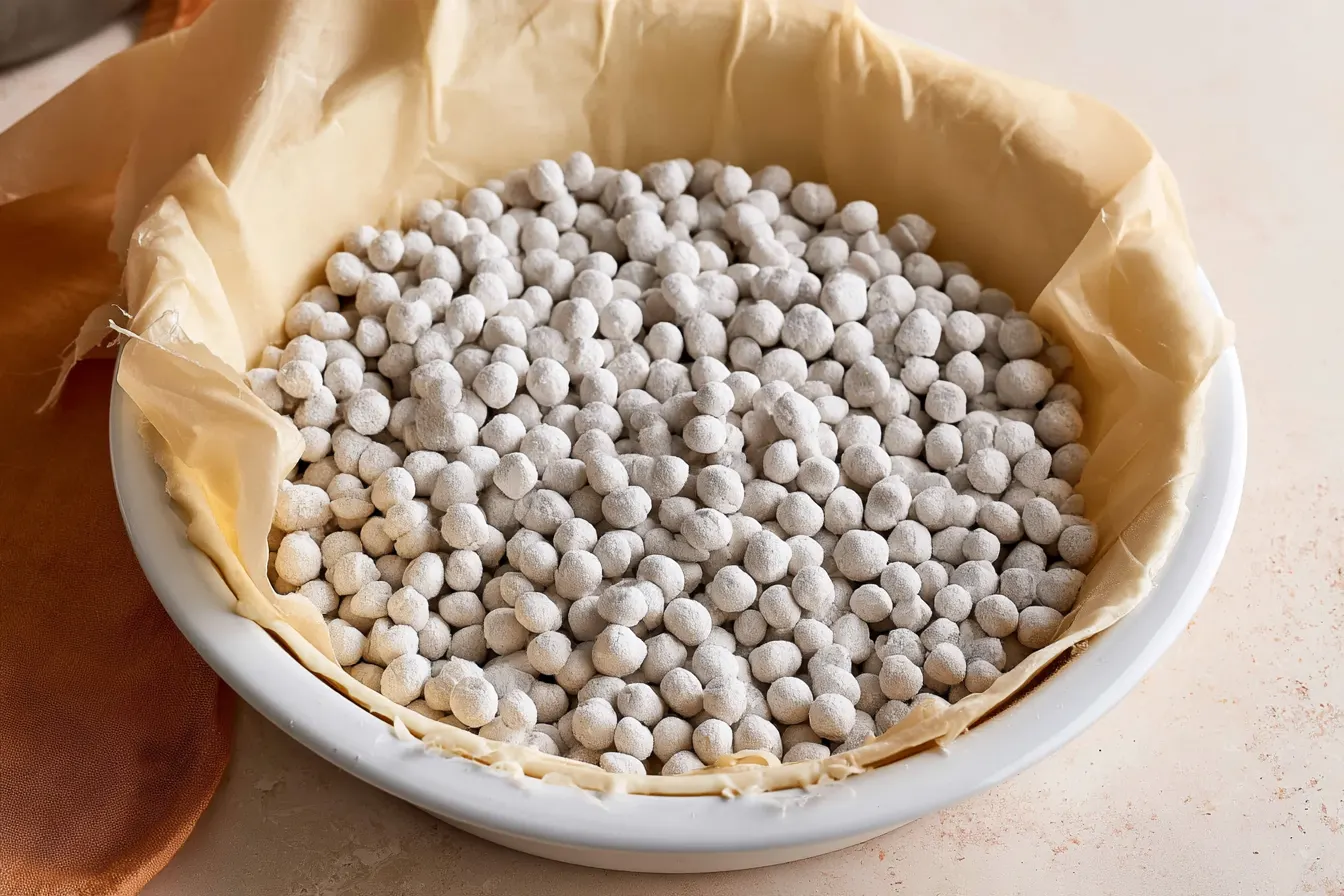
Ever bitten into a seemingly perfect pie, only to find a sad, soggy bottom lurking beneath that glorious filling? It’s a tragedy, isn’t it? That moment of culinary heartbreak can ruin an otherwise stellar dessert. But what if I told you there’s a simple, straightforward technique that acts like a magic shield against that dreaded dampness? It’s all about learning how to blind bake pie crust, and once you master it, your pies will thank you.

Why Blind Baking is Your Pie’s Best Friend
Okay, so we’ve established that blind baking is crucial for preventing a soggy bottom. But let’s get a little deeper into the “why” of it all. When you bake a pie with a wet filling (like a custard or fruit that releases a lot of juice), the moisture from that filling can seep into the unbaked crust. This steams the dough rather than bakes it, resulting in a pale, gummy, and utterly unappetizing texture. Blind baking, or pre-baking, gives the crust a head start. It allows the dough to firm up, dry out, and develop a golden color before it even meets its filling. This creates a barrier, a crispy shield, that protects it from the moisture that will inevitably come its way. It’s like sending your pie crust to the gym for a good workout before the main event!The Science of a Crispy Base
Think about it from a structural perspective. Pie dough is essentially flour, fat, water, and salt. When heated, the water turns to steam, creating those wonderful flaky layers. The fat melts, tenderizing the crust, and the flour proteins set, giving the crust its structure. Without blind baking, that setting process can be hindered by the moisture from the filling, leading to a weak, underdeveloped crust. A good blind bake ensures all those elements do their job correctly, resulting in a robust and delicious foundation for your pie.Essential Tools for Blind Baking Success
You don’t need a professional kitchen setup to blind bake like a pro, but having the right tools makes the process smoother and more reliable.The Right Pie Plate
For blind baking, I almost always reach for a ceramic or glass pie plate. These conduct heat evenly and retain it well, which helps ensure a uniformly baked crust. Metal pie plates can work, but sometimes they heat up a bit too quickly, so keep an eye on them. For tarts, a tart pan with a removable bottom is a dream – makes serving a breeze!Parchment Paper or Foil
This is non-negotiable. You’ll need something to line your chilled pie crust before adding weights. Parchment paper is my personal favorite as it conforms nicely to the shape and rarely sticks. Heavy-duty aluminum foil also works well, but be careful not to tear it when pressing it into the corners.Pie Weights or Dried Beans/Rice
This is the “weight” in pie weights! Their job is to hold the pie crust in place as it bakes, preventing it from bubbling up or shrinking down the sides of the pan. Ceramic pie weights are fantastic because they’re reusable and distribute heat evenly. If you don’t have them, dried beans (like kidney or pinto) or even uncooked rice work perfectly. Just know that once you use them for baking, they’re generally not suitable for cooking anymore, so store them in a labeled container specifically for pie weights.A Pastry Brush
Handy for a quick egg wash if you’re going for a fully baked crust.Mastering the Method: How to Blind Bake Pie Crust
This isn’t just about throwing dough in an oven. There are a few critical steps that make all the difference between a good blind bake and a great one. Let’s walk through it, step by step.1. Prepare Your Dough
Start with a well-made, chilled pie dough. This is foundational. Cold dough is easier to roll and less likely to shrink in the oven. If your dough is too warm, the butter will melt too quickly, and you’ll lose that flakiness. Roll out your dough on a lightly floured surface to about 1/8 to 1/4 inch thickness. Carefully transfer it to your pie plate. Don’t stretch the dough as you place it; gently ease it into the pan. Stretching can cause it to snap back and shrink during baking. Trim the edges, leaving about a 1/2-inch overhang. You can crimp the edges now or wait until after the first bake if you prefer a neater, less rustic look.2. Chill, Chill, Chill!
This step is often overlooked but it’s paramount for preventing shrinkage. Once your dough is in the pie plate and trimmed, pop it into the refrigerator for at least 30 minutes, or even better, the freezer for 15-20 minutes. This re-chills the butter in the dough, firming it up and helping it hold its shape during baking.3. The Piercing and Lining Act
Before baking, you need to prick the bottom of the crust with a fork. This creates small vents for steam to escape, preventing large bubbles from forming. Do this all over the bottom, but avoid piercing the sides too much. Next, gently line the chilled crust with parchment paper or aluminum foil. Make sure it extends up and over the edges to prevent the crust from browning too quickly. Fill the lined crust with pie weights, dried beans, or rice. Fill it right to the brim, especially pressing them into the corners and up against the sides. This is critical for preventing the crust from slumping.
4. The First Bake: Partial Blind Bake
Preheat your oven to 400°F (200°C). A hotter oven helps to set the crust quickly. Bake the weighted crust for 15-20 minutes. The edges should start to look dry and lightly golden. Carefully remove the pie plate from the oven. Gently lift the parchment paper (or foil) with the weights out of the crust. Be careful, the weights will be hot! If your crust has any small cracks or tears at this point, you can usually patch them up with a small piece of reserved dough or by pressing the warm dough together.5. The Second Bake: Fully Blind Baked Crust
This step is for when your recipe calls for a “fully blind baked” crust, meaning the crust will not be baked again with a filling (think no-bake fillings like chocolate mousse or fresh fruit tarts). Reduce your oven temperature to 375°F (190°C). Return the crust to the oven, unweighted, and bake for another 10-15 minutes, or until the bottom is golden brown and looks dry. You want it to be a uniform color. Tip: If you notice the edges are browning too quickly, you can cover them loosely with aluminum foil to protect them. For a partially blind baked crust (for fillings that will bake again, like quiches or fruit pies), you might only need a few more minutes after removing the weights, just enough for the bottom to look dry, but not necessarily deep golden. This prevents overbaking later.6. Cooling Down
Once baked, let the crust cool completely on a wire rack before adding your filling. If you add a filling to a warm crust, it can create steam and negate all your hard work!Common Pitfalls and How to Avoid Them
Even with the best intentions, things can sometimes go awry. Here are a few common issues and how to troubleshoot them.Shrinking Edges
This is probably the most frequent complaint. It happens when the dough isn’t chilled enough, or if it was stretched into the pan. Solution: Always re-chill your dough in the pie plate for at least 30 minutes before baking. Also, make sure you don’t stretch the dough when fitting it into the pan. Drape it gently and ease it in. And don’t skimp on those pie weights! Fill them right to the top.Puffy Bottom
If your crust puffs up like a balloon even with weights, it usually means there wasn’t enough piercing, or the weights didn’t cover the entire bottom surface effectively. Solution: Prick the bottom generously with a fork before lining and weighting. Ensure your weights are spread evenly and cover the entire base of the crust.Cracks in the Crust
Sometimes small cracks can appear, especially if the dough was a bit dry or overworked. Solution: Don’t panic! Warm dough is pliable. While the crust is still warm from the oven, you can often gently press the cracks together to seal them. For larger cracks, a small patch of reserved raw dough can be pressed into place and baked for a few extra minutes.Uneven Browning
If one side is darker than the other, your oven might have hot spots. Solution: Rotate your pie plate halfway through the baking process. If the edges are browning too fast, a pie shield (or a ring of foil) can protect them.Frequently Asked Questions About Blind Baking
Got more questions bubbling up? Let’s tackle some of the common queries I hear about blind baking.Does blind baking always involve pie weights?
Not always, but almost always recommended for traditional pie dough. Some very specific recipes might suggest baking without weights for a very thin tart shell, but for a standard pie crust that needs to hold its shape, weights are your best friend. They prevent the crust from puffing up and shrinking.Can I use dried beans or rice instead of ceramic pie weights?
Absolutely! Dried beans (like kidney beans or pinto beans) or even uncooked rice work wonderfully as pie weights. The key is to make sure they fill the crust completely. Just remember, once they’ve been baked at high temperatures, they’re generally not suitable for cooking and eating, so designate them as your “pie weights” and store them in a jar for future baking projects.How do I know if my blind-baked crust is fully cooked?
For a partially blind-baked crust, it should look dry, opaque, and perhaps lightly golden on the bottom. For a fully blind-baked crust, you’re aiming for a uniform golden-brown color across the entire surface, including the bottom and sides. It should sound hollow when tapped.What if my crust sticks to the parchment paper?
This is rare if you’re using good quality parchment paper, but it can happen, especially if there’s any moisture. Make sure your dough is well-chilled, and if you’re concerned, you can lightly spray the parchment with a non-stick spray before placing it in the crust, though I rarely find this necessary. Removing the weights when the crust is still warm can also help prevent sticking.Can I prepare my pie crust in advance and blind bake it later?
Yes, you can! You can prepare the dough and place it in the pie plate, then wrap it tightly with plastic wrap and refrigerate it for up to 2-3 days before blind baking. You can also freeze the unbaked crust in the pie plate for a few weeks; just be sure to wrap it extra well. When ready to bake, you can blind bake straight from frozen, adding a few extra minutes to the initial baking time.Serving Suggestions & Creative Fillings
Once you’ve got that perfectly blind-baked crust, the world of pie is your oyster! For a fully baked crust, think about: No-Bake Cheesecakes: A creamy, dreamy filling that sets beautifully in a crispy shell. Chocolate Silk Pie: Decadent and rich, it needs no further baking. Fresh Fruit Tarts: A light pastry cream base topped with seasonal berries, kiwis, and peaches makes for a stunning dessert. Lemon Meringue Pie: The bright, tangy lemon curd goes into the pre-baked crust, then gets topped with a fluffy meringue and browned. For a partially blind-baked crust, the possibilities are endless: Quiches: A savory custard filling with cheese, vegetables, and meats. Apple or Berry Pies: The fruit filling bakes right along with the crust, but that head start prevents a soggy bottom. Chicken Pot Pie: Hearty and comforting, a pre-baked bottom crust ensures it’s not a doughy mess. The beauty of a perfectly blind-baked crust is its versatility. It’s the sturdy, reliable canvas for whatever culinary masterpiece you dream up next. So go forth, conquer those pies, and banish soggy bottoms forever! Your taste buds (and your guests) will thank you.
Perfect Blind Baked Pie Crust
Master the art of blind baking pie crust for a perfectly crisp, golden base every time, ideal for any pie or tart filling.
📝 Ingredients
👩🍳 Instructions
- 1Prepare your pie dough: Roll out your chilled pie dough on a lightly floured surface to about a 1/8 to 1/4-inch thickness, large enough to fit your 9-inch pie plate with some overhang. Gently transfer the dough to the pie plate, easing it into the corners without stretching. Trim the edges, leaving a 1/2-inch overhang, then crimp or decoratively finish the edges as desired.
- 2Chill the crust: Place the prepared pie plate with the dough into the refrigerator for at least 30 minutes, or into the freezer for 15-20 minutes. This is crucial for preventing shrinkage during baking.
- 3Preheat and prick: Preheat your oven to 400°F (200°C). While the oven heats, remove the chilled crust from the fridge/freezer. Prick the bottom of the crust all over with a fork (this creates vents for steam).
- 4Line and weigh: Line the chilled, pricked crust with a piece of parchment paper or heavy-duty aluminum foil, ensuring it covers the bottom and extends up the sides and over the edges. Fill the lined crust completely with pie weights, dried beans, or uncooked rice, pressing them firmly into the corners and against the sides of the crust.
- 5First bake (partial blind bake): Bake in the preheated oven for 15-20 minutes, or until the edges of the crust look dry and are lightly golden. The weights help to hold the shape and prevent bubbles.
- 6Remove weights: Carefully remove the pie plate from the oven. Lift the parchment paper (or foil) along with the hot pie weights out of the crust. Be gentle, as the crust will be delicate at this stage. If any cracks appear, you can gently press them together while the crust is warm.
- 7Second bake (fully blind bake, if needed): Reduce the oven temperature to 375°F (190°C). Return the unweighted crust to the oven and bake for another 10-15 minutes, or until the bottom of the crust is golden brown and appears dry. If the edges are browning too quickly, you can loosely cover them with aluminum foil. For a partially blind-baked crust (for pies with fillings that will be baked again), you might only need a few minutes until the bottom looks dry, not necessarily deep golden.
- 8Cool completely: Remove the fully or partially blind-baked crust from the oven and let it cool completely on a wire rack before adding any filling. Adding filling to a warm crust can make it soggy.
💡 Notes
Always ensure your pie dough is very cold before blind baking; this is the best defense against shrinkage. If using store-bought dough, follow the chilling instructions on the package. Leftover blind-baked crusts can be stored at room temperature, loosely covered, for up to 2 days.



