


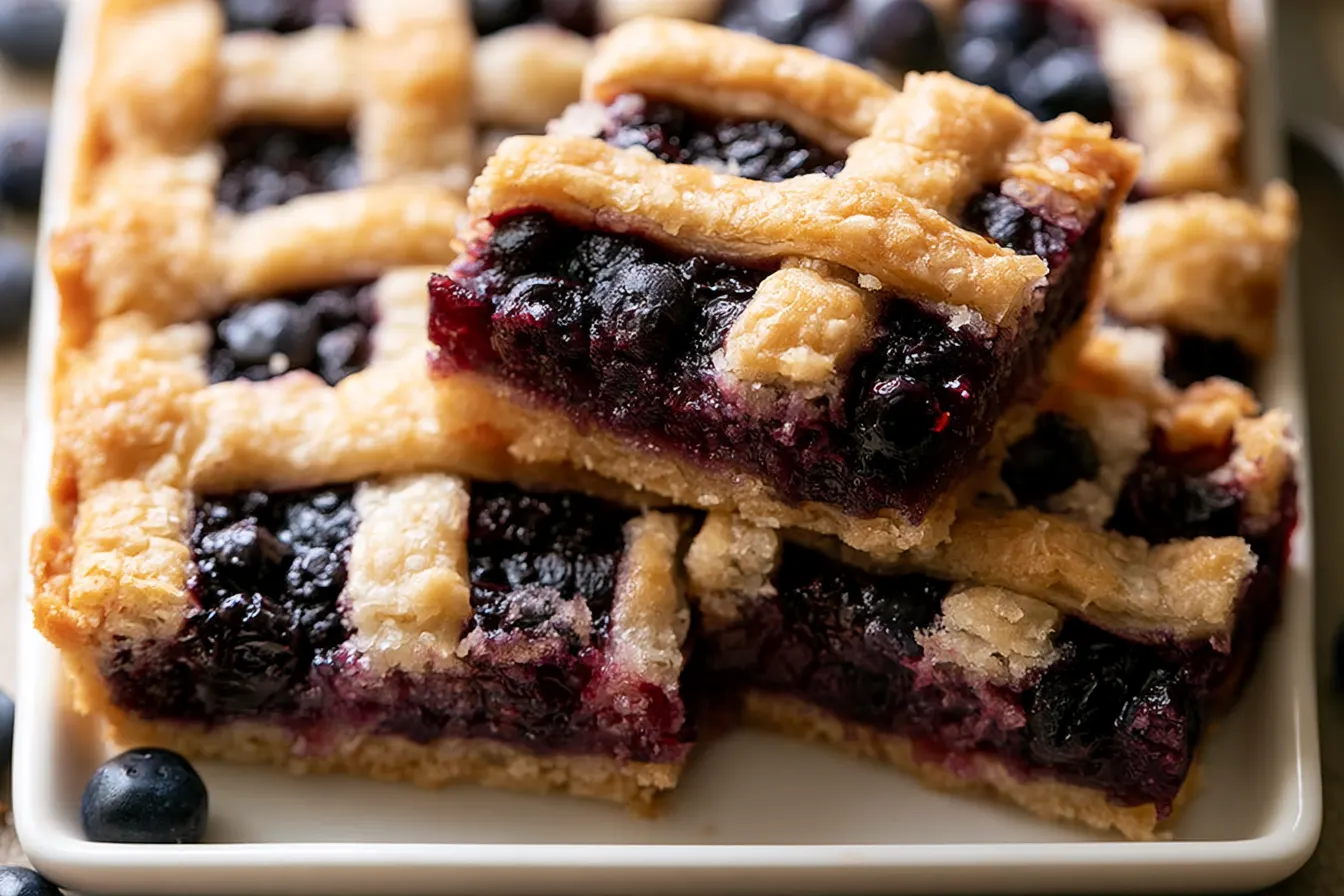
There’s something about the smell of a buttery crust baking with sweet, bubbling fruit that just screams “summer.” It’s that exact aroma that fills my kitchen when these incredible blueberry pie bars are in the oven, a scent that instantly transports me back to sun-drenched afternoons and fresh-picked berries. Forget the fuss of a full pie; these bars deliver all the comfort and flavor with a fraction of the effort, perfect for sharing at any backyard gathering.

Why These Blueberry Pie Bars Are Pure Summer Magic
So, what makes these particular blueberry pie bars stand out in a sea of dessert recipes? It’s all about the balance. We’re not just throwing blueberries into a pan; we’re creating a harmonious blend of textures and flavors that sing together. The crust is sturdy enough to hold its shape but melts in your mouth, while the filling is sweet but still bright, letting the natural tartness of the blueberries shine through. First off, the crust. It’s a simple, classic butter pie dough that bakes up beautifully golden and crisp. It forms both the sturdy base and the decorative lattice top, ensuring every bite has that essential buttery foundation. We’ll be working with a slightly softer dough than a traditional pie crust, making it easier to press into the pan and cut into strips for the lattice. Then there’s the filling. Oh, the filling! Plump, ripe blueberries are tossed with just enough sugar, a hint of lemon zest to brighten everything up, and a touch of cornstarch to create that perfect, slightly jammy consistency. No runny, watery filling here – just pure, concentrated blueberry goodness that bursts with flavor. It’s like capturing the essence of a sunny July day in every square. And the lattice! It’s the crowning glory. It allows little peeks of that gorgeous purple filling to show through, creating an inviting visual that’s hard to resist. Plus, it helps the steam escape, ensuring your filling sets perfectly. It’s impressive, yes, but totally achievable even for a beginner baker. We’re going for rustic charm, not perfect precision.Gather Your Goodies: What You’ll Need
Making these bars doesn’t require any fancy ingredients. Most of what you need is likely already in your pantry or easily found at your local grocery store. Fresh is always best for blueberries, but frozen will work in a pinch – just make sure they’re not overly wet.For the Buttery Crust
- All-purpose flour: The foundation of our crust. Don’t pack it too tightly when measuring.
- Granulated sugar: Just a touch to sweeten the crust slightly and aid in browning.
- Salt: Essential for balancing the flavors and enhancing the butteriness.
- Unsalted butter: Very cold and cut into cubes. This is key for a flaky crust.
- Ice water: Start with just a few tablespoons; you might need a little more or less.
For the Juicy Blueberry Filling
- Fresh blueberries: About 4-5 cups. If using frozen, don’t thaw them first – add them directly to the mixture.
- Granulated sugar: Adjust to your berries’ sweetness. If they’re tart, add a little more.
- Cornstarch: Our thickening agent. It ensures the filling sets up nicely.
- Lemon zest and juice: Brightens the flavor and adds a lovely tang that complements the blueberries beautifully.
- Vanilla extract: A warm, aromatic background note.
- Pinch of cinnamon (optional): A tiny hint can add warmth without overpowering the berries.
For Finishing Touches
- Egg wash: One egg yolk beaten with a tablespoon of water or milk, for a golden shine.
- Coarse sugar (optional): For a little sparkle and crunch on top.

Crafting Your Blueberry Pie Bars: Step-by-Step
Don’t be intimidated by the lattice! We’ll break it down so it’s super simple. The key is to keep your ingredients cold, especially the butter for the crust. This helps create those wonderful flaky layers.Step 1: Prep the Pie Crust Dough
In a large bowl, whisk together the flour, sugar, and salt. Add the cold, cubed butter. Using a pastry blender, your fingertips, or a food processor, cut the butter into the flour mixture until it resembles coarse crumbs with some pea-sized pieces of butter remaining. This texture is what gives you a flaky crust.
Gradually add the ice water, one tablespoon at a time, mixing until the dough just comes together. Be careful not to overmix! The dough should be shaggy but hold together when squeezed. Divide the dough into two portions: one slightly larger (about 2/3) for the base and one smaller (1/3) for the lattice. Flatten each portion into a disk, wrap tightly in plastic wrap, and refrigerate for at least 30 minutes (or up to 2 days). Tip: If your kitchen is warm, you might want to chill your mixing bowl and pastry blender beforehand.
Step 2: Roll Out the Base
Preheat your oven to 375°F (190°C). Lightly grease a 9×13 inch baking pan or line with parchment paper, leaving an overhang on the sides to help lift the bars out later. On a lightly floured surface, roll out the larger disk of dough into a rectangle roughly 10×14 inches. Carefully transfer the dough to your prepared baking pan, pressing it gently into the bottom and up the sides. Trim any excess dough from the edges. Prick the bottom of the crust a few times with a fork. Place the pan in the refrigerator while you prepare the filling.
Step 3: Mix Up the Blueberry Filling
In a medium bowl, gently combine the fresh blueberries, granulated sugar, cornstarch, lemon zest, lemon juice, vanilla extract, and cinnamon (if using). Stir until the blueberries are evenly coated. Try not to crush the berries too much – we want them to hold their shape during baking.
Step 4: Assemble and Add the Lattice
Pour the blueberry filling evenly into the chilled crust. Now, for the lattice! On a lightly floured surface, roll out the smaller disk of dough into a rectangle about 9×13 inches. Using a sharp knife or a pizza cutter, cut the dough into 1/2-inch to 3/4-inch wide strips. You’ll need about 10-12 strips.
Arrange half of the strips evenly spaced across the top of the filling, running in one direction. Fold back every other strip about halfway. Place a new strip of dough perpendicular to the first set of strips, tucking it under the folded strips. Unfold the original strips over the new one. Now, fold back the alternating strips (the ones that were not folded back before) and place another perpendicular strip. Continue this weaving pattern until you have covered the top of the bars. Trim any excess dough from the sides and crimp the edges to seal. Note: Don’t stress about perfect symmetry for the lattice; rustic charm is part of the appeal!
Step 5: Bake to Golden Perfection
In a small bowl, whisk together the egg yolk and water (or milk) to create an egg wash. Lightly brush the lattice top with the egg wash and sprinkle with coarse sugar, if desired. Bake for 45-55 minutes, or until the crust is golden brown and the blueberry filling is bubbly. If the crust starts browning too quickly, you can loosely tent the pan with aluminum foil.

Step 6: Cool and Serve
Once baked, remove the pan from the oven and place it on a wire rack to cool completely. This is crucial! The filling needs time to set properly. If you cut into them too soon, the filling will be loose. Let them cool for at least 2-3 hours, or even better, chill them in the refrigerator for an hour after they’ve cooled to room temperature. Once cooled, use the parchment paper overhang to lift the entire slab out of the pan and cut into squares or rectangles. Serve as is, or with a scoop of vanilla ice cream.
Common Questions About Blueberry Pie Bars
Got a few questions bubbling up? Here are some of the most common ones I hear when it comes to these delightful bars.Can I use frozen blueberries instead of fresh?
Absolutely! Frozen blueberries work wonderfully here. The key is *not* to thaw them before adding them to the filling mixture. If you thaw them, they’ll release too much water and make your filling runny. Just toss them directly from the freezer with the sugar, cornstarch, and other ingredients.
My crust is tough! What went wrong?
A tough crust is usually a sign of overworking the dough or adding too much water. When mixing, stop as soon as the dough just comes together. You want to see some visible bits of butter, as these create steam and flakiness during baking. Use ice water and add it a tablespoon at a time until the dough is just shaggy enough to hold together.
How do I prevent the filling from being too runny?
The cornstarch in the recipe is your best friend here. Make sure you use the specified amount. Also, ensure your bars are fully cooled before cutting into them. The filling thickens considerably as it cools. If you slice them warm, it will indeed be quite loose.
Can I make these blueberry pie bars ahead of time?
Yes, these bars are fantastic for making ahead! You can bake them a day in advance and store them, covered, at room temperature or in the refrigerator. They actually firm up nicely overnight, making them even easier to cut and serve. For longer storage, see the freezing tips below.
What if I don’t want to do a lattice top?
No problem at all! You can do a full top crust by rolling out the smaller dough portion and placing it directly over the filling. Just be sure to cut a few slits in the top crust to allow steam to escape during baking. You could also do a crumble topping instead for a different texture.
Making Ahead & Storing Your Bars
These blueberry pie bars are fantastic for meal prep or for taking to a gathering, as they hold up beautifully.Storage
Once completely cooled, store leftover blueberry pie bars in an airtight container at room temperature for up to 2 days. If your kitchen is particularly warm, or if you want them to last longer, transfer them to the refrigerator. They’ll keep well in the fridge for up to 4-5 days. Bringing them to room temperature for about 30 minutes before serving can enhance their flavor and texture.
Freezing Instructions
These bars freeze like a dream! Once they are completely cooled, cut them into individual squares. Arrange the squares in a single layer on a baking sheet and freeze until solid (about 2-3 hours). Once frozen, transfer the individual bars to a freezer-safe airtight container or a freezer bag, separating layers with parchment paper to prevent sticking. They can be frozen for up to 3 months. Thaw them at room temperature for a few hours or overnight in the refrigerator before serving.
Variations to Play With
While these blueberry pie bars are perfect as they are, there’s always room for a little creative play in the kitchen!Mixed Berry Marvel
Why stick to just blueberries? Feel free to swap out a cup or two of blueberries for other berries like raspberries, blackberries, or sliced strawberries. Just be mindful that softer berries might release more liquid, so you might need a tiny bit more cornstarch (another 1/2 teaspoon) if you’re using a lot of them.
A Hint of Spice
For a warmer, more autumnal feel, amp up the spices. A pinch of nutmeg or a whisper of cardamom added to the blueberry filling can elevate the flavor profile. These spices pair wonderfully with berries and add a cozy depth.
Almond Accents
Blueberries and almonds are a match made in heaven. You could add a teaspoon of almond extract to the filling instead of or in addition to vanilla. For an extra textural element, sprinkle some sliced almonds over the top of the lattice before baking. The toasted nuts add a lovely crunch and nutty flavor.
Citrus Zest Swap
Lemon zest is classic, but orange zest would also be delightful. It adds a slightly sweeter, brighter citrus note that complements blueberries beautifully. A combination of both lemon and orange zest would be truly divine!
Serving Suggestions for Your Blueberry Bliss
These bars are incredibly versatile and shine in many settings.Simple & Sweet
They’re perfect on their own, perhaps with a dusting of powdered sugar. A classic glass of cold milk or a cup of your favorite tea makes a wonderful companion for a relaxed afternoon treat.
A La Mode
For a more decadent dessert, serve these bars slightly warm with a generous scoop of vanilla bean ice cream. The cold, creamy ice cream melting into the warm, fruity filling is pure heaven. A dollop of freshly whipped cream is also a fantastic option.
Brunch Star
These bars make an excellent addition to a brunch spread. Their handheld nature makes them easy to grab and enjoy alongside other breakfast pastries, fruit salads, and quiches. They’re a guaranteed crowd-pleaser.
Picnic Perfect
Because they’re so sturdy and travel well, blueberry pie bars are ideal for picnics, potlucks, and outdoor gatherings. Pack them in a container, and they’ll be a welcome sight at any event.
No matter how you serve them, these blueberry pie bars are destined to become a beloved staple in your dessert repertoire. They capture the essence of summer in every bite, offering that comforting, home-baked feel without any of the fuss. Go ahead, bake a batch and let that incredible aroma fill your home – you won’t regret it!
Blueberry Pie Bars with Lattice Top
Buttery blueberry pie bars with a flaky crust, sweet-tart blueberry filling, and a beautiful lattice topping, perfect for any occasion.
📝 Ingredients
👩🍳 Instructions
- 1Prepare the Crust: In a large bowl, whisk together flour, ½ cup sugar, and salt. Cut in the cold, cubed butter using a pastry blender or your fingertips until the mixture resembles coarse crumbs with some pea-sized pieces of butter remaining. Gradually add ice water, 1 tablespoon at a time, mixing until the dough just comes together. Do not overmix. Divide dough into two portions (2/3 for base, 1/3 for lattice). Flatten each into a disk, wrap in plastic, and refrigerate for at least 30 minutes.
- 2Prep Pan & Base Crust: Preheat oven to 375°F (190°C). Lightly grease a 9x13 inch baking pan or line with parchment paper. On a lightly floured surface, roll out the larger dough disk to a 10x14 inch rectangle. Carefully transfer to the prepared pan, pressing into the bottom and up the sides. Prick bottom with a fork. Chill while preparing filling.
- 3Make the Blueberry Filling: In a medium bowl, gently combine blueberries, ¾ cup sugar, cornstarch, lemon zest, lemon juice, vanilla extract, and cinnamon (if using). Stir until evenly coated.
- 4Assemble & Add Lattice: Pour blueberry filling evenly into the chilled crust. Roll out the smaller dough disk to a 9x13 inch rectangle. Cut into ½ to ¾ inch wide strips. Arrange half the strips evenly across the filling in one direction. Fold back every other strip halfway. Place a new strip perpendicular, tucking it under the folded strips. Unfold original strips. Repeat, folding back alternating strips, placing a new perpendicular strip, and unfolding. Trim excess dough and crimp edges.
- 5Bake: Whisk egg yolk with 1 tablespoon water/milk for egg wash. Brush over lattice and sprinkle with coarse sugar if desired. Bake for 45-55 minutes, or until crust is golden and filling is bubbly. If browning too fast, loosely tent with foil.
- 6Cool: Remove from oven and cool completely on a wire rack for at least 2-3 hours. The filling needs to set. For easier cutting, chill in the refrigerator for an hour after reaching room temperature. Lift from pan using parchment overhang and cut into squares.
💡 Notes
Ensure butter and water for the crust are very cold for flakiness. If using frozen blueberries, do not thaw them. For best results and clean slices, allow bars to cool completely before cutting. Store leftovers in an airtight container at room temperature for up to 2 days, or in the refrigerator for up to 5 days. Bars can be frozen for up to 3 months.



