


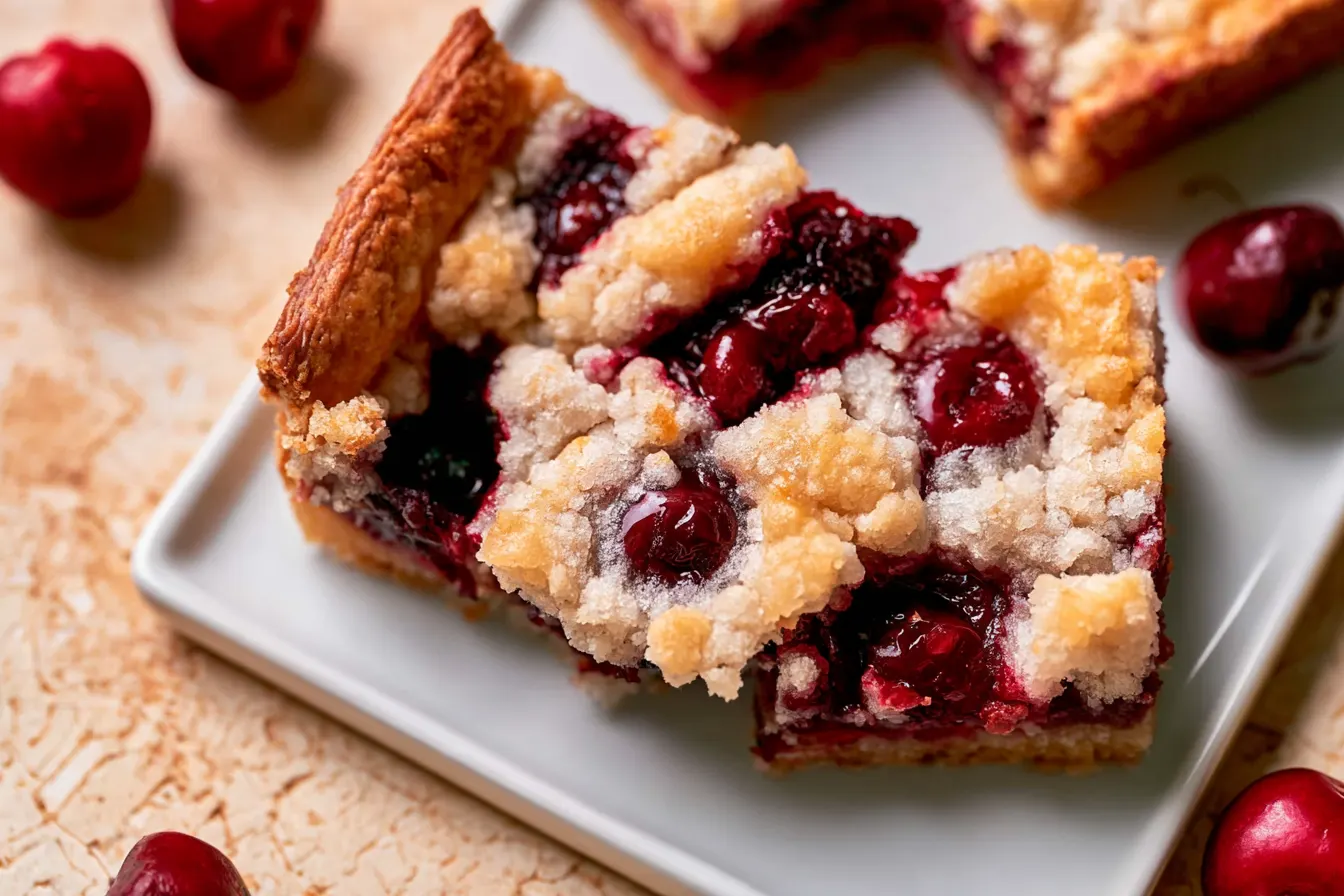
I once tried to make a cherry pie entirely from scratch for a summer picnic, convinced I’d emerge victorious with a perfectly crimped, glistening masterpiece. What I ended up with was a delicious but structurally questionable blob of fruit filling that defied all attempts at elegant slicing. The crust crumbled, the filling oozed, and while everyone still enjoyed it with a spoon, I knew there had to be an easier way to deliver that incredible cherry pie flavor. That, my friends, is how these wonderful cherry pie bars came to be.
These bars capture all the best parts of a classic cherry pie – the sweet-tart filling, the buttery crust, the pretty lattice top – but in a format that’s infinitely more forgiving and, dare I say, even more delightful to eat. No more wrestling with delicate pie crusts or worrying about a soggy bottom. Just pure, unadulterated cherry bliss in a neat, sliceable square.
They’re a fantastic solution for potlucks, picnics, or just a simple dessert at home when you’re craving that comforting fruit pie taste without all the fuss. Plus, they look absolutely stunning without requiring professional baking skills.

Let’s be real: sometimes, the idea of baking a full pie can feel a bit daunting. The rolling, the crimping, the blind baking – it’s a commitment. These cherry pie bars cut out a lot of that pressure while still delivering an undeniably impressive result. You get the robust flavor of homemade cherry pie filling, encased in a tender, buttery shortbread-style crust that holds its shape beautifully.
What sets this recipe apart is the balanced sweet-tart profile of the filling. We’re using fresh or frozen cherries, allowing their natural brightness to shine through. The subtle hint of almond extract perfectly complements the fruit, elevating the flavor beyond just “sweet.” It’s a combination that truly sings on the palate.
And that lattice top? It looks intricate, but it’s much simpler to achieve with a bar crust than with a traditional pie. It adds a lovely texture and a peek-a-boo view of the ruby-red filling underneath, making these bars as appealing to the eye as they are to the taste buds.
The Essentials: What You’ll Need
Gathering your ingredients before you start is half the battle. For these delicious bars, we’re breaking things down into two main components: the buttery crust and the vibrant cherry filling. Quality ingredients truly make a difference here, especially with the cherries.
For the Buttery Crust
- All-Purpose Flour: The foundation of our crust. Make sure it’s unbleached for the best texture.
- Granulated Sugar: Just enough to add a touch of sweetness to the crust without overpowering the filling.
- Salt: A pinch enhances all the other flavors. Don’t skip it!
- Unsalted Butter: Crucially, cold and cut into cubes. This is key for a tender, flaky, and rich crust.
- Ice Water: Helps bring the dough together without overworking it.
For the Homemade Cherry Filling
- Fresh or Frozen Cherries: About 6 cups, pitted. If using frozen, there’s no need to thaw them beforehand.
Tip: While fresh cherries are wonderful in season, high-quality frozen cherries are an excellent year-round substitute and often more economical. - Granulated Sugar: Adjust to your taste, depending on the sweetness of your cherries.
- Cornstarch: Our thickening agent. It ensures the filling sets beautifully without being runny.
- Lemon Juice: A splash brightens the flavors and balances the sweetness.
- Almond Extract: This is the secret weapon! It pairs incredibly well with cherries and adds a depth of flavor.
- Unsalted Butter: A small pat to stir into the warm filling for richness and shine.

Crafting Your Cherry Pie Bars: Step-by-Step
Let’s get baking! The process is broken down into manageable steps, making it easy for even novice bakers to achieve fantastic results. Remember, baking should be fun, not stressful!
Part 1: Preparing the Flaky Crust
- Combine Dry Ingredients: In a large bowl, whisk together the flour, sugar, and salt. This ensures even distribution of flavor.
- Cut in the Butter: Add the cold, cubed butter to the dry ingredients. Use a pastry blender, your fingertips, or a food processor to cut the butter into the flour until the mixture resembles coarse crumbs with some pea-sized pieces of butter remaining. This creates pockets of steam during baking, leading to flakiness.
- Add Ice Water: Gradually add ice water, one tablespoon at a time, mixing until the dough just comes together. Be careful not to overmix, or your crust will be tough.
- Divide and Chill: Divide the dough into two portions, one slightly larger than the other (about 2/3 and 1/3). Form each into a disc, wrap tightly in plastic wrap, and refrigerate for at least 30 minutes. This resting period helps hydrate the flour and relaxes the gluten, making the dough easier to roll.
Part 2: Developing the Luscious Cherry Filling
- Combine Cherries and Sugar: In a medium saucepan, combine the pitted cherries and granulated sugar. Stir gently to coat the fruit.
- Thicken the Filling: In a small bowl, whisk together the cornstarch with a tablespoon or two of cold water to create a slurry. Add this to the cherries.
- Cook on Stovetop: Cook the cherry mixture over medium heat, stirring frequently, until it thickens and comes to a gentle boil. This usually takes about 5-8 minutes. The cornstarch needs to boil to fully activate its thickening power.
- Finish with Flavor: Remove from heat and stir in the lemon juice, almond extract, and the small pat of butter. Let the filling cool slightly while you prepare the crust for assembly.

Part 3: Assembling and Baking Your Bars
- Preheat and Prep: Preheat your oven to 375°F (190°C). Lightly grease and flour a 9×13-inch baking pan, or line it with parchment paper, leaving an overhang on the sides for easy lifting.
- Roll the Bottom Crust: On a lightly floured surface, roll out the larger dough disc into a rectangle slightly larger than your baking pan. Carefully transfer it to the prepared pan, pressing it gently into the bottom and up the sides. Trim any excess dough.
- Add the Filling: Pour the slightly cooled cherry filling evenly over the bottom crust.
- Create the Lattice Top: Roll out the smaller dough disc into a rectangle. Using a pastry wheel or knife, cut it into 1/2-inch wide strips. Arrange these strips in a lattice pattern over the cherry filling. You can simply lay them across, or weave them for a more traditional look. Trim the ends and press them gently into the edges of the bottom crust.
- Bake to Golden Perfection: Bake for 40-50 minutes, or until the crust is golden brown and the cherry filling is bubbling. If the crust starts to brown too quickly, you can loosely tent it with aluminum foil.
- Cool Completely: This is the hardest part! Let the bars cool completely in the pan on a wire rack before attempting to cut them. The filling needs time to set fully, otherwise, they’ll be messy. This can take several hours.
Common Questions About Cherry Pie Bars
Baking is full of questions, and I’m here to help you troubleshoot or plan ahead. Here are some of the most frequent queries I get about making cherry pie bars.
Can I use canned cherry pie filling?
While you certainly *can* use canned filling for convenience, I highly recommend making your own from scratch. The flavor and texture of homemade filling are simply superior, and it allows you to control the sweetness. If you do use canned, you might want to reduce the added sugar in the crust slightly and add a splash of lemon juice to the filling for brightness.
What’s the best way to pit fresh cherries?
A cherry pitter is your best friend here! If you don’t have one, a sturdy straw, a chopstick, or even the small end of a pastry tip can work. Just push it through the stem end until the pit pops out. Be prepared for a bit of a mess – cherry juice stains!
How do I prevent the crust from getting soggy?
Several factors help prevent a soggy bottom. First, make sure your filling isn’t too wet; cornstarch is key here. Second, ensure you bake the bars long enough for the bottom crust to fully cook through and become golden. Finally, always cool the bars completely before cutting. The filling continues to set as it cools, preventing moisture from seeping into the crust.
Can I make these ahead of time?
Absolutely! These cherry pie bars are excellent for making ahead. You can bake them a day or two in advance. Store them covered at room temperature for up to 2 days, or in the refrigerator for up to 4-5 days. The flavors often deepen overnight.
What’s a good way to store leftover bars?
Once completely cooled, store any leftover bars in an airtight container. They’ll keep well at room temperature for a couple of days, or in the refrigerator for up to 5 days. For longer storage, you can freeze individual bars wrapped tightly in plastic wrap and then placed in a freezer-safe bag for up to 2-3 months. Thaw at room temperature before serving.
Serving Up Sweetness: Pairing Ideas
These cherry pie bars are fantastic on their own, but a little something extra can turn them into an extraordinary dessert experience. Here are a few ideas to elevate your serving:
- A Scoop of Vanilla Bean Ice Cream: The classic pairing for any warm fruit dessert. The cold, creamy ice cream is a perfect contrast to the sweet-tart cherry filling.
- A Dollop of Whipped Cream: Light and airy, a swirl of homemade whipped cream adds an elegant touch without being too heavy.
- A Drizzle of Chocolate Sauce: Cherries and chocolate are a match made in heaven! A thin drizzle of dark chocolate sauce takes these bars to another level of indulgence.
- A Sprinkle of Toasted Almonds: To echo the almond extract in the filling, a few toasted slivered almonds on top add a lovely crunch and nutty flavor.
Whether you’re bringing them to a summer barbecue, serving them at a family gathering, or just enjoying a quiet evening treat, these cherry pie bars are guaranteed to bring smiles. They embody everything wonderful about homemade baking – comforting, flavorful, and made with love.

Homemade Cherry Pie Bars with Lattice Top
Sliceable cherry pie bars featuring a buttery crust and sweet-tart homemade cherry filling, perfect for easy summer entertaining.
📝 Ingredients
👩🍳 Instructions
- 1For the Crust: In a large bowl, whisk together flour, ½ cup sugar, and ½ teaspoon salt. Add the cold, cubed butter. Cut in with a pastry blender or your fingertips until the mixture resembles coarse crumbs with some pea-sized pieces of butter remaining.
- 2Gradually add ice water, 1 tablespoon at a time, mixing lightly until the dough just comes together. Do not overmix. Divide dough into two portions (one slightly larger, about 2/3), flatten into discs, wrap in plastic, and refrigerate for at least 30 minutes.
- 3For the Filling: In a medium saucepan, combine pitted cherries and ¾ cup sugar. In a small bowl, whisk cornstarch with 1-2 tablespoons cold water to form a slurry. Add to cherries.
- 4Cook over medium heat, stirring frequently, until the mixture thickens and comes to a gentle boil, about 5-8 minutes. Remove from heat and stir in lemon juice, almond extract, and 1 tablespoon butter. Let cool slightly.
- 5Assembly & Bake: Preheat oven to 375°F (190°C). Lightly grease and flour a 9x13-inch baking pan or line with parchment paper.
- 6On a lightly floured surface, roll out the larger dough disc into a rectangle slightly larger than the pan. Carefully transfer it to the pan, pressing into the bottom and up the sides. Trim excess dough.
- 7Pour the slightly cooled cherry filling evenly over the bottom crust.
- 8Roll out the smaller dough disc and cut into ½-inch wide strips. Arrange these strips in a lattice pattern over the filling. Trim ends and press gently into the edges of the bottom crust.
- 9Bake for 40-50 minutes, or until the crust is golden brown and the filling is bubbling. If crust browns too quickly, tent loosely with foil.
- 10Cool completely in the pan on a wire rack for several hours before cutting into bars. This is crucial for the filling to set properly.
💡 Notes
For best results, use very cold butter for the crust. Fresh cherries are ideal, but high-quality frozen cherries work perfectly (no need to thaw). Store cooled bars in an airtight container at room temperature for up to 2 days, or refrigerated for up to 5 days. These bars also freeze well for longer storage.



