


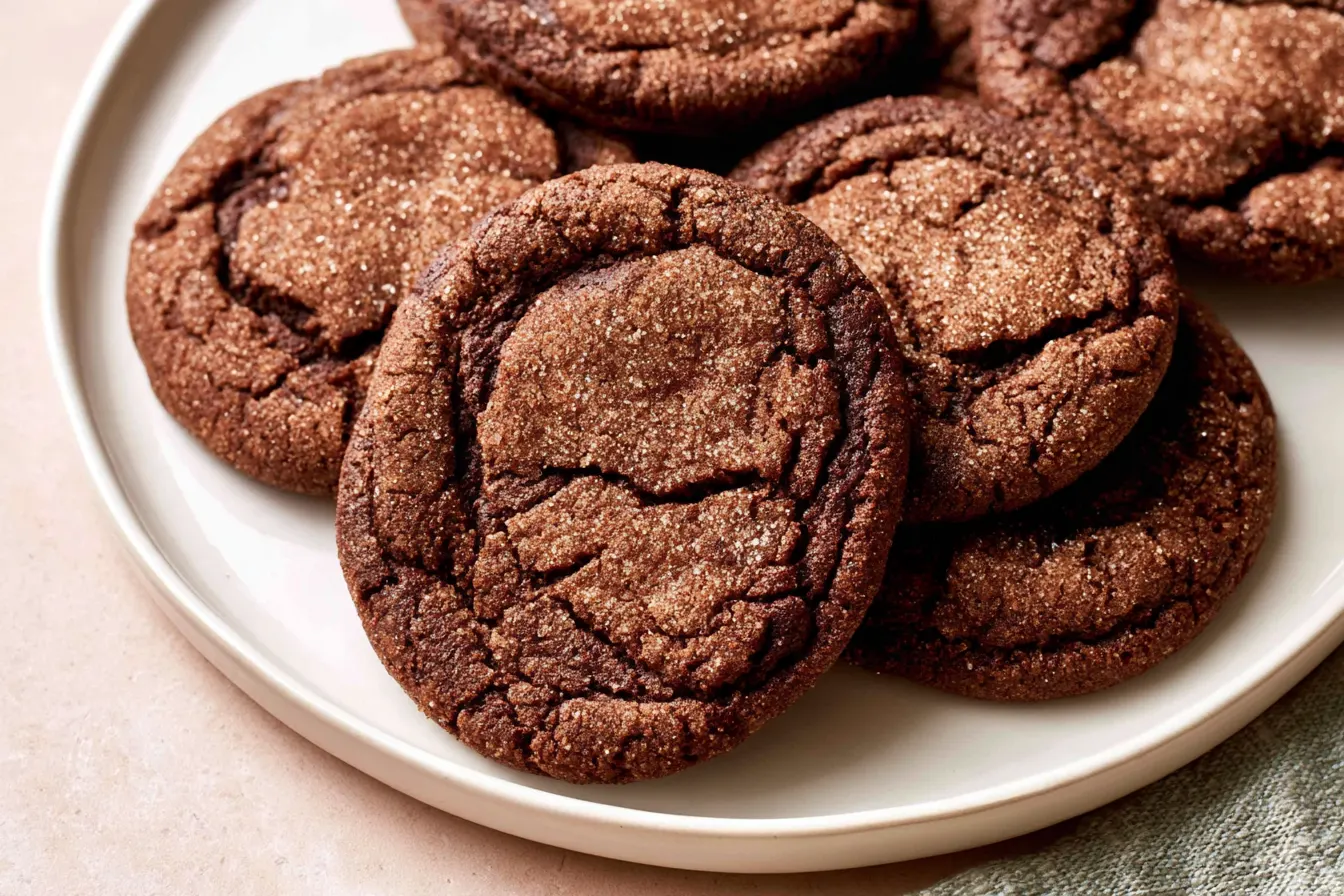
Have you ever wondered what happens when two cookie titans collide? Well, wonder no more, because these Chocolate Snickerdoodle Cookies are the delicious answer. Imagine the comforting chewiness and the signature tang of a classic snickerdoodle, but then, a rich, dark chocolate heart unfurls itself with every bite. It’s a revelation, truly.
- The Delicious Alchemy of Chocolate and Snickerdoodle
- Gathering Your Baking Arsenal: Ingredients for Chocolate Snickerdoodles
- Crafting Your Chocolate Snickerdoodle Masterpiece
- Beyond the Bake: Storage and Serving Ideas
- Unraveling the Mysteries: Chocolate Snickerdoodle FAQs
- The Undeniable Charm of a Chocolate Snickerdoodle

The Delicious Alchemy of Chocolate and Snickerdoodle
There’s a certain magic that happens when you combine the unexpected. Snickerdoodles, with their distinctive cream of tartar tang and cozy cinnamon-sugar coating, have always held a special place in my heart. They’re simple, unpretentious, and always deliver on comfort. But sometimes, even comfort needs a little edge, a little intrigue. Enter chocolate. Not just any chocolate, but a good quality cocoa powder that brings depth and richness without overwhelming the delicate balance. The key here is to ensure the chocolate enhances, rather than competes with, the snickerdoodle’s iconic profile. It’s a delicate dance, but when it works, it’s pure cookie bliss. We’re not just making a chocolate cookie rolled in cinnamon sugar. We’re creating a chocolate cookie *that behaves* like a snickerdoodle. That means maintaining that soft, pillowy texture, those crinkly edges, and most importantly, that subtle, almost lemony tang from the cream of tartar that makes a snickerdoodle, well, a snickerdoodle. It’s a delightful paradox in every bite.Gathering Your Baking Arsenal: Ingredients for Chocolate Snickerdoodles
Before we dive into the delightful mess of baking, let’s make sure our pantry is well-stocked. Quality ingredients make all the difference, especially when you’re aiming for that perfect balance of flavors. You’ll find most of these are standard baking staples, but a couple are non-negotiables for true snickerdoodle magic.For the Cookie Dough
- All-Purpose Flour: The backbone of our cookie. Make sure it’s unbleached for the best texture.
- Unsweetened Cocoa Powder: This is where our chocolate flavor comes from. I prefer Dutch-processed for its darker color and smoother flavor, but natural cocoa works too if that’s what you have.
- Baking Soda: Works with the cream of tartar to give these cookies their signature chewiness and rise.
- Cream of Tartar: The essential ingredient for snickerdoodles! It provides that unique tangy flavor and contributes to their soft, chewy texture. Don’t skip it!
- Salt: A pinch enhances all the other flavors.
- Unsalted Butter: Softened to room temperature. This helps create a smooth, emulsified dough.
- Granulated Sugar: For sweetness in the dough.
- Light Brown Sugar: Adds moisture and a subtle caramel note, contributing to the cookie’s chewiness.
- Eggs: At room temperature, they bind everything together and add richness.
- Vanilla Extract: Pure vanilla is always best; it complements both chocolate and cinnamon beautifully.
For the Cinnamon-Sugar Coating
- Granulated Sugar: The base of our crunchy coating.
- Ground Cinnamon: The classic snickerdoodle spice, providing warmth and aroma.

Crafting Your Chocolate Snickerdoodle Masterpiece
The process for these cookies is straightforward, but a few key steps ensure perfection. Take your time, enjoy the aromas, and get ready for some seriously good treats.Step 1: Prep Your Workspace
First things first, preheat your oven to 375°F (190°C). Line a couple of baking sheets with parchment paper or silicone mats. This prevents sticking and ensures even baking. In a small bowl, whisk together the granulated sugar and ground cinnamon for the coating. Set this aside—it’s going to be the cozy blanket for our cookies.
Step 2: Combine the Dry Ingredients
In a medium bowl, whisk together the flour, cocoa powder, baking soda, cream of tartar, and salt. Give it a good whisk to ensure everything is evenly distributed. This step is crucial for consistent texture and flavor throughout your cookies.
Step 3: Cream the Butter and Sugars
In a large bowl, using an electric mixer (stand or hand-held), cream together the softened butter, granulated sugar, and light brown sugar until the mixture is light and fluffy. This usually takes about 2-3 minutes. Scrape down the sides of the bowl to make sure everything gets incorporated. This aeration step is vital for the cookies’ texture. Tip: Don’t rush the creaming process! Properly aerated butter and sugar create tiny air pockets that contribute to a tender, chewy cookie.
Step 4: Add the Wet Ingredients
Beat in the eggs one at a time, mixing well after each addition until just combined. Then, stir in the vanilla extract. The mixture might look a little curdled at this point, but don’t worry, it will come together as you add the dry ingredients.
Step 5: Bring the Dough Together
Gradually add the dry ingredient mixture to the wet ingredients, mixing on low speed until just combined. Be careful not to overmix; overmixing can lead to tough cookies. Stop as soon as you no longer see streaks of flour.

Step 6: Roll and Coat
Scoop the dough using a 1.5-tablespoon cookie scoop (or about 1 ounce per cookie). Roll each ball of dough gently between your palms to smooth it out. Then, generously roll each dough ball in the prepared cinnamon-sugar mixture, ensuring it’s completely coated. This coating is what gives the snickerdoodle its signature look and flavor.
Step 7: Bake to Perfection
Place the coated dough balls about 2 inches apart on your prepared baking sheets. Bake for 9-11 minutes, or until the edges are just set but the centers still look slightly soft. They might look a little puffy when they come out of the oven, but they’ll settle down as they cool. Don’t overbake, or they’ll lose their chewy texture!
Step 8: Cool and Enjoy
Let the cookies cool on the baking sheets for 5 minutes before transferring them to a wire rack to cool completely. This helps them set up and prevents them from breaking. Once cool enough to handle, dig in! The aroma alone is half the joy.
Beyond the Bake: Storage and Serving Ideas
Once you’ve managed to bake a batch of these glorious Chocolate Snickerdoodle Cookies (and resisted eating them all warm from the oven), you’ll want to know how to keep them fresh or how to elevate the experience even further. These cookies are fantastic on their own, but a little imagination never hurts.Keeping Them Fresh
Store your cooled chocolate snickerdoodles in an airtight container at room temperature for up to 3-4 days. They tend to get even chewier and more flavorful the next day, as the flavors meld together. For longer storage, you can freeze the baked cookies for up to 2 months. Just thaw them at room temperature when you’re ready to enjoy.
If you want to bake fresh cookies on demand, you can also freeze the raw cookie dough balls. After rolling them in the cinnamon-sugar mixture, place them on a baking sheet and freeze until solid. Then, transfer them to a freezer-safe bag. Bake from frozen, adding an extra 2-3 minutes to the baking time.
Serving Suggestions
These cookies are wonderful with a tall glass of cold milk, which is pretty much a universal truth for any chocolate cookie. But don’t stop there! Try them with a hot cup of coffee or a spicy chai latte for a more grown-up pairing. The cinnamon in the coating really sings with warm beverages. They also make a surprisingly good companion to a scoop of vanilla bean ice cream, creating a delightful warm-cold contrast.
Unraveling the Mysteries: Chocolate Snickerdoodle FAQs
Baking often comes with questions, and I’m here to help you troubleshoot or simply understand the “why” behind the “how.” Here are some common queries about these delightful chocolate snickerdoodle cookies.Why is cream of tartar so important for snickerdoodles?
Cream of tartar is what gives snickerdoodles their distinctive tangy flavor and helps achieve their chewy texture. It’s an acidic ingredient that reacts with baking soda, preventing the sugar from crystallizing too much and keeping the cookies soft and pliable, rather than crispy or crumbly. Without it, you’d just have a regular chocolate cookie rolled in cinnamon sugar, which isn’t quite the same!
Can I use natural cocoa powder instead of Dutch-processed?
Yes, you can. Dutch-processed cocoa powder is treated to reduce its acidity, resulting in a darker color and a smoother, less bitter chocolate flavor. Natural cocoa powder is acidic and reacts differently with baking soda. If you use natural cocoa, your cookies might be slightly lighter in color and have a more intense, slightly bitter chocolate note. The texture shouldn’t be drastically different, but the flavor profile will shift a bit.
My cookies spread too much! What happened?
Several factors can cause cookies to spread excessively. The most common culprits are: butter that was too soft (or even melted) when creamed, not enough flour, or an oven that wasn’t hot enough. Make sure your butter is at room temperature but still slightly firm. Also, accurately measure your flour, preferably by weight if you have a scale. Chilling the dough for 30 minutes before rolling can also help prevent spreading.
Can I make these gluten-free?
I haven’t personally tested a gluten-free version of this specific recipe, but generally, you can substitute all-purpose flour with a 1:1 gluten-free baking blend that contains xanthan gum. The texture might be slightly different, but it should still yield a delicious cookie. Always check the specific recommendations for your chosen gluten-free blend.
What if I don’t have light brown sugar?
While light brown sugar adds a lovely moistness and subtle caramel flavor, you can substitute it with an equal amount of granulated sugar if absolutely necessary. However, be aware that the cookies might be slightly less chewy and a bit sweeter. You could also make your own brown sugar by combining granulated sugar with a small amount of molasses (about 1 tablespoon per cup of sugar).
The Undeniable Charm of a Chocolate Snickerdoodle
There’s something incredibly satisfying about taking a familiar classic and giving it a new lease on life. These Chocolate Snickerdoodle Cookies do exactly that. They honor the beloved traditions of the snickerdoodle while embracing the irresistible allure of chocolate. It’s a cookie that feels both nostalgic and exciting, a testament to the fact that even the simplest treats can be elevated with a touch of creativity. Each bite offers that comforting crinkle, the delicate whisper of cinnamon, and then, the deep, satisfying richness of chocolate that lingers on your palate. They’re perfect for sharing, for gifting, or simply for savoring with a quiet moment and a warm drink. I guarantee they’ll become a new favorite in your cookie repertoire, a delightful twist that you’ll return to again and again. So go ahead, whip up a batch, and let these unique cookies bring a little extra joy to your day. You absolutely deserve it.
Chewy Chocolate Snickerdoodle Cookies
Rich and chewy chocolate snickerdoodles with a classic cinnamon-sugar coating. A delightful twist on a beloved cookie!
📝 Ingredients
👩🍳 Instructions
- 1Preheat your oven to 375°F (190°C). Line two baking sheets with parchment paper or silicone mats.
- 2In a small bowl, combine the 1/4 cup granulated sugar and 2 teaspoons ground cinnamon for the coating. Set aside.
- 3In a medium bowl, whisk together the flour, cocoa powder, cream of tartar, baking soda, and salt. Set aside.
- 4In a large bowl, using an electric mixer, cream together the softened butter, 1 1/2 cups granulated sugar, and light brown sugar until light and fluffy, about 2-3 minutes. Scrape down the sides of the bowl as needed.
- 5Beat in the eggs one at a time, mixing well after each addition. Stir in the vanilla extract.
- 6Gradually add the dry ingredient mixture to the wet ingredients, mixing on low speed until just combined. Be careful not to overmix the dough.
- 7Scoop the dough using a 1.5-tablespoon cookie scoop (or about 1 ounce per cookie). Roll each dough ball gently between your palms, then generously roll it in the prepared cinnamon-sugar coating.
- 8Place the coated dough balls about 2 inches apart on the prepared baking sheets.
- 9Bake for 9-11 minutes, or until the edges are just set and the centers still look slightly soft. Avoid overbaking to maintain chewiness.
- 10Let the cookies cool on the baking sheets for 5 minutes before transferring them to a wire rack to cool completely. Enjoy!
💡 Notes
Ensure butter and eggs are at room temperature for best results. For a stronger chocolate flavor, you can add 1/4 cup of mini chocolate chips to the dough. Store cookies in an airtight container at room temperature for up to 4 days or freeze for up to 2 months.



