


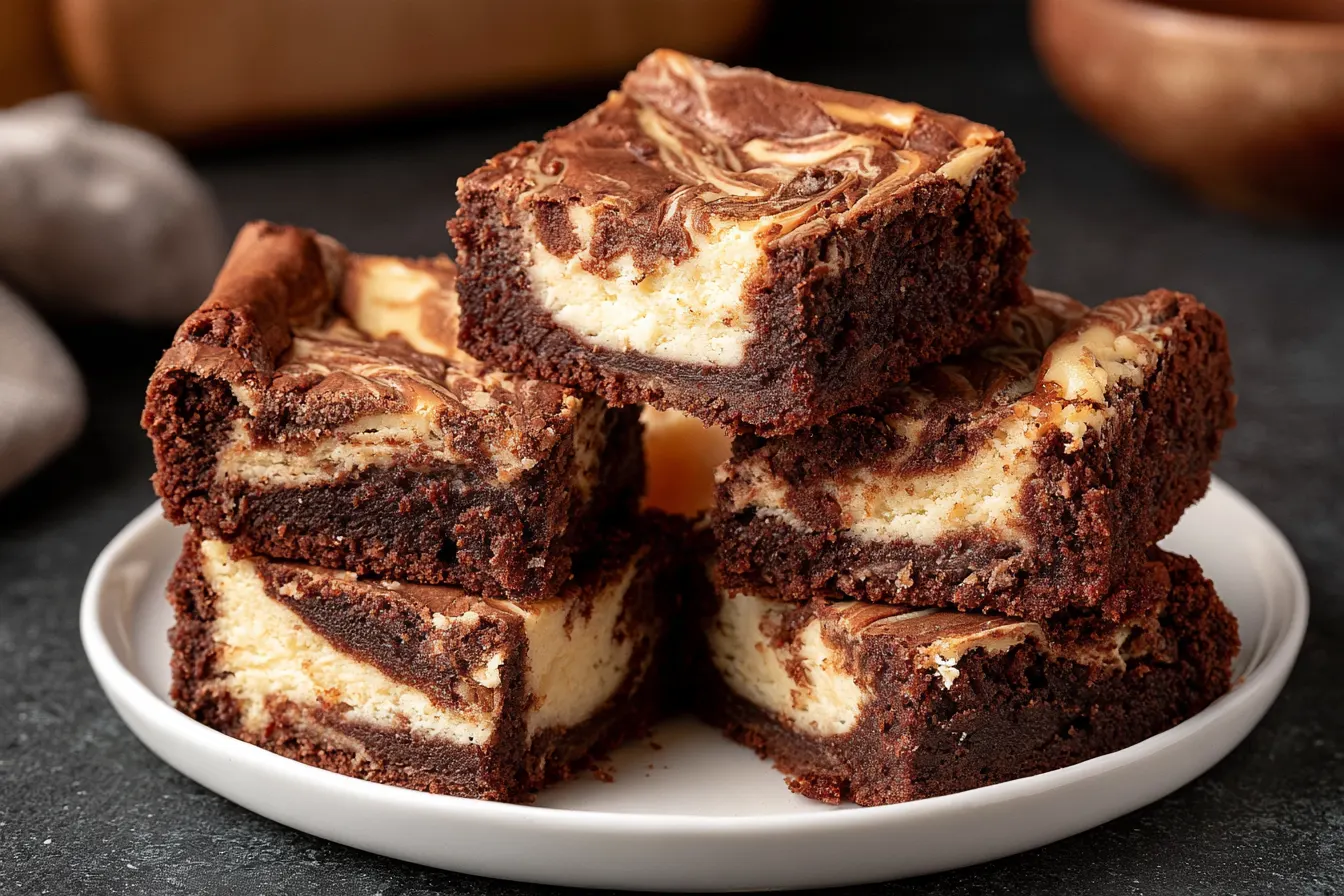
There’s something truly magical that happens when two dessert titans, the fudgy brownie and the creamy cheesecake, decide to join forces. It’s not just a casual acquaintance; it’s a full-blown, passionate culinary embrace that results in something far greater than the sum of its parts. If you’ve ever found yourself torn between a rich chocolate fix and a tangy, smooth treat, these cheesecake brownies are about to become your new best friend.

What Makes These Cheesecake Brownies Unforgettable?
Let’s be honest, there are a lot of brownie recipes out there. And cheesecake recipes? An absolute ocean of them. So, what makes *this* particular rendition of cheesecake brownies stand out from the crowd? It boils down to a few key elements that I’ve painstakingly refined. First, the brownie itself. We’re not talking about a cakey, airy brownie here. Oh no. This is a dense, fudgy, almost gooey brownie that melts in your mouth. It gets its intense chocolate flavor from a combination of unsweetened cocoa powder and melted dark chocolate, giving it a depth that’s impossible to resist. The slight chew comes from using a touch more brown sugar than white, which also adds a lovely molasses note. Then there’s the cheesecake layer. It’s not too sweet, providing that essential tangy counterpoint to the rich chocolate. We use full-fat cream cheese for ultimate creaminess, a touch of sour cream for extra tang and moisture, and just enough sugar to balance it all out. A hint of vanilla extract ties everything together beautifully. The ratio of cheesecake to brownie is crucial here – you want enough to make its presence known, but not so much that it overwhelms the chocolate. It’s a delicate dance, but we’ve nailed the choreography.The Art of the Swirl
Achieving that beautiful, marbled swirl is easier than you might think, but there are a few tricks. You don’t want to overmix it, or you’ll lose the distinct layers. We’re aiming for pockets of creamy white against dark chocolate, not a uniform grey. A simple butter knife or skewer is your best tool for creating those elegant patterns. It’s a moment of mindful baking, where a little artistic flourish goes a long way in making these brownies not just taste incredible, but look absolutely stunning too.Gather Your Ingredients
Before we dive into the delicious process, let’s ensure our kitchen is stocked with everything we need. High-quality ingredients truly make a difference in a recipe like this, so opt for good chocolate and fresh dairy if you can.
For the Fudgy Brownie Base:
- ½ cup (113g) unsalted butter, melted
- 1 cup (200g) granulated sugar
- ½ cup (100g) packed light brown sugar
- 2 large eggs, at room temperature
- 1 teaspoon vanilla extract
- ¾ cup (75g) unsweetened cocoa powder (Dutch-processed for a darker, less bitter brownie)
- ½ cup (60g) all-purpose flour
- ¼ teaspoon baking powder
- ¼ teaspoon salt
- ½ cup (85g) semi-sweet chocolate chips or chopped dark chocolate (optional, but highly recommended for extra melty pockets)
For the Creamy Cheesecake Swirl:
- 8 ounces (226g) full-fat cream cheese, softened
- ¼ cup (50g) granulated sugar
- 1 large egg yolk (reserve the white for another use, or discard)
- 1 tablespoon sour cream or full-fat plain Greek yogurt
- ½ teaspoon vanilla extract
Crafting Your Masterpiece: Step-by-Step
Let’s get baking! The process is broken down to make it super easy to follow, even if you’re a beginner. Read through all the steps once before you start.
1. Prepare Your Pan and Preheat
Preheat your oven to 350°F (175°C). Line an 8×8 inch (20×20 cm) baking pan with parchment paper, leaving an overhang on two sides to create “handles.” This makes it incredibly easy to lift the cooled brownies out later. Lightly grease the parchment paper.
2. Start the Brownie Batter
In a large bowl, whisk together the melted butter, granulated sugar, and brown sugar until well combined and smooth. This step ensures your sugars dissolve nicely, contributing to that fudgy texture.
3. Add Wet Ingredients to Brownie Mix
Beat in the eggs one at a time, mixing well after each addition. Stir in the vanilla extract. The mixture should look glossy and rich. Don’t overmix here; just combine until uniform.
4. Combine Dry Brownie Ingredients
In a separate medium bowl, whisk together the cocoa powder, all-purpose flour, baking powder, and salt. This ensures everything is evenly distributed before it hits the wet ingredients.
5. Mix Brownie Batter
Gradually add the dry ingredients to the wet ingredients, mixing on low speed or by hand until *just* combined. Be careful not to overmix; overmixing can lead to tough brownies. Gently fold in the chocolate chips or chopped chocolate if using. Pour about two-thirds of the brownie batter into your prepared pan and spread it evenly. Reserve the remaining one-third.
6. Prepare the Cheesecake Layer
In a medium bowl, beat the softened cream cheese with the granulated sugar until smooth and creamy. Make sure there are no lumps. Mix in the egg yolk, sour cream, and vanilla extract until just combined. Again, avoid overmixing the cheesecake batter to keep it light and airy.
7. Assemble and Swirl
Carefully drop dollops of the cheesecake mixture over the brownie batter in the pan. Then, drop small spoonfuls of the remaining one-third brownie batter into the gaps and on top of the cheesecake layer. Using a butter knife or skewer, gently swirl the batters together. Don’t go overboard; a few passes are all you need to create beautiful marbling. Tip: For distinct swirls, try to limit your passes to 6-8 gentle strokes.
8. Bake to Perfection
Bake for 30-35 minutes, or until the edges are set and a toothpick inserted into the brownie portion (not the cheesecake portion) comes out with moist crumbs attached. The center may still look slightly jiggly, which is perfect for fudgy brownies. Overbaking will result in dry brownies.
9. Cool and Serve
Remove the pan from the oven and let the cheesecake brownies cool completely in the pan on a wire rack. This is crucial for them to set properly. For the cleanest cuts, you can even chill them in the refrigerator for an hour or two before slicing. Once cool, use the parchment paper overhangs to lift the whole slab out, slice into squares, and enjoy!
Common Questions About Cheesecake Brownies
Baking can sometimes throw curveballs, especially when combining two different batters. Here are some common questions I get about these delightful treats.Can I use low-fat cream cheese?
While you *can* use low-fat cream cheese, I strongly recommend against it for this recipe. Full-fat cream cheese is essential for achieving that rich, creamy texture and tangy flavor that makes the cheesecake layer so luxurious. Low-fat versions often contain more water, which can lead to a less stable and less flavorful cheesecake swirl.
My cheesecake layer cracked. What went wrong?
Cracked cheesecake layers can happen for a few reasons. The most common culprit is overbaking, which dries out the cheesecake. Another reason could be cooling too quickly; drastic temperature changes can cause cracking. Ensure you don’t overbake, and let the brownies cool gradually on the counter, away from drafts.
How do I get clean slices?
For beautifully neat slices, ensure your cheesecake brownies are completely cooled, preferably chilled in the refrigerator for at least an hour. Use a sharp, thin-bladed knife. For extra clean cuts, wipe the knife clean with a damp cloth after each slice. This prevents the chocolate and cheesecake from smudging.
Can I make these ahead of time?
Absolutely! Cheesecake brownies are an excellent make-ahead dessert. They actually firm up and often taste even better the next day as the flavors meld. Store them in an airtight container in the refrigerator for up to 3-4 days.
What if I don’t have sour cream?
If you don’t have sour cream, full-fat plain Greek yogurt is an excellent substitute for the cheesecake layer. It provides a similar tang and creaminess. Avoid using regular plain yogurt as it’s often too thin and can make the cheesecake layer watery.
Easy Storage and Freezing Tips
You’ve baked a glorious batch of these incredible cheesecake brownies, but what if you have leftovers (a rare occurrence, I know!) or want to make them in advance? Here’s how to keep them fresh and delicious.Storing in the Refrigerator
Once completely cooled, store your cheesecake brownies in an airtight container in the refrigerator. They will keep beautifully for up to 3-4 days. This is my preferred method, as the chilled brownies have an even firmer, fudgier texture that’s simply divine.
Freezing for Later
Yes, these freeze wonderfully! First, ensure the brownies are fully cooled. You can freeze them as a whole slab or cut into individual squares. If freezing squares, place them on a baking sheet lined with parchment paper and freeze until solid (about 1-2 hours). Then, transfer the frozen squares to a freezer-safe airtight container or a heavy-duty freezer bag, separating layers with parchment paper to prevent sticking. They will keep well for up to 2-3 months.
To thaw, simply transfer them from the freezer to the refrigerator overnight, or let individual squares sit at room temperature for about 30-60 minutes. They’ll be just as delicious as the day you baked them!
Serving Suggestions and Flavor Twists
These cheesecake brownies are phenomenal on their own, but a few little additions can elevate them even further.Classic Pairings
A scoop of good quality vanilla bean ice cream is always a winner – the contrast between the cold ice cream and the rich brownie is heavenly. A dollop of lightly sweetened whipped cream also works beautifully, adding a touch of airiness. For coffee lovers, a strong espresso or a pour-over coffee makes a perfect companion.
Creative Variations
- Raspberry Swirl: Before swirling, dollop small amounts of raspberry jam or raspberry puree onto the cheesecake layer for a fruity bright kick.
- Peanut Butter Dream: Swirl in a few tablespoons of melted creamy peanut butter into the cheesecake batter for a rich, nutty twist.
- Mint Chocolate Chip: Add a teaspoon of peppermint extract to the brownie batter and sprinkle some mini chocolate chips over the top before baking for a refreshing flavor.
- Espresso Kick: Dissolve 1-2 teaspoons of instant espresso powder in the melted butter for the brownie batter to deepen the chocolate flavor and add a subtle coffee note.
Don’t be afraid to experiment with your favorite flavors! The beauty of these cheesecake brownies is how versatile they are, providing a fantastic canvas for your culinary creativity.

Fudgy Cheesecake Brownies
Rich, fudgy chocolate brownies swirled with creamy vanilla cheesecake for an irresistible dessert.
📝 Ingredients
👩🍳 Instructions
- 1Preheat oven to 350°F (175°C). Line an 8x8 inch baking pan with parchment paper, leaving an overhang, and lightly grease.
- 2In a large bowl, whisk melted butter, 1 cup granulated sugar, and brown sugar until smooth.
- 3Beat in 2 large eggs one at a time, then stir in 1 tsp vanilla extract.
- 4In a separate bowl, whisk cocoa powder, flour, baking powder, and salt. Gradually add dry ingredients to wet, mixing until just combined. Fold in chocolate chips if using.
- 5Pour about two-thirds of the brownie batter into the prepared pan and spread evenly. Reserve the remaining one-third.
- 6For the cheesecake layer: In a medium bowl, beat softened cream cheese with ¼ cup granulated sugar until smooth. Mix in egg yolk, sour cream, and ½ tsp vanilla extract until just combined.
- 7Drop dollops of cheesecake mixture over the brownie batter in the pan. Then, drop small spoonfuls of the reserved brownie batter into gaps and on top of cheesecake.
- 8Using a butter knife or skewer, gently swirl the batters together 6-8 times to create a marbled effect.
- 9Bake for 30-35 minutes, or until edges are set and a toothpick inserted into the brownie portion comes out with moist crumbs. The center may still be slightly jiggly.
- 10Cool completely in the pan on a wire rack. For cleanest cuts, chill in the refrigerator for at least 1 hour before slicing into squares.
💡 Notes
Ensure all dairy ingredients are at room temperature for a smooth batter. Do not overmix either batter. For a richer chocolate flavor, use Dutch-processed cocoa powder. Store leftovers in an airtight container in the refrigerator for up to 4 days, or freeze for longer storage.



