


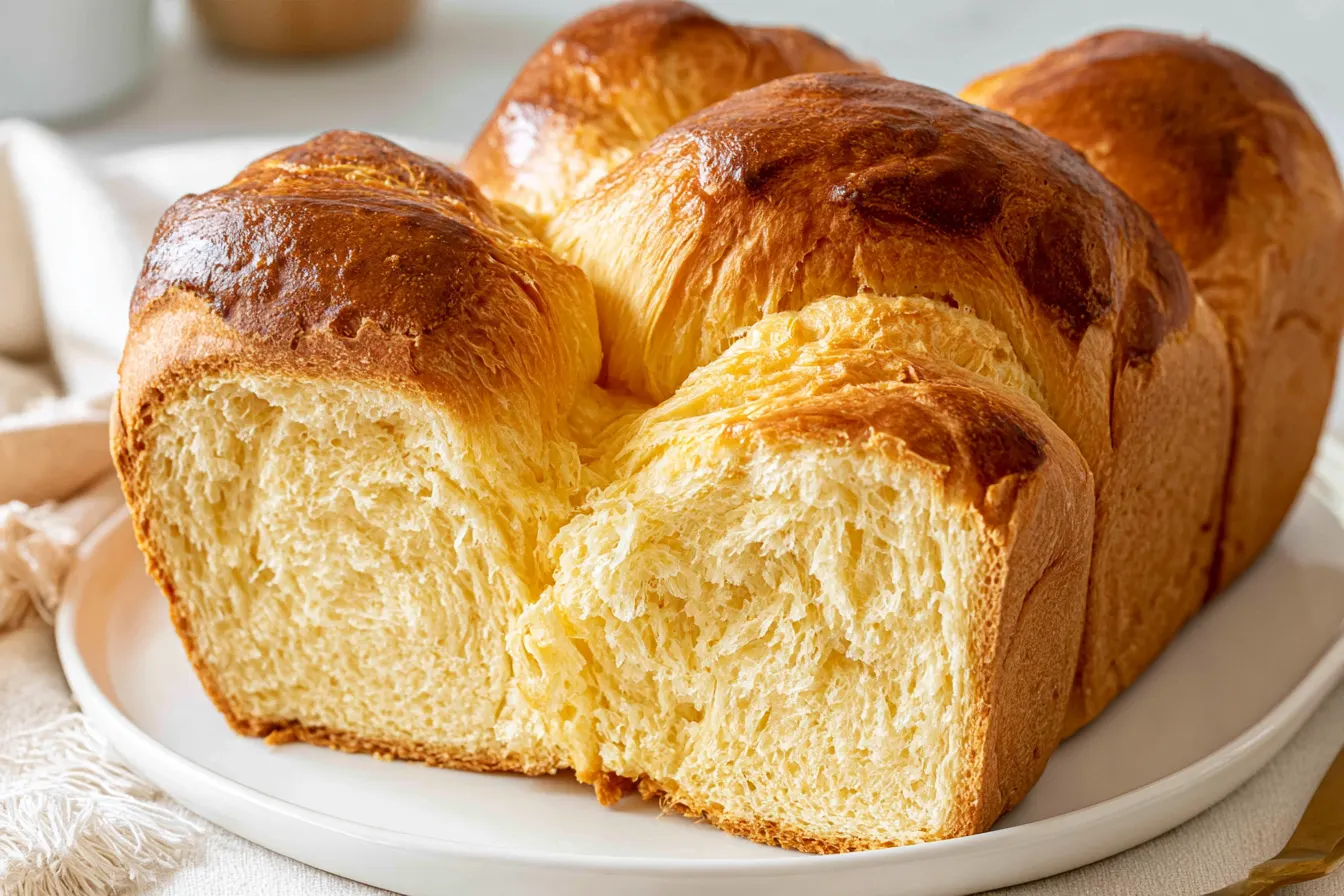
There are certain smells that just transport you, aren’t there? For me, it’s the warm, slightly sweet, impossibly buttery aroma of a fresh-baked loaf of French Brioche Bread cooling on the counter. It’s the kind of scent that makes you pause, close your eyes, and just breathe it in. This isn’t just bread; it’s an experience, a little slice of culinary heaven that promises pure indulgence from the first bite.
I’ve spent years chasing that perfect brioche – the one that’s impossibly light, with a tender crumb that practically melts away on your tongue. It’s a bread that feels fancy, but honestly, it’s more about patience and technique than any elusive magic. Once you get the hang of it, you’ll be wondering why you didn’t bake this sooner.
This isn’t a quick bread, no. Brioche demands a little time, but oh, the rewards are so worth it. Imagine tearing into a golden-brown slice, still warm from the oven, its delicate texture a testament to the generous amounts of butter and eggs that make it so uniquely rich. It’s truly a pastry disguised as bread.

If you’ve ever dreamt of waking up to the smell of a French boulangerie in your own kitchen, this recipe is your golden ticket. We’re diving deep into the art of making the most exquisite brioche loaf imaginable. It’s a journey from simple ingredients to a truly magnificent bake that will elevate any breakfast, brunch, or afternoon tea.
The Secret to Unforgettable Brioche: It’s All in the Dough
What sets a truly exceptional brioche apart from other enriched breads? It’s primarily the sheer amount of butter and eggs. Unlike a lean baguette, brioche embraces richness, resulting in a dough that is incredibly soft, elastic, and, frankly, a joy to work with once you get the hang of it. This high fat content is precisely what gives French Brioche Bread its signature fluffy crumb and golden hue.
Many people are intimidated by enriched doughs, fearing they’ll be too sticky or difficult to handle. The trick, I’ve found, is patience and temperature control. A slightly cooler kitchen and chilled butter make a world of difference. Don’t rush the process; let the yeast do its work slowly, building flavor and structure.
The Building Blocks: What You’ll Need
Gathering your ingredients ahead of time, a practice known as “mise en place,” makes the entire baking process smoother and more enjoyable. For our decadent brioche, you’ll want the freshest eggs and the highest quality butter you can find – it truly makes a difference in the final flavor profile.
- All-Purpose Flour: Unbleached all-purpose works beautifully here, providing enough gluten for structure without making the bread tough.
- Granulated Sugar: Just enough to provide a hint of sweetness and feed the yeast.
- Active Dry Yeast: Ensure it’s fresh and active. This is the lifeblood of our bread!
- Salt: Essential for flavor balance. Don’t skip it!
- Large Eggs: The richness and color of brioche come largely from these. Make sure they’re at room temperature.
- Unsalted Butter: The star of the show. Cold, cubed butter is key for incorporating it into the dough properly.
- Whole Milk: Warmed slightly, it helps activate the yeast and adds tenderness.
- Egg Wash: A simple mix of egg yolk and milk for that beautiful golden crust.

Mastering the Method: How to Bake the Perfect Loaf
Baking brioche is a bit like a dance – a series of steps that build upon each other to create something truly spectacular. Follow these instructions carefully, and you’ll be rewarded with the most exquisite bread you’ve ever pulled from your oven.
Step 1: Activating the Yeast
In a small bowl, combine the warm milk (no hotter than 110°F / 43°C) with a teaspoon of sugar and sprinkle the active dry yeast over top. Give it a gentle stir and let it sit for about 5-10 minutes. You should see a foamy layer form on the surface, indicating your yeast is alive and ready to work its magic. If no foam appears, your yeast might be old, and it’s best to start with a fresh packet.
Step 2: Mixing the Dough
In the bowl of a stand mixer fitted with the dough hook attachment, combine the flour, remaining sugar, and salt. Add the activated yeast mixture and the eggs. Mix on low speed until a shaggy dough forms, scraping down the sides of the bowl as needed. Continue mixing for about 5-7 minutes until the dough starts to come together and pull away from the sides of the bowl. It will be quite sticky at this stage.
Step 3: Incorporating the Butter
Now comes the fun part! With the mixer still running on low speed, add the cold, cubed butter one piece at a time. Wait until each piece is mostly incorporated before adding the next. This process can take a good 10-15 minutes. The dough will look like it’s never going to come together, but trust the process. Keep mixing until the dough is smooth, elastic, and shiny, and passes the “windowpane test.”
Tip: The windowpane test means you can stretch a small piece of dough between your fingers until it’s thin enough to see light through it without tearing. This indicates excellent gluten development, which is crucial for a fluffy brioche.
Step 4: First Rise (Bulk Fermentation)
Transfer the dough to a lightly oiled bowl, turning it once to coat. Cover the bowl tightly with plastic wrap and let it rise in a warm place for 1.5 to 2 hours, or until doubled in size.
Once doubled, gently punch down the dough to release the air. This step is important for redistributing the yeast and gas, leading to a finer crumb. Cover again and refrigerate for at least 4 hours, or preferably overnight. Chilling the dough makes it much easier to handle and develops deeper flavors.
Step 5: Shaping the Brioche
On a lightly floured surface, turn out the chilled dough. You have a few options for shaping: a classic loaf, individual brioche à tête (with a little “head”), or small rolls. For a loaf, divide the dough into three equal pieces. Roll each piece into a log and braid them together, pinching the ends to seal. Alternatively, you can roll each piece into a ball and arrange them in a loaf pan. Place the shaped dough into a greased 9×5 inch loaf pan.

Step 6: Second Rise (Proofing)
Cover the loaf pan loosely with plastic wrap or a clean kitchen towel and let it rise in a warm, draft-free place for another 1 to 1.5 hours, or until it has nearly doubled in size and looks puffy. This second rise is crucial for that airy, light texture.
Note: Don’t rush this step. An under-proofed brioche will be dense, while an over-proofed one might collapse in the oven. Look for a dough that springs back slowly when gently poked.
Step 7: Egg Wash and Baking
Preheat your oven to 375°F (190°C). In a small bowl, whisk together the egg yolk and milk for the egg wash. Gently brush the top of the risen brioche with the egg wash, being careful not to deflate it.
Bake for 30-35 minutes, or until the brioche is deeply golden brown on top and sounds hollow when tapped on the bottom. If it’s browning too quickly, you can loosely tent it with aluminum foil for the last 10-15 minutes of baking.
Step 8: Cooling and Enjoying
Once baked, immediately remove the brioche from the loaf pan and transfer it to a wire rack to cool completely. Slicing into it too soon can compromise its delicate texture. I know, it’s torture resisting that smell!
Common Questions About Baking Brioche
What if my dough is too sticky to handle?
Brioche dough is naturally quite soft and sticky due to its high butter and egg content. Chilling the dough overnight is absolutely critical here; it firms up the butter, making the dough much easier to manage. If it’s still too sticky after chilling, lightly dust your hands and work surface with a small amount of flour, but be careful not to add too much, as this can dry out the bread.
Can I make brioche without a stand mixer?
While a stand mixer with a dough hook makes the process much easier, especially for incorporating all that butter, you absolutely can make brioche by hand. It will require a good 20-30 minutes of vigorous kneading to achieve the necessary gluten development and properly incorporate the butter. Be prepared for a good arm workout!
How long does homemade brioche last?
Freshly baked brioche is best enjoyed the day it’s made. It will stay wonderfully fresh at room temperature, tightly wrapped, for about 2-3 days. For longer storage, you can freeze individual slices or the whole loaf.
What’s the best way to store and reheat brioche?
To store, wrap cooled brioche tightly in plastic wrap, then place it in an airtight container or freezer bag. For reheating, a quick toast in a toaster oven or a few minutes in a warm oven (300°F / 150°C) can bring it back to its soft, warm glory.
Can I add flavor variations to this brioche recipe?
Absolutely! Brioche is a fantastic canvas for various flavors. You can gently fold in chocolate chips, dried cranberries, orange zest, or even a swirl of cinnamon sugar after the first rise and before shaping. Just be mindful not to overmix once the additions are in.
Serving Suggestions for Your Golden Loaf
Once your magnificent French Brioche Bread has cooled, the possibilities are endless. It’s incredibly versatile and elevates any meal.
My absolute favorite way to enjoy it is simply toasted with a generous smear of good quality butter and a dollop of homemade jam. The slight crispness from toasting and the rich, tender interior are simply divine. It’s also the quintessential base for the most luxurious French toast you’ll ever make. The richness of the brioche soaks up the custard beautifully, creating a truly decadent breakfast.
Consider using slices for elegant sandwiches, especially with something rich like smoked salmon and cream cheese, or even a gourmet grilled cheese. Leftover brioche also makes incredible bread pudding, absorbing all the custard and baking up into a golden, custardy dream. For a simpler treat, a sprinkle of pearl sugar on top before baking adds a lovely crunch and sweetness.
Why This Brioche Recipe Stands Out
You might find countless brioche recipes out there, but this one has been refined over many trials to strike the perfect balance. It’s not overly sweet, allowing the buttery richness to truly shine. The process of gradually incorporating cold butter, rather than melted, creates a more tender crumb with a finer texture that’s less prone to dryness.
The extended cold fermentation isn’t just about making the dough easier to handle; it’s a flavor enhancer. This slow rise allows the yeast to develop complex notes, giving the brioche a depth of flavor that’s missing from recipes that rush the process. It’s this attention to detail that transforms a good brioche into an extraordinary one.
Baking bread, especially something as rewarding as brioche, is a true labor of love. There’s a certain satisfaction that comes from transforming humble ingredients into something so beautiful and delicious. I hope this recipe brings you as much joy in the making and eating as it has brought me. Happy baking, my friends!

Classic French Brioche Bread
Indulge in the perfect French Brioche Bread with a fluffy crumb and rich buttery flavor, ideal for breakfast or brunch.
📝 Ingredients
👩🍳 Instructions
- 1In a small bowl, combine the warm milk with 1 teaspoon of the granulated sugar and sprinkle the yeast over top. Stir gently and let sit for 5-10 minutes until foamy.
- 2In the bowl of a stand mixer fitted with the dough hook, combine the flour, remaining sugar, and salt. Add the yeast mixture and the 4 eggs. Mix on low speed for 5-7 minutes until a shaggy dough forms and starts to pull away from the sides of the bowl.
- 3With the mixer still on low, add the cold, cubed butter one piece at a time, waiting until each piece is mostly incorporated before adding the next. This will take 10-15 minutes. Continue mixing until the dough is smooth, elastic, and shiny, passing the windowpane test.
- 4Transfer the dough to a lightly oiled bowl, turning to coat. Cover tightly with plastic wrap and let rise in a warm place for 1.5-2 hours, or until doubled. Gently punch down the dough, then cover again and refrigerate for at least 4 hours, or preferably overnight.
- 5On a lightly floured surface, turn out the chilled dough. Divide it into three equal pieces. Roll each piece into a log and braid them together, pinching the ends to seal. Place the shaped dough into a greased 9x5 inch loaf pan.
- 6Cover the loaf pan loosely with plastic wrap or a clean kitchen towel and let it rise in a warm, draft-free place for 1-1.5 hours, or until nearly doubled and puffy.
- 7Preheat your oven to 375°F (190°C). In a small bowl, whisk together the egg yolk and 1 tablespoon of milk for the egg wash. Gently brush the top of the risen brioche with the egg wash.
- 8Bake for 30-35 minutes, or until deeply golden brown and sounds hollow when tapped. If browning too quickly, tent loosely with foil. Remove from the pan and cool completely on a wire rack before slicing and serving.
💡 Notes
Ensure your yeast is fresh for a good rise. Chilling the dough overnight is crucial for flavor development and easier handling. For variations, fold in chocolate chips or orange zest before shaping. Best enjoyed fresh, but freezes well.



