


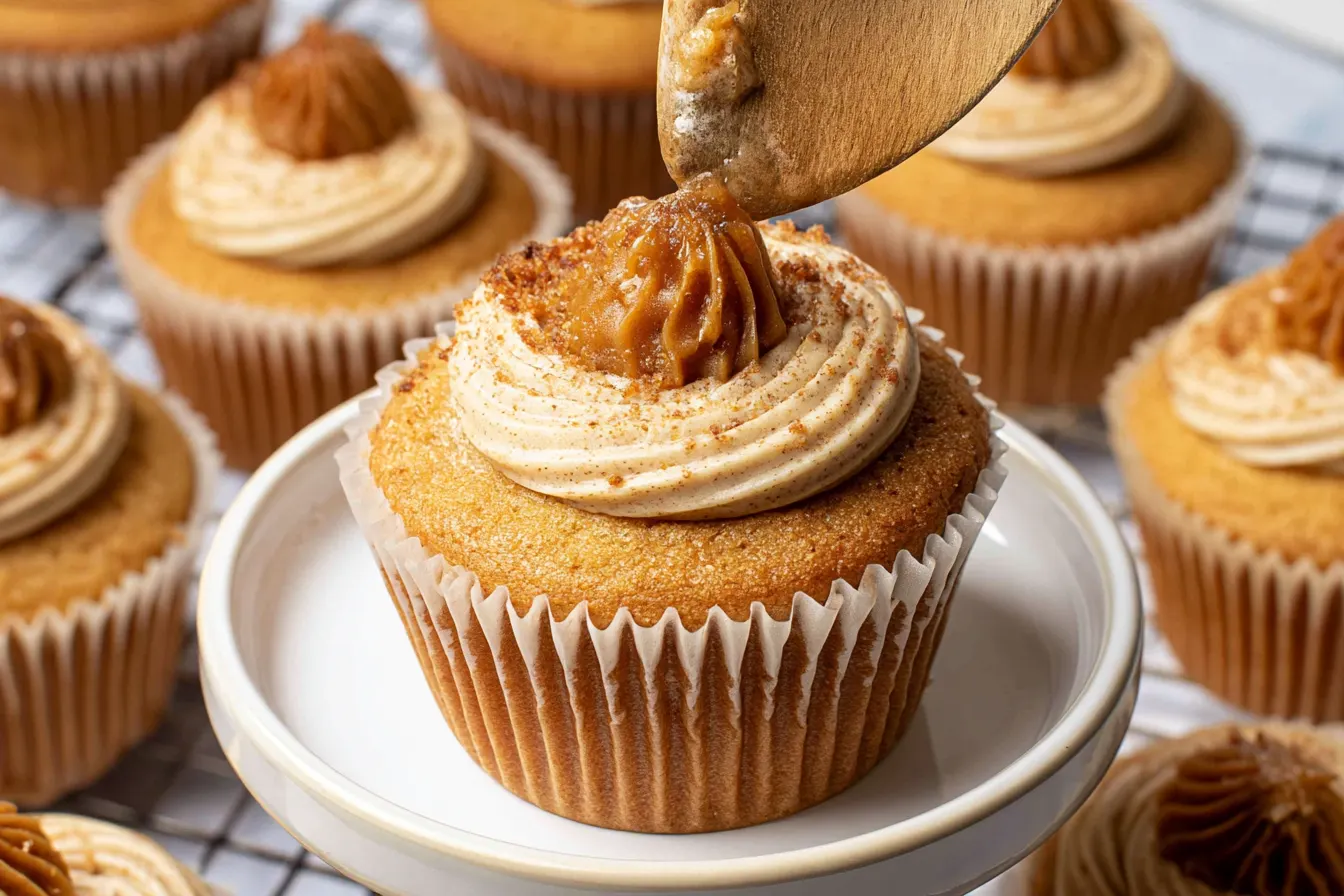
Ever bitten into a cupcake, expecting that delightful burst of flavor, only to find it’s just cake and frosting? It’s a bit of a letdown, isn’t it? Learning how to fill cupcakes correctly isn’t just about adding an extra layer of sweetness; it’s about transforming a simple treat into a multi-textured, multi-flavored experience that truly delights the senses.
- Why Bother with Filling? The Secret to Next-Level Cupcakes
- Gathering Your Tools: What You’ll Need
- Picking Your Perfect Filling: Creative Ideas for Every Palate
- Step-by-Step: How to Fill Cupcakes Like a Pro
- Common Cupcake Filling Faux Pas and How to Avoid Them
- Flavor Pairings: What Goes With What?
- Frequently Asked Questions About Filling Cupcakes

Why Bother with Filling? The Secret to Next-Level Cupcakes
You might be thinking, “Isn’t frosting enough?” And while a good swirl of buttercream is always welcome, a hidden filling takes your cupcakes from good to unforgettable. Think of it as the delicious secret weapon in your baking arsenal. It adds moisture, introduces new flavor profiles, and provides an exciting textural surprise. A filled cupcake tells your guests you put in that extra bit of love and effort. It’s what separates a nice treat from a truly memorable dessert.The Power of Contrast: Flavors and Textures
The best filled cupcakes play with contrast. A light, airy cake begs for a rich, dense filling. A sweet cake can be balanced with a tart fruit curd. Crunchy elements can be introduced with chopped nuts or cookie pieces within a creamy base. This thoughtful layering creates a more complex and enjoyable eating experience. It’s not just about sweetness; it’s about a symphony of tastes and textures.Gathering Your Tools: What You’ll Need
Before we dive into the delicious details, let’s make sure you have the right equipment. You don’t need a fancy pastry kitchen, but a few key tools will make the process much smoother and more enjoyable. Having everything laid out and ready to go before you start is half the battle won.Essential Baking Gadgets
Cupcake corer: This is a specialized tool that makes a neat, even hole in the center of your cupcake. It’s incredibly efficient. Paring knife: If you don’t have a corer, a small, sharp paring knife works perfectly well for cutting out the center. Piping bags and tips: A standard round tip (like an Ateco 804 or Wilton 12) is ideal for piping fillings. Reusable silicone bags or disposable plastic ones both work. Squeeze bottles: For thinner, runnier fillings like fruit purees or melted caramel, squeeze bottles are fantastic for precise application and minimal mess. Small spoons or offset spatula: Useful for gently pressing down filling or smoothing the tops.
Picking Your Perfect Filling: Creative Ideas for Every Palate
The world of cupcake fillings is vast and wonderful! Don’t feel limited to just one type. Think about the flavor profile of your cupcake and what would complement it best. Do you want something sweet, tart, creamy, or crunchy?Creamy & Dreamy Fillings
These are often the easiest to work with and provide a luxurious mouthfeel. Chocolate Ganache: Dark, milk, or white – a simple mix of chocolate and cream. Cream Cheese Frosting (thinned): Just like your favorite frosting, but a little looser. Custards & Puddings: Vanilla bean, chocolate, or even a lemon curd. Nutella/Nut Butters: Straight from the jar or slightly warmed for easier piping. Caramel Sauce: Velvety smooth and intensely sweet.Fruity & Fresh Fillings
Perfect for adding a bright, zesty contrast. Fruit Curds: Lemon, lime, passionfruit, raspberry – these are wonderfully tart and creamy. Fruit Compotes/Jams: Thicker fruit preparations, maybe with a few chunky bits. Berry Purees: Fresh berries blended and strained, perhaps sweetened slightly. Mashed Berries: Strawberries or raspberries gently mashed with a touch of sugar.Crunchy & Unexpected Fillings
For those who love a textural surprise! Chopped Candies/Cookies: Crushed Oreos, Heath bars, mini M&Ms. Toasted Nuts: Pecans, walnuts, almonds – often mixed with caramel or chocolate. Crumbled Cake/Brownie Bites: A fun way to use up leftover cake.Step-by-Step: How to Fill Cupcakes Like a Pro
This is where the magic happens! Don’t be intimidated; with a little practice, you’ll be filling cupcakes like a seasoned baker. The key is to work carefully and have your fillings at the right consistency.1. Cooling is Crucial
First things first: your cupcakes *must* be completely cool. Trying to fill warm cupcakes will lead to melted filling, torn cake, and a general mess. Patience is a virtue here. Let them cool on a wire rack for at least 30 minutes to an hour after coming out of the oven.2. Creating the Cavity
There are a few ways to make the hole for your filling. Choose the method you’re most comfortable with. Using a Cupcake Corer: This is the easiest and neatest method. Simply press the corer into the center of the cupcake, twist gently, and pull it out. It will remove a perfect cylinder of cake. Using a Paring Knife: Hold your paring knife at an angle, about half an inch from the edge of the cupcake. Cut a circle, angling the knife towards the center, creating a cone shape. Gently lift out the cone of cake. You can then trim off the pointy bottom of the cone to create a flat “lid” if you wish to replace it. Using a Round Piping Tip: A large round piping tip (like an Ateco 804) can be pressed down into the center of the cupcake, twisted, and pulled out to create a small, neat hole. This is great for smaller fillings or if you just want a small pocket. Tip: Don’t discard the cake you remove! You can crumble it and sprinkle it on top of the frosting, or snack on it while you work.3. Filling Your Cupcakes
Now for the fun part! Get your chosen filling ready. Ensure it’s at the right consistency – not too thick to pipe, not too thin to run out. For Thicker Fillings (Ganache, Curds, Thick Frostings): Spoon your filling into a piping bag fitted with a round tip. Gently insert the tip into the hole you created, going about two-thirds of the way down. Squeeze the bag, filling the cavity until the filling just reaches the top of the cupcake. Avoid overfilling, as it can cause the cupcake to crack or the filling to ooze out when you try to replace the cap or frost it. For Thinner Fillings (Caramel, Fruit Purees in Squeeze Bottles): If using a squeeze bottle, simply insert the nozzle into the hole and gently squeeze until the cavity is filled. If using a piping bag, use a smaller round tip.
4. Sealing the Deal (Optional but Recommended)
Once filled, you have a couple of options to “seal” the cupcake before frosting. Replace the Cake Cap: If you used a paring knife and trimmed the cake cone, you can gently place the flat “lid” back on top of the filling. This creates a neat surface for frosting. A Thin Layer of Frosting: For holes made with a corer or piping tip, you can just pipe a small dollop of frosting directly over the filling to cover it. This acts as a barrier and provides a smooth base for your main frosting swirl.5. Frost and Decorate!
With your cupcakes expertly filled, you’re ready for the grand finale – frosting and decorating! Pipe your favorite buttercream, cream cheese frosting, or glaze over the filled cupcakes. Get creative with sprinkles, extra fruit, or chocolate shavings. The hidden filling will be your little secret, waiting to surprise and delight.Common Cupcake Filling Faux Pas and How to Avoid Them
Even the most seasoned bakers run into snags now and then. But with a little foresight, you can easily sidestep these common pitfalls when filling your cupcakes.Mistake 1: Filling Warm Cupcakes
This is probably the most common error. As mentioned, warm cake and cold filling (or even room temp filling) are a recipe for disaster. The cake will be too soft and prone to tearing, and the filling will melt and become runny, leading to a soggy cupcake. Solution: Always, always, *always* ensure your cupcakes are completely cooled to room temperature. A little chill in the fridge for 10-15 minutes can even help firm them up slightly.Mistake 2: Overfilling the Cavity
It’s tempting to pack in as much deliciousness as possible, but overfilling can lead to structural integrity issues. The cupcake might crack, the filling could seep out when you frost it, or the top might pop off entirely. Solution: Fill the cavity until the filling is just level with the top of the cupcake, or slightly below. You want enough room for a little cap of cake or frosting to sit comfortably on top.Mistake 3: Using a Filling That’s Too Thin or Too Thick
A filling that’s too runny will soak into the cake and make it soggy. One that’s too thick might be hard to pipe and could tear the delicate cake. Solution: Adjust your filling consistency. If it’s too thin, you might be able to chill it slightly to firm it up, or for fruit purees, reduce it on the stovetop. If it’s too thick, gently warm it (for ganache or caramel) or add a tiny bit of milk or cream (for thicker frostings) until it’s pipeable but still holds its shape.Mistake 4: Not Sealing the Filling
While not strictly necessary for every filling, leaving a wet filling exposed can lead to your frosting sliding off or becoming discolored. Solution: Either replace the cake cap you removed or pipe a thin layer of complementary frosting over the filling before applying your main frosting swirl. This creates a barrier and a more stable surface.Flavor Pairings: What Goes With What?
Part of the fun of filling cupcakes is experimenting with flavor combinations. Here are some classic pairings to get you started, and some ideas to spark your own creativity. Vanilla Cupcakes: Lemon curd, raspberry jam, chocolate ganache, caramel sauce, cream cheese filling. Chocolate Cupcakes: Peanut butter cream, salted caramel, cherry pie filling, mint chocolate ganache, espresso cream. Red Velvet Cupcakes: Cream cheese frosting (thinned), white chocolate ganache. Lemon Cupcakes: Raspberry curd, blueberry compote, lemon cream. Carrot Cake Cupcakes: Cream cheese frosting, spiced apple compote. Don’t be afraid to think outside the box! A little bit of experimentation can lead to your next signature cupcake.Frequently Asked Questions About Filling Cupcakes
Got more questions? Here are some common queries I hear from fellow bakers.What if I don’t have a cupcake corer?
A small, sharp paring knife is your best friend! You can cut a cone shape out of the center of the cupcake. Alternatively, a large, round piping tip can also be pressed into the cupcake to create a neat, small hole.Can I fill cupcakes the day before?
Absolutely! Many fillings, especially ganaches, curds, and cream cheese-based fillings, hold up wonderfully in the refrigerator. In fact, some flavors deepen overnight. Just make sure to store them in an airtight container in the fridge. Let them come to room temperature for 15-30 minutes before serving for the best texture.How much filling should I use per cupcake?
Generally, about 1-2 tablespoons of filling per standard-sized cupcake is a good amount. This provides a generous burst of flavor without compromising the cupcake’s structure. It’s better to underfill slightly than to overfill.My filling is too runny, what can I do?
For chocolate ganache, chill it in the fridge for 15-30 minutes, stirring occasionally, until it thickens. For fruit purees, you might need to gently reduce them on the stovetop over low heat until they thicken, then cool completely. For thinner caramel, another quick simmer might help.Can I freeze filled cupcakes?
It depends on the filling! Cupcakes with jam, ganache, or nut butter fillings tend to freeze well. Cream cheese fillings can sometimes alter in texture when frozen and thawed, becoming a bit grainy. Fruit curds can also be tricky. If freezing, do so before frosting, then thaw in the fridge overnight before frosting and serving.
How to Fill Cupcakes (Ultimate Guide)
Master the art of filling cupcakes with this comprehensive guide, covering tools, techniques, and delicious filling ideas.
📝 Ingredients
👩🍳 Instructions
- 1Ensure your cupcakes are completely cooled to room temperature. This is crucial for preventing tears and melted filling.
- 2Choose your preferred method for creating a cavity: Use a cupcake corer, press a large round piping tip into the center, or use a small paring knife to cut a cone shape from the center of each cupcake. If using a knife, you can trim the pointed end off the removed cake piece to create a flat 'lid'.
- 3Prepare your filling. Ensure it is at the correct consistency – thick enough to hold its shape but soft enough to pipe or spoon easily. If needed, chill to thicken or gently warm to soften.
- 4Transfer the filling to a piping bag fitted with a round tip (or a squeeze bottle for thinner fillings).
- 5Gently insert the piping tip about two-thirds of the way down into the center of a cupcake cavity. Slowly squeeze the piping bag, filling the cavity until the filling reaches just below or level with the top of the cupcake. Be careful not to overfill.
- 6If desired, gently place the trimmed cake 'lid' back over the filling to seal it. Alternatively, pipe a small dollop of your chosen frosting over the filling to create a smooth surface.
- 7Repeat with the remaining cupcakes. Once all cupcakes are filled, they are ready to be frosted and decorated as usual.
💡 Notes
Always use completely cooled cupcakes to avoid messy results. If making ahead, store filled cupcakes (before frosting) in an airtight container in the refrigerator for up to 2-3 days, depending on the filling. Bring to room temperature before frosting and serving for best texture.



