


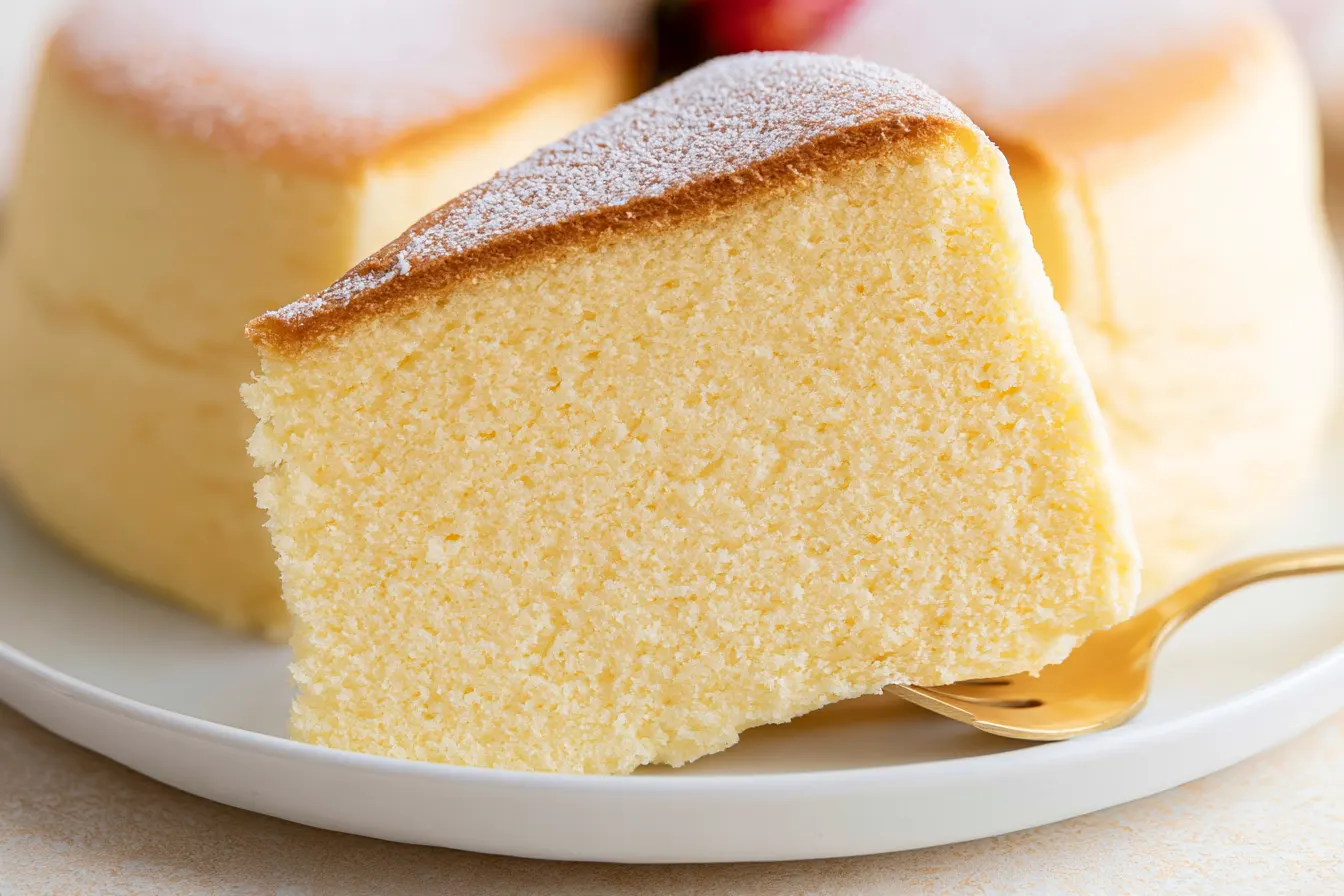
Do you ever wonder what it feels like to eat a cloud? A sweet, subtly tangy cloud that just melts on your tongue? Well, that’s precisely the experience you’re signing up for with this incredible Jiggly Japanese Cheesecake recipe. It’s not your dense, New York-style cousin; this is a whole other world of light, airy, soufflé-like delight, often dubbed “cotton cheesecake” for its ethereal texture.
For years, I’d seen those mesmerizing videos of the cheesecakes wobbling, almost dancing, on plates. I imagined it would be incredibly tricky, requiring some secret Japanese pastry wizardry. Turns out, while it does have its nuances, it’s far more approachable than you might think.
This version, refined through countless batches and a fair share of “oops” moments, consistently delivers that signature wobble and delicate flavor. It’s a showstopper that will genuinely impress, yet it tastes like a gentle hug in dessert form.

What Makes This Japanese Cheesecake So Special?
Unlike the rich, firm cheesecakes many of us grew up with, Japanese cheesecake is a marvel of lightness. The magic comes from two key techniques: a meringue base and a water bath. By whipping egg whites separately into a soft, airy meringue and gently folding it into the cream cheese batter, you introduce an incredible amount of air.
The water bath then provides a moist, even cooking environment, preventing cracks and allowing the cheesecake to rise slowly and evenly, creating that signature delicate crumb. It’s less about the deep tang of cream cheese and more about a subtle sweetness and an impossibly smooth texture that truly melts away.
I find it’s the perfect end to a lighter meal, or a wonderful afternoon treat with a cup of green tea. It feels sophisticated but is surprisingly comforting.
Gather Your Essentials: The Ingredients List
Making this jiggly marvel doesn’t require a long list of obscure ingredients, which is fantastic. Most of these you likely already have in your pantry or can easily find at any grocery store. Quality matters, though, especially for your cream cheese and eggs!
For the Cream Cheese Base:
- 250g (about 8.8 oz) full-fat cream cheese, softened
- 60g (1/4 cup + 2 tbsp) unsalted butter
- 100ml (scant 1/2 cup) whole milk
- 6 large egg yolks
- 60g (1/2 cup) all-purpose flour, sifted
- 20g (2 tbsp) cornstarch, sifted
- Zest of 1/2 a lemon (optional, but highly recommended for brightness)
For the Meringue:
- 6 large egg whites
- 100g (1/2 cup) granulated sugar
- 1/2 teaspoon cream of tartar (or 1 teaspoon lemon juice/white vinegar)
Make sure your eggs are at room temperature – this is crucial for both the yolks incorporating smoothly and the whites whipping up properly. Cold eggs just won’t give you the same volume!

Crafting Your Cloud: Step-by-Step Baking Guide
Don’t be intimidated by the number of steps; each one is straightforward. The key is to be gentle and patient, especially when folding the meringue. That’s where the “jiggle” truly begins!
Prepare Your Baking Setup
Preheat your oven to 160°C (325°F). You’ll also need a large roasting pan for the water bath. Line an 8-inch round cake pan (preferably springform, but wrap the bottom very well in foil if using one) with parchment paper on the bottom and sides. Grease it lightly too. Wrap the outside of your cake pan tightly with a few layers of aluminum foil to prevent water from seeping in during the water bath.
Melt the Cream Cheese Base
In a heatproof bowl set over a pot of simmering water (a double boiler setup), combine the softened cream cheese, butter, and milk. Stir continuously until the mixture is smooth and completely melted, with no lumps. Remove from heat and let it cool slightly for about 5 minutes.
Once cooled a bit, whisk in the egg yolks one at a time until fully incorporated. The mixture should be silky and uniform. Stir in the lemon zest if you’re using it.
Fold in the Dry Ingredients
Sift the all-purpose flour and cornstarch directly into the cream cheese mixture. Whisk gently until just combined. Don’t overmix here; you want to avoid developing too much gluten, which can make the cake tough. The batter will be thick but smooth.
Tip: Sifting the flour and cornstarch is non-negotiable for this recipe. It ensures there are no lumps and helps create that fine, delicate crumb structure we’re after.
Whip the Meringue
In a very clean, dry bowl, beat the egg whites with an electric mixer on medium speed until foamy. Add the cream of tartar (or lemon juice/vinegar). Gradually add the granulated sugar, about a tablespoon at a time, while continuing to beat on medium-high speed.
Continue beating until you reach soft to medium peaks. The meringue should be glossy and hold its shape, but the tip should curl over slightly when you lift the whisk. Don’t overbeat to stiff peaks, as this makes it harder to fold and can result in a drier cake.

Gently Combine the Mixtures
Add about one-third of the meringue to the cream cheese batter. Using a rubber spatula, gently fold it in to lighten the batter. It doesn’t need to be perfectly incorporated at this stage.
Then, add the remaining meringue in two additions, folding very carefully. Use a cut-and-fold motion, bringing the spatula down through the center of the bowl, sweeping it across the bottom, and folding it over the top. Rotate the bowl as you go. The goal is to incorporate the meringue without deflating it. Stop folding as soon as no streaks of white remain.
Bake in a Water Bath
Pour the delicate batter into your prepared cake pan. Gently tap the pan on the counter a few times to release any large air bubbles. Place the cake pan into the larger roasting pan. Carefully pour hot water into the roasting pan, reaching about 1 inch up the sides of the cake pan.
Bake in the preheated oven for 60-75 minutes. The cheesecake is done when it’s puffed up, golden brown on top, and a toothpick inserted into the center comes out clean or with moist crumbs. The top might crack slightly, which is perfectly normal.
Cooling and Serving
Once baked, turn off the oven and prop the oven door open slightly with a wooden spoon. Let the cheesecake cool in the oven for another 30-60 minutes. This slow cooling prevents drastic temperature changes that can cause the cake to sink or crack.
Remove from the oven and water bath. Let it cool completely on a wire rack before refrigerating for at least 3-4 hours, or preferably overnight, for the best texture and flavor. Carefully run a thin knife around the edge of the pan before unmolding.
Troubleshooting Common Japanese Cheesecake Woes
Making this cake can feel a bit like a science experiment, and sometimes things don’t go perfectly the first time. Here are some common issues and how to tackle them.
Why did my cheesecake crack on top?
Cracking is often due to baking at too high a temperature or cooling too quickly. The key is a gentle, moist baking environment (the water bath!) and a slow cool-down in the oven with the door ajar. Sometimes a small crack is inevitable, but it doesn’t affect the taste.
My cheesecake sank in the middle. What happened?
Sinking can happen if the meringue was over-whipped (too stiff) or if it was deflated during the folding process. It can also occur if the cake is underbaked, meaning the structure isn’t fully set. Ensure your meringue is at soft to medium peaks and fold gently!
Why isn’t my cheesecake jiggly? It’s too dense.
If your cake isn’t jiggly, it’s likely that the meringue wasn’t incorporated properly, or it was overmixed, causing too much air to be lost. Also, too much flour or cornstarch, or not sifting them, can lead to a denser texture. Make sure your flour measurements are accurate.
Can I make this cheesecake ahead of time?
Absolutely! In fact, it’s highly recommended. Japanese cheesecake benefits greatly from chilling overnight. The flavors meld, and the texture becomes even more stable and delightful.
How do I store leftover Japanese Cheesecake?
Store any leftovers in an airtight container in the refrigerator for up to 3-4 days. It tastes fantastic chilled, but you can also let it come to room temperature for about 15-20 minutes before serving if you prefer a slightly softer texture.
Serving Suggestions & Flavor Twists
This jiggly Japanese cheesecake is truly wonderful on its own, its delicate flavor needing very little accompaniment. However, a few simple additions can elevate the experience even further.
A dusting of powdered sugar just before serving adds a touch of elegance. You could also serve it with fresh berries – strawberries, blueberries, or raspberries provide a lovely tart contrast to the cheesecake’s subtle sweetness. A light dollop of unsweetened whipped cream or a thin fruit coulis (like raspberry or mango) would also be divine.
For a flavor twist, consider adding a teaspoon of vanilla bean paste to the cream cheese base for a more aromatic profile. You could also experiment with a hint of matcha powder (about 1-2 teaspoons, sifted with the flour) for a classic Japanese-inspired variation. Just remember, the beauty of this cake is its subtle nature, so don’t overpower it with too many strong flavors.

Jiggly Japanese Cheesecake
Experience the ultimate fluffy, soufflé-like Japanese cheesecake with its signature jiggly texture – a true 'cotton cheesecake' delight.
📝 Ingredients
👩🍳 Instructions
- 1Preheat oven to 160°C (325°F). Prepare an 8-inch round cake pan (springform or regular), lining the bottom and sides with parchment paper and greasing lightly. Wrap the outside with several layers of foil to create a waterproof seal.
- 2In a heatproof bowl over simmering water, combine cream cheese, butter, and milk. Stir until smooth and melted. Remove from heat and cool slightly for 5 minutes.
- 3Whisk egg yolks into the cooled cream cheese mixture one at a time until fully incorporated and smooth. Stir in lemon zest, if using.
- 4Sift flour and cornstarch into the cream cheese mixture. Whisk gently until just combined and no lumps remain. Do not overmix.
- 5In a separate clean, dry bowl, beat egg whites on medium speed until foamy. Add cream of tartar. Gradually add sugar, beating on medium-high speed until soft to medium peaks form. Meringue should be glossy and hold shape, with a slightly curled tip.
- 6Gently fold one-third of the meringue into the cream cheese batter to lighten it. Then, add the remaining meringue in two additions, using a cut-and-fold technique until just combined and no white streaks remain. Be careful not to deflate the meringue.
- 7Pour batter into the prepared cake pan. Gently tap the pan on the counter to release large air bubbles. Place the cake pan into a larger roasting pan.
- 8Pour hot water into the roasting pan, reaching about 1 inch up the sides of the cake pan. Bake for 60-75 minutes, or until puffed, golden, and a toothpick comes out clean or with moist crumbs.
- 9Turn off the oven and prop the door open slightly. Let the cheesecake cool in the oven for 30-60 minutes. Remove from oven and water bath, and cool completely on a wire rack.
- 10Refrigerate for at least 3-4 hours, or preferably overnight, before carefully unmolding and serving. Dust with powdered sugar and serve with fresh berries if desired.
💡 Notes
Ensure all ingredients, especially eggs, are at room temperature for best results. Do not overmix the batter or overbeat the meringue. The slow cooling process in the oven is crucial for preventing cracks and maintaining the cake's delicate structure. Store leftovers in an airtight container in the refrigerator for up to 4 days.



