


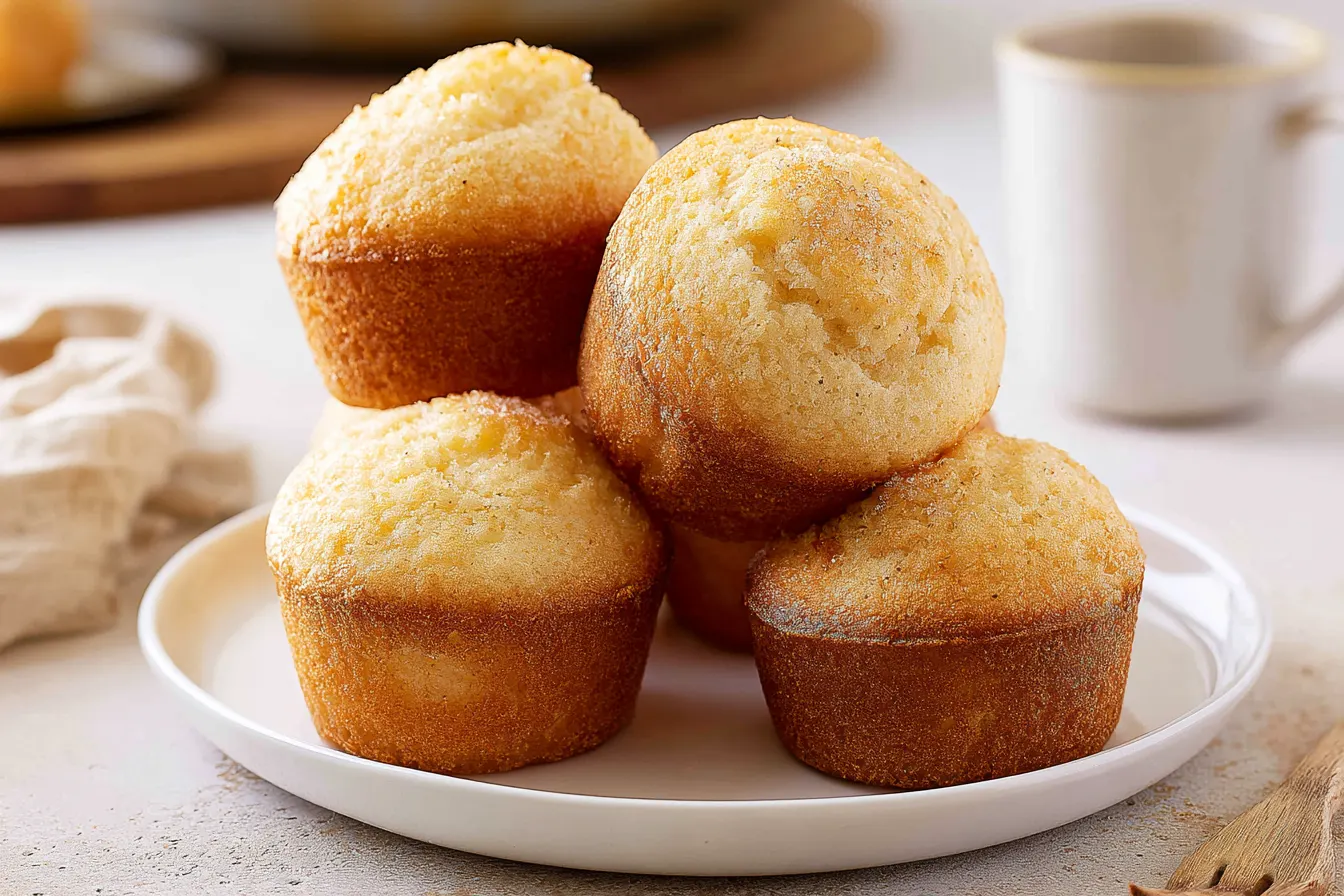
There’s a certain magic in the aroma of something baking, isn’t there? For me, it’s often the simplest scents that truly hit home – like the warm, sweet perfume of vanilla wafting from the oven. These incredibly easy and utterly delicious vanilla muffins embody that very comfort, offering a little hug in every light, fluffy bite.

What Makes These Muffins So Irresistibly Fluffy?
You might be wondering what the secret is to achieving that perfect, airy texture in a simple muffin. It’s a combination of a few key techniques and ingredients, all working together in harmony. First, we’re using both baking powder and baking soda, which create a beautiful lift and a tender crumb. The acidity from the buttermilk (or a DIY substitute) reacts with the baking soda, giving an extra boost. Another crucial element is not overmixing the batter. Seriously, this is where many muffin mishaps happen! Overmixing develops the gluten too much, leading to tough, dense muffins. We’re aiming for just-combined ingredients, even if there are a few small lumps. Trust the process; those lumps will sort themselves out in the oven. Finally, the quality of your vanilla truly shines here. Since vanilla is the star of the show, investing in a good quality vanilla extract (or even vanilla bean paste for those little specks of heaven) makes a world of difference. It deepens the flavor profile, making each bite more aromatic and satisfying. It’s a small detail, but one that elevates these from good to absolutely glorious.Gather Your Kitchen Essentials
Before we start mixing, let’s make sure you have everything ready. This recipe doesn’t call for any exotic ingredients, but having them pre-measured and at room temperature (especially the wet ingredients) really helps achieve that consistently perfect texture.Dry Ingredients:
- 2 cups (240g) All-Purpose Flour
- ½ cup (100g) Granulated Sugar
- 2 teaspoons Baking Powder
- ½ teaspoon Baking Soda
- ¼ teaspoon Salt
Wet Ingredients:
- 1 large Egg, at room temperature
- 1 cup (240ml) Buttermilk, at room temperature
- ¼ cup (60ml) Vegetable Oil (or any neutral oil)
- 2 teaspoons Pure Vanilla Extract (the good stuff!)

Whipping Up Your Vanilla Muffin Batter
This part is quick, I promise! The key is gentle handling.Step 1: Prep Your Oven and Pan
Preheat your oven to 400°F (200°C). Line a 12-cup muffin tin with paper liners or grease it thoroughly. This ensures your beautiful muffins won’t stick and makes for easy cleanup.
Step 2: Combine the Dry Elements
In a large mixing bowl, whisk together the flour, granulated sugar, baking powder, baking soda, and salt. Make sure there are no lumps and everything is well combined. This distributes the leavening agents evenly.
Step 3: Whisk the Wet Ingredients
In a separate, medium-sized bowl, lightly beat the egg. Then, add the buttermilk, vegetable oil, and vanilla extract. Whisk until everything is smoothly incorporated.
Tip: If you don’t have buttermilk on hand, you can easily make a substitute! Just add 1 tablespoon of white vinegar or lemon juice to a measuring cup, then fill the rest of the way to 1 cup with regular milk. Let it sit for 5 minutes until it slightly curdles.
Step 4: Marry Wet and Dry
Pour the wet ingredients into the dry ingredients. Using a rubber spatula or a wooden spoon, gently fold everything together until *just* combined. A few lumps are perfectly fine and even desirable! Overmixing is the enemy of tender muffins, so stop as soon as you see no more streaks of dry flour.
Step 5: Fill and Bake
Divide the batter evenly among the 12 muffin cups. You can use an ice cream scoop for easy portioning. Fill each cup about two-thirds full. Place the muffin tin into your preheated oven.
Bake for 18-22 minutes, or until the tops are golden brown and a wooden skewer inserted into the center of a muffin comes out clean. The tops should spring back lightly when touched.

Step 6: Cool and Enjoy!
Once baked, remove the muffin tin from the oven and let the muffins cool in the pan for about 5 minutes. This helps them firm up slightly before you transfer them. Then, carefully move them to a wire rack to cool completely. Or, if you’re like me, enjoy one (or two!) warm from the oven!
Common Questions About Vanilla Muffins
It’s natural to have a few questions when you’re trying a new recipe. Here are some of the most common ones I hear about making perfect muffins.Can I add chocolate chips or other mix-ins to these?
Absolutely! These vanilla muffins are a fantastic base for all sorts of additions. Feel free to fold in ½ to ¾ cup of chocolate chips, blueberries, raspberries, or even a sprinkle of cinnamon sugar before baking.
My muffins didn’t rise much. What went wrong?
There are a few culprits here. Overmixing is a big one, as it can deflate the air pockets created by the leavening. Also, check the freshness of your baking powder and baking soda; old leavening agents lose their potency. Make sure your oven is preheated correctly too!
How do I store leftover muffins?
Once completely cooled, store your vanilla muffins in an airtight container at room temperature for up to 3-4 days. For longer storage, you can freeze them for up to 3 months. Thaw at room temperature or gently warm in the microwave.
Can I make these dairy-free?
Yes, you can! Substitute the buttermilk with a dairy-free alternative like almond milk or soy milk, soured with a tablespoon of apple cider vinegar. Just ensure your milk substitute is unsweetened and unflavored.
Why is room temperature important for the wet ingredients?
Room temperature ingredients emulsify more easily, creating a smoother, more uniform batter. This leads to a finer crumb and a more tender muffin. Cold ingredients can make the batter seize up and become lumpy, making it harder to mix properly without overworking it.
Variations to Keep Things Exciting
While I adore these classic vanilla muffins, sometimes it’s fun to shake things up. Here are a couple of ideas to get your creative juices flowing:Lemon Vanilla Zest:
Add 1-2 tablespoons of fresh lemon zest to the dry ingredients for a bright, citrusy twist that complements the vanilla beautifully. The aroma alone is worth it!
Vanilla Bean Dream:
For an extra luxurious touch, swap out half of the vanilla extract for 1 teaspoon of vanilla bean paste. You’ll get those gorgeous little specks of vanilla bean throughout your muffins, and an even deeper, more complex vanilla flavor.
Cinnamon Sugar Swirl:
After filling the muffin cups, sprinkle a mixture of 1 tablespoon sugar and ½ teaspoon cinnamon over the top of each muffin before baking. It creates a lovely, crunchy topping that’s absolutely divine.
Serving Suggestions & The Perfect Pairing
These vanilla muffins are incredibly versatile. They’re excellent for breakfast, a mid-morning snack, or even a light dessert. For breakfast, try them alongside a cup of coffee or tea. They’re also wonderful with a small bowl of fresh fruit or a side of yogurt. The simple sweetness of the muffin balances beautifully with the tartness of berries or the creaminess of dairy. As an afternoon treat, they pair wonderfully with a tall glass of cold milk. If you’re feeling a bit fancy, a small dollop of homemade whipped cream or a drizzle of warm fruit compote could take them to the next level. They’re humble, yet elegant enough for any occasion.A Word on Why Homemade Matters
There’s an undeniable charm to baking from scratch, especially when it comes to something as comforting as muffins. The process itself is therapeutic – the measuring, the mixing, the anticipation of that golden-brown goodness emerging from the oven. And the result? A truly superior product that simply can’t be replicated by store-bought alternatives. Homemade muffins allow you to control the quality of your ingredients, ensuring you’re using fresh, wholesome components. You can adjust the sweetness to your liking, add your favorite mix-ins, and avoid any artificial flavors or preservatives. It’s a small act of self-care, a way to nourish yourself and those you love with something made with intention and warmth. So, next time you’re craving a little something sweet, I encourage you to whip up a batch of these vanilla muffins. You won’t regret the brief effort, and the reward of that first warm, fragrant bite is truly priceless. Enjoy every moment!
Classic Fluffy Vanilla Muffins
Light, tender, and bursting with pure vanilla flavor, these easy-to-make muffins are perfect for any time of day.
📝 Ingredients
👩🍳 Instructions
- 1Preheat your oven to 400°F (200°C). Line a 12-cup muffin tin with paper liners or grease it well.
- 2In a large mixing bowl, whisk together the flour, granulated sugar, baking powder, baking soda, and salt until thoroughly combined.
- 3In a separate medium bowl, lightly beat the egg. Add the buttermilk, vegetable oil, and vanilla extract, whisking until smooth.
- 4Pour the wet ingredients into the dry ingredients. Using a rubber spatula or wooden spoon, gently fold until just combined. A few small lumps are fine; do not overmix.
- 5Divide the batter evenly among the 12 prepared muffin cups, filling each about two-thirds full.
- 6Bake for 18-22 minutes, or until the tops are golden brown and a wooden skewer inserted into the center comes out clean. The tops should spring back when lightly touched.
- 7Let the muffins cool in the tin for 5 minutes before transferring them to a wire rack to cool completely. Serve warm or at room temperature.
💡 Notes
For best results, ensure all wet ingredients are at room temperature. If you don't have buttermilk, combine 1 cup milk with 1 tablespoon lemon juice or white vinegar and let sit for 5 minutes. Store cooled muffins in an airtight container for up to 3-4 days.



