


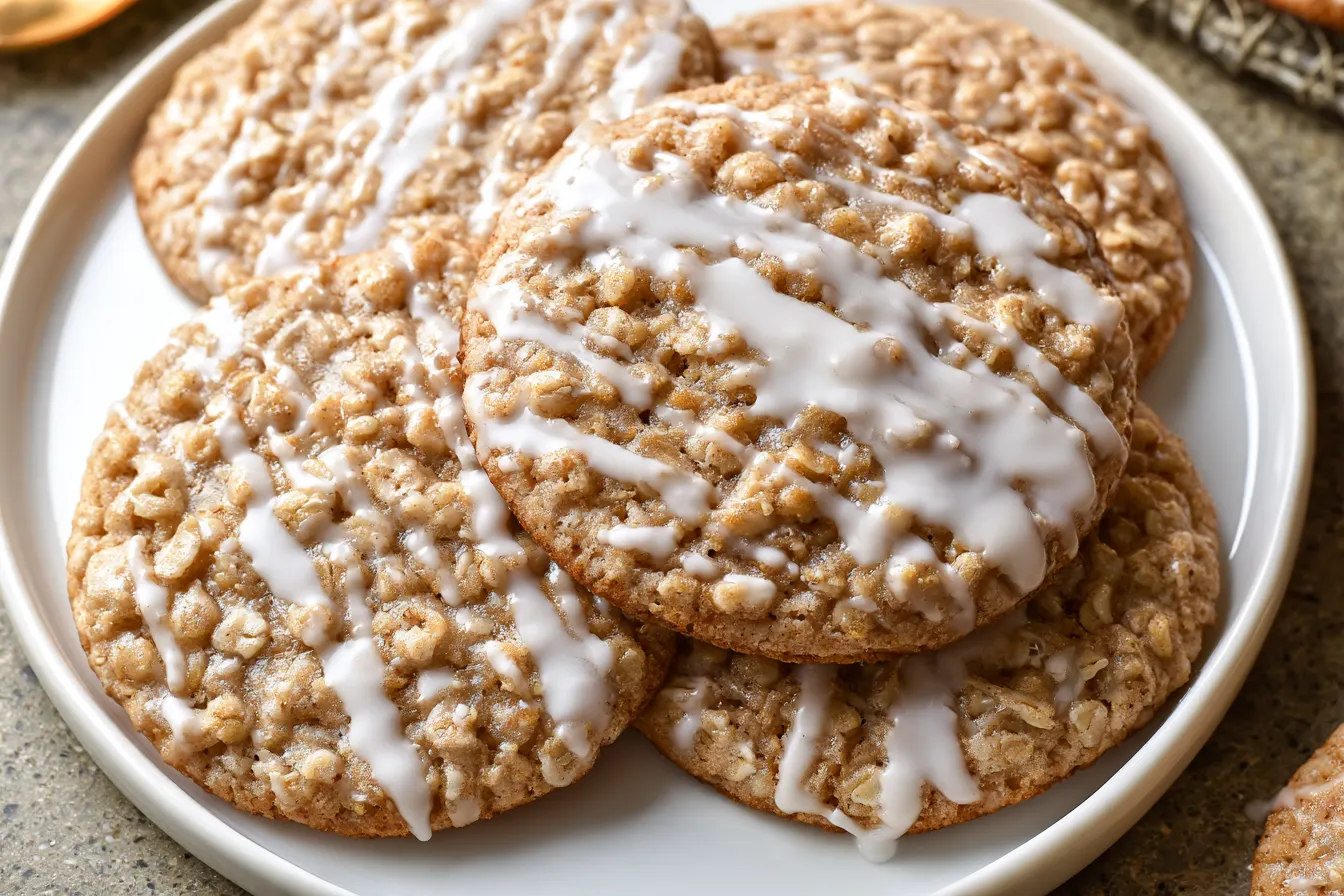
There’s a distinct aroma that signals comfort, a warm, toasty fragrance that permeates the kitchen and instantly makes you feel at home. For me, that’s often the smell of baking butter – specifically, brown butter. It’s the secret weapon in these soft and chewy Brown Butter Iced Oatmeal Cookies, elevating them far beyond your standard oatmeal cookie and into the realm of pure indulgence.
- Why Brown Butter Makes All the Difference
- Gather Your Baking Essentials: Ingredients for Iced Oatmeal Bliss
- The Journey to Perfect Brown Butter Iced Oatmeal Cookies
- Step 1: The Brown Butter Magic
- Step 2: Creaming the Sugars and Butter
- Step 3: Wet Ingredients Unite
- Step 4: Dry Ingredients Come Together
- Step 5: Combining Wet and Dry
- Step 6: Chill Out, Dough!
- Step 7: Prepping for Baking
- Step 8: Bake to Golden Perfection
- Step 9: Whipping Up the Vanilla Glaze
- Step 10: Glaze and Enjoy!
- Questions From Your Kitchen: FAQ About Iced Oatmeal Cookies
- Mastering the Brown Butter: Tips for Success
- Beyond the Bake: Storage and Serving Ideas
- Why You’ll Love This Iced Oatmeal Cookie Recipe

Why Brown Butter Makes All the Difference
You might be wondering, “Is browning butter really worth the extra step?” The answer, unequivocally, is yes. This isn’t just about melting butter; it’s about transforming it. As butter gently cooks over medium heat, its milk solids toast and turn amber, releasing a complex, nutty, almost caramel-like aroma. This simple process adds an incredible depth of flavor that plain melted butter simply can’t replicate. For these iced oatmeal cookies, that brown butter infusion is a game-changer. It harmonizes with the oats and spices, lending a sophisticated richness that makes each bite feel truly gourmet. It’s the subtle magic that takes a good cookie and makes it extraordinary. If you’ve never browned butter before, don’t fret – it’s easier than it sounds, and I’ll walk you through it.Gather Your Baking Essentials: Ingredients for Iced Oatmeal Bliss
Creating these delightful cookies starts with a few pantry staples, but each plays a crucial role in building that signature flavor and texture.For the Brown Butter Oatmeal Cookies:
- Unsalted Butter: The star of our show, destined for browning. Unsalted gives you control over the final salt content.
- Granulated Sugar & Light Brown Sugar: A blend for the perfect balance of sweetness and moisture. Brown sugar contributes to the cookies’ chewiness.
- Large Egg & Egg Yolk: The whole egg provides structure, while the extra yolk adds richness and helps keep the cookies tender.
- Vanilla Extract: Use good quality vanilla! It makes a noticeable difference.
- All-Purpose Flour: The foundation of our cookie dough.
- Old-Fashioned Rolled Oats: Essential for that classic oatmeal cookie texture. Don’t use quick oats here; they’ll get too mushy.
- Baking Soda: Our leavening agent, helping the cookies spread and become tender.
- Ground Cinnamon & Nutmeg: The warm spices that define the oatmeal cookie experience. Feel free to adjust to your preference.
- Salt: Balances the sweetness and enhances all the other flavors.
For the Sweet Vanilla Glaze:
- Powdered Sugar (Confectioners’ Sugar): The base of our smooth, pourable glaze.
- Milk (Any kind): Just a touch to thin the glaze to the right consistency.
- Vanilla Extract: Again, a good quality vanilla for that distinct sweet flavor. A tiny pinch of salt in the glaze can also brighten it.

The Journey to Perfect Brown Butter Iced Oatmeal Cookies
Let’s break down the process into manageable steps. Don’t rush the browning of the butter – it’s worth taking your time for maximum flavor.Step 1: The Brown Butter Magic
Melt the unsalted butter in a light-colored saucepan over medium heat. Swirl occasionally. As it melts, it’ll foam, then the milk solids at the bottom will start to turn golden brown and smell nutty. This usually takes 5-7 minutes. Once deeply golden brown and fragrant, immediately pour the butter into a heatproof bowl to stop the cooking. Let it cool for about 10-15 minutes, allowing it to solidify slightly but still remain soft.
Note: Keep a close eye on the butter during this stage. It can go from perfectly browned to burnt in a matter of seconds. The goal is a rich amber color, not dark brown or black.
Step 2: Creaming the Sugars and Butter
Once your brown butter has cooled a bit, transfer it to a large mixing bowl (or the bowl of a stand mixer fitted with the paddle attachment). Add both the granulated sugar and light brown sugar. Beat on medium speed for 2-3 minutes until the mixture is light, fluffy, and well combined. Scrape down the sides of the bowl as needed to ensure everything is incorporated.
Step 3: Wet Ingredients Unite
Beat in the egg, followed by the egg yolk, one at a time, mixing well after each addition until fully incorporated. Stir in the vanilla extract. The mixture will look glossy and smooth at this point.
Step 4: Dry Ingredients Come Together
In a separate medium bowl, whisk together the all-purpose flour, old-fashioned rolled oats, baking soda, ground cinnamon, ground nutmeg, and salt. Make sure there are no lumps of baking soda or spices, as this ensures even distribution in the cookies.
Step 5: Combining Wet and Dry
Gradually add the dry ingredients to the wet ingredients, mixing on low speed until just combined. Be careful not to overmix the dough – overmixing can lead to tough cookies. Stop as soon as you no longer see streaks of flour.
Step 6: Chill Out, Dough!
Cover the bowl with plastic wrap and refrigerate the cookie dough for at least 30 minutes, or up to 2 hours. Chilling helps the flavors meld, prevents the cookies from spreading too much in the oven, and makes the dough easier to handle. This step is crucial for the perfect texture in these Brown Butter Iced Oatmeal Cookies.
Step 7: Prepping for Baking
Preheat your oven to 350°F (175°C). Line two baking sheets with parchment paper or silicone baking mats. This prevents sticking and promotes even baking. Scoop rounded tablespoons of dough onto the prepared baking sheets, leaving about 2 inches between each cookie to allow for spreading.
Step 8: Bake to Golden Perfection
Bake for 9-11 minutes, or until the edges are set and lightly golden, but the centers still look slightly soft. They will continue to set up as they cool. Don’t overbake! A slightly underbaked cookie is a soft cookie. Remove from the oven and let the cookies cool on the baking sheets for 5 minutes before transferring them to a wire rack to cool completely. This prevents them from breaking.

Step 9: Whipping Up the Vanilla Glaze
While the cookies cool, prepare the glaze. In a small bowl, whisk together the powdered sugar, milk, and vanilla extract until smooth and free of lumps. You’re looking for a consistency that’s thick enough to coat the back of a spoon but still pourable. Add more milk a tiny bit at a time if it’s too thick, or more powdered sugar if it’s too thin.
Step 10: Glaze and Enjoy!
Once the cookies are completely cool, spoon or drizzle the vanilla glaze over each one. For a classic look, you can dip the tops of the cookies into the glaze. Let the glaze set for about 15-20 minutes before serving. The wait is the hardest part, I promise!
Questions From Your Kitchen: FAQ About Iced Oatmeal Cookies
What kind of oats should I use for iced oatmeal cookies?
For the best texture in these Brown Butter Iced Oatmeal Cookies, always opt for old-fashioned rolled oats. They provide a chewier, more substantial bite. Quick oats or instant oats are too finely cut and will result in a mushier texture, while steel-cut oats are too tough and won’t soften enough during baking.
Can I make these cookies gluten-free?
While I haven’t tested a gluten-free version of this specific recipe, you could try substituting a 1:1 gluten-free all-purpose flour blend that contains xanthan gum. Ensure your rolled oats are certified gluten-free as well, as oats can sometimes be cross-contaminated during processing. Results may vary slightly in texture.
How do I store leftover iced oatmeal cookies?
Store your iced oatmeal cookies in an airtight container at room temperature for up to 3-4 days. Once the glaze has fully set, you can stack them with parchment paper in between layers to prevent sticking. For longer storage, you can freeze unglazed cookies for up to 2 months and then glaze them after thawing.
My brown butter burned! What did I do wrong?
Browning butter requires constant attention. It transitions quickly from perfectly golden to burnt. The most common mistake is walking away from the pan or using too high heat. Keep the heat at medium, stir frequently, and as soon as you see those amber milk solids and smell the nutty aroma, remove it from the heat and pour it into a cool bowl immediately.
Can I add other spices to the cookie dough?
Absolutely! While cinnamon and nutmeg are traditional, feel free to experiment. A pinch of ground cloves, allspice, or even a touch of cardamom could add another layer of warmth. Start with a small amount (1/4 teaspoon) and adjust to your taste preferences.
Mastering the Brown Butter: Tips for Success
Browning butter is an art, but it’s an accessible one. Here are a few pointers to ensure your brown butter is perfect every time, providing that signature depth for your Brown Butter Iced Oatmeal Cookies: Use a Light-Colored Pan: This is key! A light-bottomed saucepan allows you to clearly see the color change of the milk solids. In a dark pan, it’s much harder to judge, and you risk burning the butter. Medium Heat is Your Friend: Don’t crank up the heat to rush the process. Medium heat allows for a gradual browning, giving you more control and less chance of scorching. Stir Constantly, Then Swirl: As the butter melts, stir it often. Once it starts to foam, switch to swirling the pan occasionally. This helps distribute the heat and ensures even browning. Watch and Smell: Your senses are your best tools here. Watch for the tiny milk solids at the bottom to turn from white to golden, then to amber. Simultaneously, you’ll notice a delightful nutty aroma filling your kitchen – that’s your cue! Remove from Heat Immediately: As soon as the butter reaches that beautiful amber color and smells fragrant, take it off the heat. Pour it into a separate, cool bowl to stop the cooking process. The residual heat in the pan can continue to cook it, potentially leading to bitterness. Let it Cool Down: For cookie dough, you don’t want piping hot butter. Let it cool for at least 10-15 minutes, or until it’s just warm and has slightly thickened, but isn’t solid. This helps prevent the cookies from spreading too much.Beyond the Bake: Storage and Serving Ideas
These Brown Butter Iced Oatmeal Cookies are a treat best enjoyed fresh, but they also store wonderfully. Once the glaze has fully set (give it at least 20-30 minutes, or even an hour for a firmer set), you can stack them in an airtight container. They’ll keep at room temperature for up to 3-4 days, remaining soft and chewy. For an extra special touch, serve these cookies with a tall glass of cold milk, just like you would have as a kid. They’re also fantastic alongside a hot cup of coffee or tea for an afternoon pick-me-up. If you’re feeling adventurous, crumble a few over a scoop of vanilla ice cream for a deconstructed oatmeal cookie sundae! The possibilities are endless for enjoying these spiced, sweet delights.Why You’ll Love This Iced Oatmeal Cookie Recipe
There are countless oatmeal cookie recipes out there, but this one stands out. It’s not just a copycat; it’s an elevated homage. The browned butter isn’t just a gimmick; it genuinely transforms the flavor profile, adding a layer of sophistication without making the cookie feel fussy. The balance of warm spices with the chewy oats and the sweet, smooth vanilla glaze creates a harmonious bite that’s deeply satisfying. It’s a recipe that evokes nostalgia while simultaneously offering something new and exciting for your taste buds. Expect rave reviews from anyone lucky enough to try them – these aren’t just cookies, they’re an experience.
Brown Butter Iced Oatmeal Cookies
Soft, chewy brown butter iced oatmeal cookies with warm spices and a sweet vanilla glaze – a homemade twist on a classic favorite.
📝 Ingredients
👩🍳 Instructions
- 1Brown the Butter: In a light-colored saucepan, melt 1 cup unsalted butter over medium heat. Swirl occasionally. It will foam, then the milk solids will turn golden brown and smell nutty (5-7 minutes). Immediately pour into a heatproof bowl to stop cooking. Let cool for 10-15 minutes.
- 2Cream Sugars & Butter: Transfer cooled brown butter to a large mixing bowl. Add granulated sugar and light brown sugar. Beat on medium speed for 2-3 minutes until light and fluffy.
- 3Add Wet Ingredients: Beat in the whole egg, then the egg yolk, one at a time, mixing well after each. Stir in 2 teaspoons vanilla extract.
- 4Combine Dry Ingredients: In a separate bowl, whisk together flour, rolled oats, baking soda, cinnamon, nutmeg, and salt.
- 5Mix Dough: Gradually add dry ingredients to wet, mixing on low speed until just combined. Do not overmix.
- 6Chill Dough: Cover bowl and refrigerate dough for at least 30 minutes, or up to 2 hours.
- 7Prepare for Baking: Preheat oven to 350°F (175°C). Line two baking sheets with parchment paper. Scoop rounded tablespoons of dough onto sheets, spacing 2 inches apart.
- 8Bake Cookies: Bake for 9-11 minutes, until edges are set and lightly golden, but centers are still slightly soft. Cool on sheets for 5 minutes, then transfer to a wire rack to cool completely.
- 9Make Glaze: While cookies cool, whisk powdered sugar, 3-4 tablespoons milk, and 1 teaspoon vanilla extract in a small bowl until smooth and pourable. Adjust milk for desired consistency.
- 10Glaze Cookies: Once cookies are completely cool, spoon or drizzle glaze over each. Let glaze set for 15-20 minutes before serving.
💡 Notes
For a richer brown butter flavor, you can let the butter solids get a little darker, but watch carefully to prevent burning. Ensure cookies are fully cooled before glazing, or the glaze will melt. Store cookies in an airtight container at room temperature for up to 4 days.



