


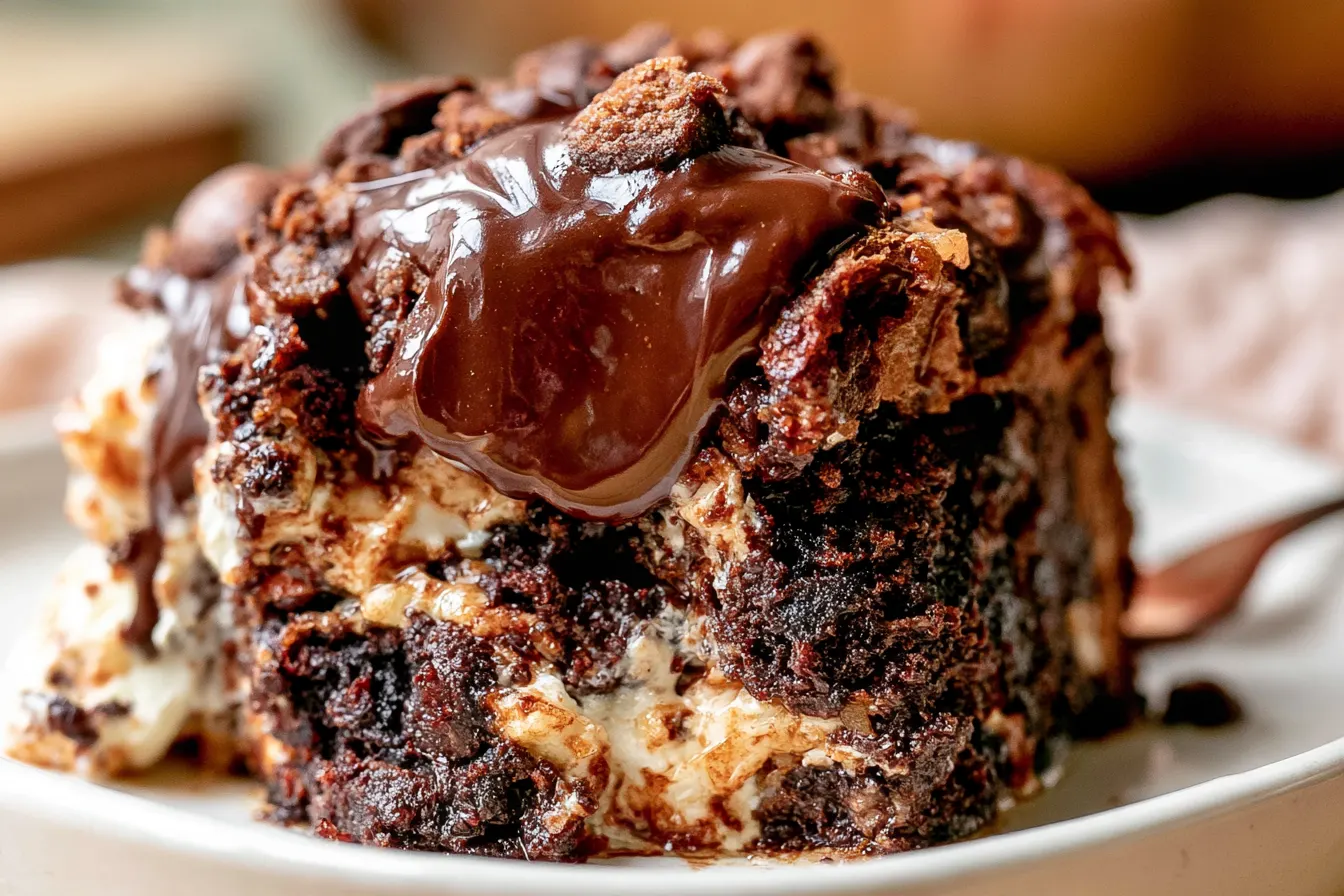
I fess up: my baking journey hasn’t always been a cakewalk. There was a dark period in my early twenties when every single cake I attempted either sunk in the middle, dried out like a desert, or tasted suspiciously like cardboard. It was a disheartening time, filled with crumpled recipes and deflated dreams. But then, a friend brought an Earthquake Cake to a potluck, and everything changed. This wasn’t just a cake; it was a revelation – a delightfully chaotic, chocolate-drenched, gooey masterpiece that literally defied every baking failure I’d ever known. It’s impossible to mess up, and it’s always a showstopper.

Why This Earthquake Cake Will Be Your New Favorite Quake
So, what makes *this* particular Earthquake Cake recipe stand out from the rest? It’s all about balance and a few clever shortcuts that don’t compromise on flavor. Many recipes lean too heavily on just one element, but here, we strike a perfect harmony between the deep, dark chocolate, the nutty crunch of pecans, the chewy sweetness of coconut, and the tangy cream cheese. It’s a symphony of textures and tastes. We also build this cake on a solid foundation: a doctored-up cake mix. Before you scoff, hear me out. Using a good quality box mix saves a ton of time and guarantees a consistent, moist crumb every single time. But we don’t stop there. We elevate it with a few simple additions that make it taste completely homemade – no one will ever guess your secret! This means less stress in the kitchen and more time enjoying the oohs and aahs from your delighted guests.The Essential Elements: What Makes an Earthquake Cake Quake
At its heart, an Earthquake Cake is a chocolate cake with a surprise. It’s a bit like a treasure hunt in dessert form. The “quake” effect comes from the way the cream cheese mixture and the toppings sink and create fissures as the cake bakes. It’s a beautiful, delicious mess. Chocolate Cake Base: We’re starting with a simple, reliable chocolate cake mix. It provides the perfect sturdy, yet moist, foundation for all the goodness we’re about to pile on. We’ll give it a little boost to make it extra rich. Sweet Cream Cheese Swirl: This is the creamy, tangy counterpoint that cuts through the richness of the chocolate. It bakes into soft, luscious pockets that are truly irresistible. Toasted Coconut & Pecans: These aren’t just an afterthought. Toasting the coconut brings out its deep, nutty flavor and adds a wonderful chew. The pecans provide a crucial crunch, offering textural contrast in every bite. Chocolate Chips: Because more chocolate is always a good idea, right? These melt into gooey pockets, adding another layer of intense chocolate flavor. The combination of these elements creates a cake that’s complex in flavor, yet incredibly straightforward to make. It’s the kind of dessert that looks impressive but is secretly super easy, making you look like a baking superstar without all the effort.Gather Your Baking Arsenal: Ingredients for Your Earthquake Cake
Putting together an Earthquake Cake doesn’t require a trip to a specialty store. Most of these items are probably already lurking in your pantry! The beauty of this recipe is its accessibility and the way simple components come together to create something truly spectacular.
For the Chocolate Cake Layer:
- 1 (15.25 ounce) box devil’s food cake mix (or any chocolate cake mix)
- 1 cup buttermilk (or 1 cup milk with 1 tbsp vinegar/lemon juice, let sit 5 mins)
- 1/2 cup vegetable oil
- 3 large eggs
- 1 teaspoon vanilla extract
For the Gooey Cream Cheese Topping:
- 8 ounces cream cheese, softened
- 1/2 cup unsalted butter, softened
- 2 cups powdered sugar (confectioners’ sugar)
- 1 teaspoon vanilla extract
For the “Quake” Add-ins:
- 1 1/2 cups shredded sweetened coconut, toasted
- 1 cup chopped pecans, toasted
- 1 cup chocolate chips (semi-sweet or milk chocolate, your preference)
Let’s Get Baking: Crafting Your Chocolate Earthquake Cake
Creating this delightful disaster is surprisingly simple. Just follow these steps, and you’ll have a wonderfully gooey, chocolatey cake ready to impress.Step 1: Prep Your Pan and Preheat
First things first, preheat your oven to 350°F (175°C). Then, grab a 9×13 inch baking pan and give it a good spray with non-stick baking spray. You want to make sure every delicious morsel comes out easily!
Step 2: Mix the Cake Batter
In a large mixing bowl, combine the chocolate cake mix, buttermilk, vegetable oil, eggs, and vanilla extract. Beat with an electric mixer on medium speed for about 2 minutes, until the batter is smooth and well combined. Don’t overmix; just enough to get rid of any dry pockets. Pour this luscious chocolate batter evenly into your prepared 9×13 inch pan.
Step 3: Whip Up the Cream Cheese Filling
Now for the star of the show! In a separate medium bowl, beat the softened cream cheese and softened butter together until light and fluffy. This usually takes 1-2 minutes. Gradually add the powdered sugar, beating until smooth and creamy. Stir in the vanilla extract. You’ll have a wonderfully rich, spreadable mixture.

Tip: Ensure your cream cheese and butter are truly at room temperature. This makes for a much smoother, lump-free filling that’s easier to spread and swirl, creating those perfect gooey pockets.
Step 4: Layer the “Quake”
Dollop spoonfuls of the cream cheese mixture over the chocolate cake batter in the pan. Don’t worry about being neat; uneven dollops are part of the charm! Next, sprinkle the toasted coconut, toasted pecans, and chocolate chips evenly over the entire surface of the cake. This is where the magic starts to happen, setting the stage for those dramatic cracks and fissures.
Step 5: Bake to Perfection
Carefully transfer the pan to your preheated oven. Bake for 45-55 minutes, or until a wooden skewer inserted into the chocolate cake portion comes out with moist crumbs, but not wet batter. The cream cheese sections will still be soft and gooey, and the top will be beautifully cracked and golden brown. The “earthquake” effect should be well underway!
Step 6: Cool and Serve
Once baked, remove the cake from the oven and place it on a wire rack to cool completely. This is crucial; resisting the urge to cut into it warm allows the flavors to meld and the cake to set properly. Once cooled, slice and serve. It’s truly divine on its own, or with a scoop of vanilla ice cream.
Common Queries About This Gooey Delight
Got questions? I’ve got answers. This cake is pretty forgiving, but a few pointers can ensure your Earthquake Cake is an absolute triumph every time.What if I don’t have buttermilk?
No problem at all! You can easily make a buttermilk substitute. For every cup of buttermilk needed, simply pour 1 tablespoon of white vinegar or lemon juice into a liquid measuring cup, then fill the rest of the cup with regular milk (any fat percentage is fine). Give it a gentle stir and let it sit for about 5 minutes. It will curdle slightly, and that’s exactly what you want! Use it just as you would buttermilk.
Can I make this cake ahead of time?
Absolutely! This is a fantastic make-ahead dessert. You can bake the Earthquake Cake a day or two in advance. Store it covered loosely with plastic wrap at room temperature for up to 24 hours, or in the refrigerator for up to 3-4 days. Just bring it back to room temperature before serving for the best texture and flavor.
What are some good substitutions for pecans or coconut?
If pecans aren’t your jam, walnuts or chopped almonds would be excellent alternatives, providing a similar crunch. For coconut, if you’re not a fan, you could omit it entirely or replace it with an equal amount of additional nuts, or even some mini marshmallows for an extra gooey texture. The beauty of this cake is its flexibility!
Why did my cake sink in the middle?
While some sinking and cracking is intentional for an Earthquake Cake, excessive sinking might be due to a few things. Ensure your leavening agent (in the cake mix) isn’t expired. Also, avoid opening the oven door too frequently during baking, especially in the first 30 minutes, as sudden temperature changes can cause a cake to fall. Overmixing the batter can also lead to a denser cake that’s more prone to sinking.
How do I store leftover Earthquake Cake?
Leftovers should be stored in an airtight container in the refrigerator for up to 4-5 days. Because of the cream cheese component, it’s best not to leave it at room temperature for extended periods. You can enjoy it cold from the fridge, or let individual slices come to room temperature for about 30 minutes before serving.
Serving Suggestions & Pairing Ideas
This Earthquake Cake is a showstopper all on its own, but a few thoughtful additions can elevate it even further. For a truly decadent experience, serve a warm slice with a generous scoop of vanilla bean ice cream. The cold, creamy ice cream melting into the warm, gooey cake is pure bliss. A drizzle of homemade caramel sauce or a sprinkle of flaky sea salt over the top before serving adds another layer of complexity and sophistication. If you’re feeling extra fancy, a dollop of freshly whipped cream can’t be beat. For a lighter touch, a cup of strong coffee or a glass of cold milk makes the perfect accompaniment. It’s versatile enough to fit any occasion.Variations to Keep Things Exciting
While the classic Earthquake Cake is perfection, there’s always room to play! Here are a few ideas to switch things up: Nutty Explosion: Use a mix of different nuts – walnuts, almonds, hazelnuts – instead of just pecans for a more complex nutty profile. Caramel Swirl: Before adding the cream cheese mixture, drizzle some caramel sauce over the chocolate cake batter for an extra layer of gooey sweetness. White Chocolate Dream: Swap out the dark chocolate chips for white chocolate chips for a sweeter, creamier contrast. You could even use a yellow cake mix instead of chocolate for a “blonde” Earthquake Cake. Minty Fresh: Add a few drops of peppermint extract to the chocolate cake batter or sprinkle some crushed peppermint candies along with the chocolate chips for a festive twist, especially around the holidays. Boozy Bake: A splash of coffee liqueur or bourbon added to the chocolate cake batter can deepen the flavors and add a sophisticated edge. Don’t be afraid to experiment with your favorite flavors and textures. The base recipe is so sturdy and delicious, it can handle a little creative flair!
The Ultimate Earthquake Cake
A deliciously gooey chocolate cake layered with toasted coconut, pecans, and a creamy, crackled cream cheese topping. Perfect for any gathering!
📝 Ingredients
👩🍳 Instructions
- 1Preheat oven to 350°F (175°C). Lightly grease and flour a 9x13 inch baking pan.
- 2In a large bowl, combine cake mix, buttermilk, vegetable oil, eggs, and 1 teaspoon vanilla extract. Beat with an electric mixer on medium speed for 2 minutes until smooth. Pour batter into the prepared baking pan.
- 3In a separate medium bowl, beat softened cream cheese and softened butter until light and fluffy. Gradually add powdered sugar, beating until smooth. Stir in 1 teaspoon vanilla extract.
- 4Dollop spoonfuls of the cream cheese mixture over the chocolate cake batter in the pan. Sprinkle toasted coconut, toasted pecans, and chocolate chips evenly over the top.
- 5Bake for 45-55 minutes, or until a wooden skewer inserted into the chocolate cake portion comes out with moist crumbs (not wet batter). The cream cheese areas will still be soft and gooey.
- 6Remove from oven and let cool completely on a wire rack before slicing and serving.
💡 Notes
Ensure cream cheese and butter are at room temperature for a smooth filling. Toasting coconut and pecans significantly enhances their flavor. Store leftover cake in an airtight container in the refrigerator for up to 4-5 days.



