


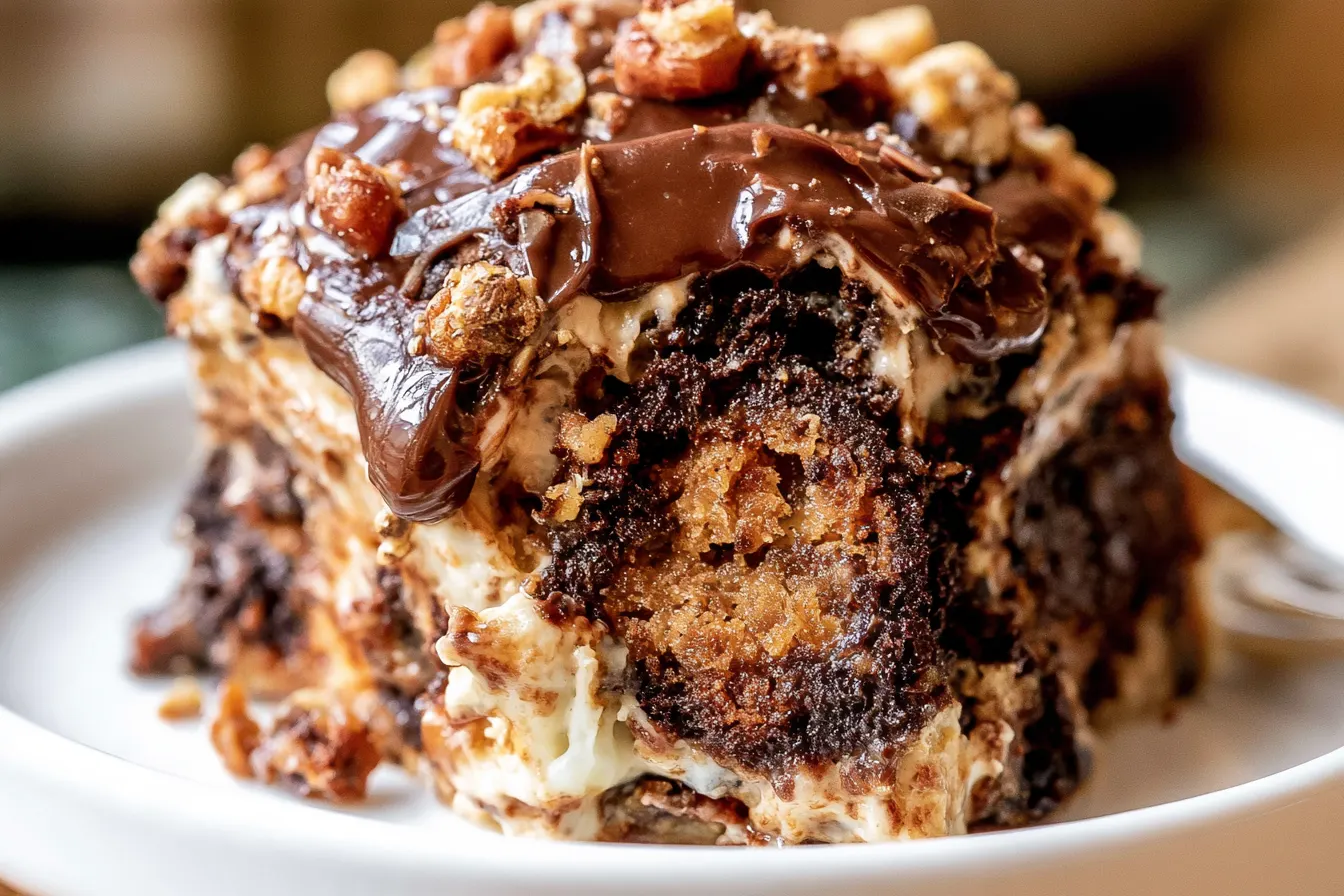
Ever had one of those days where you just needed a serious chocolate fix, but everything in the pantry felt… underwhelming? That’s exactly how I stumbled upon this incredible Earthquake Cake. It’s a dessert that not only satisfies every chocolate craving but also brings a fun, unexpected element to the table with its “cracked” top and gooey center. Forget complicated techniques; this cake is all about maximum flavor with minimal fuss, making it an absolute winner for any occasion that calls for a show-stopping sweet.
- A Little Backstory on This Wonder Cake
- What Makes This Earthquake Cake Stand Out?
- Gather Your Supplies: Ingredients for Your Earth-Shattering Dessert
- Making the Magic Happen: Step-by-Step Earthquake Cake
- Top Tips for an Unforgettable Earthquake Cake
- Storage & Reheating Notes
- Answers to Your Burning Questions About Earthquake Cake
- Why This Cake is a Must-Make for Your Next Gathering

A Little Backstory on This Wonder Cake
The name “Earthquake Cake” isn’t just a clever marketing ploy; it perfectly describes the visual effect you get when this cake emerges from the oven. As the cake bakes, the cream cheese mixture, laden with coconut and pecans, sinks and rises and cracks, creating a beautiful, almost topographical landscape on top. It looks like the earth has quite literally shifted, leaving behind delicious fissures and valleys. Origin stories for recipes can be murky, but the consensus is that this particular style of cake gained popularity in the American South, known for its love of rich, comforting desserts. It’s a testament to simple ingredients coming together in a spectacular way. While many versions exist, my goal was to perfect a recipe that balanced the sweetness with a deep chocolate flavor, ensuring every component shone through without overpowering the others. I’ve tried versions that were too dry, too sweet, or lacked that crucial gooey factor. This one? It’s just right.What Makes This Earthquake Cake Stand Out?
You might be thinking, “Another chocolate cake recipe?” But trust me, this isn’t just *another* cake. What sets this particular Earthquake Cake apart is the meticulous balance of textures and flavors. We’re not just dumping ingredients into a pan; we’re building layers of deliciousness. First, the cake base: many recipes call for a simple boxed mix, and while that works, I’ve found that starting with a slightly doctored mix (or even a scratch cake, if you’re feeling ambitious!) provides a superior foundation. The key is to keep it moist and tender, a perfect canvas for the richer elements. Then comes the magic: a generous layer of toasted coconut and pecans. Toasting them beforehand is non-negotiable; it brings out their nutty essence and adds an incredible depth of flavor that raw nuts simply can’t provide. Finally, the cream cheese topping isn’t just dolloped on top. It’s a rich, slightly tangy mixture that seeps into the cake as it bakes, creating those signature gooey pockets and that delightful crackled crust. The contrast between the soft cake, the crunchy nuts, the chewy coconut, and the creamy filling is what elevates this from a good cake to an unforgettable one. It’s a symphony of textures and tastes in every single bite.
Gather Your Supplies: Ingredients for Your Earth-Shattering Dessert
You won’t need any exotic ingredients for this one, just good quality pantry staples. The beauty of this Earthquake Cake is in its simplicity, proving that sometimes the best desserts are made from the most humble components.For the Chocolate Cake Base:
- 1 (15.25 ounce) box chocolate cake mix: Any good quality brand will do. I often opt for a devil’s food or dark chocolate mix for extra richness.
- 1 cup milk: Whole milk works best for richness, but 2% is fine too.
- ½ cup vegetable oil: Or any neutral oil like canola.
- 3 large eggs: Room temperature eggs incorporate better into the batter.
- 1 teaspoon vanilla extract: Don’t skip this; it enhances the chocolate flavor.
For the Irresistible Topping:
- 8 ounces cream cheese: Full-fat, softened to room temperature. This is crucial for a smooth mixture.
- ½ cup (1 stick) unsalted butter: Also softened.
- 2 cups powdered sugar: Sifted, if you want to avoid any lumps.
- 1 teaspoon vanilla extract: Again, for that lovely aromatic boost.
- 1 ½ cups shredded coconut: Sweetened or unsweetened, depending on your preference. I like sweetened for this.
- 1 cup chopped pecans: Lightly toasted for maximum flavor.
Making the Magic Happen: Step-by-Step Earthquake Cake
Ready to get baking? This process is straightforward, but a few key steps will ensure your cake comes out perfectly gooey and delicious every time.Prepping Your Pan and Oven
First things first, preheat your oven to 350°F (175°C). Grab a 9×13 inch baking dish and grease it really well. I like to use a baking spray with flour to ensure absolutely no sticking, especially with all the gooey goodness. This cake is too good to leave stuck to the pan!
Whipping Up the Cake Batter
In a large bowl, combine the chocolate cake mix, milk, vegetable oil, eggs, and vanilla extract. Beat with an electric mixer on medium speed for about 2 minutes, until the batter is smooth and well combined. You want to make sure there are no dry pockets of cake mix left. Pour this beautiful chocolate batter evenly into your prepared 9×13 inch baking dish.

Assembling the Topping Components
Now for the star of the show! In a separate medium bowl, combine the softened cream cheese, softened butter, powdered sugar, and vanilla extract. Beat with an electric mixer until the mixture is light, fluffy, and completely smooth. This might take a few minutes, so be patient. You don’t want any lumps of cream cheese or butter in your topping.
Next, sprinkle the shredded coconut evenly over the chocolate cake batter. Follow that with an even layer of the chopped pecans. Don’t be shy here; these are going to add incredible texture and flavor. Tip: If you’re using unsweetened coconut, you might want to give it a quick toast in a dry pan for a few minutes until fragrant and lightly golden before sprinkling it on. This really amplifies its flavor.
The “Earthquake” Effect
Dollop spoonfuls of the cream cheese mixture randomly over the coconut and pecans. Don’t try to spread it out too much; the idea is for it to be in distinct blobs. As it bakes, it will melt, spread, and sink into the cake, creating those signature cracks and gooey pockets. Resist the urge to swirl it in; the beauty is in the natural “earthquake” effect.
Baking to Perfection
Place your baking dish into the preheated oven. Bake for 45-55 minutes, or until a wooden skewer or toothpick inserted into the cake part (not into a cream cheese blob) comes out with moist crumbs attached, but not wet batter. The cream cheese topping will be golden brown and beautifully crackled. The aroma filling your kitchen right now will be absolutely heavenly!
Cooling and Serving
Once baked, remove the cake from the oven and let it cool on a wire rack for at least 30 minutes before serving. This allows the cake to set up and the gooey pockets to fully form. While it’s delicious warm, it’s even better at room temperature. A slightly warm slice with a scoop of vanilla ice cream? Pure bliss!
Top Tips for an Unforgettable Earthquake Cake
Want to ensure your Earthquake Cake is the talk of the town? Here are a few insider tips that make all the difference.Room Temperature Ingredients are Key
For both the cake batter and especially the cream cheese topping, ensure your eggs, milk, butter, and cream cheese are at room temperature. This allows them to emulsify properly, creating a smoother batter and a lump-free, creamy topping. Cold cream cheese leads to lumpy topping, and nobody wants that!
Don’t Skimp on the Grease
This cake is incredibly moist and gooey, which means it loves to stick to the pan. Use a generous amount of non-stick cooking spray, or butter and flour your baking dish thoroughly. Lining the bottom with parchment paper can also be a good extra precaution, especially if you plan to remove the cake from the pan.
Toasting is a Must
I mentioned it before, but it bears repeating: toast your pecans! A few minutes in a dry skillet over medium heat or 5-7 minutes in a 350°F (175°C) oven until fragrant makes an enormous difference in their flavor profile. It brings out their natural oils and nuttiness, elevating the whole cake. This is a small step that yields huge flavor rewards.
Patience During Cooling
It’s tempting to dive into this cake straight out of the oven, but giving it time to cool on a wire rack allows the internal structure to set. The gooey cream cheese pockets will firm up just enough to be perfectly luscious, rather than runny. A good 30-60 minutes will make a big difference in both texture and ease of serving.
Storage & Reheating Notes
Got leftovers? Lucky you! This Earthquake Cake keeps beautifully, and some even argue it tastes better the next day as the flavors meld further.Keeping it Fresh
Due to the cream cheese topping, this cake should be stored in an airtight container in the refrigerator. It will stay fresh and delicious for 3-4 days. I often cover the baking dish tightly with plastic wrap or aluminum foil. Make sure it’s completely cooled before refrigerating to prevent condensation.
Reheating for Warm Gooeyness
If you prefer your cake warm (and who wouldn’t want that gooey goodness again?), you can gently reheat individual slices. A quick 15-20 seconds in the microwave is usually enough to soften the cream cheese and warm the chocolate cake without drying it out. Alternatively, you can warm a larger piece in a low oven (around 250°F/120°C) for 10-15 minutes until just warmed through.
Freezing for Later
Yes, you can freeze Earthquake Cake! Wrap individual slices or the entire cooled cake (if you haven’t cut into it) tightly in plastic wrap, then an additional layer of aluminum foil. It will keep well in the freezer for up to 2-3 months. Thaw overnight in the refrigerator before serving, and you can warm it slightly if desired.
Answers to Your Burning Questions About Earthquake Cake
I get a lot of questions about this cake, and for good reason! It’s a unique dessert, and sometimes a little guidance goes a long way.Can I make this Earthquake Cake from scratch instead of a mix?
Absolutely! If you have a favorite chocolate cake recipe from scratch that yields a moist, tender crumb, feel free to use that. Just prepare the scratch cake batter according to your recipe, pour it into the pan, and then proceed with the coconut, pecans, and cream cheese topping as directed. The baking time might vary slightly, so keep an eye on it.
What if I don’t like coconut or pecans?
No problem! The beauty of this cake is its adaptability. If coconut isn’t your thing, simply omit it. For pecans, you can substitute with other chopped nuts like walnuts or almonds. Or, if you’re not a fan of nuts either, you can replace them with chocolate chips (milk, semi-sweet, or even white chocolate!) for an extra dose of chocolatey goodness. The core idea is a textured element with the cream cheese.
My cream cheese topping looks lumpy after mixing. What went wrong?
This usually happens when the cream cheese and/or butter aren’t sufficiently softened. It’s crucial for them to be at room temperature so they can beat into a smooth, homogeneous mixture. If yours is lumpy, try beating it for a few more minutes, or gently warming the bowl over a pot of simmering water (be careful not to melt it completely) to help soften any stubborn lumps, then beat again until smooth.
How do I know when the cake is fully baked?
The best way to check is to insert a wooden skewer or toothpick into the chocolate cake portion, avoiding the cream cheese pockets. If it comes out with moist crumbs attached (not wet batter), it’s ready. The cream cheese topping will be set and golden brown, and the cracks will be prominent. Overbaking can dry out the cake, so keep a close watch, especially toward the end of the baking time.
Can I add other flavorings to the cake or topping?
Definitely! You could add a touch of almond extract to the cream cheese topping for a different flavor profile, or even a teaspoon of espresso powder to the chocolate cake batter to deepen the chocolate flavor. A swirl of caramel or hot fudge sauce over the top after it’s cooled would also be divine. Feel free to experiment and make it your own!
Why This Cake is a Must-Make for Your Next Gathering
Whether you’re hosting a game day, a potluck, a birthday party, or just need a comforting dessert for a cozy evening in, this Chocolate Earthquake Cake fits the bill perfectly. It’s visually stunning, incredibly delicious, and deceptively easy to make. It looks like you’ve spent hours slaving away, but in reality, it’s a relatively simple recipe that delivers maximum impact. The combination of the rich chocolate, the sweet and chewy coconut, the crunchy pecans, and the creamy, tangy cream cheese creates a dessert that appeals to almost everyone. It’s got that home-baked charm with a touch of gourmet flair. Plus, it transports well and serves a crowd generously, making it an ideal choice when you need a reliable, crowd-pleasing dessert that will disappear fast. So go ahead, preheat that oven, gather your ingredients, and prepare to unleash a delicious earthquake in your kitchen. Your taste buds (and your guests) will thank you!
Chocolate Earthquake Cake
A delightful chocolate cake with a gooey, crackled cream cheese, coconut, and pecan topping that's easy to make.
📝 Ingredients
👩🍳 Instructions
- 1Preheat your oven to 350°F (175°C). Grease a 9x13 inch baking dish thoroughly.
- 2In a large bowl, combine the chocolate cake mix, milk, vegetable oil, eggs, and 1 teaspoon vanilla extract. Beat with an electric mixer on medium speed for 2 minutes until smooth. Pour the batter evenly into the prepared baking dish.
- 3In a separate medium bowl, beat the softened cream cheese, softened butter, powdered sugar, and 1 teaspoon vanilla extract with an electric mixer until light, fluffy, and completely smooth.
- 4Sprinkle the shredded coconut evenly over the chocolate cake batter. Follow with the toasted chopped pecans.
- 5Dollop spoonfuls of the cream cheese mixture randomly over the coconut and pecans. Do not spread it out; it will melt and crack as it bakes.
- 6Bake for 45-55 minutes, or until a wooden skewer or toothpick inserted into the cake part (avoiding cream cheese blobs) comes out with moist crumbs attached. The topping will be golden and cracked.
- 7Remove from the oven and let cool on a wire rack for at least 30 minutes before serving. For best results, cool to room temperature.
💡 Notes
Ensure all dairy ingredients (milk, eggs, cream cheese, butter) are at room temperature for the best texture. Toasting pecans enhances their flavor significantly. Store leftovers in an airtight container in the refrigerator for up to 3-4 days. This cake can also be frozen for up to 2-3 months.



