


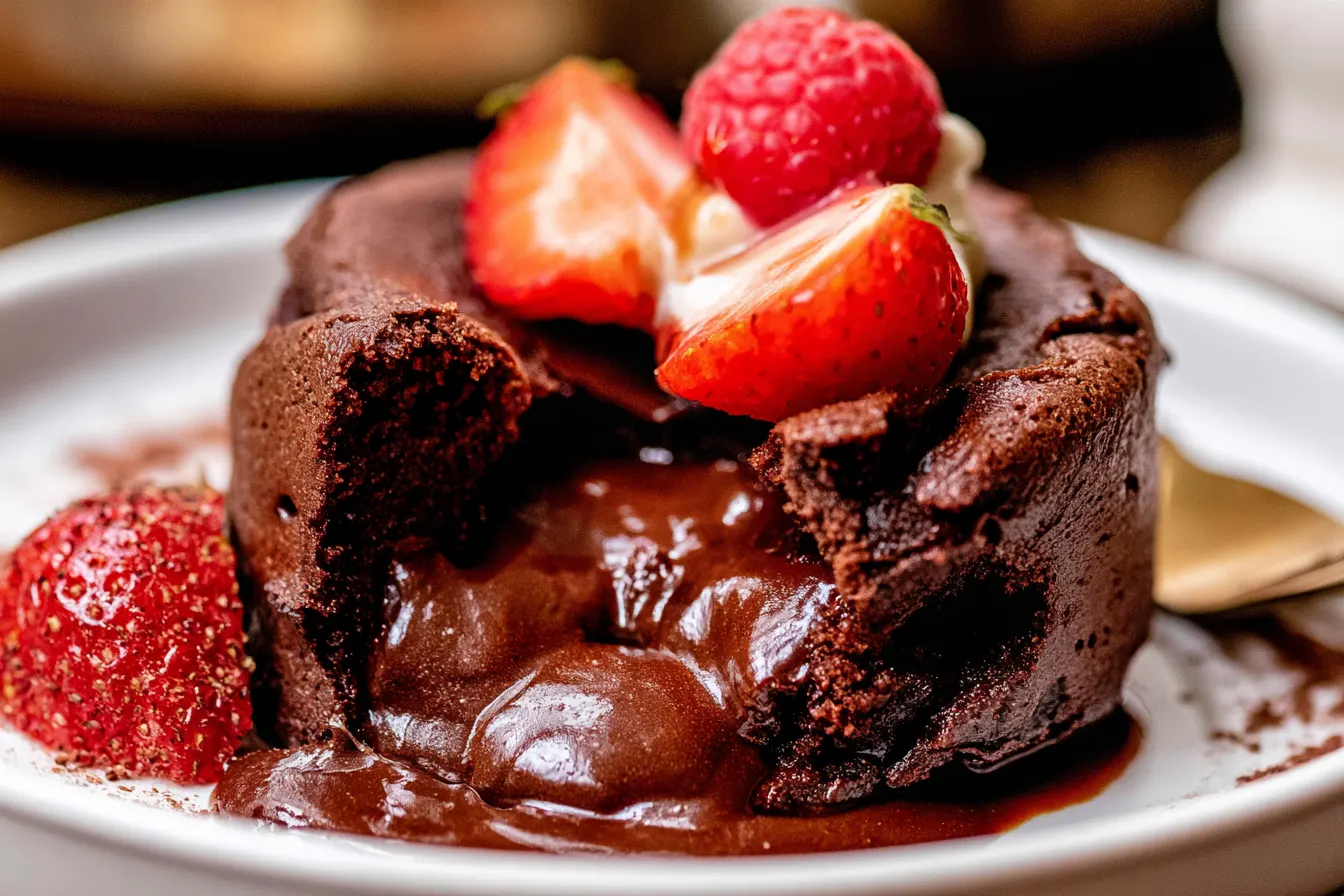
Have you ever stared at a restaurant dessert menu, eyes glazing over all the options, only to land squarely on the words “chocolate lava cake” and know, deep in your soul, that’s exactly what you need? That moment of anticipation, the first delicate slice into the cake, and then the glorious molten chocolate oozing out onto the plate – it’s pure magic. What if I told you that same magic, that intensely satisfying chocolate experience, is not only achievable in your own kitchen but also surprisingly simple and quick?

Why This Molten Chocolate Cake Recipe Just Works
There are a million lava cake recipes out there, so why bother with this one? Well, I’ve probably tried a good chunk of them, and this particular rendition cuts through the noise for a few key reasons. First off, it keeps things gloriously uncomplicated. You won’t find a laundry list of obscure ingredients or techniques that require a culinary degree. We’re talking basic pantry staples you likely already have on hand. What truly sets this recipe apart, though, is its foolproof nature. The balance of ingredients ensures that rich, dark chocolate flavor without being overly sweet. It’s about achieving that perfect structural integrity – a cake that holds its shape beautifully – while still guaranteeing that delightful molten core. We’re not aiming for a fully baked cupcake here; we want that glorious spill of chocolate when you dig in. It’s designed to give you that “wow” factor with minimal fuss.Gather Your Goodies: What You’ll Need
One of the beauties of these individual chocolate lava cakes is the simplicity of the ingredient list. No need for a special trip to a gourmet store; your everyday grocery run should cover it.The Essentials for Your Chocolate Bliss
- Unsalted Butter: The backbone of richness. Make sure it’s good quality; you’ll taste it.
- Bittersweet Chocolate: This is non-negotiable for that deep, intense chocolate flavor. Look for something around 60-70% cacao. Chocolate chips work, but a good quality bar, finely chopped, will melt more smoothly and offer a superior flavor.
- Granulated Sugar: Just enough to sweeten without overpowering the chocolate.
- Large Eggs & Egg Yolks: The eggs provide structure and richness, while the extra yolks contribute to that incredibly fudgy, molten center.
- All-Purpose Flour: Only a tiny bit! This helps bind the cake just enough so it holds together but doesn’t become too bready.
- Vanilla Extract: Enhances the chocolate flavor, adding a warm, aromatic depth.
- Pinch of Salt: Crucial for balancing sweetness and intensifying the chocolate. Don’t skip it!

Crafting Your Molten Masterpiece: Step-by-Step
Making these chocolate lava cakes is surprisingly intuitive. It’s mostly about melting, stirring, and knowing when to pull them from the oven. Don’t be intimidated by the fancy name; it’s genuinely simple.Getting Started: Prep Your Tools
- Preheat and Prep: Begin by preheating your oven to 425°F (220°C). This high temperature is key to cooking the outside quickly while leaving the inside gooey. Grease four 6-ounce ramekins generously with butter. A little dusting of cocoa powder after greasing helps prevent sticking and adds a professional finish – plus, it makes unmolding a breeze.
- Melt the Chocolate & Butter: In a heatproof bowl, combine the bittersweet chocolate and unsalted butter. Set this bowl over a saucepan of simmering water (creating a double boiler) or microwave in 30-second intervals, stirring until completely melted and smooth. Be careful not to let any water get into the chocolate. Once melted, remove from heat and let it cool slightly for a few minutes.
Bringing the Batter Together
- Whisk Eggs and Sugar: In a separate medium bowl, whisk together the granulated sugar, whole eggs, and extra egg yolks until they’re light in color and slightly thickened. This usually takes about 2-3 minutes with a hand whisk. You’re incorporating air, which helps with the cake’s texture.
- Combine Wet Ingredients: Gently fold the slightly cooled chocolate mixture into the egg mixture. Mix until just combined – don’t overmix here! You want a smooth, homogenous batter.
- Introduce the Dry: Sift the all-purpose flour and salt over the chocolate mixture. Using a rubber spatula, fold these dry ingredients in until just incorporated. A few streaks of flour are okay; overmixing develops gluten, which can make your cakes tough. Finally, stir in the vanilla extract.

Baking and Serving
- Fill the Ramekins: Divide the batter evenly among your prepared ramekins. They should be about two-thirds full. Place the ramekins on a baking sheet – this makes them easier to transfer in and out of the oven.
- Bake to Perfection: Bake for 12-15 minutes. The edges of the cakes should be set and firm, but the centers should still look slightly soft and jiggly when you gently shake a ramekin. This jiggle is your sign of that glorious molten core!
Tip: Oven temperatures can vary wildly, so keep a close eye on them, especially the first time you make this. Start checking around the 11-minute mark. - Serve Immediately: Carefully remove the ramekins from the oven. Let them rest for 1-2 minutes. Then, invert each cake onto a dessert plate. A quick tap on the bottom of the ramekin should release it. Serve these beauties immediately, perhaps with a dusting of powdered sugar, a scoop of vanilla bean ice cream, or some fresh berries.
Frequently Asked Questions About Lava Cakes
Got questions about mastering this molten delight? Here are some common queries I get about making these chocolate lava cakes.Can I prepare the batter ahead of time?
Absolutely! You can mix the batter up to 24 hours in advance. Just cover the bowl tightly with plastic wrap and refrigerate. When you’re ready to bake, give the batter a quick stir and then pour it into your ramekins. You might need to add a minute or two to the baking time if the batter is very cold from the fridge.What if my lava cake doesn’t have a molten center?
This usually means it was overbaked. The key is to look for set edges and a jiggly center. Every oven is different, so it’s a good idea to test one cake first if you’re unsure, or start checking a few minutes before the recipe suggests. Next time, pull them out a minute or two sooner.Can I make these without ramekins?
While ramekins are ideal for their individual portion size and even baking, you can use other oven-safe dishes. Muffin tins can work in a pinch, but they’ll bake much faster, so watch them closely. Just make sure whatever you use is well-greased. The molten effect will be less dramatic in larger, shallower dishes.What’s the best way to unmold a lava cake?
The trick is to grease your ramekins *really* well, and consider dusting them with cocoa powder after greasing. Once baked, let the cakes rest for just 1-2 minutes in the ramekin – this allows them to firm up slightly. Then, place a plate over the ramekin and quickly invert it. A gentle shake or tap on the bottom should release the cake.What kind of chocolate should I use?
For the best flavor, go for a high-quality bittersweet chocolate (60-70% cacao). This provides that deep, intense chocolate taste that’s characteristic of a great lava cake. Milk chocolate won’t give you the same depth, and unsweetened chocolate will be too bitter. Good quality chocolate chips can work, but chopped baking bars usually melt more smoothly.Enhancements and Serving Suggestions
While a classic chocolate lava cake is perfect on its own, a few thoughtful additions can elevate the experience even further. Think about what complements that rich, dark chocolate. A simple dusting of powdered sugar is elegant and provides a lovely visual contrast. For something a little more indulgent, a scoop of good quality vanilla bean ice cream melting alongside the warm cake is heavenly. The cold cream against the hot chocolate is a textural and temperature delight. Fresh berries – raspberries or strawberries – add a touch of tartness that cuts through the richness beautifully. A dollop of freshly whipped cream, perhaps infused with a hint of espresso or orange zest, is another fantastic option. For the true chocoholic, a drizzle of chocolate sauce (or even a little extra melted chocolate) couldn’t hurt!Storing and Reheating Any Leftovers
If, by some miracle, you have any leftover chocolate lava cakes, you can store them in an airtight container in the refrigerator for up to 2-3 days. They won’t have the same molten center straight from the fridge, of course. To reheat, place them in a microwave for 20-30 seconds, or until just warmed through and the center becomes gooey again. Alternatively, you can gently warm them in a preheated oven at 300°F (150°C) for about 5-7 minutes. Be careful not to overheat, or you’ll lose that lovely molten core! Enjoy this taste of pure decadence; you’ve earned it!
Decadent Chocolate Lava Cakes
These easy chocolate lava cakes feature a rich, dark chocolate exterior and a luscious molten center, perfect for impressing guests in under an hour.
📝 Ingredients
👩🍳 Instructions
- 1Preheat your oven to 425°F (220°C). Generously grease four 6-ounce ramekins with butter. For easy unmolding and a professional finish, dust the inside of each ramekin with cocoa powder, tapping out any excess.
- 2In a heatproof bowl, combine the chopped bittersweet chocolate and 1/2 cup unsalted butter. Melt gently over a saucepan of simmering water (double boiler method) or in the microwave in 30-second bursts, stirring until completely smooth. Remove from heat and let cool slightly for a few minutes.
- 3In a separate medium bowl, whisk together the granulated sugar, 2 large eggs, and 2 large egg yolks until the mixture is light in color and slightly thickened, about 2-3 minutes. This incorporates air, contributing to the cake's texture.
- 4Gradually fold the slightly cooled chocolate-butter mixture into the egg mixture. Stir until just combined; avoid overmixing.
- 5Sift the all-purpose flour and a pinch of salt over the chocolate mixture. Using a rubber spatula, gently fold these dry ingredients into the batter until just incorporated, being careful not to overmix. Stir in the vanilla extract.
- 6Divide the batter evenly among the prepared ramekins, filling each about two-thirds full. Place the ramekins on a baking sheet for easier handling.
- 7Bake for 12-15 minutes. The edges of the cakes should appear set and firm, but the centers should still be visibly soft and jiggly when you gently shake a ramekin. This jiggle indicates the molten core. (Note: Baking time can vary by oven; start checking at 11 minutes.)
- 8Carefully remove the ramekins from the oven. Let them rest for 1-2 minutes. Then, place a serving plate over each ramekin and invert to unmold the cake. A gentle tap on the bottom should release it. Serve immediately with a dusting of powdered sugar, a scoop of vanilla ice cream, or fresh berries, if desired.
💡 Notes
For best results, use good quality bittersweet chocolate. The batter can be made up to 24 hours in advance and refrigerated; allow it to come closer to room temperature before baking or add 1-2 minutes to bake time. Leftovers can be reheated in the microwave for 20-30 seconds until warm and gooey.



