


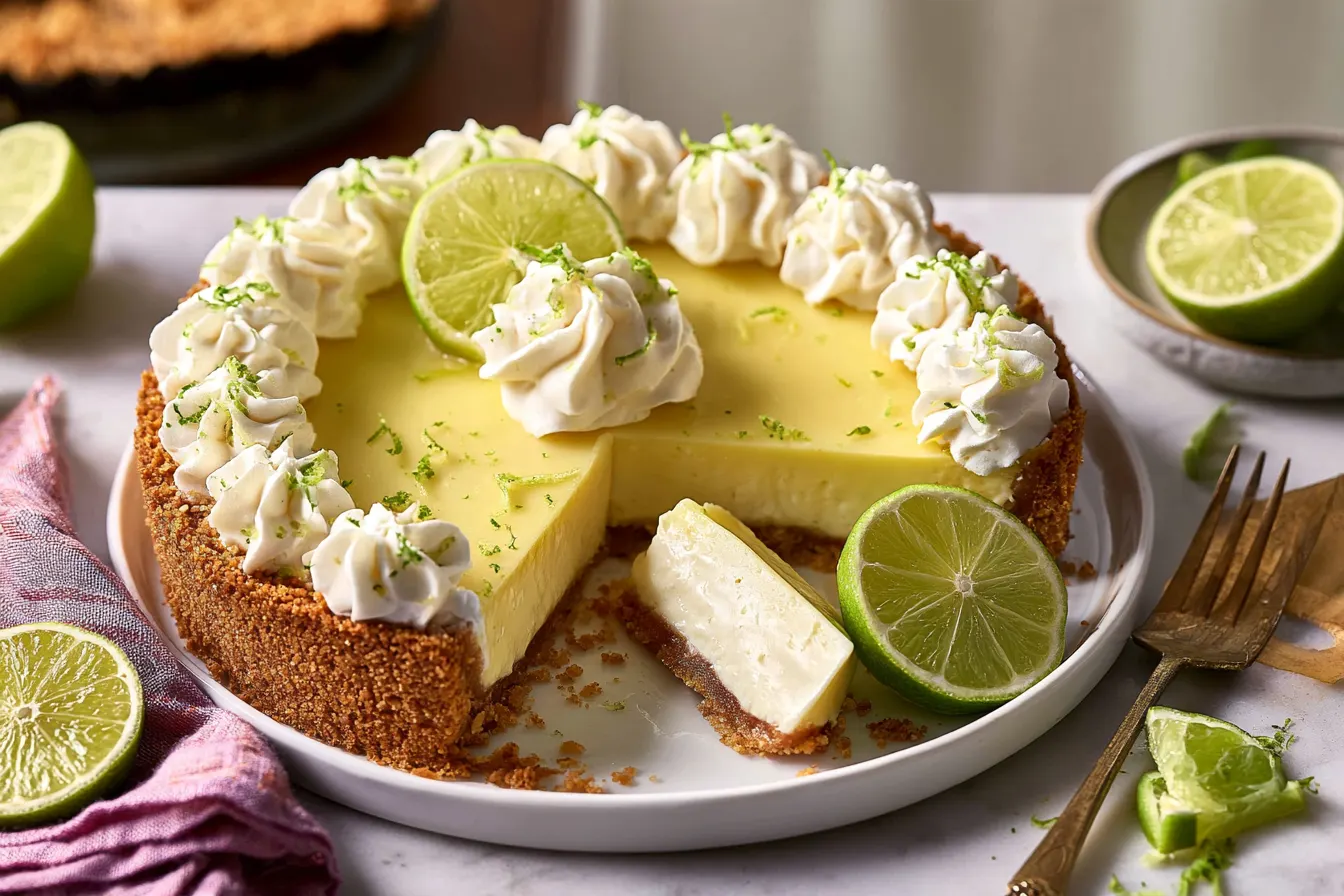
Forget everything you think you know about making Key Lime Pie. This isn’t just another recipe; it’s a revelation. I once spent an entire summer chasing the perfect balance of tart and sweet, going through more tiny limes than I care to admit. Store-bought crusts crumbled, fillings were too dense or too runny, and the “lime” flavor often tasted more like cleaning products than sunshine. After many trials and errors, I finally cracked the code to a pie that sings with bright, authentic key lime zest and a creamy, dreamy texture.
- Mastering the Zest: Why Key Limes Reign Supreme
- Gathering Your Key Lime Pie Essentials
- Crafting Your Key Lime Pie: Step by Step
- Key Lime Pie Common Questions & Clever Solutions
- The Science of Sweetness: Why Condensed Milk Works Wonders
- A Slice of Sunshine: Serving Suggestions
- Storing Your Leftover Key Lime Pie
- Why This Key Lime Pie Recipe is a Cut Above

Mastering the Zest: Why Key Limes Reign Supreme
Let’s get one thing straight from the start: you *must* use actual key limes for this recipe. While regular Persian limes can be a convenient substitute in a pinch, they simply don’t offer the same nuanced, aromatic tartness that key limes bring to the table. Their juice is more intensely floral, sweeter, and has a distinct zippiness that regular limes can’t replicate. It’s the soul of this pie, truly. Finding key limes can sometimes be a bit of a treasure hunt, but they’re usually available in larger grocery stores, especially during warmer months. They’re much smaller than their Persian cousins, with a slightly more yellowish-green hue when ripe. Don’t be deterred by their size; it just means you’ll need a few more to get enough juice. The effort is absolutely worth it.A Note on Freshness and Flavor
The fresher your key limes, the more vibrant your pie will taste. Try to pick limes that feel heavy for their size and give slightly when squeezed. Avoid any that are too hard or have noticeable blemishes. Zesting them before juicing is crucial – that’s where a lot of the essential oils and aroma are concentrated, adding another layer of complexity to your pie. Don’t skip that step!Gathering Your Key Lime Pie Essentials
Every great pie starts with a carefully curated list of ingredients. For this delightful creation, we’re focusing on quality and simplicity.For the Buttery Graham Cracker Crust
- 1 ½ cups (about 12-14 sheets) graham cracker crumbs
- ¼ cup granulated sugar
- ¼ teaspoon fine sea salt
- 6 tablespoons unsalted butter, melted
For the Irresistible Key Lime Filling
- 1 (14-ounce) can sweetened condensed milk
- ½ cup key lime juice (freshly squeezed is non-negotiable!)
- 1 tablespoon key lime zest (from about 3-4 key limes)
- 2 large egg yolks
For the Dreamy Vanilla Bean Whipped Cream Topping
- 1 ½ cups cold heavy cream
- 3 tablespoons confectioners’ sugar
- ½ teaspoon pure vanilla extract or vanilla bean paste

Crafting Your Key Lime Pie: Step by Step
Making this pie is a joyful process, a dance between sweet and tart. Follow these steps for a perfect outcome every time.Building the Perfect Crust
Preheat your oven to 350°F (175°C). In a medium bowl, combine the graham cracker crumbs, granulated sugar, and salt. Stir these dry ingredients together until they’re thoroughly mixed. This ensures an even distribution of flavor throughout your crust.
Pour the melted butter over the crumb mixture. Use a fork or your fingertips to combine everything until the crumbs are uniformly moistened. It should feel like wet sand and hold together when you press a small amount in your hand.
Press the mixture firmly and evenly into the bottom and up the sides of a 9-inch pie plate. You can use the bottom of a measuring cup or your knuckles to get a nice, compact base. Bake the crust for 8-10 minutes, or until it’s lightly golden and fragrant. Remove it from the oven and let it cool completely on a wire rack while you prepare the filling.
Whipping Up the Tangy Filling
In a large bowl, whisk together the sweetened condensed milk, fresh key lime juice, key lime zest, and egg yolks until the mixture is smooth and well combined. Don’t overmix; you just want everything incorporated. The mixture will thicken slightly as you whisk.
Pour the vibrant key lime filling into the cooled graham cracker crust. Gently tap the pie plate on the counter a few times to release any air bubbles.
Bake the pie for 15-20 minutes, or until the edges are set but the center still has a slight jiggle. Tip: Don’t overbake! Overbaking can lead to a rubbery texture, and we’re aiming for a silky, creamy consistency. A slight jiggle in the center is exactly what you want.
Remove the pie from the oven and let it cool completely on a wire rack. Once it’s at room temperature, cover it loosely with plastic wrap and refrigerate for at least 4 hours, or preferably overnight, to allow it to set properly. Chilling is crucial for that perfect slice.

Crafting the Heavenly Whipped Cream
Just before serving, prepare your vanilla bean whipped cream. In a chilled large bowl, combine the cold heavy cream, confectioners’ sugar, and vanilla extract (or paste). Using an electric mixer, beat on medium-high speed until medium-stiff peaks form. Be careful not to overbeat, or you’ll end up with butter!
Spoon or pipe the whipped cream generously over the chilled key lime pie. Garnish with a few extra lime zest curls or thin lime slices, if you’re feeling fancy. Slice and serve immediately.
Key Lime Pie Common Questions & Clever Solutions
Even the most straightforward recipes can spark a few questions. Here are some of the most common inquiries about making a fantastic key lime pie.Can I use bottled key lime juice?
While fresh key lime juice is strongly recommended for the best flavor, if you absolutely can’t find fresh key limes, bottled key lime juice (specifically “Key Lime Juice” and not just “Lime Juice”) can be used. Just be aware that the flavor won’t be quite as bright and nuanced. Adjust the zest amount slightly if using bottled juice, as it often lacks that aromatic punch.
My pie filling seems too runny after chilling. What went wrong?
A runny filling is usually a sign of one of two things: either the pie wasn’t baked quite long enough, or it wasn’t chilled for an adequate amount of time. Ensure the edges are set and the center has just a slight jiggle, not a liquid wobble, before removing it from the oven. Also, resist the urge to cut into it too soon; those 4 hours (or overnight) in the fridge are essential for the filling to firm up.
How do I prevent my graham cracker crust from getting soggy?
The key to a crisp crust is pre-baking it before adding the filling. This helps to dry it out and creates a barrier against the moisture from the filling. Also, make sure your melted butter is fully incorporated into the crumbs so it acts as a sealant. If your crust still seems prone to sogginess, you can brush a very thin layer of egg white over the baked crust and bake for another 2-3 minutes before adding the filling.
Can I make this pie ahead of time?
Absolutely! Key lime pie is an excellent make-ahead dessert. You can prepare the entire pie (crust and filling) up to two days in advance. Store it, covered loosely with plastic wrap, in the refrigerator. Wait to add the whipped cream topping until just before serving for the freshest taste and best texture.
What’s the best way to slice a clean piece of key lime pie?
For perfectly clean slices, make sure your pie is thoroughly chilled. Use a sharp, thin knife and run it under hot water before each cut, wiping it clean between slices. This will help prevent the filling from sticking and dragging.
The Science of Sweetness: Why Condensed Milk Works Wonders
Sweetened condensed milk isn’t just a sweetener here; it’s a structural marvel. Its thick, viscous nature, combined with its high sugar content, reacts with the acidity of the key lime juice and the proteins in the egg yolks. This reaction causes the mixture to thicken and set without requiring excessive baking, leading to that signature silky, almost custard-like texture of a perfect key lime pie. It’s truly a genius shortcut, replacing traditional custards that often require a double boiler and more delicate temperature control. Without this magical ingredient, you’d be looking at a very different, likely much more complicated, pie. It contributes significantly to the pie’s creamy mouthfeel and rich flavor profile, balancing the sharp tang of the key limes beautifully.A Slice of Sunshine: Serving Suggestions
This key lime pie is a showstopper all on its own, but a few thoughtful touches can elevate the experience even further.Classic Companions
The vanilla bean whipped cream is non-negotiable for me. Its airy sweetness and subtle vanilla notes perfectly cut through the pie’s tartness. A sprinkle of extra key lime zest on top adds a pop of color and a fresh aroma.
Fruity Enhancements
Consider serving individual slices with a small fan of fresh berries — raspberries or blueberries offer a lovely contrast in color and a gentle burst of freshness. A drizzle of a simple raspberry coulis could also be a beautiful addition, though I find the pie shines brightest with minimal interference.
Beverage Pairings
For a refreshing drink, a crisp iced tea or a sparkling water with a hint of mint would be delightful alongside this pie. If you’re looking for something a bit more adult, a dry sparkling wine or a light-bodied Moscato would complement the sweet-tart profile beautifully.
Storing Your Leftover Key Lime Pie
Hopefully, you’ll have some leftovers! Properly storing your key lime pie ensures it stays delicious for days.Refrigeration is Key
Once the pie has been cut, cover any remaining slices loosely with plastic wrap or transfer them to an airtight container. Store the pie in the refrigerator for up to 3-4 days. The crust might soften slightly over time, but the filling will remain wonderfully creamy.
Freezing for Later Enjoyment
Key lime pie freezes surprisingly well! If you want to make it further in advance or save some for a rainy day, wrap the whole pie (without the whipped cream topping) tightly in several layers of plastic wrap, then a layer of aluminum foil. It can be frozen for up to 1 month. Thaw it overnight in the refrigerator before adding fresh whipped cream and serving. Freezing can sometimes alter the texture of the crust slightly, but the filling holds up beautifully.
Why This Key Lime Pie Recipe is a Cut Above
I know there are a million key lime pie recipes out there. What makes this one different? It’s the meticulous balance. I’ve tweaked the ratio of lime juice to condensed milk to ensure it’s intensely flavorful without being overwhelmingly sour. The egg yolks are just enough to provide structure and richness without making it taste like scrambled eggs. And that crust? It’s thick enough to hold up to the creamy filling but still shatters perfectly with each bite. It’s a pie that feels both classic and utterly fresh, a testament to simple, quality ingredients used with care. You won’t find any green food coloring or artificial lime extracts here; just pure, unadulterated key lime goodness. It’s the kind of dessert that makes people close their eyes and sigh with satisfaction. Give it a try, and you’ll understand.
Classic Homemade Key Lime Pie with Vanilla Bean Whipped Cream
A homemade graham cracker crust filled with a creamy, tart and sweet key lime filling topped with vanilla bean whipped cream.
📝 Ingredients
👩🍳 Instructions
- 1Preheat your oven to 350°F (175°C).
- 2For the crust: In a medium bowl, combine graham cracker crumbs, granulated sugar, and salt. Pour in melted butter and mix until crumbs are uniformly moistened. Press firmly into a 9-inch pie plate, covering the bottom and sides. Bake for 8-10 minutes until lightly golden. Remove and cool completely on a wire rack.
- 3For the filling: In a large bowl, whisk together sweetened condensed milk, fresh key lime juice, key lime zest, and egg yolks until smooth and well combined. Do not overmix.
- 4Pour the filling into the cooled graham cracker crust. Gently tap the pie plate to release any air bubbles.
- 5Bake for 15-20 minutes, or until the edges are set but the center still has a slight jiggle. Do not overbake.
- 6Remove from oven and let cool completely on a wire rack. Once at room temperature, cover loosely and refrigerate for at least 4 hours, or preferably overnight, to set.
- 7For the whipped cream: Just before serving, in a chilled large bowl, combine cold heavy cream, confectioners' sugar, and vanilla. Beat with an electric mixer on medium-high speed until medium-stiff peaks form.
- 8Spoon or pipe whipped cream over the chilled pie. Garnish with extra lime zest or slices if desired. Slice and serve immediately.
💡 Notes
Always use fresh key limes for the best flavor; bottled juice will alter the taste profile. For clean slices, ensure the pie is thoroughly chilled and use a hot, clean knife for each cut. Pie can be made up to 2 days ahead and stored in the refrigerator (without whipped cream). Leftovers will keep for 3-4 days refrigerated.



