


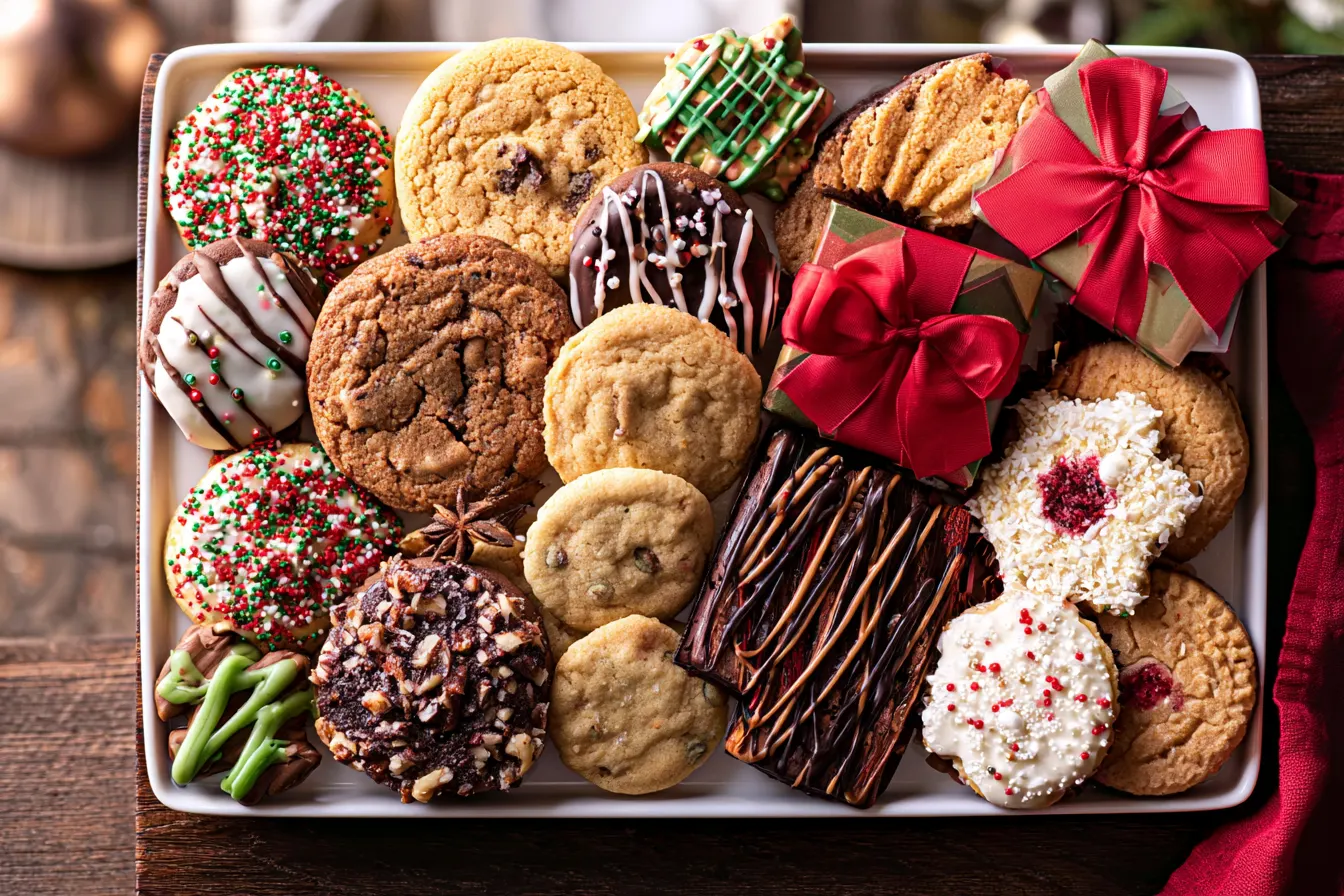
The smell of gingerbread baking, the gentle hum of Christmas carols on the radio, and the satisfying clatter of cookie cutters hitting the counter – these are the moments that truly make the holiday season for me. But as much as I love baking a mountain of festive treats, the real joy often comes from sharing them. That’s where the magic of a beautifully curated Christmas cookie box comes in.
There’s something incredibly special about receiving a thoughtfully assembled collection of homemade goodies. It’s more personal than a store-bought gift, and it says, “I spent time thinking of you, and I put love into these.” Plus, let’s be honest, who doesn’t adore opening a box to find a delightful assortment of sweet surprises?
Over the years, my holiday baking has evolved from haphazard piles of cookies on a plate to carefully constructed, show-stopping cookie boxes. This isn’t just about throwing a few treats into a container; it’s about creating an experience, a little edible tableau that delights the eyes as much as the taste buds. And trust me, it’s far less intimidating than it sounds!

Why a Christmas Cookie Box is the Ultimate Holiday Gift
Forget the endless mall treks and the struggle to find something “just right” for everyone on your list. A homemade Christmas cookie box hits all the right notes. It’s personal, it’s delicious, and it’s often more appreciated than another scented candle (though I do love a good candle!).
Beyond the personal touch, these boxes offer a fantastic way to showcase your baking skills without having to commit to baking dozens of a single type of cookie. You get to experiment with a variety of flavors and textures, making the baking process itself more fun and less monotonous. Plus, it’s a brilliant way to use up those extra sprinkles and specialty ingredients you bought for one recipe!
The Anatomy of a Perfect Cookie Box
Think of your cookie box as a mini edible art installation. It needs balance, variety, and a touch of flair. When I plan mine, I always aim for a mix of different elements. This isn’t just about flavor profiles; it’s also about visual appeal and textural contrast.
Consider including:
- A Showstopper: One or two truly impressive cookies, perhaps elaborately decorated sugar cookies or a delicate shortbread.
- A Crowd-Pleaser: Everyone loves a classic! Think chocolate chip, snickerdoodles, or peanut butter blossoms.
- A Chewy Treat: Brownies, chewy ginger snaps, or oatmeal raisin cookies.
- A Crunchy Bite: Biscotti, pizzelles, or a crispy ginger cookie.
- A Unique Flavor: Something a little unexpected, like lavender shortbread or cranberry pistachio biscotti.
- A No-Bake Option: To give yourself a break and add another texture, like chocolate truffles or Rolo pretzels.
The key is to have a good mix so that every bite offers something new and exciting. It keeps the recipient engaged and ensures there’s something for everyone’s preference.

Planning Your Cookie Box Strategy
Before you even preheat your oven, a little planning goes a long way. This will save you stress, time, and potential cookie casualties.
Choosing Your Cookies Wisely
When selecting your cookie line-up, consider a few factors:
- Shelf Life: Choose cookies that hold up well for at least a few days. Delicate meringue cookies might not be the best choice for a box that needs to travel or sit for a bit. Sturdier cookies like shortbread, gingerbread, and drop cookies are ideal.
- Color & Texture Variety: As mentioned, aim for a visually appealing mix. Dark chocolate cookies next to bright red velvet crinkles, or rugged oatmeal cookies beside smooth, glazed shortbread.
- Flavor Harmony: While variety is good, make sure the flavors don’t clash. A super spicy gingerbread might overwhelm a delicate lemon shortbread if they’re too close.
- Your Skill Level & Time: Be realistic! Don’t try to bake 10 different intricate cookies if you only have one free afternoon. Pick a few challenging ones and balance them with some easy, quick recipes.
I usually pick 5-7 different types of cookies for a medium-sized box. This provides plenty of variety without overwhelming me in the kitchen.
Essential Supplies for Assembly
You’ve baked your heart out, now let’s make it look professional! Here’s what you’ll need:
- The Box Itself: Sturdy cardboard gift boxes are perfect. Look for ones with clear lids or festive designs.
- Parchment Paper or Wax Paper: To line the box and separate layers of cookies.
- Small Cupcake Liners or Petit Four Cups: Great for holding smaller or more delicate cookies, preventing them from crumbling or sticking to others.
- Crinkle Cut Shredded Paper or Tissue Paper: To fill gaps, provide cushioning, and add a festive touch.
- Twine, Ribbon, or Gift Tags: For decoration and personalization.
- Cellophane Bags (optional): For individually wrapping cookies that might be sticky or have a strong aroma.
Having these on hand before you start assembling will make the process smooth and enjoyable.
The Art of Assembling Your Christmas Cookie Box
This is where your inner artist comes out! Assembling the box is almost as fun as the baking itself. It’s about presentation and making that first impression count.
Step-by-Step Assembly Guide
Follow these steps for a beautifully arranged cookie box every time:
- Line Your Box: Start by lining the bottom of your box with a piece of parchment paper or wax paper. Let it extend up the sides slightly. This protects the box and makes it easier to remove cookies.
- Add Your Base Layer: If you’re using crinkle paper or tissue paper for cushioning, place a layer of it at the bottom. This also helps elevate your cookies for a better visual.
- Start with the Largest Cookies: Place your biggest or sturdiest cookies first, ideally along the edges or in the corners. This provides a good foundation.
- Fill in with Medium-Sized Cookies: Arrange your next size of cookies, paying attention to color and shape. Try to alternate colors and textures for visual interest.
- Incorporate Small & Delicate Treats: Use mini cupcake liners for smaller cookies like thumbprints or truffles. This keeps them tidy and prevents them from getting crushed.
- Create Layers (if needed): If your box is deep, you can create a second layer. Place a piece of parchment or wax paper over the first layer of cookies before adding more. This prevents them from sticking.
- Fill Gaps: Use smaller cookies, candies, or a bit more crinkle paper to fill any empty spaces. This prevents the cookies from shifting too much during transport. Note: Don’t overpack to the point of crushing, but make sure there aren’t huge gaps either.
- Add the Finishing Touches: Once all your cookies are nestled in, add a sprig of rosemary or a small candy cane for a festive touch. Close the lid, and secure with ribbon or twine. Don’t forget a gift tag!

Frequently Asked Questions About Christmas Cookie Boxes
How far in advance can I bake the cookies?
Most sturdy Christmas cookies (like gingerbread, shortbread, and many drop cookies) can be baked 3-5 days in advance and stored in airtight containers at room temperature. More delicate cookies or those with cream cheese frosting might only last 1-2 days. I often bake cookies in batches over a week, freezing some if needed, and then thaw and assemble closer to gifting.
What are the best cookies for shipping in a box?
For shipping, choose robust cookies that won’t easily crumble. Think biscotti, bar cookies (like brownies or blondies cut into squares), gingerbread, sturdy shortbread, and drop cookies without delicate frostings. Avoid anything fragile, heavily iced, or extremely moist. Wrap individual cookies or small stacks in plastic wrap before placing them in a well-padded box.
How do I prevent different cookie flavors from mingling?
If you have cookies with strong flavors (like peppermint or anise) next to more subtle ones (like vanilla shortbread), they can sometimes transfer aromas. To prevent this, individually wrap strongly flavored cookies in small cellophane bags before placing them in the box. Using cupcake liners also helps create a barrier.
Can I include non-cookie items in my box?
Absolutely! Small candies, homemade fudge, candied nuts, chocolate-dipped pretzels, or even a mini hot chocolate bomb can be wonderful additions. Just ensure they are individually wrapped or contained to prevent them from making the cookies soggy or getting crushed.
What’s the best way to store a finished cookie box?
Once assembled, store the cookie box in a cool, dry place away from direct sunlight. If your cookies have any perishable ingredients (like cream cheese frosting), they’ll need to be refrigerated. Generally, a finished box is best enjoyed within 3-4 days to ensure freshness.
Recipes to Inspire Your Christmas Cookie Box
Now for the fun part: deciding what deliciousness goes into your box! Here are some of my go-to recipes that always get rave reviews and hold up beautifully in a gift box.
Classic Cut-Out Sugar Cookies
These are a must for any Christmas cookie box. They’re perfect for decorating and add a beautiful pop of festive color. My recipe yields a dough that’s easy to roll and doesn’t spread too much in the oven, meaning your intricate snowflake or star shapes will stay perfectly defined.
Chewy Gingerbread People
The warm spices of gingerbread just scream Christmas. I prefer a slightly chewy gingerbread to a super crisp one for a gift box, as it tends to stay fresher longer and is more enjoyable to eat. A simple white glaze or royal icing outline is all they need.
Pecan Shortbread Bites
Shortbread is incredibly reliable for gifting. It’s sturdy, has a long shelf life, and its buttery richness is universally loved. Adding finely chopped pecans gives these a wonderful texture and nutty flavor. A dusting of powdered sugar after baking makes them extra charming.
Chocolate Crinkle Cookies
These are visually stunning with their contrasting dark chocolate and snowy powdered sugar coating. They’re soft, fudgy, and intensely chocolatey, offering a different texture profile to the box. They also bake up quite quickly, which is always a bonus during busy holiday baking.
Salted Caramel Thumbprints
For a touch of decadence, these thumbprints with a gooey salted caramel center are irresistible. The shortbread-like cookie base holds up well, and the caramel adds a lovely chewiness and rich flavor. A sprinkle of flaky sea salt elevates them even further.
Packaging and Presentation Tips
The wrapper matters almost as much as what’s inside! A beautifully presented box adds to the excitement and makes your homemade efforts feel even more special.
Making It Look Festive
- Ribbons & Bows: Classic for a reason! Use satin, grosgrain, or even rustic twine with a sprig of pine or holly.
- Gift Tags: Hand-written tags add a personal touch. You can even list the contents of the box for your recipient.
- Stickers & Labels: Custom stickers or labels with your name or a festive design can elevate the look.
- Cellophane Wrap: Once the box is closed, wrapping the entire thing in clear cellophane and tying it with a bow can protect it further and give it a polished finish.
Personalizing Your Gift
Think about the recipient. Do they have a favorite cookie? Are they allergic to nuts? Tailoring your selection to their preferences shows an extra layer of thoughtfulness. For instance, if they love chocolate, make sure your box is heavily weighted with chocolatey delights. If they’re a fan of citrus, include some lemon crinkles or orange zest shortbread.
Making a Christmas cookie box isn’t just about baking; it’s about giving a piece of your heart, a taste of your kitchen, and a little bit of holiday cheer. The effort you put into selecting, baking, and arranging these edible gifts truly shines through. So, roll up your sleeves, crank up the carols, and get ready to spread some serious sweetness this season!

Ultimate Christmas Cookie Box Assembly Guide
A comprehensive guide to planning, baking, and assembling a stunning Christmas cookie box for holiday gifting.
📝 Ingredients
👩🍳 Instructions
- 1Plan Your Cookie Selection: Choose 5-7 cookie varieties, aiming for a mix of flavors, textures, and visual appeal. Consider shelf life and your baking schedule. Refer to suggested recipes like Classic Cut-Out Sugar Cookies, Chewy Gingerbread People, Pecan Shortbread Bites, Chocolate Crinkle Cookies, and Salted Caramel Thumbprints.
- 2Bake Your Cookies: Prepare all chosen cookie recipes according to their instructions. Allow them to cool completely on wire racks before handling or storing.
- 3Prepare Your Box: Line the bottom of your chosen gift box with a sheet of parchment paper or wax paper, letting it extend up the sides. If desired, add a layer of crinkle cut shredded paper or tissue paper for extra cushioning and height.
- 4Arrange the Base Layer: Start by placing your largest or sturdiest cookies along the edges and corners of the box. Create a solid foundation for the other cookies.
- 5Fill with Medium Cookies: Continue by adding medium-sized cookies, varying colors and shapes. Aim for a visually balanced arrangement, scattering different types evenly.
- 6Incorporate Small & Delicate Treats: Use small cupcake liners or petit four cups for tiny or fragile cookies (like truffles or delicate thumbprints) to keep them protected and organized within the box.
- 7Create Additional Layers (If Needed): If your box is deep, place another sheet of parchment or wax paper over the first layer of cookies before adding more. This prevents cookies from sticking together.
- 8Fill Any Gaps: Use smaller cookies, candies, or additional crinkle paper to fill any remaining spaces. This prevents cookies from shifting during transport and keeps the arrangement looking full and appealing.
- 9Add Finishing Touches: Tuck in a small festive decoration, like a sprig of fresh rosemary or a mini candy cane. Close the lid of the box.
- 10Decorate & Personalize: Tie the box with festive ribbon or twine. Attach a personalized gift tag, perhaps listing the cookie types inside. If transporting, consider wrapping the entire box in clear cellophane for extra protection.
💡 Notes
For best freshness, assemble the box no more than 1-2 days before gifting. Store the assembled box in a cool, dry place. If any cookies contain perishable ingredients, refrigeration may be necessary. For shipping, choose robust cookies and wrap them individually before placing in a well-padded box.



