


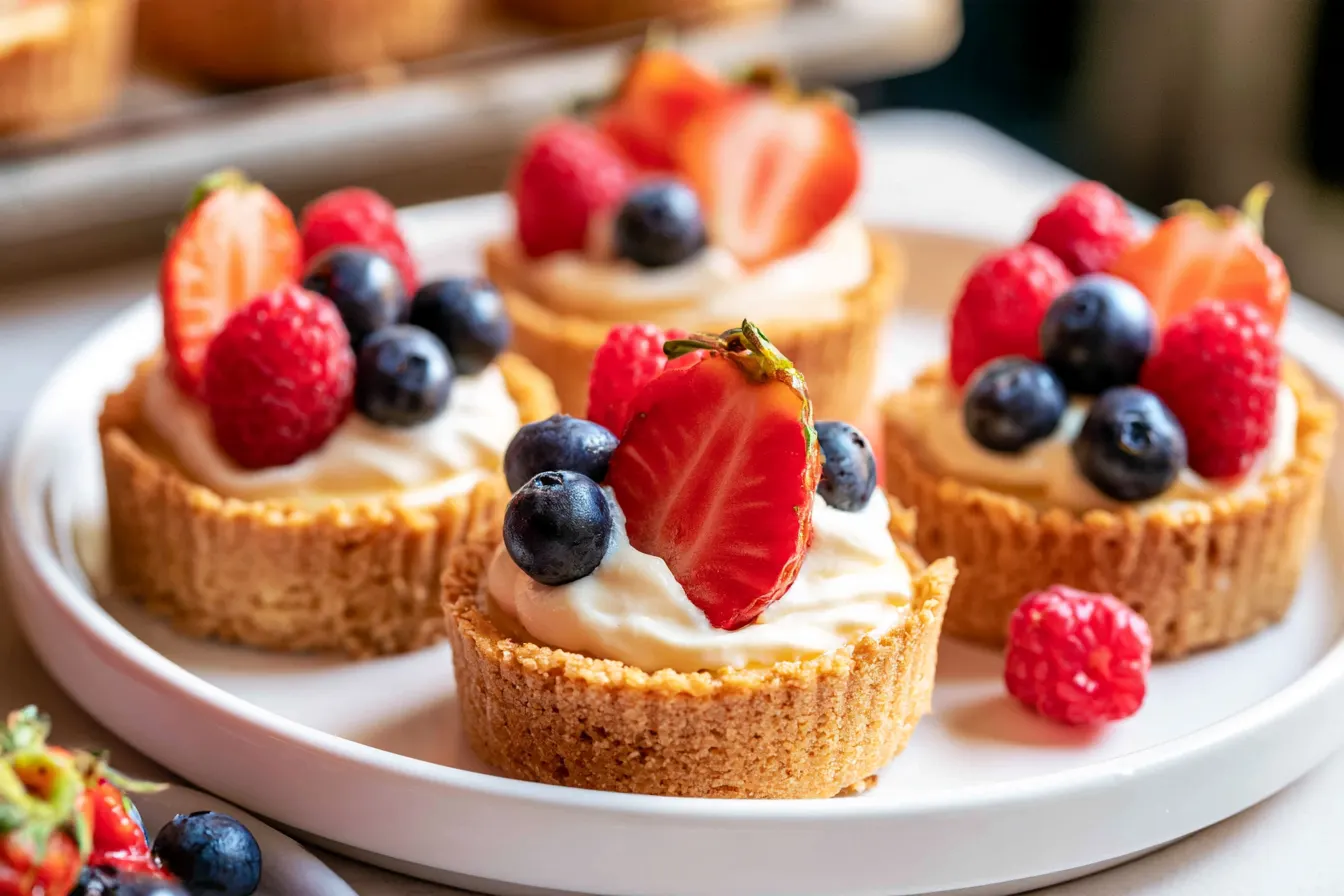
I think we can all agree: some desserts just *feel* like summer. For me, it’s anything bright, creamy, and requiring absolutely zero oven time. That’s where these delightful No-Bake Mini Cheesecakes waltz in, making a grand entrance right on cue for those warm, sun-drenched days. Forget the fuss of water baths and cracked tops; this recipe is about pure, unadulterated cheesecake joy, scaled down for individual indulgence.
- Why These Mini Cheesecakes Are Your New Best Friend
- Common Questions About No-Bake Mini Cheesecakes
- Flavor Adventures: Creative Twists for Your Mini Cheesecakes
- Why the No-Bake Method is a Game-Changer
- Serving Suggestions and Occasions
- A Few More Tips for Success
There’s something inherently charming about a dessert that comes in its own perfectly portioned package. No need for slicing, no sticky mess on the plate – just a neat, sweet treat waiting to be devoured. It’s the kind of dessert that whispers “elegant” but screams “effortless.”
And let’s be real, who wants to fire up the oven when the mercury is climbing? My kitchen turns into a sauna, and my patience wears thin. This no-bake wonder keeps things cool, calm, and collected, leaving you more time to actually enjoy the sunshine.

For years, cheesecake felt like a Mount Everest of baking. The fear of cracks, the delicate balance of oven temperatures, the sheer commitment! Then I discovered the magic of no-bake, and suddenly, the world of creamy, tangy deliciousness opened up. These mini versions take that liberation a step further, offering individual servings that are as easy to assemble as they are to eat.
This recipe isn’t just simple; it’s practically foolproof. We’re talking about a crunchy graham cracker base, a velvety smooth cream cheese filling that sets up beautifully in the fridge, and a vibrant crown of fresh berries. It’s the trifecta of textures and flavors that makes a truly memorable dessert, especially when you’re looking for something light and refreshing.
Why These Mini Cheesecakes Are Your New Best Friend
Beyond the obvious “no oven required” perk, there are several reasons these little gems will become a staple in your dessert repertoire. They’re incredibly customizable, making them perfect for any occasion, from a casual backyard BBQ to a more formal gathering. Plus, their individual size means portion control is built right in, if you’re into that sort of thing!
They’re also fantastic for entertaining. You can make them ahead of time, leaving you free to enjoy your guests without last-minute dessert panic. Just pull them from the fridge, add your toppings, and watch them disappear.
The Key to Creamy Perfection: Ingredients Unveiled
Gathering your components is the first step to success. For these mini cheesecakes, quality ingredients truly shine, especially since there’s no baking to mask anything. Make sure your cream cheese is full-fat and at room temperature for the smoothest, silkiest filling.

For the Graham Cracker Crust:
- 1 ½ cups graham cracker crumbs (about 10-12 full sheets)
- ¼ cup granulated sugar
- ½ cup unsalted butter, melted
For the Creamy Filling:
- 2 (8-ounce) packages full-fat cream cheese, softened
- 1 cup powdered sugar (confectioners’ sugar)
- 1 teaspoon pure vanilla extract
- ¼ teaspoon salt
- 1 cup heavy cream, chilled
For the Topping:
- 1 cup mixed fresh berries (strawberries, blueberries, raspberries)
- Optional: a sprinkle of powdered sugar or a drizzle of berry coulis
Crafting Your No-Bake Mini Cheesecakes: Step-by-Step
Let’s get down to business! This process is surprisingly quick and satisfying. You’ll be amazed at how easily these come together.
Step 1: Prepare Your Crusts
In a medium bowl, combine the graham cracker crumbs and granulated sugar. Pour in the melted butter and mix until all the crumbs are moistened. It should resemble wet sand. Press about 1 ½ to 2 tablespoons of the mixture firmly into the bottom of each cup of a 12-cup muffin tin lined with paper liners. Use the back of a spoon or a small measuring cup to really compact the crust. Place the muffin tin in the refrigerator to chill while you prepare the filling.
Step 2: Whip Up the Filling
In a large bowl, using an electric mixer, beat the softened cream cheese on medium speed until smooth and creamy, about 2-3 minutes. This is crucial for a lump-free filling. Gradually add the powdered sugar, vanilla extract, and salt, mixing until just combined and smooth. Don’t overmix at this stage.
Step 3: Fold in the Whipped Cream
In a separate, chilled bowl, whip the cold heavy cream with clean beaters until stiff peaks form. Gently fold the whipped cream into the cream cheese mixture until no streaks remain. Be careful not to deflate the whipped cream; this is what gives our no-bake cheesecake its light, airy texture.
Tip: For the best results when whipping cream, make sure both your bowl and beaters are very cold. You can pop them in the freezer for 10-15 minutes beforehand!

Step 4: Fill and Chill
Spoon or pipe the cheesecake filling evenly over the chilled graham cracker crusts in the muffin tin. Smooth the tops with the back of a spoon or an offset spatula. Cover the muffin tin loosely with plastic wrap and refrigerate for at least 4 hours, or preferably overnight, until the cheesecakes are firm and set.
Step 5: Garnish and Serve
Once firm, carefully remove the mini cheesecakes from the muffin tin by lifting the paper liners. Just before serving, top each cheesecake with a generous spoonful of fresh mixed berries. A dusting of powdered sugar adds a lovely finish.
Common Questions About No-Bake Mini Cheesecakes
Even though this recipe is straightforward, a few common questions pop up. Let’s tackle them to ensure your cheesecake journey is smooth sailing.
Can I use a different type of crust?
Absolutely! While graham crackers are classic, you can get creative. Try crushed shortbread cookies, Oreo cookies (for a chocolate crust), or even digestive biscuits. Just ensure you maintain the same crumb-to-butter ratio to get a firm base.
How long do these mini cheesecakes last?
Stored in an airtight container in the refrigerator, these no-bake mini cheesecakes will stay fresh for up to 3-4 days. It’s best to add the fresh berries just before serving to prevent them from becoming soggy.
Can I freeze these cheesecakes?
Yes, you can! Without the berry topping, these freeze beautifully. Place the set cheesecakes (still in their liners or gently removed) on a baking sheet and freeze until solid. Then, transfer them to an airtight freezer-safe container or bag. They’ll keep for up to 1 month. Thaw in the refrigerator for a few hours before serving and topping with fresh berries.
What if my filling isn’t setting up?
The most common culprit is not enough chilling time, or your cream cheese might not have been full-fat. Ensure you’re using full-fat cream cheese and give them ample time in the fridge. Sometimes a humid environment can also affect setting, so patience is key!
What other toppings can I use?
The possibilities are endless! Think lemon curd, chocolate ganache, caramel sauce, chopped nuts, a drizzle of fruit syrup, or even a sprinkle of mini chocolate chips. The beauty of these no-bake mini cheesecakes is their versatility.
Flavor Adventures: Creative Twists for Your Mini Cheesecakes
While the classic berry topping is undeniably delicious, don’t be afraid to experiment with other flavors. These mini cheesecakes are a fantastic canvas for your culinary creativity. Imagine a lemon zest infused filling, or a hint of almond extract for a marzipan-like twist.
For a tropical vibe, try topping them with diced mango and a sprinkle of toasted coconut. Or, for the chocolate lovers, a light dusting of cocoa powder and some mini chocolate curls would be divine. The simplicity of the base recipe allows for so much playful customization.
Consider a swirl of passion fruit puree for a tangy kick, or a homemade cherry compote for a richer, deeper flavor. Even a simple drizzle of honey and a few fresh mint leaves can elevate these little treats into something truly special.
Why the No-Bake Method is a Game-Changer
The no-bake approach isn’t just about avoiding the oven; it creates a distinct texture. Baked cheesecakes are denser, often with a slight custardy finish. No-bake versions, however, are lighter, airier, and melt-in-your-mouth creamy, thanks to the whipped cream folded into the base. It’s a completely different (but equally delightful) experience.
This difference in texture means they feel lighter on the palate, making them an ideal choice for a dessert after a larger meal, or on a particularly hot day. The bright tang of the cream cheese is also often more pronounced in a no-bake recipe.
Serving Suggestions and Occasions
These mini cheesecakes are incredibly versatile for serving. They make perfect individual desserts for a summer potluck or barbecue. Line them up on a platter for a stunning presentation at a bridal shower or baby shower.
For a festive touch, especially around the 4th of July, use a combination of blueberries and sliced strawberries for a patriotic red, white, and blue theme. They’re also an excellent option for parties where you want to avoid messy slicing and serving.
Don’t forget them for a simple weeknight treat! Having a batch in the fridge means you’re always just moments away from a little personal dessert indulgence. They pair beautifully with a cup of coffee or a glass of chilled white wine.
A Few More Tips for Success
The smallest details can sometimes make the biggest difference. Here are a couple more nuggets of wisdom to ensure your no-bake mini cheesecakes are absolutely perfect.
When pressing the crust, really get in there and compact it. A loose crust can crumble when you try to remove the cheesecakes. A flat-bottomed shot glass or the base of a spice jar works wonderfully for this.
Don’t skimp on the chilling time. It’s the secret to those perfectly firm, sliceable (or in this case, pick-up-able) cheesecakes. Rushing this step will result in a soft, messy dessert.
Finally, always use real vanilla extract. The flavor impact is significant in a recipe where vanilla plays such a prominent role. Skip the artificial stuff for this one!
These No-Bake Mini Cheesecakes truly are a simple pleasure. They offer all the deliciousness of a classic cheesecake with none of the usual fuss. Give them a try, and you might just find your new favorite warm-weather dessert!

No-Bake Mini Cheesecakes with Berries
Creamy, no-bake mini cheesecakes with a crisp graham cracker crust, topped with fresh berries for an easy summer dessert.
📝 Ingredients
👩🍳 Instructions
- 1Prepare the crust: In a medium bowl, combine graham cracker crumbs and granulated sugar. Pour in the melted butter and mix until all crumbs are moistened. Press about 1 ½ to 2 tablespoons of the mixture firmly into the bottom of each cup of a 12-cup muffin tin lined with paper liners. Chill in the refrigerator.
- 2Make the filling: In a large bowl, beat softened cream cheese with an electric mixer until smooth and creamy (2-3 minutes). Gradually add powdered sugar, vanilla extract, and salt, mixing until just combined and smooth.
- 3Whip the heavy cream: In a separate, chilled bowl, whip the cold heavy cream until stiff peaks form.
- 4Combine filling: Gently fold the whipped cream into the cream cheese mixture until no streaks remain, being careful not to deflate the whipped cream.
- 5Fill and chill: Spoon or pipe the cheesecake filling evenly over the chilled graham cracker crusts. Smooth the tops. Cover loosely with plastic wrap and refrigerate for at least 4 hours, or preferably overnight, until firm and set.
- 6Garnish and serve: Once set, carefully remove cheesecakes from the muffin tin. Just before serving, top each with fresh mixed berries.
💡 Notes
Ensure cream cheese is full-fat and at room temperature for the creamiest filling. For best results, chill the cheesecakes overnight. Store leftovers in an airtight container in the refrigerator for up to 3-4 days; add berries just before serving.



