


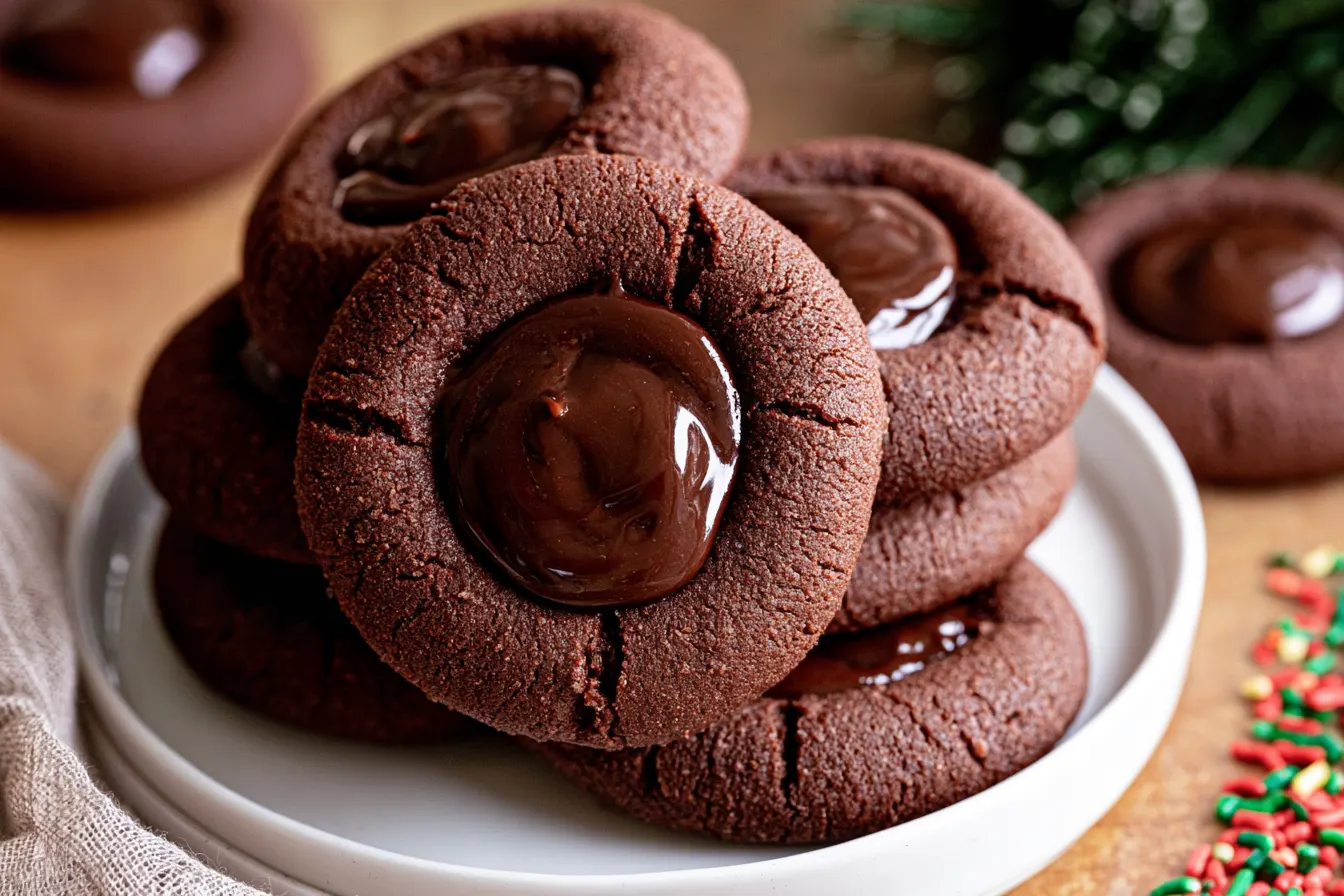
There’s something about a chocolate thumbprint cookie that just feels like a warm hug, doesn’t there? It’s not just a cookie; it’s a little edible cup of comfort, especially when that cup is brimming with velvety smooth chocolate ganache. Forget those dry, crumbly versions you might have encountered; this recipe is all about a deep, dark chocolate cookie base that’s impossibly chewy and rich.
- Why These Chocolate Thumbprint Cookies Are a Cut Above
- Gather Your Ingredients
- Let’s Bake Some Magic: Step-by-Step Guide
- Step 1: Prep Your Oven and Pan
- Step 2: Cream Butter and Sugars
- Step 3: Add Egg and Vanilla
- Step 4: Incorporate Melted Chocolate
- Step 5: Whisk Dry Ingredients
- Step 6: Combine Wet and Dry
- Step 7: Form and Indent the Cookies
- Step 8: Bake to Perfection
- Step 9: Prepare the Rich Ganache
- Step 10: Finish the Ganache and Fill
- Common Questions About These Cookies
- Serving Suggestions & Storage

Why These Chocolate Thumbprint Cookies Are a Cut Above
You might be thinking, “Another thumbprint cookie recipe?” But trust me, this isn’t just *another* recipe. This is *the* recipe. The secret lies in a few key details that transform a good chocolate cookie into an extraordinary one. We’re using both cocoa powder and melted chocolate in the dough for an unparalleled depth of flavor, ensuring each bite is intensely chocolatey. The texture is also paramount. We’re not aiming for a cakey cookie here. Instead, we want that delightful chewiness that signals a truly well-made cookie. And then, there’s the ganache. So many thumbprint recipes skimp on the filling, or use something too stiff. We’re making a silky, rich chocolate ganache that perfectly complements the cookie, creating a harmonious balance of textures and flavors. It’s that perfect combination that makes these chocolate thumbprint cookies truly special.Gather Your Ingredients
Before we dive into the fun part, let’s make sure our kitchen arsenal is ready. You’ll find that these ingredients are fairly common, but their quality will truly shine through in the final product.For the Deep Chocolate Cookie Base
- Unsalted Butter: Make sure it’s softened to room temperature. This helps create a smooth dough.
- Granulated Sugar: For sweetness and a little crispness around the edges.
- Light Brown Sugar: Adds moisture and that lovely chewy texture we’re after.
- Large Egg: Binds everything together and contributes to richness.
- Vanilla Extract: A classic flavor enhancer that brings out the chocolate.
- All-Purpose Flour: The structure of our cookies.
- Unsweetened Cocoa Powder: For intense chocolate flavor. I prefer Dutch-processed for its smooth, dark color.
- Baking Soda: Our leavening agent for a slight lift.
- Salt: Essential for balancing the sweetness and enhancing all the flavors.
- Semi-Sweet Chocolate Chips or Chunks: Melted into the dough for extra richness and fudginess.
For the Velvety Chocolate Ganache Filling
- Heavy Cream: The base of our luxurious ganache.
- Semi-Sweet or Dark Chocolate: High-quality chocolate is key here. Chunks or finely chopped bars melt more evenly than chips.
- Unsalted Butter: A small knob of butter stirred in at the end makes the ganache extra glossy and smooth.
- Vanilla Extract: Just a touch to deepen the flavor of the ganache.

Let’s Bake Some Magic: Step-by-Step Guide
Making these chocolate thumbprint cookies is a delightful process. Take your time, enjoy the aromas filling your kitchen, and you’ll be rewarded with truly spectacular results.Step 1: Prep Your Oven and Pan
Preheat your oven to 350°F (175°C). Line a baking sheet with parchment paper or a silicone baking mat. This prevents sticking and ensures even baking.
Step 2: Cream Butter and Sugars
In a large bowl, using an electric mixer, cream together the softened butter, granulated sugar, and brown sugar until light and fluffy. This usually takes about 2-3 minutes. Make sure to scrape down the sides of the bowl often.
Step 3: Add Egg and Vanilla
Beat in the egg until just combined, then stir in the vanilla extract. Don’t overmix at this stage; we just want everything incorporated.
Step 4: Incorporate Melted Chocolate
Melt the semi-sweet chocolate chips or chunks in a microwave-safe bowl in 30-second intervals, stirring after each, until smooth. Let it cool for a minute or two, then pour it into the wet ingredients and mix until just combined.
Note: Ensure your melted chocolate isn’t too hot when you add it, or it could scramble the egg!
Step 5: Whisk Dry Ingredients
In a separate medium bowl, whisk together the all-purpose flour, cocoa powder, baking soda, and salt. Whisking ensures all the dry ingredients are evenly distributed, preventing lumps in your dough.
Step 6: Combine Wet and Dry
Gradually add the dry ingredients to the wet ingredients, mixing on low speed until just combined. Be careful not to overmix the dough once the flour is added, as this can lead to tough cookies.
Step 7: Form and Indent the Cookies
Scoop rounded tablespoons of dough and roll them into smooth balls. Place them about 2 inches apart on your prepared baking sheet. Using your thumb or the back of a rounded teaspoon, gently press an indentation into the center of each cookie ball.
Tip: If the dough is too sticky to roll, chill it for 15-20 minutes in the refrigerator before forming the balls.
Step 8: Bake to Perfection
Bake for 10-12 minutes, or until the edges are set and the centers are still slightly soft. They might look a little underdone, but they’ll firm up as they cool. Remove from the oven and let them cool on the baking sheet for 5 minutes before transferring to a wire rack to cool completely.

Step 9: Prepare the Rich Ganache
While the cookies cool, make the ganache. Heat the heavy cream in a small saucepan over medium heat until it just begins to simmer around the edges – do not boil. Alternatively, heat it in the microwave in 30-second bursts.
Place your chopped chocolate in a heatproof bowl. Pour the hot cream over the chocolate and let it sit undisturbed for 5 minutes. This allows the heat from the cream to melt the chocolate.
Step 10: Finish the Ganache and Fill
After 5 minutes, gently whisk the chocolate and cream together until smooth and glossy. Stir in the small piece of butter and vanilla extract until fully incorporated. Let the ganache cool slightly, about 10-15 minutes, so it thickens enough to hold its shape in the cookies.
Spoon or pipe the ganache into the indentations of the cooled chocolate thumbprint cookies. Let them set at room temperature for about an hour, or in the refrigerator for 30 minutes, until the ganache is firm.
Common Questions About These Cookies
You’ve got questions, I’ve got answers! Here are some common queries people have about making chocolate thumbprint cookies.Can I use milk chocolate for the ganache?
Absolutely, if you prefer a sweeter, milder chocolate flavor. Just be aware that milk chocolate ganache can be a bit softer, so you might need to use a tiny bit less cream or chill it slightly longer to achieve the desired consistency. I prefer semi-sweet or dark for a richer contrast to the cookie.
How do I prevent my thumbprints from cracking?
The key is to press gently and consistently. If your dough is too cold, it’s more prone to cracking. Let it sit at room temperature for a few minutes if it’s straight from the fridge. Also, if they crack slightly during baking, you can gently re-press the indentation with a spoon as soon as they come out of the oven, while they’re still warm and pliable.
Can I make these cookies ahead of time?
Yes! You can prepare the cookie dough and store it in an airtight container in the refrigerator for up to 3 days. You can also freeze the dough balls for up to 3 months; just thaw them slightly before baking and indenting. The baked cookies, filled with ganache, store well at room temperature for up to 5 days in an airtight container.
What if my ganache is too thick or too thin?
If your ganache is too thick, add a tiny bit more warm cream (1 teaspoon at a time) and whisk until it reaches the desired consistency. If it’s too thin, let it sit at room temperature for a bit longer, or pop it in the fridge for 10-15 minutes, stirring occasionally, until it thickens up. Remember, it will continue to thicken as it cools.
Can I add other flavorings to the ganache?
Definitely! Get creative. A splash of Kahlua, Grand Marnier, or a hint of peppermint extract (especially for Christmas!) would be delicious. Just add a small amount (1/4 to 1/2 teaspoon) with the vanilla extract and taste as you go.
Serving Suggestions & Storage
These chocolate thumbprint cookies are fantastic on their own, but they also make a wonderful addition to a dessert platter. Serve them with a cup of hot coffee, a glass of cold milk, or alongside a scoop of vanilla bean ice cream for an extra-decadent treat. They’re also perfect for gift-giving during the holidays or as a thoughtful treat for a friend. To store them, place the cooled cookies in an airtight container at room temperature for up to 5 days. If it’s particularly warm in your kitchen, or if you prefer a firmer ganache, you can store them in the refrigerator. Just let them come to room temperature for about 15-20 minutes before serving for the best texture and flavor. Freezing is also an option! Once the ganache has fully set, place the cookies in a single layer on a baking sheet and freeze until solid. Then, transfer them to a freezer-safe container or bag, separating layers with parchment paper, for up to 2 months. Thaw at room temperature before enjoying.
Rich & Fudgy Chocolate Thumbprint Cookies
Indulge in chewy dark chocolate cookies with a rich, velvety smooth chocolate ganache center. Perfect for any chocolate lover!
📝 Ingredients
👩🍳 Instructions
- 1Preheat your oven to 350°F (175°C). Line a baking sheet with parchment paper or a silicone baking mat.
- 2In a large bowl, cream together the softened butter, granulated sugar, and brown sugar with an electric mixer until light and fluffy (2-3 minutes).
- 3Beat in the egg until just combined, then stir in the vanilla extract.
- 4Melt the semi-sweet chocolate chips in a microwave-safe bowl in 30-second intervals, stirring until smooth. Let cool for a minute, then add to the wet ingredients and mix until just combined.
- 5In a separate medium bowl, whisk together the all-purpose flour, cocoa powder, baking soda, and salt.
- 6Gradually add the dry ingredients to the wet ingredients, mixing on low speed until just combined. Do not overmix.
- 7Scoop rounded tablespoons of dough and roll into smooth balls. Place them 2 inches apart on the prepared baking sheet. Gently press an indentation into the center of each cookie with your thumb or a rounded teaspoon.
- 8Bake for 10-12 minutes, or until the edges are set and the centers are slightly soft. They will firm up as they cool. Let cool on the baking sheet for 5 minutes, then transfer to a wire rack to cool completely.
- 9To make the ganache: Heat the heavy cream in a small saucepan over medium heat until it just begins to simmer around the edges (do not boil).
- 10Place the finely chopped chocolate in a heatproof bowl. Pour the hot cream over the chocolate and let sit undisturbed for 5 minutes.
- 11Gently whisk the chocolate and cream together until smooth and glossy. Stir in the softened butter and vanilla extract until fully incorporated.
- 12Let the ganache cool slightly (10-15 minutes) until it thickens enough to hold its shape. Spoon or pipe the ganache into the indentations of the cooled cookies.
- 13Allow the cookies to set at room temperature for about an hour, or in the refrigerator for 30 minutes, until the ganache is firm.
💡 Notes
For best results, use high-quality chocolate for both the cookies and the ganache. If the cookie dough is too sticky, chill it for 15-20 minutes before rolling. Store baked cookies in an airtight container at room temperature for up to 5 days, or refrigerate for a firmer ganache. They also freeze well for up to 2 months.



