


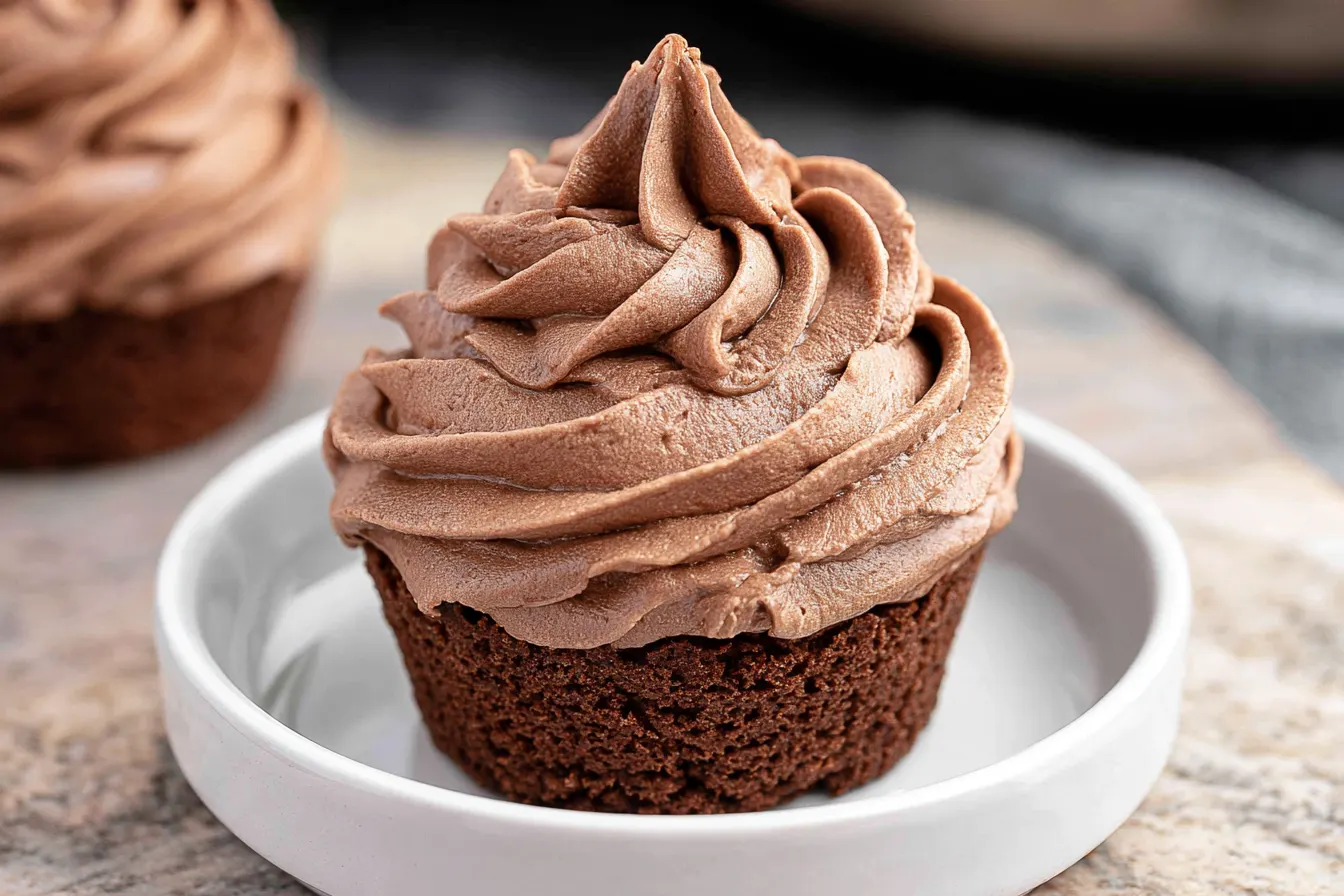
Ever tried to pipe a beautiful swirl onto a cupcake, only for your frosting to collapse into a sad, droopy mess? Been there, done that, bought the t-shirt. For years, I struggled with frostings that were either too stiff, too sweet, or just plain uncooperative. But then I discovered the magic of a truly stable chocolate whipped cream frosting, and my dessert game was forever changed.
- What Makes This Chocolate Whipped Cream Frosting a Game-Changer?
- Gather Your Supplies: The Essential Ingredients
- Whipping Up Your Decadent Frosting: Step-by-Step
- Creative Ways to Enjoy Your Chocolate Dream
- Mastering Your Chocolate Whipped Cream: Common Questions Answered
- Storage Savvy: Keeping Your Frosting Fresh

What Makes This Chocolate Whipped Cream Frosting a Game-Changer?
You might be thinking, “Whipped cream? For frosting? Doesn’t that just deflate?” And you’d be right to be skeptical if we were talking about plain old whipped cream. The secret here lies in a few key techniques and ingredients that transform a delicate topping into a sturdy, pipeable frosting. We’re talking about achieving that perfect balance of rich chocolate flavor and airy lightness, all while ensuring it stays put on your dessert. What truly sets this recipe apart is its incredible versatility and sophisticated texture. It’s light enough not to overwhelm delicate cakes, yet substantial enough to stand up to richer brownies or robust chocolate cupcakes. The cocoa infusion isn’t just an afterthought; it’s deeply integrated, giving you that satisfying chocolatey punch in every single bite.Gather Your Supplies: The Essential Ingredients
Making this luscious chocolate whipped cream frosting doesn’t require a trip to a specialty store. You likely have most of these items in your pantry and fridge already! Quality ingredients do make a difference here, especially with the cocoa powder and heavy cream, so opt for the best you can reasonably find.The Creamy Core
- Heavy Cream (or Heavy Whipping Cream): This is non-negotiable. You need at least 36% milk fat for proper whipping and stability. Don’t try to substitute with half-and-half or light cream – it just won’t work. Chilled cream whips up best, so keep it in the fridge until you’re ready.
- Powdered Sugar (Confectioners’ Sugar): This sweetens the frosting and, crucially, helps stabilize it. Its fine texture dissolves easily, ensuring a smooth, grit-free finish. Granulated sugar will make your frosting grainy, so stick to powdered.
The Chocolatey Heart
- Unsweetened Cocoa Powder: For that deep, rich chocolate flavor. I prefer Dutch-processed cocoa powder here because it’s less acidic and provides a darker color and smoother taste, but natural unsweetened cocoa powder works too. Just be aware the color might be slightly lighter and the flavor a touch more assertive.
- Vanilla Extract: A touch of vanilla enhances the chocolate notes beautifully. Use a good quality pure vanilla extract for the best flavor.
The Stability Secret
- Cornstarch (or Cream of Tartar): This is our secret weapon for a stable whipped cream frosting! Just a tiny amount helps prevent the cream from weeping and keeps it firm for longer. You won’t taste it, but you’ll appreciate its work.

Whipping Up Your Decadent Frosting: Step-by-Step
Creating this dreamy chocolate whipped cream frosting is a straightforward process, but a few key steps ensure perfection. Make sure your equipment is cold, and don’t rush the whipping!Step 1: Chill Your Tools
Before you even think about pouring cream, pop your mixing bowl (preferably metal or glass) and whisk attachment (from your stand mixer or hand mixer) into the freezer for at least 15-20 minutes. A cold environment helps the cream whip up faster and achieve maximum volume and stability. This is a small step that makes a huge difference in the final texture of your chocolate whipped cream frosting.
Step 2: Sift the Dry Ingredients
In a small bowl, whisk together the powdered sugar, unsweetened cocoa powder, and cornstarch. Sifting these ingredients together is crucial to prevent lumps in your finished frosting. Nobody wants a mouthful of dry cocoa powder when they’re expecting silky smooth chocolatey goodness! This also ensures even distribution of the stabilizers and sweetness.
Step 3: Whip the Cream to Soft Peaks
Remove your chilled bowl and whisk from the freezer. Pour the very cold heavy cream into the bowl. Begin whipping on medium-low speed, gradually increasing to medium-high. You want to whip the cream until it just starts to thicken and holds soft peaks. This means when you lift the whisk, the cream forms a peak that gently folds over itself. It won’t be firm yet, but it should have some body.
Note: Over-whipping at this stage can lead to a grainy texture later, so keep a close eye on it!

Step 4: Gradually Add Dry Ingredients and Vanilla
With the mixer still running on medium-low speed, slowly add the sifted dry ingredient mixture to the cream, about a tablespoon at a time. Once all the dry ingredients are incorporated, pour in the vanilla extract. Increase the speed back to medium-high.
Step 5: Whip to Stiff Peaks
Continue whipping the mixture until it reaches stiff peaks. This means that when you lift the whisk, the peaks stand up straight and hold their shape firmly. The frosting should look thick, glossy, and completely smooth. Be careful not to over-whip, or it can become grainy or even turn into butter! Stop as soon as it reaches this stage.
Step 6: Use Immediately or Chill
Your beautiful chocolate whipped cream frosting is now ready to use! Pipe it onto cupcakes, spread it over a cake, or dollop it onto individual desserts. If you’re not using it right away, cover the bowl tightly with plastic wrap and refrigerate it for up to 2-3 days. A quick whisk by hand might be needed before using if it’s been chilling for a while, just to restore its fluffy texture.
Creative Ways to Enjoy Your Chocolate Dream
This chocolate whipped cream frosting isn’t just for cakes and cupcakes! Its versatile nature means it can elevate a multitude of desserts. Think beyond the obvious and let your culinary imagination run wild. For instance, try piping generous dollops onto a classic vanilla bean panna cotta for a sophisticated contrast in textures and flavors. Or, layer it with fresh berries and crushed graham crackers in a parfait glass for an instant, no-bake dessert that looks stunning and tastes incredible. It’s also divine as a filling for choux pastry — imagine chocolate cream puffs! Don’t forget the simplest pleasures: a spoonful on top of a warm brownie, a dollop next to a slice of apple pie, or even just a small bowl with a few fresh raspberries for a quick, elegant treat. This frosting can also be gently folded into a chocolate mousse to add another layer of airy texture and richness.Mastering Your Chocolate Whipped Cream: Common Questions Answered
Even simple recipes can spark a few questions. Here are some of the most common queries about making the perfect chocolate whipped cream frosting.Can I make this frosting ahead of time?
Yes, absolutely! While it’s best enjoyed fresh, this stabilized chocolate whipped cream frosting holds up beautifully in the refrigerator for up to 2-3 days. Make sure to store it in an airtight container to prevent it from absorbing any fridge odors. When you’re ready to use it, give it a quick whisk by hand for about 30 seconds to restore its fluffy texture before piping or spreading.
Why did my whipped cream frosting turn grainy?
Grainy whipped cream is usually a sign of over-whipping. As you whip cream past the stiff peak stage, the fat molecules start to clump together, separating from the liquid and eventually turning into butter. Keep a very close eye on it during the final stages of whipping, and stop as soon as it reaches stiff peaks. Using very cold cream and chilled equipment also helps prevent over-whipping by giving you more control.
What kind of cocoa powder is best for this recipe?
I highly recommend using Dutch-processed unsweetened cocoa powder. It has a smoother, less bitter flavor and provides a darker, richer color to your frosting. Natural unsweetened cocoa powder will also work, but the flavor will be a bit more intense and slightly acidic, and the color might be a tad lighter. Both are delicious, so it often comes down to personal preference for depth of flavor and appearance.
Can I make this frosting less sweet?
Yes, you can certainly adjust the sweetness to your liking. Start with half the amount of powdered sugar, whip until stiff peaks form, and then taste. If you prefer it sweeter, add more powdered sugar, a tablespoon at a time, until you reach your desired level of sweetness. Remember that the cocoa powder adds a slight bitterness, so some sweetness is usually needed to balance it out.
My frosting isn’t holding its shape. What went wrong?
There are a few potential culprits here. The most common reason is not using heavy cream with a high enough fat content (it needs to be at least 36%). Another reason could be that your cream wasn’t cold enough, or your bowl and whisk weren’t chilled. Finally, not whipping it to true stiff peaks will result in a frosting that lacks structure. Ensure all these conditions are met for a perfectly stable frosting.
Storage Savvy: Keeping Your Frosting Fresh
Once you’ve made this delightful chocolate whipped cream frosting, you’ll want to ensure any leftovers are stored properly to maintain their freshness and texture. For unused frosting, transfer it to an airtight container. Press a piece of plastic wrap directly onto the surface of the frosting before sealing the container. This prevents a skin from forming and helps keep it fresh. Store it in the refrigerator for up to 2-3 days. When you’re ready to use it again, you might find it has stiffened slightly. A quick whisk by hand for about 30 seconds will usually bring it back to its original fluffy consistency. Avoid re-whipping with an electric mixer, as this can easily lead to over-whipping. If you’ve already frosted a cake or cupcakes, they should also be stored in an airtight container in the refrigerator. While the frosting is quite stable, extended periods at room temperature can cause it to soften, especially in warm environments. For best results and appearance, bring frosted desserts out of the fridge about 15-20 minutes before serving to allow them to come to a more pleasant temperature.
Stable Chocolate Whipped Cream Frosting
A rich, pipeable chocolate whipped cream frosting that holds its shape beautifully for all your dessert needs.
📝 Ingredients
👩🍳 Instructions
- 1Place a large mixing bowl (preferably metal) and your whisk attachment in the freezer for at least 15-20 minutes to chill thoroughly.
- 2In a small bowl, whisk together the sifted powdered sugar, sifted cocoa powder, and cornstarch. This ensures no lumps and even distribution.
- 3Remove the chilled bowl and whisk from the freezer. Pour the very cold heavy cream into the bowl. Begin whipping on medium-low speed, gradually increasing to medium-high, until the cream starts to thicken and holds soft peaks (when you lift the whisk, the peak gently folds over).
- 4With the mixer still running on medium-low, gradually add the sifted dry ingredient mixture to the cream, about a tablespoon at a time, until fully incorporated. Pour in the vanilla extract.
- 5Increase the mixer speed to medium-high and continue whipping until the frosting forms stiff peaks. This means the peaks will stand straight up when you lift the whisk. Be careful not to over-whip, or it will become grainy.
- 6Use the chocolate whipped cream frosting immediately to pipe onto cupcakes, spread on a cake, or dollop onto desserts. If not using right away, cover tightly with plastic wrap and refrigerate for up to 2-3 days. A quick whisk by hand may be needed before use.
💡 Notes
For best results, ensure all your ingredients and equipment are thoroughly chilled. Dutch-processed cocoa powder yields a darker color and smoother chocolate flavor. Adjust sweetness by adding more or less powdered sugar to taste. This frosting is stable for several hours at room temperature in a cool environment, but refrigerate frosted desserts for longer storage.



