


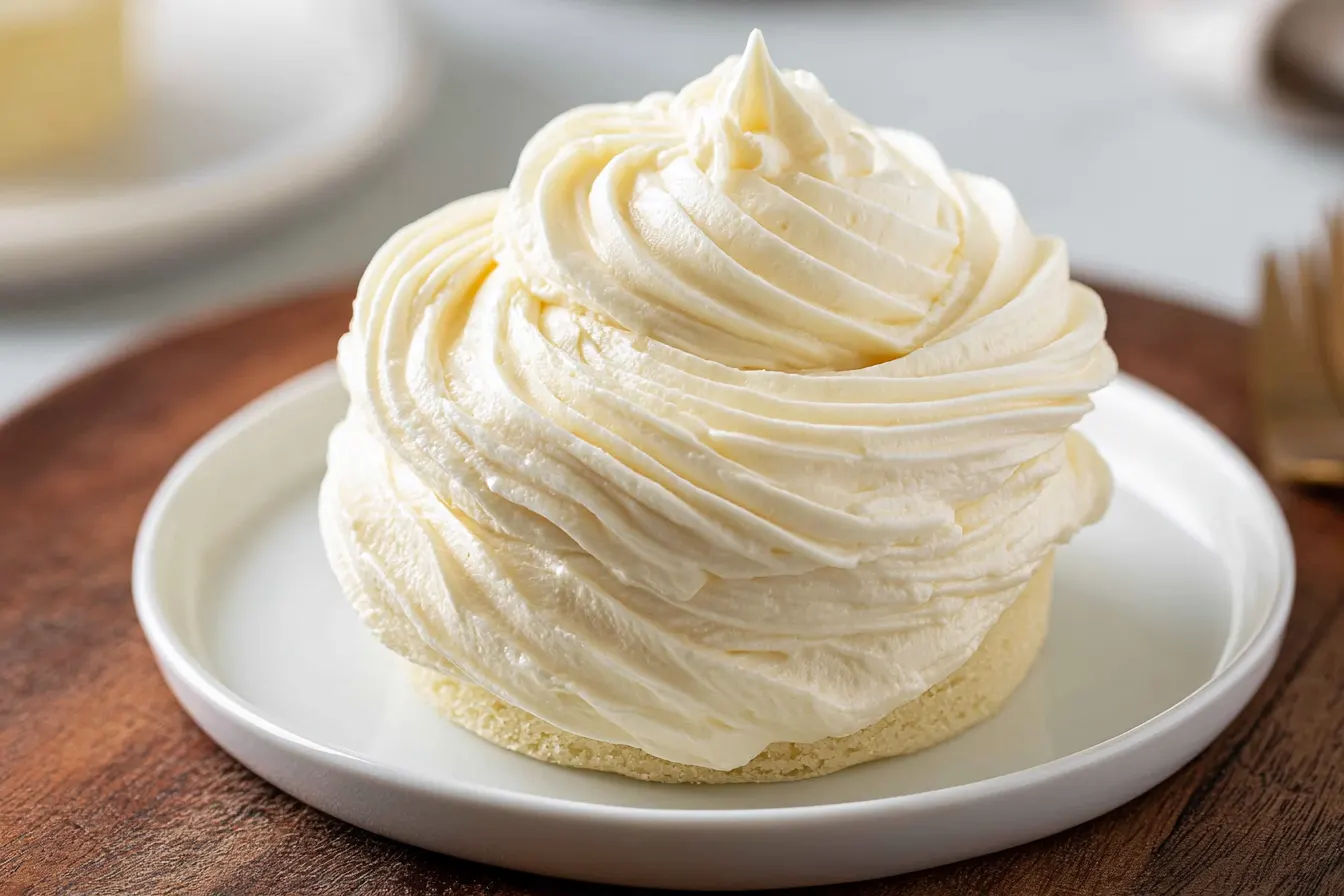
I confess, for years I was a buttercream purist, convinced that anything less than a pound of butter and powdered sugar wasn’t worth my time. Then I met Ermine Frosting, and my entire world, or at least my cake decorating world, flipped upside down. It’s light, it’s fluffy, and it’s got this incredible silky texture that makes you wonder where it’s been all your life. Best of all, it’s far less sweet than traditional buttercream, letting your cake’s flavor shine through.
- Why You’ll Fall for This Frosting (and Never Look Back)
- Gather Your Tools: What You’ll Need
- The Ingredients for a Fluffy Ermine Frosting
- Crafting Your Ermine Frosting: A Step-by-Step Guide
- Understanding Ermine: Why This Works
- Common Questions About Ermine Frosting
- Serving Suggestions & Perfect Pairings
- Storage Tips for Leftovers

Why You’ll Fall for This Frosting (and Never Look Back)
Before we dive into the how-to, let’s talk about why Ermine Frosting deserves a permanent spot in your baking repertoire. It all comes down to its unique texture and balanced flavor profile. Unlike American buttercream, which relies heavily on powdered sugar for its structure and sweetness, Ermine uses a cooked flour and milk base. This creates a pudding-like foundation that, when whipped with butter, transforms into an ethereal cloud. The result is a frosting that’s incredibly stable, yet melts in your mouth without any greasy residue. It pipes beautifully, holds its shape, and provides a delightful counterpoint to richer cakes like red velvet or chocolate. It’s also surprisingly versatile, taking on various flavorings with grace.Gather Your Tools: What You’ll Need
Making this elegant frosting doesn’t require any fancy equipment, but having the right tools can certainly make the process smoother. A good heavy-bottomed saucepan is essential for cooking the flour and milk mixture without scorching. I also recommend a whisk for stirring and a stand mixer with a whisk attachment for whipping everything to perfection. If you don’t have a stand mixer, a hand mixer will absolutely work, though your arm might get a bit of a workout! You’ll also want a flexible spatula for scraping down the bowl, ensuring everything is incorporated evenly. A clean, dry bowl is crucial, especially when whipping the butter, as any residual grease or water can prevent it from emulsifying properly.The Ingredients for a Fluffy Ermine Frosting
The beauty of Ermine Frosting lies in its simplicity. You likely have most of these staples in your pantry and fridge right now. The quality of your ingredients, especially the butter and vanilla, will shine through in the final product, so opt for good stuff if you can!For the Flour-Milk Paste:
- Granulated Sugar: Not powdered sugar! This sweetens the paste and helps it thicken.
- All-Purpose Flour: This is the secret thickener, creating the base for our silky frosting. Don’t worry, you won’t taste raw flour!
- Whole Milk: The fat in whole milk contributes to a richer, creamier paste. You can use 2% if that’s what you have, but whole is preferred.
- Pinch of Salt: Just a tiny bit to balance the sweetness and enhance the flavors.
For the Frosting:
- Unsalted Butter, softened: This is where the magic happens. Softened butter whips up beautifully, creating that light, airy texture. Make sure it’s truly softened, but not melted.
- Pure Vanilla Extract: A classic and essential flavor. Use the best quality you can find.

Crafting Your Ermine Frosting: A Step-by-Step Guide
Don’t be intimidated by the two-part process; each stage is straightforward. The key is patience and allowing the flour paste to cool completely. Rushing this step is the most common mistake and will result in a soupy mess.1. Prepare the Flour Paste
In a medium, heavy-bottomed saucepan, whisk together the granulated sugar, all-purpose flour, and salt. Make sure there are no lumps of flour. Gradually pour in the milk, whisking constantly to prevent lumps from forming. It’s important to add the milk slowly at first, creating a smooth slurry before adding the rest.
Place the saucepan over medium heat, continuing to whisk constantly. The mixture will begin to thicken after a few minutes, much like a pudding. Bring it to a gentle boil, then continue to cook and whisk for another 1-2 minutes until it’s very thick and smooth. You should see it bubbling and hear it ‘plopping’ a bit. It should be thick enough to coat the back of a spoon.
2. Cool the Paste Completely
Transfer the cooked flour paste to a shallow bowl or baking dish. This helps it cool faster. Press a piece of plastic wrap directly onto the surface of the paste to prevent a skin from forming. This step is crucial! Allow it to cool completely to room temperature. This can take several hours on the counter, or you can speed it up in the refrigerator, checking every 30 minutes or so. It needs to be cool to the touch, not even slightly warm.
Tip: You can make the flour paste a day in advance and store it in the fridge overnight. Just be sure to let it sit out for 30 minutes to an hour at room temperature before proceeding with the next step, as it will be very firm when cold.
3. Whip the Butter
Once your flour paste is completely cool, place the softened unsalted butter in the bowl of a stand mixer fitted with the whisk attachment (or use a large bowl with a hand mixer). Beat the butter on medium-high speed for 5-7 minutes, until it’s very pale in color, incredibly light, and fluffy. It should almost double in volume. Don’t skimp on this step – it’s what gives the frosting its airy texture.

4. Combine and Emulsify
With the mixer running on low speed, add the cooled flour paste to the whipped butter, one spoonful at a time. It’s important to add it slowly and gradually. As you add the paste, the mixture might look curdled or separated – don’t panic! This is normal. Continue beating on medium-high speed for another 5-10 minutes. The mixture will magically come together, becoming incredibly smooth, light, and fluffy. It should resemble soft-serve ice cream in consistency.
5. Finish with Flavor
Once the frosting is smooth and light, add the pure vanilla extract. Beat for another minute or so until it’s fully incorporated. Taste and adjust for sweetness if desired (though I rarely find it needs more!).
Your beautiful, silky Ermine Frosting is now ready to use! It’s perfect for piping onto cupcakes, spreading onto cakes, or even filling macarons.
Understanding Ermine: Why This Works
The genius of Ermine Frosting lies in its emulsion. When you cook flour and milk, you create a stable, starchy base. This base, once cooled, acts like a binder. When you slowly add it to vigorously whipped butter, the flour paste helps to emulsify the fat, trapping air and creating an incredibly stable and light structure. It’s a bit like making a custard first, then turning that custard into a cloud of buttery goodness. The starch from the flour contributes to its unique mouthfeel, which is distinctively less greasy and less sweet than a purely butter-and-sugar frosting. It’s a delightful culinary alchemy.Common Questions About Ermine Frosting
Can I make Ermine Frosting ahead of time?
Absolutely! You can make the flour paste up to 3 days in advance and store it in an airtight container in the refrigerator. When you’re ready to make the frosting, let the paste come to room temperature first. The finished Ermine Frosting can also be stored in an airtight container in the refrigerator for up to 5 days. When you want to use it, let it come to room temperature for about an hour, then re-whip it with your stand mixer for a few minutes until it’s light and fluffy again.
Why is my Ermine Frosting soupy or runny?
The most common culprit for soupy Ermine Frosting is adding the flour paste to the butter before it has cooled completely. Even a little warmth can melt the butter and cause separation. Ensure both the paste and the butter are at the correct temperatures (room temperature for both) before combining. Over-mixing can also sometimes lead to a slightly looser consistency, but it’s usually temperature related.
Can I add other flavors to Ermine Frosting?
Yes, this frosting is wonderfully versatile! You can swap out some of the vanilla extract for other extracts like almond, peppermint, or lemon. Cocoa powder can be sifted into the flour mixture along with the sugar for a chocolate version. You can also fold in finely crushed freeze-dried fruit powder, citrus zest, or even a tablespoon or two of fruit purée (ensure it’s thick and doesn’t add too much liquid) at the very end.
Is Ermine Frosting suitable for piping decorations?
Yes, it holds its shape beautifully! Ermine Frosting is known for being quite stable, making it excellent for piping intricate designs, swirls, and borders on cakes and cupcakes. Its smooth texture allows for clean lines and definition, which is a huge bonus for anyone who loves to decorate their bakes.
What’s the difference between Ermine Frosting and Swiss Meringue Buttercream?
While both are less sweet than American buttercream and have a silky texture, their bases are very different. Swiss Meringue Buttercream uses egg whites and sugar cooked over a double boiler, then whipped into a meringue before butter is added. Ermine Frosting, on the other hand, uses a cooked flour and milk paste as its base, with no eggs involved. Ermine is often considered a bit simpler to make as it avoids the meringue step, and it also doesn’t contain any raw egg whites, which some people prefer.
Serving Suggestions & Perfect Pairings
Ermine Frosting is a fantastic choice for so many baked goods because it doesn’t overpower them with sweetness. It’s truly iconic on a Red Velvet Cake, where its subtle sweetness and tangy notes (if you add a touch of cream cheese or buttermilk to the paste, a common variation) perfectly complement the cake’s richness. It’s also divine on chocolate cakes, carrot cakes, or even simple vanilla cupcakes. Consider pairing it with fruit-forward desserts too. A lemon cake with Ermine Frosting could be a revelation! Or, for a seasonal twist, try it on a pumpkin spice cake in the fall. Because it’s so light, it also makes for a lovely filling for whoopie pies or sandwich cookies. The possibilities are truly endless once you have this versatile frosting in your arsenal.Storage Tips for Leftovers
If you find yourself with extra Ermine Frosting (a rare occurrence in my house!), you can store it. Place it in an airtight container and refrigerate for up to 5 days. When you’re ready to use it again, simply bring it back to room temperature. This might take an hour or two depending on how cold your fridge is. Once it’s at room temperature, re-whip it in your stand mixer on medium-high speed for a few minutes until it’s light, smooth, and fluffy again. It’ll be just as good as fresh! Freezing isn’t typically recommended as it can affect the texture upon thawing.This frosting truly is a game-changer. It’s got that delightful old-fashioned charm with a thoroughly modern appeal, delivering on flavor and texture without the sugar overload. Give it a try, and you might just find your new favorite go-to frosting!

Classic Ermine Frosting
A silky, light, and not-too-sweet frosting perfect for cakes and cupcakes, using a cooked flour and milk base.
📝 Ingredients
👩🍳 Instructions
- 1In a medium, heavy-bottomed saucepan, whisk together the granulated sugar, all-purpose flour, and salt until well combined and no lumps remain.
- 2Gradually pour in the whole milk, whisking constantly to create a smooth, lump-free mixture.
- 3Place the saucepan over medium heat. Cook, whisking continuously, until the mixture thickens and comes to a gentle boil. Continue to cook and whisk for 1-2 minutes after it starts boiling, until it is very thick, smooth, and resembles a pudding. It should coat the back of a spoon thickly.
- 4Transfer the cooked flour paste to a shallow bowl or baking dish. Press a piece of plastic wrap directly onto the surface of the paste to prevent a skin from forming. Allow it to cool completely to room temperature (this can take 2-3 hours on the counter, or you can refrigerate it, stirring occasionally, to speed up the process). It is crucial that the paste is completely cool.
- 5Once the flour paste is completely cool, place the softened unsalted butter in the bowl of a stand mixer fitted with the whisk attachment (or use a large bowl with a hand mixer). Beat the butter on medium-high speed for 5-7 minutes, until it is very pale in color, incredibly light, and fluffy, almost doubled in volume.
- 6With the mixer running on low speed, add the cooled flour paste to the whipped butter, one spoonful at a time. The mixture may look curdled or separated initially, but continue beating. Increase the speed to medium-high and beat for another 5-10 minutes until the frosting is smooth, light, and fluffy, resembling soft-serve ice cream.
- 7Add the pure vanilla extract and beat for another minute until fully incorporated. Taste and adjust sweetness or add more vanilla if desired. Use immediately or store as directed.
💡 Notes
Ensure both the flour paste and butter are at room temperature before combining to prevent a soupy frosting. For chocolate Ermine, whisk 1/4 cup unsweetened cocoa powder with the dry ingredients in step 1. For a slight tang, a tablespoon of buttermilk or cream cheese can be added to the paste in step 1, reducing the milk slightly.


