


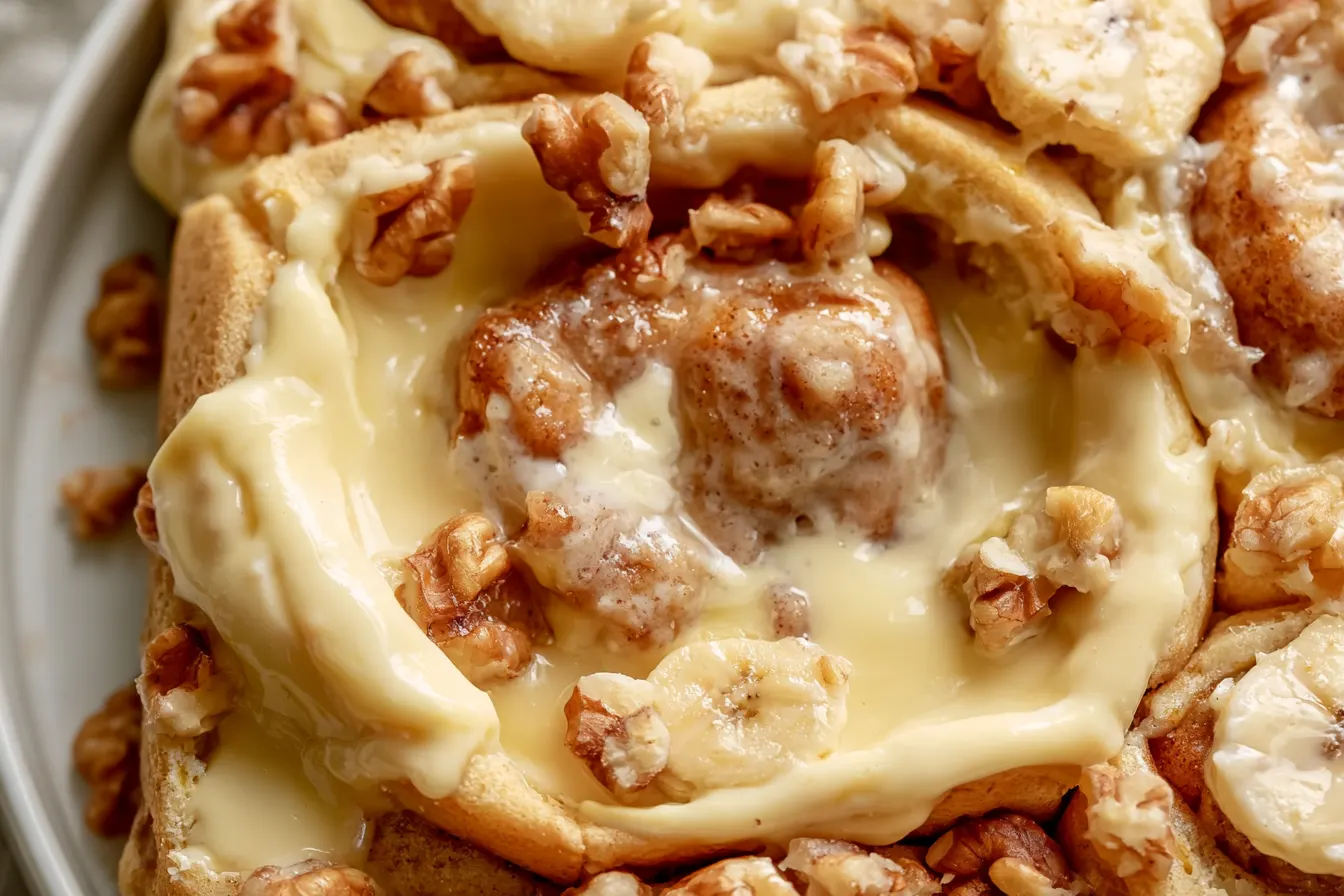
I’m not gonna lie, sometimes my kitchen feels like a mad scientist’s lab. One morning, I was staring at a bowl of slightly-too-ripe bananas, a box of Nilla Wafers I’d bought for a party that never happened, and a lingering craving for something warm, gooey, and utterly comforting. My brain, bless its chaotic heart, decided to smash together two American dessert titans: classic banana pudding and a fluffy, spiced cinnamon roll. The result? These absolutely incredible banana pudding cinnamon rolls.
It might sound a little wild on paper, but trust me, this fusion is pure magic. Imagine a tender, swirled cinnamon roll dough, but instead of just cinnamon sugar, it’s layered with rich, mashed bananas, pockets of creamy vanilla pudding, and the delightful crunch of crushed Nilla Wafers. Every bite is like a warm hug, a sweet symphony of textures and flavors that just works.
This isn’t just another cinnamon roll recipe; it’s an experience. It’s the kind of treat that makes a weekend morning feel extra special, or turns an ordinary weeknight dessert into something memorable. Get ready for smiles, sticky fingers, and a whole lot of “mmmmm” around your table.

Why These Rolls Are a Game-Changer
You’ve had cinnamon rolls. You’ve had banana pudding. But have you had them together, in one glorious, unified, baked-to-perfection package? Probably not, and that’s precisely why this recipe is about to blow your mind. We’re not just topping a cinnamon roll with banana pudding; we’re incorporating the essence of banana pudding right into the roll itself.
The secret lies in the layers. First, a soft, pillowy dough that’s rich with butter and just enough sweetness. Then, a generous spread of mashed ripe bananas — not too much, just enough to bring that fruity, comforting flavor. Next, a sprinkle of crushed Nilla Wafers, which absorb some of the moisture while providing a delightful texture contrast. And finally, dollops of thick, homemade vanilla pudding are swirled into the mix, melting into luscious pockets as they bake.
Forget dry, crumbly rolls. These are moist, tender, and bursting with flavor. The vanilla pudding glaze on top is just the cherry (or rather, the banana slice) on this incredible dessert. It’s a dessert that feels familiar yet entirely new, comforting yet exciting.
The Anatomy of a Perfect Banana Pudding Cinnamon Roll
Let’s break down the components that make these rolls so irresistible. Each part plays a crucial role in achieving that perfect balance of sweetness, texture, and banana-y goodness.
- The Dough: We start with a classic enriched yeast dough. It’s soft, pliable, and rises beautifully, creating those iconic fluffy layers. The slight sweetness in the dough itself complements the fillings without being cloying.
- Mashed Bananas: This isn’t just an afterthought. Ripe bananas (the kind with plenty of brown spots!) are mashed and spread directly onto the dough. As they bake, they caramelize slightly, intensifying their flavor and adding incredible moisture.
- Crushed Nilla Wafers: These are non-negotiable for true banana pudding flavor. Crushed and sprinkled over the bananas, they absorb some of the banana moisture and provide a gentle crunch that softens beautifully during baking, reminiscent of the wafers in a traditional banana pudding.
- Vanilla Pudding: This is where the magic happens. A thick, homemade vanilla pudding is spread in dollops over the bananas and wafers before rolling. It melts into creamy pockets, adding an unparalleled richness and that distinct banana pudding flavor.
- Cinnamon Sugar: Of course, it wouldn’t be a cinnamon roll without it! A light dusting of cinnamon sugar adds that warm, familiar spice that ties everything together.
- Vanilla Pudding Glaze: A simple, creamy glaze made with more vanilla pudding, powdered sugar, and a splash of milk. It drizzles over the warm rolls, seeping into every nook and cranny for an extra layer of sweetness and moisture.
Gathering Your Ingredients for Banana Pudding Bliss
Before we get our hands delightfully sticky, let’s make sure we have everything we need. Most of these ingredients are pantry staples, but a few might require a quick trip to the store. Quality ingredients make a difference, especially when it comes to something as comforting as a cinnamon roll.

For the Fluffy Yeast Dough:
- Active Dry Yeast: Essential for that beautiful rise. Make sure it’s fresh!
- Warm Milk: Around 105-115°F (40-46°C) — warm enough to activate the yeast but not so hot it kills it.
- Granulated Sugar: Feeds the yeast and adds sweetness to the dough.
- Large Egg: Binds the dough and adds richness.
- Melted Unsalted Butter: For flavor and tender texture.
- All-Purpose Flour: The structure of our rolls.
- Salt: Balances the sweetness and enhances flavor.
For the Irresistible Banana Pudding Filling:
- Ripe Bananas: The star of the show! The riper, the better for sweetness and mashability.
- Crushed Nilla Wafers: A key texture and flavor component. Don’t skip these!
- Granulated Sugar: Just a touch to enhance the banana flavor.
- Ground Cinnamon: The classic spice that makes a cinnamon roll, well, a cinnamon roll.
- Homemade Vanilla Pudding: (Or a good quality store-bought one if you’re in a pinch, but homemade is highly recommended!) This should be thick and cooled.
For the Dreamy Vanilla Pudding Glaze:
- Powdered Sugar: For a smooth, lump-free glaze.
- More Homemade Vanilla Pudding: Thinned out slightly for drizzling.
- Milk (or Cream): To reach the perfect drizzling consistency.
- Vanilla Extract: To boost that lovely vanilla flavor.
Note: While you can use instant pudding for the glaze, I highly recommend making a batch of homemade vanilla pudding for the filling and using some of that for the glaze. It makes a world of difference in flavor and texture.
Crafting Your Banana Pudding Cinnamon Rolls: A Step-by-Step Guide
Alright, apron on? Let’s get baking! This process might seem like a few steps, but each one is straightforward and incredibly rewarding. Take your time, enjoy the process, and let the aromas fill your kitchen.

Whipping Up the Dough
- Activate the Yeast: In a large bowl or the bowl of a stand mixer, combine the warm milk, 1 tablespoon of granulated sugar, and the active dry yeast. Give it a gentle stir and let it sit for 5-10 minutes until foamy. This tells you your yeast is alive and ready to work!
- Combine Wet Ingredients: To the foamy yeast mixture, add the remaining granulated sugar, the egg, and the melted butter. Mix well until combined.
- Add Dry Ingredients: Gradually add the flour and salt to the wet ingredients. If using a stand mixer, attach the dough hook and mix on low speed until a shaggy dough forms.
- Knead the Dough: Increase the speed to medium-low and knead for about 5-7 minutes, or until the dough is smooth, elastic, and pulls away from the sides of the bowl. If kneading by hand, turn the dough out onto a lightly floured surface and knead for 8-10 minutes.
- First Rise: Lightly grease a clean bowl with oil. Place the dough in the bowl, turning once to coat. Cover the bowl with plastic wrap or a clean kitchen towel and let it rise in a warm place for 1-1.5 hours, or until doubled in size.
Prepping the Pudding and Filling
- Make the Pudding: While the dough is rising, prepare your vanilla pudding according to your preferred recipe. Make sure it’s thick and then let it cool completely in the refrigerator. We need it chilled and firm enough to spread.
- Mash the Bananas: In a small bowl, mash the ripe bananas with a fork. You want them mostly smooth, but a few small lumps are fine for texture. Stir in the granulated sugar and ground cinnamon.
- Crush Wafers: Place Nilla Wafers in a zip-top bag and crush them using a rolling pin, or pulse briefly in a food processor until you have coarse crumbs.
Assembling and Baking the Rolls
- Roll Out the Dough: Once the dough has doubled, gently punch it down to release the air. Turn it out onto a lightly floured surface and roll it into a large rectangle, roughly 12×18 inches.
- Layer the Filling: Evenly spread the mashed banana mixture over the entire surface of the dough, leaving a small border (about 1/2 inch) on one of the long edges. Sprinkle the crushed Nilla Wafers over the bananas. Then, dollop spoonfuls of the cooled vanilla pudding evenly over the banana and wafer layers.
- Roll ‘Em Up: Starting from the long edge opposite the border, carefully roll the dough into a tight log. Pinch the seam closed firmly to seal.
- Slice the Rolls: Using a sharp knife or unflavored dental floss, cut the log into 12-14 equal slices, about 1.5 inches thick.
- Second Rise: Arrange the slices in a greased 9×13 inch baking dish, leaving a little space between them (they’ll expand!). Cover the dish with plastic wrap or a clean towel and let them rise in a warm place for another 30-45 minutes, or until puffy.
Tip: If your kitchen is cool, preheat your oven to its lowest setting (usually around 170°F/75°C), then turn it off. Place the covered rolls inside for a warm, draft-free spot to rise quickly.
- Bake: Preheat your oven to 375°F (190°C). Bake the rolls for 20-25 minutes, or until golden brown and cooked through. The exact time will depend on your oven, so keep an eye on them.
- Cool Slightly: Remove from the oven and let them cool in the pan for about 10 minutes before glazing.
Finishing with the Glaze
- Make the Glaze: While the rolls are cooling slightly, whisk together the powdered sugar, cooled vanilla pudding, milk (or cream), and vanilla extract in a small bowl until smooth and of drizzling consistency. Add more milk if you want a thinner glaze, or more powdered sugar for a thicker one.
- Glaze and Serve: Drizzle the glaze generously over the warm cinnamon rolls. Serve immediately and watch them disappear!
Common Questions About Banana Pudding Cinnamon Rolls
Got questions? I’ve got answers! Here are some of the most common queries I hear about making these delightful rolls.
Can I use store-bought dough for these?
While I highly recommend making the dough from scratch for the best flavor and texture, you absolutely can use store-bought refrigerated biscuit dough or pizza dough in a pinch. Just be aware the texture won’t be quite as soft and pillowy as homemade yeast dough. If using store-bought, roll it out slightly thinner and proceed with the filling steps. Adjust baking time as per package directions.
What kind of bananas should I use?
The riper, the better! Look for bananas with plenty of brown spots on the peel. These are sweeter and easier to mash, which will give you the best banana flavor in your rolls. Green or yellow bananas won’t offer the same depth of flavor.
Can I make these ahead of time?
Yes! There are a couple of ways to do this. You can prepare the rolls up to the second rise (step 14), cover them tightly with plastic wrap, and refrigerate overnight. In the morning, pull them out and let them come to room temperature and finish rising for about an hour before baking as directed. Alternatively, you can bake them fully, let them cool, cover tightly, and reheat gently in the microwave or oven when ready to serve. They’re always best fresh, but still delicious reheated!
What if my dough isn’t rising?
The most common culprits are old yeast or milk that’s too hot (which kills the yeast) or too cold (which won’t activate it). Ensure your yeast is fresh and your milk is warm, not scorching. A warm, draft-free environment is also key for rising. If your kitchen is cold, try the oven trick mentioned in the recipe notes.
Can I freeze these banana pudding cinnamon rolls?
Absolutely! You can freeze them baked or unbaked.
- To freeze unbaked: Prepare the rolls up to step 14 (second rise). Place them in the baking dish, cover tightly with plastic wrap, then aluminum foil, and freeze for up to 1 month. When ready to bake, transfer to the refrigerator overnight to thaw and rise, then bake as directed.
- To freeze baked: Let the baked and glazed rolls cool completely. Wrap individual rolls tightly in plastic wrap, then place them in a freezer-safe bag or container for up to 2-3 months. Reheat in the microwave for 30-60 seconds, or in a warm oven until heated through.
A Little More About the Dough
The dough is the foundation of any great cinnamon roll, and for these banana pudding versions, we want something incredibly soft and yielding. Enriched doughs, like the one we’re using, get their tenderness from ingredients like milk, butter, and eggs. These additions not only add flavor but also inhibit gluten development slightly, resulting in a more delicate crumb.
Kneading is crucial here. It develops the gluten, creating the elasticity needed for the dough to stretch and hold its shape, as well as trap the gases produced by the yeast. A properly kneaded dough will be smooth, supple, and will spring back when gently poked. Don’t skimp on this step – it pays off in the final texture!
The Importance of a Good Rise
Yeast needs warmth and time to do its job. The first rise, often called the “bulk fermentation,” allows the yeast to work its magic, producing carbon dioxide that makes the dough expand. This also develops flavor in the dough. The second rise, after the rolls are shaped, is equally important. It’s often called “proofing” and gives the individual rolls their final puffiness and light texture. Rushing either of these steps can lead to dense, heavy rolls.
Serving Suggestions & Pairing Ideas
These banana pudding cinnamon rolls are a showstopper on their own, but they also play well with others.
- Breakfast/Brunch Star: Serve them warm with a strong cup of coffee or a tall glass of cold milk. They’re perfect alongside a fruit salad for a balanced (ish!) brunch spread.
- Dessert Delight: While rich, they aren’t overly heavy as a dessert. A scoop of vanilla bean ice cream melting over a warm roll is divine. Or, for an extra indulgent treat, a drizzle of warm caramel sauce.
- Holiday Treat: These make an incredible addition to any holiday breakfast or dessert table, particularly for Thanksgiving or Christmas, offering a unique twist on classic flavors.
Storage and Reheating Tips
While these are undeniably best fresh from the oven, you can absolutely enjoy them later.
- At Room Temperature: Store leftover rolls in an airtight container at room temperature for up to 2 days. The pudding in the filling will keep them moist, but they won’t be quite as fresh as day one.
- In the Refrigerator: For longer storage, keep them in an airtight container in the refrigerator for up to 4-5 days.
- Reheating: To reheat, pop individual rolls in the microwave for 20-30 seconds until warm and soft. For a crispier exterior, you can warm them in a preheated oven at 300°F (150°C) for about 5-10 minutes, covering loosely with foil if they start to brown too much.
There you have it! A recipe that combines two beloved desserts into one unforgettable treat. These banana pudding cinnamon rolls are more than just a baked good; they’re a celebration of comfort, a testament to playful kitchen experimentation, and a guaranteed crowd-pleaser. So go on, get baking, and prepare to fall in love with your new favorite brunch obsession!

Banana Pudding Cinnamon Rolls
Soft, gooey cinnamon rolls layered with mashed bananas, crushed Nilla wafers, and creamy homemade vanilla pudding.
📝 Ingredients
👩🍳 Instructions
- 1In a large bowl or stand mixer, combine warm milk, 1 tbsp granulated sugar, and yeast. Stir and let sit 5-10 minutes until foamy.
- 2Add remaining ¼ cup granulated sugar, egg, and melted butter to yeast mixture. Mix well.
- 3Gradually add flour and salt. Mix with a dough hook on low speed for 5-7 minutes, or knead by hand for 8-10 minutes, until smooth and elastic.
- 4Lightly grease a clean bowl. Place dough in bowl, turning to coat. Cover and let rise in a warm place for 1-1.5 hours, or until doubled.
- 5While dough rises, prepare homemade vanilla pudding and let it cool completely in the refrigerator until thick.
- 6Mash ripe bananas in a small bowl. Stir in 2 tablespoons granulated sugar and ground cinnamon.
- 7Crush Nilla Wafers until coarse crumbs form.
- 8Punch down risen dough. Roll into a 12x18 inch rectangle on a lightly floured surface.
- 9Spread mashed banana mixture evenly over the dough, leaving a ½-inch border on one long edge. Sprinkle crushed Nilla Wafers over bananas. Dollop cooled vanilla pudding evenly over the layers.
- 10Starting from the long edge opposite the border, carefully roll the dough into a tight log. Pinch the seam closed.
- 11Cut the log into 12-14 equal slices (about 1.5 inches thick) using a sharp knife or dental floss.
- 12Arrange slices in a greased 9x13 inch baking dish. Cover and let rise in a warm place for 30-45 minutes, or until puffy.
- 13Preheat oven to 375°F (190°C). Bake for 20-25 minutes, or until golden brown.
- 14While rolls cool for 10 minutes, whisk together powdered sugar, ½ cup cooled vanilla pudding, ¼ cup milk/cream, and 1 tsp vanilla extract until smooth for the glaze.
- 15Drizzle glaze generously over warm cinnamon rolls. Serve immediately.
💡 Notes
For the vanilla pudding, a good thick homemade recipe works best for both the filling and the glaze. You can find a reliable recipe on my blog under 'Easy Homemade Vanilla Pudding.' If freezing, see article for detailed instructions on unbaked and baked methods.



