


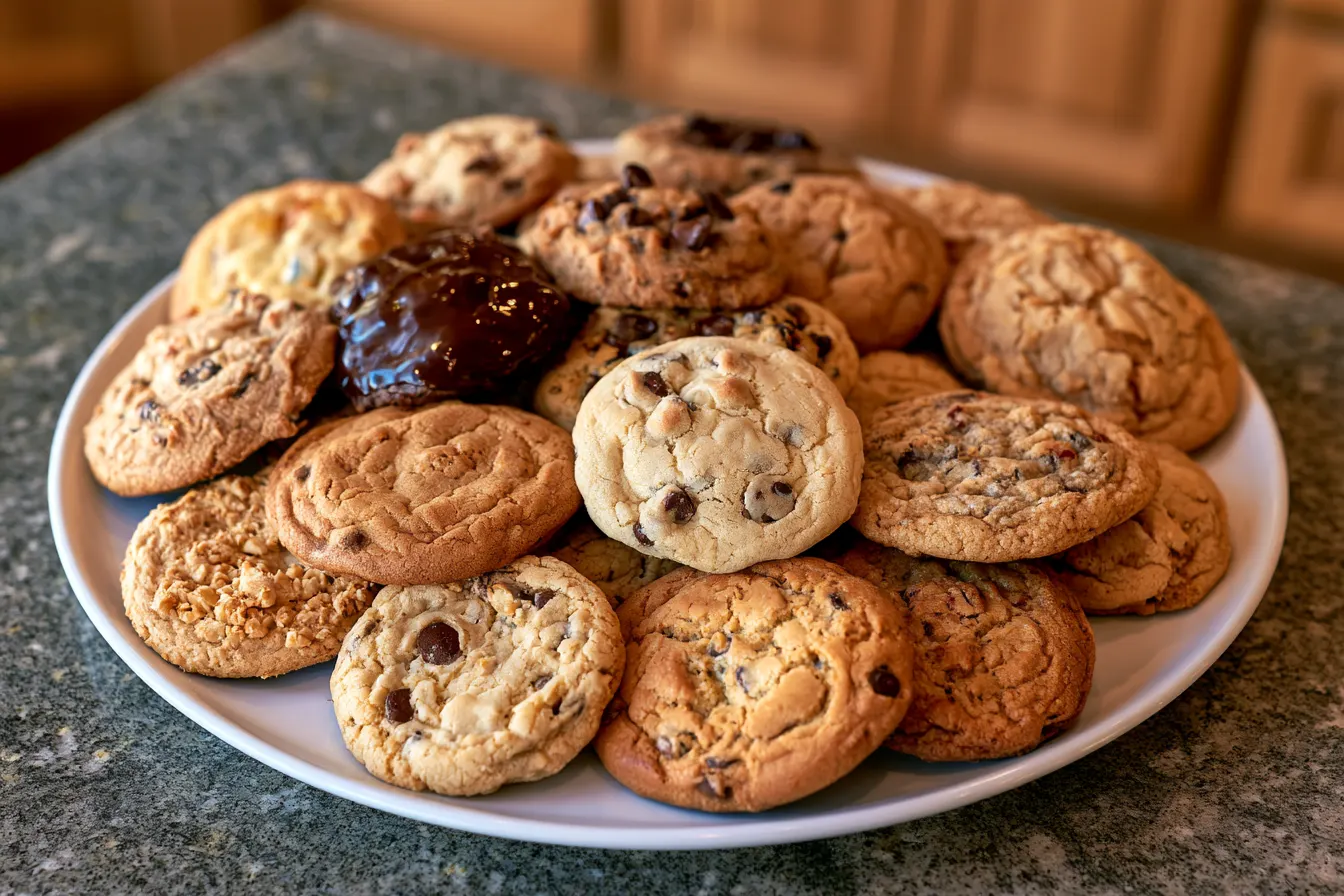
There’s something uniquely comforting about the aroma of freshly baked cookies wafting through the house. For me, it instantly transports me back to childhood Saturdays, when my grandmother would pull a warm sheet of homemade chocolate chip cookies from her trusty oven. That scent, the one that promises gooey centers and slightly crisp edges, is pure magic. Today, we’re recreating that magic with a recipe that’s not just easy, but truly irresistible.

Mastering the Cookie: Why This Recipe Works Wonders
You might be thinking, “Another chocolate chip cookie recipe? What makes this one different?” And that’s a fair question! The internet is swimming in them. But here’s the secret sauce to *this* particular rendition: it’s all about the balance of fats and sugars, and a little patience. We’re using a combination of both brown and granulated sugar, which contributes to that coveted chewiness and depth of flavor. The brown sugar brings moisture and a molasses-like richness, while the white sugar ensures those delightfully crisp edges. Beyond that, we’re not skimping on the butter (because, well, butter makes everything better!) and we’re letting our dough chill. This isn’t a mandatory step if you’re in a cookie emergency, but trust me, even 30 minutes in the fridge makes a noticeable difference. It allows the flavors to meld and the fats to firm up, resulting in less spreading and a more concentrated, complex taste. It’s a small extra step for a truly elevated homemade chocolate chip cookie experience.Essential Supplies for Your Baking Adventure
Before we even crack an egg, let’s make sure our kitchen arsenal is ready. You won’t need anything fancy, just the basics: Large mixing bowls: At least two will be handy. Electric mixer (stand or hand-held): While you *can* do this by hand, a mixer makes creaming butter and sugar a breeze. Rubber spatula: For scraping down the bowl and folding in chocolate chips. Measuring cups and spoons: Accuracy is key in baking! Baking sheets: Light-colored ones are best for even baking. Parchment paper or silicone baking mats: Non-stick and makes cleanup a dream. Wire cooling rack: Essential for letting your cookies cool properly and prevent sogginess. Ice cream scoop (optional, but recommended): This is your secret weapon for perfectly uniform cookies. Having these tools ready means you can flow through the recipe without interruptions, making the whole process even more enjoyable.Gather Your Goodies: What You’ll Need
Good cookies start with good ingredients. There’s no need for anything exotic here, just your standard pantry staples. Make sure your butter and eggs are at room temperature – this makes a huge difference in the texture of your dough and how well everything combines. Cold ingredients don’t emulsify as well, leading to a less smooth, less cohesive batter.
For the Irresistible Cookie Dough
1 cup (2 sticks) unsalted butter, softened to room temperature ¾ cup granulated sugar 1 cup packed light brown sugar 2 large eggs, at room temperature 1 teaspoon vanilla extract (good quality makes a difference!) 2 ¼ cups all-purpose flour 1 teaspoon baking soda ½ teaspoon salt 1 ½ cups (about 9 oz) semi-sweet chocolate chips (or a mix of milk and dark!)A Note on Chocolate Choices
While semi-sweet chocolate chips are the classic choice, don’t be afraid to experiment! I often use a mix of milk chocolate and dark chocolate chips for a more complex flavor profile. You could also chop up a good quality chocolate bar for those beautiful, melty puddles of chocolate throughout your cookies. Chocolate chunks or even mini chocolate chips work wonderfully too, just adjust the quantity slightly if they’re much smaller or larger.Whipping Up Your Wonderful Cookies: Step-by-Step
Alright, ovens preheating to 375°F (190°C), baking sheets lined with parchment paper – let’s make some magic happen. This process is straightforward, but each step plays a crucial role in the final outcome. Don’t rush it, and enjoy the process!Step 1: Creaming the Dream Team
In your large mixing bowl, combine the softened butter, granulated sugar, and brown sugar. Using your electric mixer, beat these together on medium speed until the mixture is light, fluffy, and pale in color. This usually takes about 2-3 minutes. This creaming process incorporates air, which will give your cookies a lovely texture. Scrape down the sides of the bowl with your spatula to ensure everything is evenly mixed.Step 2: Adding the Wet Wonders
Crack in your two room-temperature eggs, one at a time, beating well after each addition until fully incorporated. Then, stir in the vanilla extract. The mixture might look a little curdled at this point, but don’t worry, it will come together as you add the dry ingredients.Step 3: Bringing in the Dry Goodness
In a separate medium bowl, whisk together the all-purpose flour, baking soda, and salt. This ensures these dry ingredients are evenly distributed before they hit the wet mixture. Gradually add the dry ingredients to the wet ingredients, mixing on low speed until *just* combined. Be careful not to overmix here! Overmixing develops the gluten in the flour too much, leading to tougher cookies. Stop as soon as you no longer see streaks of dry flour.
Step 4: Chocolate Chip Extravaganza
Now for the best part! Fold in your chocolate chips using a rubber spatula. Mix until they are evenly distributed throughout the dough. Tip: If you want to get really fancy, save about ¼ cup of chocolate chips to press into the tops of the cookie dough balls just before baking. This makes for a beautiful, bakery-style finish.Step 5: Chill Out (Optional, but Recommended!)
Cover the bowl with plastic wrap and chill the dough in the refrigerator for at least 30 minutes, or up to 24 hours. As mentioned, this step deepens the flavor and helps prevent spreading. If you’re pressed for time, you can skip it, but your cookies will thank you for the wait!Step 6: Scoop and Bake
Using a 1.5-2 tablespoon ice cream scoop or your hands, drop rounded spoonfuls of dough onto your prepared baking sheets, leaving about 2 inches between each cookie. This allows them to spread without merging into one giant cookie. Bake for 9-12 minutes, or until the edges are golden brown and the centers are still slightly soft. They might look a little underdone, but they will continue to cook as they cool.Step 7: Cool Down and Devour
Let the cookies cool on the baking sheets for about 5 minutes before transferring them to a wire rack to cool completely. This helps them set up and prevents them from breaking. And then? Enjoy! Warm, gooey, and utterly delicious.Common Cookie Conundrums: Solved!
Even the most seasoned bakers run into little quirks now and then. Here are a few common questions and troubleshooting tips for your homemade chocolate chip cookies.Why are my cookies spreading too much and becoming flat?
Several culprits could be at play here! Your butter might have been too soft (verging on melted), your oven temperature could be off (a common issue!), or you might not have enough flour. Chilling the dough is also a great way to combat spreading, as it firms up the butter.My cookies are hard and dry, not chewy. What happened?
Overmixing the dough is a prime suspect for tough cookies, as it develops the gluten too much. Baking for too long is another common cause. Remember, you want the edges golden but the centers still a bit soft when you pull them from the oven. They’ll continue to set as they cool.Can I make this dough ahead of time?
Absolutely! Cookie dough is fantastic for making in advance. You can keep it covered in the refrigerator for up to 3 days. For longer storage, scoop the dough onto a parchment-lined baking sheet and freeze until solid. Then transfer the frozen dough balls to a freezer-safe bag for up to 3 months. When you’re ready to bake, you can bake directly from frozen, adding an extra 2-4 minutes to the baking time.What’s the best way to store leftover cookies?
Once completely cooled, store your homemade chocolate chip cookies in an airtight container at room temperature for up to 3-4 days. To keep them extra fresh and soft, you can even add half a slice of bread to the container – the cookies will absorb moisture from the bread, keeping them wonderfully chewy.Can I substitute different flours?
For this particular recipe, I highly recommend sticking with all-purpose flour for the best results. Substituting other flours like whole wheat or gluten-free blends can drastically change the texture and liquid absorption, requiring significant adjustments to the recipe. If you’re looking for alternative flour recipes, it’s often best to find one specifically designed for that flour.Sweet Variations and Serving Suggestions
While these homemade chocolate chip cookies are perfect as is, there’s always room for a little playful experimentation! Here are a few ideas to keep your cookie game exciting.Flavor Twists to Try
Nutty Goodness: Add ½ cup of chopped walnuts or pecans along with the chocolate chips for a classic texture and flavor boost. Toasting them lightly beforehand can really enhance their taste. Salted Caramel Swirl: Before adding the chocolate chips, swirl in a couple of tablespoons of thick, good quality caramel sauce into the dough. A sprinkle of flaky sea salt on top before baking elevates the flavors beautifully. Espresso Kick: Add 1-2 teaspoons of instant espresso powder to the dry ingredients for a subtle coffee note that perfectly complements the chocolate. Candy Mix-Ins: For a fun twist, swap out some of the chocolate chips for M&M’s, chopped candy bars, or even crushed pretzels for a sweet and salty crunch.Perfect Pairings
A warm, gooey chocolate chip cookie is a treat in itself, but it truly shines when paired with certain accompaniments. Classic Milk: A tall, cold glass of milk is the quintessential partner for a chocolate chip cookie. It’s simple, satisfying, and timeless. Hot Coffee or Tea: The slight bitterness of coffee or a robust tea can beautifully cut through the sweetness of the cookie, making for a sophisticated afternoon treat. Vanilla Ice Cream: For an indulgent dessert, sandwich a scoop of vanilla bean ice cream between two warm cookies, or simply serve a cookie à la mode. A drizzle of chocolate sauce or caramel never hurts! Fruit Salad: Believe it or not, a light, fresh fruit salad can be a lovely counterpoint to a rich cookie, offering a refreshing balance. Whether you enjoy them straight from the oven, still warm and yielding, or cooled and perfectly chewy the next day, these chocolate chip cookies are designed to bring a smile to your face. They’re a testament to the simple power of good ingredients and a little bit of baking love. So go ahead, whip up a batch, and share the bliss!
Classic Homemade Chocolate Chip Cookies
Chewy, buttery, and loaded with melty chocolate, these homemade cookies are easy to bake and guaranteed to be a family favorite.
📝 Ingredients
👩🍳 Instructions
- 1Preheat your oven to 375°F (190°C). Line two baking sheets with parchment paper or silicone baking mats.
- 2In a large bowl, cream together the softened butter, granulated sugar, and brown sugar using an electric mixer until light and fluffy (2-3 minutes). Scrape down the sides of the bowl.
- 3Beat in the eggs one at a time, mixing well after each addition. Stir in the vanilla extract.
- 4In a separate medium bowl, whisk together the all-purpose flour, baking soda, and salt.
- 5Gradually add the dry ingredients to the wet ingredients, mixing on low speed until just combined. Be careful not to overmix.
- 6Fold in the chocolate chips with a rubber spatula until evenly distributed.
- 7Optional: Cover the dough and chill in the refrigerator for at least 30 minutes for better flavor and less spreading.
- 8Drop rounded spoonfuls (about 1.5-2 tablespoons) of dough onto the prepared baking sheets, leaving 2 inches between each cookie.
- 9Bake for 9-12 minutes, or until the edges are golden brown and the centers are still slightly soft.
- 10Let the cookies cool on the baking sheets for 5 minutes before transferring them to a wire rack to cool completely.
💡 Notes
For best results, ensure butter and eggs are at room temperature. For uniform cookies, use an ice cream scoop. Store cooled cookies in an airtight container at room temperature for up to 4 days. Dough can be frozen for up to 3 months.



