


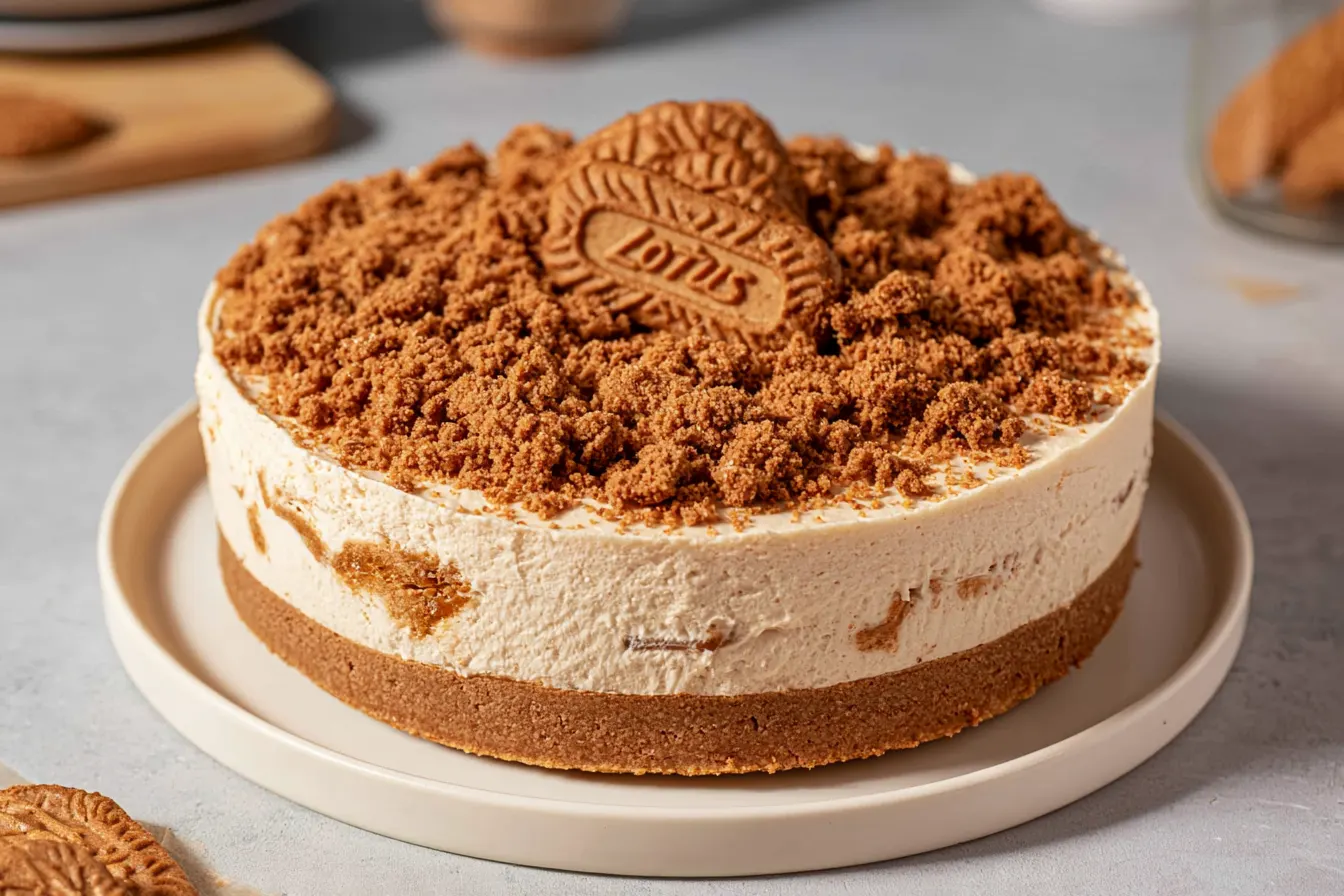
Ever had one of those days where the craving for something utterly decadent hits, but the thought of turning on the oven feels like scaling Everest? Been there, my friend, countless times. That’s precisely how this incredible No-bake Lotus Biscoff cheesecake came into existence — born from a desperate desire for creamy, spiced caramel goodness without an ounce of baking fuss.

Why This Biscoff Cheesecake is a Game-Changer
You might have seen a few Biscoff cheesecake recipes floating around, but trust me when I say this one is truly special. The magic lies in the balance. We’re not just throwing Biscoff into a standard cheesecake mix; we’re building layers of that beloved flavor, ensuring it shines through in every single component. From the buttery, crumbly base to the unbelievably smooth filling, it’s Biscoff all the way down. What truly sets this version apart is the texture of the filling. It’s gloriously rich and firm enough to hold its shape beautifully, but still melts in your mouth with an almost mousse-like quality. No gelatin needed here, just the right ratios and a little patience for chilling. It’s the kind of dessert that gathers compliments and disappears quickly, leaving everyone asking for the recipe.The Secret to Cheesecake Perfection: Ingredients You’ll Need
Gathering your ingredients is the first step towards Biscoff bliss. Each component plays a crucial role in achieving that perfect balance of flavor and texture. Don’t skimp on quality here; it truly makes a difference.For the Irresistible Biscoff Base
- Lotus Biscoff Biscuits: You’ll need about one and a half standard packs. These are the star, providing that distinct caramelized crunch.
- Unsalted Butter: Melted. This binds the biscuit crumbs together, creating a sturdy yet tender base. Don’t substitute with margarine; butter offers superior flavor.
- A Pinch of Salt: Just a tiny bit enhances the sweetness and rounds out the flavor of the biscuits.
For the Silky Smooth Biscoff Filling
- Cream Cheese: Full-fat, block-style cream cheese is essential. Avoid the spreadable tubs as they contain too much water and can lead to a runny filling. Make sure it’s softened to room temperature for a lump-free mixture.
- Powdered Sugar (Icing Sugar): This dissolves easily, ensuring a smooth, grit-free filling. Adjust to your sweetness preference.
- Lotus Biscoff Spread (Smooth): This is folded directly into the cream cheese, infusing the entire filling with that iconic Biscoff taste.
- Heavy Cream (Double Cream): At least 35% fat content. This is whipped to stiff peaks and then gently folded in, giving the cheesecake its light, airy, yet rich texture. Make sure it’s very cold!
- Vanilla Extract: A good quality vanilla enhances the other flavors without overpowering them.
For the Glorious Topping
- Lotus Biscoff Spread: More of the good stuff! This will be gently warmed to create a pourable, glossy topping.
- Extra Lotus Biscoff Biscuits: Crushed or halved for decoration and an added textural contrast.

Crafting Your No-Bake Masterpiece: Step-by-Step
Making this cheesecake is surprisingly straightforward. The key is to follow the steps patiently and allow ample chilling time. That’s where the magic really happens!1. Prepare the Crumbly Base
Start by crushing your Lotus Biscoff biscuits. You can do this in a food processor until they resemble fine crumbs, or place them in a zip-top bag and bash them with a rolling pin for a more rustic texture. Transfer the crumbs to a medium bowl.
Melt the unsalted butter and pour it over the biscuit crumbs. Add the pinch of salt. Mix thoroughly with a fork until all the crumbs are moistened and resemble wet sand. This ensures a firm base.
Press the mixture firmly and evenly into the bottom of an 8 or 9-inch springform pan. Use the back of a spoon or the bottom of a flat-bottomed glass to compact it well. Pop this into the fridge to chill while you prepare the filling.
2. Whip Up the Creamy Filling
In a large mixing bowl, beat the softened cream cheese with an electric mixer on medium speed until it’s light and fluffy, about 2-3 minutes. Scrape down the sides of the bowl to ensure everything is incorporated.
Add the powdered sugar and the smooth Biscoff spread to the cream cheese. Beat again until completely smooth and combined, making sure there are no lumps. This should take another 2-3 minutes. Tip: If your Biscoff spread is a little stiff, you can gently warm it in the microwave for 15-20 seconds to make it easier to mix.
In a separate, very cold bowl, whip the heavy cream until it forms stiff peaks. Be careful not to over-whip, or it will become grainy. Gently fold about a third of the whipped cream into the cream cheese mixture to lighten it, then fold in the remaining whipped cream until just combined. Be careful not to deflate the air you’ve just whipped in.
3. Assemble and Chill
Retrieve your chilled biscuit base from the fridge. Spoon the Biscoff cream cheese filling over the base, spreading it evenly with an offset spatula or the back of a spoon. Create a smooth, level surface.
Cover the springform pan loosely with plastic wrap and refrigerate for a minimum of 6 hours, or ideally overnight. This chilling time is crucial for the cheesecake to set properly and achieve its luxurious texture.
4. Top and Serve
Once the cheesecake is fully set, it’s time for the crowning glory! Gently warm the remaining Biscoff spread in a microwave-safe bowl for about 30 seconds, or until it’s pourable. Stir it well.
Pour the warmed Biscoff spread over the top of the chilled cheesecake, spreading it gently to the edges. It will set quickly. Decorate with crushed or whole Lotus Biscoff biscuits around the edge or in the center. Use a sharp knife dipped in hot water and wiped clean for neat slices.

Common Questions About Your Biscoff Cheesecake
Even the simplest recipes can spark a few questions. Here are some of the most common ones I hear about no-bake cheesecakes, specifically this Biscoff version!Can I make this cheesecake ahead of time?
Absolutely, and I highly recommend it! This no-bake Lotus Biscoff cheesecake actually benefits from extra chilling time. You can prepare it up to 2-3 days in advance, keeping it covered in the refrigerator. Just add the Biscoff topping and extra biscuits right before serving for the freshest look.
Why is my cheesecake filling runny?
Several factors can lead to a runny filling. The most common culprits are using low-fat cream cheese (always use full-fat block cream cheese!), not whipping your heavy cream to stiff peaks, or not chilling the cheesecake for long enough. Ensure all your dairy ingredients are very cold before whipping and allow the full 6 hours (or overnight) for it to set properly.
Can I use crunchy Biscoff spread?
While the recipe specifies smooth Biscoff spread for the filling and topping to achieve that silky texture, you could certainly experiment with crunchy Biscoff spread if you like extra texture. Just be aware it might change the mouthfeel slightly, especially in the filling. For the topping, crunchy would add a fun contrast!
How do I get clean slices?
For picture-perfect slices, use a long, sharp knife. Dip the knife in hot water before each cut, then wipe it completely dry. This warms the blade slightly, allowing it to glide cleanly through the filling and topping without dragging. Repeat for every slice.
Can I freeze this cheesecake?
Yes, this cheesecake freezes beautifully! Once fully set, you can freeze the entire cheesecake (without the top Biscoff layer and decorations) for up to 1 month. Wrap it tightly in several layers of plastic wrap, then foil. To serve, thaw overnight in the refrigerator, then add the warmed Biscoff topping and fresh biscuit decorations.
Serving and Pairing Suggestions
This No-bake Lotus Biscoff cheesecake is a showstopper all on its own, but a few thoughtful additions can elevate the experience even further. Think about contrasting textures and temperatures to make each bite sing. A dollop of extra whipped cream on the side never hurts, especially if you’re serving it to a crowd. For a touch of fresh brightness, a scattering of fresh raspberries or sliced strawberries provides a lovely counterpoint to the rich, spiced caramel flavor. The tartness cuts through the sweetness beautifully. Coffee is a natural partner for Biscoff, so a strong espresso or a creamy latte would be an excellent accompaniment. For something a little more indulgent, a scoop of vanilla bean ice cream melting gently alongside a slice is pure bliss. It’s also fantastic with a warm cup of chai tea, really playing up those warming spice notes.A Note on Storage
Leftovers (if there are any!) should be stored in an airtight container in the refrigerator. It will keep well for 3-4 days, maintaining its delicious flavor and texture. The Biscoff topping might firm up a bit in the cold, but it’s still wonderfully delicious. For the best experience, let it sit at room temperature for 10-15 minutes before serving to allow the flavors to soften slightly. This cheesecake is truly a labor of love, but one that rewards you tenfold with its simplicity and incredible taste. It’s become a go-to in my kitchen for those times when I want something special without the fuss. I hope it becomes a favorite in yours too!
No-Bake Lotus Biscoff Cheesecake
A creamy, dreamy no-bake cheesecake featuring the irresistible caramel and spice flavor of Lotus Biscoff biscuits and spread.
📝 Ingredients
👩🍳 Instructions
- 1Prepare the Base: Crush Biscoff biscuits in a food processor until fine crumbs. Transfer to a bowl. Add melted butter and a pinch of salt; mix until crumbs are fully moistened. Press firmly into the bottom of an 8 or 9-inch springform pan. Chill in the fridge for at least 20 minutes.
- 2Make the Filling: In a large bowl, beat softened cream cheese with an electric mixer until light and fluffy (2-3 minutes). Scrape down the sides.
- 3Add powdered sugar and 150g Biscoff spread to the cream cheese. Beat until completely smooth and lump-free. Stir in vanilla extract.
- 4In a separate, very cold bowl, whip the heavy cream until stiff peaks form.
- 5Gently fold about a third of the whipped cream into the cream cheese mixture to lighten it, then carefully fold in the remaining whipped cream until just combined, being careful not to deflate the air.
- 6Assemble & Chill: Spoon the Biscoff filling over the chilled biscuit base, spreading evenly. Cover loosely with plastic wrap and refrigerate for a minimum of 6 hours, or preferably overnight, until completely set.
- 7Add Topping: When ready to serve, gently warm the remaining 100g Biscoff spread in the microwave for 20-30 seconds until pourable. Pour over the chilled cheesecake, spreading to the edges.
- 8Decorate with extra Biscoff biscuits, crushed or whole. Slice with a hot, clean knife and serve.
💡 Notes
Ensure all dairy ingredients are full-fat and very cold for best results. For clean slices, dip your knife in hot water and wipe clean between each cut. This cheesecake can be made 2-3 days in advance and stored in the refrigerator. Freezes well for up to 1 month (without topping).



