


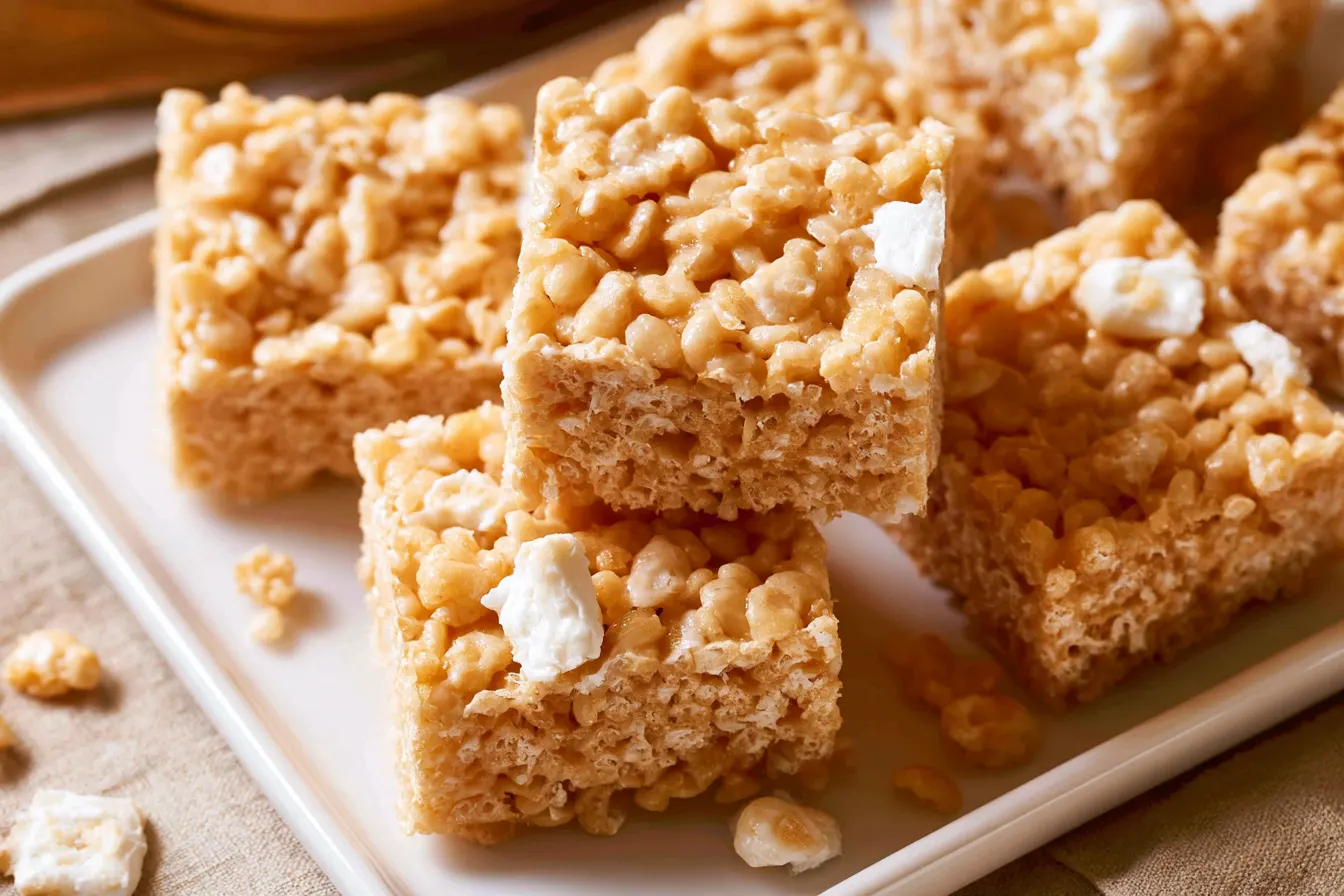
The smell of browned butter wafting through the kitchen is, for me, the ultimate comfort scent. It’s warm, nutty, and instantly transforms anything it touches. That’s precisely why these brown butter rice krispie treats aren’t just good; they’re a revelation, taking a classic childhood snack and elevating it into something truly special.

What Makes These Treats Truly Stand Out?
You’ve had regular Rice Krispie treats. We all have. They’re a perfectly fine, easy, no-bake dessert that brings back fond memories. But this recipe isn’t just “fine.” It’s extraordinary. The secret, as you might guess, lies entirely in the butter. When you brown butter, you’re not just melting it. You’re coaxing out the milk solids, allowing them to toast and caramelize, developing a complex, nutty flavor that is pure magic. This process transforms a simple ingredient into a flavor powerhouse. This isn’t just about adding flavor; it’s about adding *depth*. The nutty notes of the brown butter complement the sweet marshmallow and crisp cereal beautifully. It creates a more sophisticated, well-rounded treat that still retains all the gooey, chewy characteristics you love. It’s an easy extra step that yields incredible results, making these treats feel both familiar and utterly new at the same time. Think of it as taking your favorite childhood toy and giving it a luxurious, grown-up makeover.Gather Your Kitchen Essentials
Before we dive into the fun of browning butter, let’s make sure you have everything ready. One of the joys of Rice Krispie treats is their minimal ingredient list, and this version keeps that tradition alive, just with an added flavor punch.The Good Stuff You’ll Need:
- Unsalted Butter: This is our star ingredient. Unsalted is crucial because we’re browning it, and we want to control the salt content ourselves. Don’t worry, we’ll add a touch later.
- Mini Marshmallows: The smaller size melts more quickly and evenly, ensuring a super smooth, gooey binder for our treats.
- Vanilla Extract: A splash of vanilla brightens all the flavors and adds another layer of warmth. Don’t skip it!
- Pinch of Salt: Just a tiny bit enhances the sweetness and balances the richness of the butter and marshmallows. It’s a flavor enhancer, not just for saltiness.
- Crispy Rice Cereal: The classic base! Make sure it’s fresh for optimal crispness.

The Art of Browning Butter
This is where the magic happens, and it’s simpler than you might think. Don’t be intimidated; it just requires a little attention.Step-by-Step Goodness:
- Melt It Down: Grab a large pot or a deep, heavy-bottomed saucepan. Over medium heat, add your unsalted butter. Let it melt completely, swirling the pan occasionally.
- Watch for the Foam: As the butter melts, it will start to foam. This is normal! Continue to swirl or stir gently with a heat-proof spatula.
- Observe the Color Change: The foam will subside, and you’ll begin to see little brown bits forming at the bottom of the pan. This is your cue! The butter itself will turn a beautiful amber color and smell wonderfully nutty, like toasted hazelnuts.
- Quick Removal: As soon as you see those golden-brown bits and smell that divine aroma, immediately remove the pan from the heat. The butter can go from perfectly browned to burnt very quickly. Don’t walk away!
- Stir in Marshmallows: Add almost all of your mini marshmallows to the hot brown butter, reserving about a cup. Stir continuously until they are completely melted and smooth. The residual heat from the butter will do most of the work.
- Flavor Boosters: Once melted, stir in the vanilla extract and that small pinch of salt. These really make the flavors pop.
- Fold in Cereal: Gently pour in your crispy rice cereal. Fold it carefully with your spatula until every single piece is coated in that glorious, sticky marshmallow mixture. This part requires a bit of patience to ensure even distribution without crushing the cereal.
- Add Remaining Marshmallows: Now, quickly fold in the reserved cup of mini marshmallows. These won’t fully melt, creating delightful pockets of gooeyness throughout your treats. This is a texture game-changer!
Tip: Working quickly once the cereal is in is key. The mixture will start to set as it cools, making it harder to spread evenly.
- Press into Pan: Lightly grease a 9×13 inch baking pan with a bit more butter or non-stick spray. Transfer the mixture into the prepared pan.
Note: Don’t press too firmly! Use a piece of parchment paper or waxed paper lightly greased, or the back of a greased spatula, to gently press the mixture into an even layer. Over-compressing can lead to hard, dense treats.
- Cool and Cut: Let the treats cool completely at room temperature for at least 1-2 hours. Once firm, cut them into squares using a sharp, greased knife. Enjoy!

Common Mistakes to Steer Clear Of
Even seemingly simple recipes have their pitfalls. Avoiding these common missteps will ensure your brown butter rice krispie treats turn out perfectly every time.Watch Out For These:
- Burning the Butter: This is the most crucial step. Brown butter is amazing; burnt butter is acrid. Stay by the stove, keep the heat at medium, and remove it the second it hits that nutty amber stage. Trust your nose!
- Over-Melting Marshmallows: While you want them completely melted, don’t let them simmer and cook down too much. This can make your treats overly hard. As soon as they’re smooth, get ready for the cereal.
- Crushing the Cereal: When folding in the crispy rice cereal, use a gentle hand. Over-mixing or pressing too hard will break the cereal, leading to a less satisfying texture. We want those distinct crispy bits!
- Packing Too Tightly: After transferring the mixture to the pan, resist the urge to press it down with all your might. Lightly pressing with greased parchment paper or a greased spatula is sufficient. Too much pressure results in dense, hard treats instead of gooey, chewy ones.
- Not Enough Salt: It sounds counterintuitive for a sweet treat, but a pinch of salt really makes all the flavors sing and cuts through the richness. Don’t omit it!
Frequently Asked Questions About These Chewy Squares
Got a burning question about making the best brown butter rice krispie treats? I’ve got answers!Why use unsalted butter if I’m adding salt later?
Using unsalted butter gives you complete control over the salt content. Different brands of salted butter have varying amounts of sodium, so starting with unsalted ensures your treats aren’t too salty or not salty enough. It allows for a more consistent flavor profile every time.Can I use regular-sized marshmallows instead of mini?
Yes, you can! However, mini marshmallows melt much more quickly and evenly, which is ideal for incorporating into the brown butter without overcooking the mixture. If using large marshmallows, you might need to cut them into smaller pieces to speed up the melting process.How do I store these treats to keep them fresh and gooey?
Store your brown butter rice krispie treats in an airtight container at room temperature. They are best enjoyed within 2-3 days. After that, they tend to lose some of their crispness and become a bit chewier. Avoid refrigerating, as this can make them hard.Can I add other mix-ins to the brown butter rice krispie treats?
Absolutely! This recipe is a fantastic base for customization. Once you’ve folded in the cereal and marshmallows, you could quickly add in a handful of chocolate chips, sprinkles, chopped nuts (pecans or walnuts would be lovely with the brown butter!), or even a drizzle of melted chocolate on top once they’ve set. Just be sure to add them quickly before the mixture cools too much.My butter burned! Can I salvage it?
Unfortunately, once butter is burnt, there’s no going back. The acrid taste will permeate the entire batch. It’s best to discard it and start fresh. That’s why keeping a close eye on it during the browning process is so important!Make-Ahead and Storage Wisdom
These treats are fantastic for making ahead, which is perfect for parties or when you just need a sweet snack ready to go.Planning Ahead:
The beauty of these treats is their simplicity and relatively quick setting time. You can easily whip up a batch a day or two in advance of when you plan to serve them. Just make sure they’re completely cool before slicing.Keeping Them Fresh:
Once cooled and cut, transfer your brown butter rice krispie treats to an airtight container. Keep them at room temperature, away from direct sunlight or heat. They’ll stay wonderfully gooey and delicious for 2-3 days. Beyond that, the cereal can start to get a little soft, though they’ll still be tasty. For optimal texture, aim to enjoy them within that timeframe. Resist the urge to refrigerate them, as the cold can make them quite hard and less enjoyable to eat.Variations to Spark Your Creativity
Once you’ve mastered the classic brown butter version, feel free to get creative! The base is so good, it lends itself well to all sorts of delicious additions.Exciting Twists:
- Chocolate Drizzle: Melt some dark or milk chocolate chips with a tiny bit of coconut oil, then drizzle over the cooled treats before cutting. A sprinkle of flaky sea salt on top of the chocolate is divine.
- Nutty Crunch: Fold in about ½ cup of chopped toasted pecans or walnuts along with the cereal. The nutty notes will harmonize beautifully with the browned butter.
- Salted Caramel Swirl: Once the treats are pressed into the pan, drizzle about ¼ cup of store-bought or homemade salted caramel over the top and swirl gently with a knife before they set.
- Fall Spices: Stir in ½ teaspoon of ground cinnamon or a pinch of pumpkin pie spice along with the vanilla extract for a cozy, seasonal twist.
- Sprinkle Fun: For a festive touch, fold in some sprinkles with the last cup of marshmallows, or press them onto the top of the treats before they fully set.
Why You’ll Absolutely Adore These
There’s something truly magical about taking a familiar comfort food and giving it a subtle yet significant upgrade. These brown butter rice krispie treats do exactly that. They’re not overly complicated, they don’t require fancy techniques, but the result is nothing short of spectacular. The nutty, complex flavor of the browned butter elevates every bite, making these treats feel sophisticated and indulgent, yet still approachable and fun. They’re the perfect balance of childhood nostalgia and grown-up flavor. Whether you’re making them for a potluck, a school bake sale, or just a quiet evening at home, they’re guaranteed to be a crowd-pleaser. The way the light catches the golden-brown bits of butter, the aroma that fills your kitchen, and that first perfectly gooey, chewy bite – it all adds up to a truly delightful experience. So, go on, give them a try. Your taste buds will thank you!
Delectable Brown Butter Rice Krispie Treats
Gooey, chewy, and packed with nutty brown butter flavor, these elevated rice krispie treats are surprisingly easy to make.
📝 Ingredients
👩🍳 Instructions
- 1Lightly grease a 9x13 inch baking pan with butter or non-stick spray and set aside.
- 2In a large, heavy-bottomed pot or Dutch oven, melt the unsalted butter over medium heat. Continue to cook, stirring occasionally, until the butter foams, then the foam subsides and brown bits appear at the bottom of the pan. The butter will turn a rich amber color and smell nutty. This usually takes 5-8 minutes. Watch carefully to avoid burning.
- 3Immediately remove the pot from the heat. Add 8 ounces (about 5 cups) of the mini marshmallows to the hot brown butter. Stir continuously until the marshmallows are completely melted and smooth. The residual heat will melt them.
- 4Stir in the vanilla extract and salt until well combined.
- 5Add the crispy rice cereal to the marshmallow mixture. Gently fold with a rubber spatula until the cereal is evenly coated.
- 6Quickly fold in the remaining 2 ounces (about 1 cup) of mini marshmallows. These will remain mostly whole, adding extra pockets of gooeyness.
- 7Transfer the mixture to the prepared baking pan. Using a piece of lightly greased parchment paper or the back of a greased spatula, gently press the mixture evenly into the pan. Do not press too firmly, as this can make the treats hard.
- 8Let the treats cool completely at room temperature for at least 1-2 hours before cutting into squares with a sharp, greased knife. Serve and enjoy!
💡 Notes
For best results, use fresh crispy rice cereal. Store treats in an airtight container at room temperature for up to 3 days. Do not refrigerate, as it can make them hard. Feel free to add a drizzle of melted chocolate or a sprinkle of flaky sea salt on top for an extra touch.



