


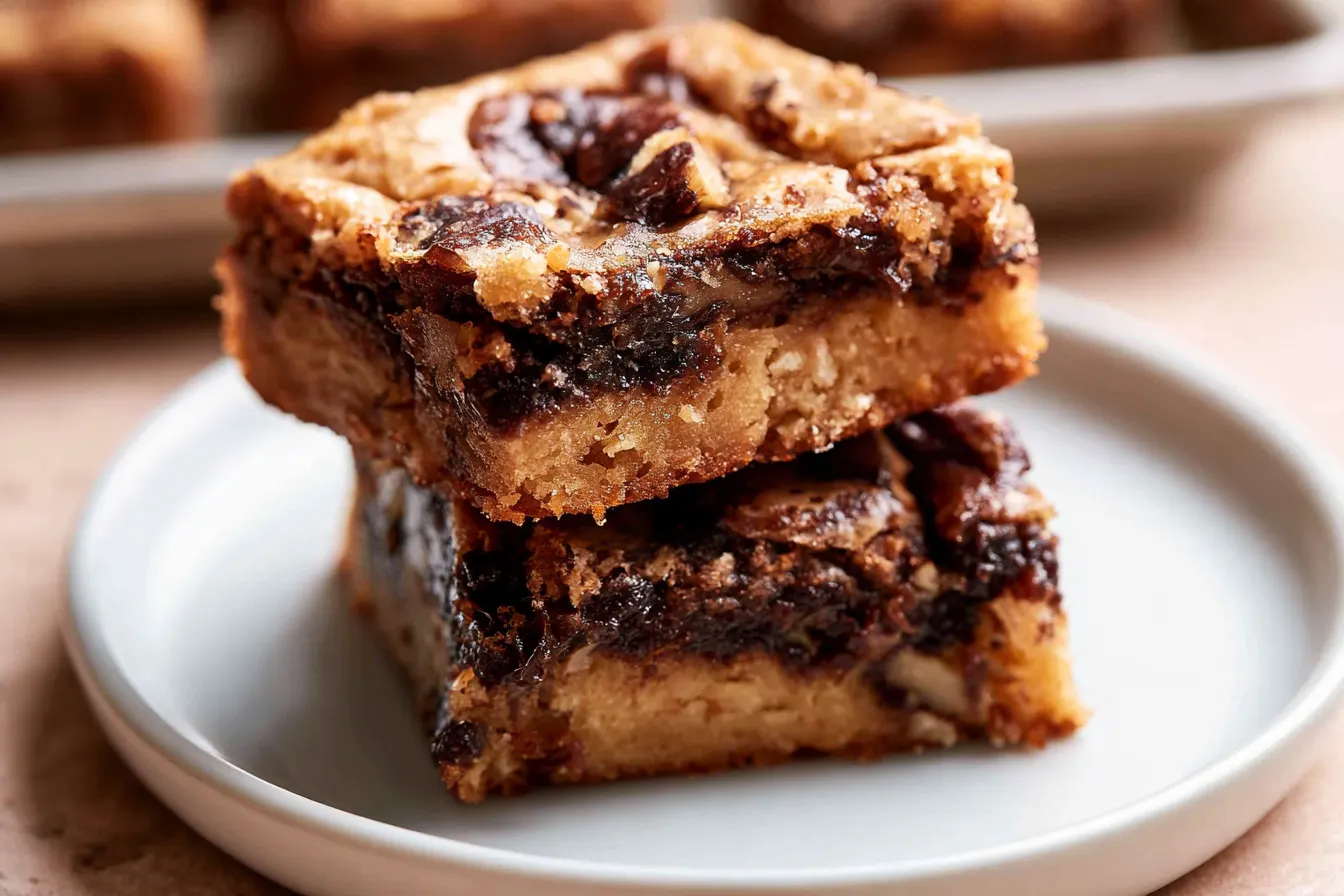
Have you ever stood in front of a dessert tray, torn between the rich, dark allure of a brownie and the sweet, chewy charm of a blondie? It’s a truly agonizing decision, especially when both treats call your name. Well, my friends, you no longer have to choose! These incredible brownie blondies bring together the fudgy depth of a classic chocolate brownie with the buttery, vanilla-kissed chewiness of a blondie in one glorious bite. It’s like they were always meant to be together.
- Why These Hybrid Bars Will Become Your New Obsession
- Gathering Your Baking Arsenal
- Crafting Your Masterpiece: Step-by-Step
- Frequently Asked Questions About Brownie Blondies
- Variations to Keep Things Exciting
- Serving Suggestions: Elevate Your Dessert Game
- The Science of Fudgy vs. Cakey: Why It Matters Here
- Common Pitfalls and How to Avoid Them
- A Little History Lesson: The Origins of Brownies and Blondies

Why These Hybrid Bars Will Become Your New Obsession
There’s a lot to love about combining two dessert titans, but it goes beyond just getting two treats for the price of one. We’re creating something new, something that captures the best qualities of each parent. Imagine the crinkly top of a perfect brownie meeting the slightly chewy edge of a blondie. It’s a match made in dessert heaven, offering a more complex flavor profile and a truly satisfying texture. This isn’t just throwing two batters into a pan; it’s about carefully balancing the distinct characteristics so neither one overwhelms the other. We want that deep chocolate experience to shine, but also for the buttery notes of the blondie to sing through. It’s a delicate dance, but one that this recipe has perfected. Plus, they look absolutely stunning with their marbled, contrasting layers – perfect for impressing guests or just treating yourself to something extra special.Gathering Your Baking Arsenal
Before we dive into the fun part, let’s make sure our kitchen is well-stocked. You likely have most of these ingredients already on hand, making this a perfect spontaneous baking project.For the Decadent Brownie Layer
- Unsalted Butter: We’ll melt this down, no need to soften. It provides richness and helps with that fudgy texture.
- Granulated Sugar: Essential for sweetness and structure.
- Large Eggs: Two of them, binding everything together and contributing to the chewiness.
- Vanilla Extract: A touch of pure vanilla elevates the chocolate flavor beautifully.
- All-Purpose Flour: Just enough to give the brownie structure without making it cakey.
- Unsweetened Cocoa Powder: This is where that intense chocolate flavor comes from. Use good quality cocoa for the best results!
- Salt: A tiny pinch brightens all the flavors and balances the sweetness.
For the Golden Blondie Layer
- Unsalted Butter: Again, melted butter for that classic blondie chew.
- Brown Sugar: This is key for the blondie’s signature caramel notes and moist texture. Light or dark brown sugar works well.
- Granulated Sugar: A little extra sweetness and helps with that slightly crispy edge.
- Large Egg: One egg to bind and add richness.
- Vanilla Extract: Don’t skimp on the vanilla here; it’s a star in blondies.
- All-Purpose Flour: The primary structural component.
- Baking Powder: Just a touch to give the blondie layer a slight lift.
- Salt: Balances the sweetness and enhances the flavors.

Crafting Your Masterpiece: Step-by-Step
Let’s get those hands a little floury! The beauty of these brownie blondies is that the process is straightforward, even for novice bakers. Just follow along, and you’ll have a pan of irresistible treats in no time.Prepping Your Workspace
First things first, preheat your oven to 350°F (175°C). Line a 9×13-inch baking pan with parchment paper, leaving an overhang on the sides. This “sling” will make it incredibly easy to lift your baked bars out of the pan later. Lightly grease the parchment paper with a little butter or cooking spray.
Whipping Up the Brownie Batter
In a medium microwave-safe bowl, melt 1/2 cup (1 stick) unsalted butter. Add 1 cup of granulated sugar and whisk until well combined. The mixture should look glossy.
Stir in 2 large eggs and 1 teaspoon of vanilla extract. Keep whisking until everything is smooth and fully incorporated. It should be a beautiful, rich brown color.
Now, add 1/2 cup all-purpose flour, 1/2 cup unsweetened cocoa powder, and 1/4 teaspoon salt. Gently fold these dry ingredients into the wet mixture until just combined. Be careful not to overmix here; overmixing can lead to tough brownies. Set this decadent brownie batter aside.
Assembling the Blondie Batter
In a separate medium bowl, melt 1/2 cup (1 stick) unsalted butter. Add 1 cup of brown sugar (packed) and 1/4 cup granulated sugar. Whisk vigorously until the sugars are completely dissolved and the mixture is smooth and syrupy. This step is crucial for that signature blondie chew!
Stir in 1 large egg and 1 teaspoon of vanilla extract. Whisk until the mixture is light and fluffy, almost like a thin caramel sauce. It should be pale and fragrant.
Add 1 1/2 cups all-purpose flour, 1 teaspoon baking powder, and 1/4 teaspoon salt. Fold these dry ingredients into the wet mixture until just combined. Again, avoid overmixing. The batter will be thick and slightly sticky.

Layering and Marbling Magic
Dollop spoonfuls of the brownie batter evenly across the bottom of your prepared baking pan. It doesn’t need to be perfectly spread; we’re going for a rustic, marbled look.
Next, carefully dollop spoonfuls of the blondie batter over the brownie layer. Try to distribute it as evenly as possible. You might find it helpful to use two spoons or a small spatula to guide the thick blondie batter.
Tip: For that beautiful swirled effect, take a butter knife or a skewer and gently swirl it through both layers a few times. Don’t overdo it, or the colors will completely blend. A few gentle S-shapes or figure-eights are all you need to create those distinct marbled patterns.
Baking to Perfection
Pop the pan into your preheated oven and bake for 30-35 minutes. You’ll know they’re done when the edges are set and a toothpick inserted into the center (avoiding a puddle of chocolate, if possible!) comes out with moist crumbs, not wet batter. The center should still look a little soft and fudgy – that’s exactly what we want for ultimate gooeyness.
Once baked, let the brownie blondies cool completely in the pan on a wire rack. This is arguably the hardest part, but cooling allows them to set properly, making them easier to cut and ensuring that perfect fudgy-chewy texture. Trust me, it’s worth the wait!
Frequently Asked Questions About Brownie Blondies
Got questions? I’ve got answers! Here are some common queries that pop up when making these delightful treats.Can I make these brownie blondies ahead of time?
Absolutely! These bars are fantastic for making ahead. In fact, many people find their flavors deepen and their texture becomes even more appealing the day after they’re baked. Just store them in an airtight container at room temperature once fully cooled.
What’s the best way to store leftover brownie blondies?
Keep your leftover brownie blondies in an airtight container at room temperature for up to 3-4 days. If you want them to last longer, you can refrigerate them for up to a week, or even freeze them for a couple of months. Just bring them back to room temperature before serving for the best texture.
My brownie layer came out too cakey. What went wrong?
A cakey brownie usually means one of two things: either you added too much flour, or you overmixed the batter. When adding the dry ingredients, mix only until no streaks of flour remain. Overmixing develops the gluten, leading to a tougher, more cake-like texture instead of that desired fudgy chew.
Can I add mix-ins to these bars?
Yes, please do! These brownie blondies are a wonderful canvas for your creativity. Chocolate chips (dark, milk, or white), chopped nuts (walnuts, pecans), or even a swirl of peanut butter or caramel can be added to either layer before baking. Just be mindful not to overcrowd the batter.
How do I get that perfect crinkly top on the brownie layer?
The crinkly top on brownies is often a result of rapid evaporation of moisture from the surface during baking, creating a thin, crisp crust. Using melted butter and whisking the sugar and eggs well until light and thick (before adding dry ingredients) can help achieve this. The ratio of sugar to flour also plays a role, and this recipe is designed to encourage that classic crinkle.
Variations to Keep Things Exciting
While these brownie blondies are perfect as they are, there are so many ways to customize them and make them your own.Nutty Delight
Fold in 1/2 cup of chopped walnuts or pecans into either the brownie or blondie batter (or both!) for an extra layer of crunch and nutty flavor. Toasted nuts work especially well here, bringing out their natural oils and aroma.
Caramel Swirl
Before baking, drizzle 1/4 cup of store-bought or homemade caramel sauce over the top of the marbled batter. Use your knife to swirl it gently into the layers for pockets of gooey caramel goodness.
Peanut Butter Power
Melt 1/4 cup of creamy peanut butter and drizzle it over the top of the combined batters, then swirl for a peanut butter brownie blondie mashup. This is particularly good if you’re a fan of the classic chocolate-peanut butter combo.
Minty Fresh
For a festive twist, add 1/2 teaspoon of mint extract to the brownie batter and sprinkle crushed peppermint candies on top during the last 5-10 minutes of baking, or after they come out of the oven. This is especially lovely around the holidays.
Serving Suggestions: Elevate Your Dessert Game
These brownie blondies are undeniably delicious on their own, but a few simple additions can turn them into an even more impressive dessert.A scoop of vanilla bean ice cream melting over a warm square of brownie blondie is pure bliss. The contrast of hot and cold, fudgy and creamy, is simply divine.
A dusting of powdered sugar makes them look elegant and adds a subtle sweetness. Or, for a touch of sophistication, a light drizzle of chocolate ganache or a sprinkle of flaky sea salt can truly elevate the experience.
Pair them with a strong cup of coffee or a cold glass of milk for a comforting afternoon treat. They’re also a fantastic addition to any dessert platter for parties or gatherings, offering a crowd-pleasing option that caters to both brownie and blondie lovers.
The Science of Fudgy vs. Cakey: Why It Matters Here
Understanding the subtle differences in brownie and blondie batters is key to perfecting these hybrid bars. Brownies often achieve their signature fudginess through a higher fat-to-flour ratio and minimal leavening. This recipe leans into that with melted butter and just enough flour to hold things together, ensuring that dense, chewy center. Blondies, on the other hand, get their chew from brown sugar, which contains molasses, contributing to moisture and a chewier texture. They also typically have a bit more leavening (like the baking powder here) to give them a slightly lighter crumb than their chocolate counterparts, but still far from cake-like. By carefully crafting each batter separately and then combining them, we ensure that both textures are represented and celebrated in every single bite. It’s not just about flavor; it’s a textural journey too!Common Pitfalls and How to Avoid Them
Even the simplest recipes can have their tricky spots. Here’s how to ensure your brownie blondies come out perfect every time:Overmixing the Batter
This is probably the most common mistake in bar baking. Once you add the flour, mix only until just combined. Overmixing develops the gluten in the flour, which leads to a tough, dry, or cakey texture instead of that desired fudgy chew. Think of it as gently folding rather than vigorous stirring.
Under- or Over-Baking
This is a delicate balance. Under-baked bars will be too gooey and fall apart, while over-baked ones will be dry and crumbly. For these brownie blondies, you want the edges to be set and a toothpick inserted into the center to come out with moist crumbs, not wet batter. The center might still look a little soft, and that’s okay – it will continue to set as it cools.
Not Cooling Completely
I know, the smell is intoxicating, and you want to dig in right away! But resist the urge. Cooling completely is crucial for the bars to set up properly. If you cut into them too soon, they’ll be crumbly and messy. Patience is a virtue, especially in baking!
Using the Wrong Pan Size
This recipe is designed for a 9×13-inch pan. Using a smaller pan will result in thicker bars that require a longer baking time and might not cook through evenly. A larger pan will yield thinner bars that cook faster and might become dry quickly. Stick to the recommended size for best results.
A Little History Lesson: The Origins of Brownies and Blondies
It’s fun to know a little about the desserts we love! The brownie’s origin story is a bit murky, but popular legend attributes its creation to a chef at Chicago’s Palmer House Hotel in the late 19th century, tasked with creating a dessert “suitable for ladies” attending the World’s Columbian Exposition. It was to be a small cake-like confection that could be easily eaten from boxed lunches. From there, it evolved into the fudgy, chocolatey squares we adore today. Blondies, often seen as the brownie’s vanilla-flavored cousin, likely emerged in the early 20th century. They predate the widespread availability of cocoa powder and chocolate for home bakers, offering a rich, buttery bar cookie that highlighted brown sugar, butter, and vanilla. They are essentially a butterscotch-flavored bar, a delightful canvas for nuts, chips, and other mix-ins. Bringing these two classics together into one harmonious bar feels like a natural progression, a celebration of their individual strengths combined for a truly epic dessert.
Fudgy Brownie Blondies
Two delicious desserts in one! Fudgy brownie meets chewy blondie for the ultimate dessert bar.
📝 Ingredients
👩🍳 Instructions
- 1Preheat your oven to 350°F (175°C). Line a 9x13-inch baking pan with parchment paper, leaving an overhang on the sides. Lightly grease the parchment paper.
- 2For the Brownie Layer: In a medium bowl, combine the melted butter and 1 cup granulated sugar. Whisk until smooth and glossy.
- 3Stir in 2 large eggs and 1 tsp vanilla extract, whisking until well combined and smooth.
- 4Add 1/2 cup all-purpose flour, 1/2 cup unsweetened cocoa powder, and 1/4 tsp salt. Fold gently with a spatula until just combined. Set aside.
- 5For the Blondie Layer: In a separate medium bowl, combine the melted butter, 1 cup packed brown sugar, and 1/4 cup granulated sugar. Whisk vigorously until the sugars are dissolved and the mixture is smooth and syrupy.
- 6Stir in 1 large egg and 1 tsp vanilla extract, whisking until light and fluffy.
- 7Add 1 1/2 cups all-purpose flour, 1 tsp baking powder, and 1/4 tsp salt. Fold gently with a spatula until just combined. The batter will be thick.
- 8Dollop spoonfuls of brownie batter evenly across the bottom of the prepared pan. Follow with dollops of blondie batter, scattering it over the brownie layer.
- 9Take a butter knife or skewer and gently swirl it through both layers a few times to create a marbled effect. Do not overmix the layers.
- 10Bake for 30-35 minutes, or until the edges are set and a toothpick inserted into the center (avoiding a chocolate puddle) comes out with moist crumbs. The center may still look slightly soft.
- 11Cool completely in the pan on a wire rack before lifting out with the parchment sling and cutting into squares. This allows them to set properly for the best texture.
💡 Notes
For extra indulgence, add 1/2 cup chocolate chips or chopped nuts to either batter. Store cooled brownie blondies in an airtight container at room temperature for up to 4 days, or freeze for longer storage. Serve with a scoop of vanilla ice cream for a warm treat.



