


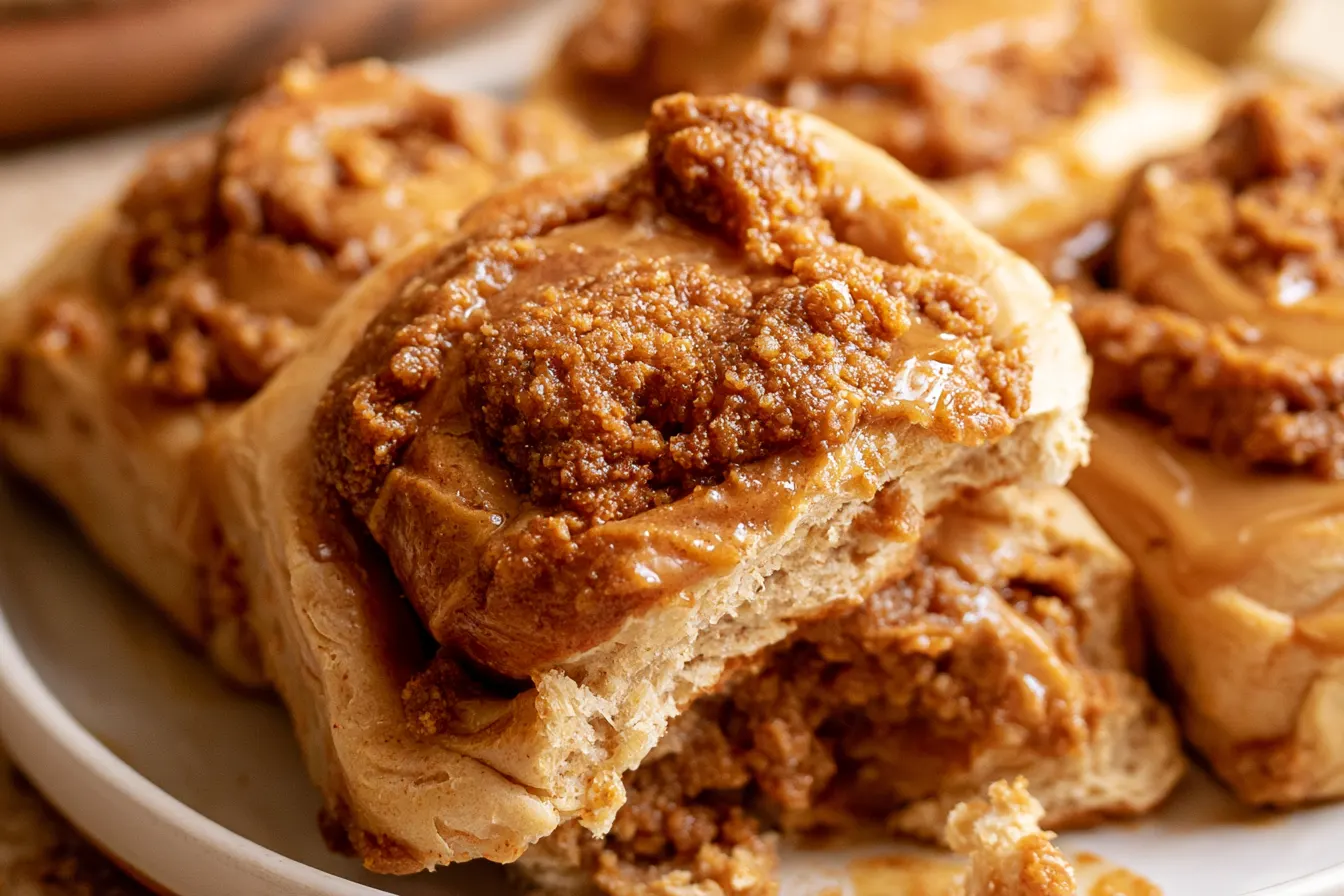
Ever had one of those days where nothing quite hits the spot? A day when you crave something utterly comforting, ridiculously sweet, and just a little bit decadent? That’s precisely how the idea for these incredible cookie butter rolls was born. Forget your troubles, because these ooey-gooey spirals of joy are about to become your new favorite way to indulge.
As a former pastry chef, I’ve rolled out more dough than I care to count, always seeking that perfect balance of flavor and texture. And let me tell you, when the rich, spiced notes of cookie butter met the soft, fluffy embrace of a homemade cinnamon roll, it was pure magic. This isn’t just a dessert; it’s an experience, a warm hug for your tastebuds.
We’re talking tender, pillowy dough swirled with a generous layer of creamy cookie butter and crunchy cookie crumbles, then baked until golden and bubbling. To top it all off? More molten cookie butter baked right on top and a luscious, dreamy cookie butter glaze that drips into every crevice. Get ready, because your kitchen is about to smell heavenly.

Why These Cookie Butter Rolls Are Different (and Better!)
You might be thinking, “Aren’t cinnamon rolls already perfect?” And yes, they are! But sometimes, perfect needs a little twist, a little je ne sais quoi. My secret weapon here is layering the cookie butter experience. We’re not just adding it to the filling; we’re baking it right into the dough, layering it into the swirl, and smothering it on top with a dreamy glaze.
Many recipes might just use cookie butter in the filling, but we’re going for full immersion. The warmth of the oven transforms the cookie butter into an even more fragrant, almost caramelized delight, permeating every bite. Plus, the crushed Biscoff cookies in the filling add an unexpected textural crunch that makes these rolls truly unforgettable. It’s a symphony of soft, chewy, and crispy all at once.
The Heart of the Matter: Ingredients for Cookie Butter Bliss
Making incredible cookie butter rolls starts with quality ingredients, but don’t worry, nothing too fancy here. Just good, honest pantry staples, plus, of course, our star ingredient!
For the Softest Dough:
- Warm Milk: About 1 cup, whole milk is best for richness, but 2% works too. It needs to be between 105-115°F (40-46°C) to activate the yeast.
- Active Dry Yeast: 2 ¼ teaspoons, one standard packet. Make sure it’s fresh!
- Granulated Sugar: ¼ cup, to feed the yeast and sweeten the dough.
- Large Egg: 1, at room temperature, for richness and binding.
- Unsalted Butter: ¼ cup (½ stick), melted and slightly cooled. This makes the dough tender.
- All-Purpose Flour: Approximately 3 ½ – 4 cups, plus more for dusting. Start with less and add as needed.
- Salt: 1 teaspoon, crucial for balancing flavors.
For the Irresistible Cookie Butter Filling:
- Cookie Butter: 1 cup, creamy variety. Biscoff spread is my go-to!
- Brown Sugar: ¼ cup, packed, for depth of sweetness.
- Crushed Biscoff Cookies: ½ cup, finely crushed. You can do this in a food processor or by hand in a bag with a rolling pin.
For the Dreamy Glaze:
- Powdered Sugar: 1 ½ cups, sifted, to prevent lumps.
- Cookie Butter: ¼ cup, melted.
- Milk or Cream: 2-3 tablespoons, adjust for desired consistency.
- Vanilla Extract: ½ teaspoon, for a touch of warmth.

Crafting Your Cookie Butter Masterpiece: Step-by-Step
Don’t be intimidated by working with yeast dough! It’s a forgiving process, and the aroma alone is worth the effort. Just follow these steps, and you’ll be a cookie butter roll expert in no time.
Step 1: Activating the Yeast and Mixing the Dough
First things first, warm your milk. It should feel like a warm bath on your wrist, not too hot, not too cold. Pour it into a large mixing bowl (or the bowl of a stand mixer fitted with a dough hook). Sprinkle the yeast and a tablespoon of sugar over the milk. Give it a gentle stir and let it sit for about 5-10 minutes until it gets foamy. This tells you your yeast is alive and ready to work!
Once foamy, add the remaining granulated sugar, egg, melted butter, and salt to the bowl. Stir them together until well combined. Gradually add the flour, about a cup at a time, mixing until a shaggy dough forms. If using a stand mixer, let it knead on low speed. If by hand, turn it out onto a lightly floured surface.
Step 2: Kneading to Perfection
Knead the dough for 5-7 minutes, until it’s smooth, elastic, and no longer sticky. You might need to add a tiny bit more flour, a tablespoon at a time, if it’s too sticky, but be careful not to add too much, or your rolls will be tough. The dough should spring back when you gently poke it.
Tip: A good way to test if your dough is kneaded enough is the windowpane test. Pinch off a small piece of dough and gently stretch it. If you can stretch it thin enough to see light through it without tearing, it’s ready!
Step 3: The First Rise
Lightly grease a clean large bowl with a little oil. Place the dough in the bowl, turning it once to coat. Cover the bowl with plastic wrap or a clean kitchen towel and let it rise in a warm, draft-free place for 1 to 1 ½ hours, or until doubled in size. This is where the magic happens and the dough develops its soft texture.
Step 4: Rolling and Filling
Once the dough has doubled, gently punch it down to release the air. Turn it out onto a lightly floured surface. Using a rolling pin, roll the dough into a large rectangle, approximately 12×18 inches. Try to keep the edges as straight as possible.
Now for the good part! Spread the softened cookie butter evenly over the entire surface of the dough, leaving a small ½-inch border along one of the long edges. Sprinkle the crushed Biscoff cookies over the cookie butter. Don’t be shy here!
Step 5: Rolling, Slicing, and the Second Rise
Starting from the long edge opposite the border you left, tightly roll the dough into a log. Once rolled, pinch the seam closed to seal it. Using a sharp, un-serrated knife or a piece of dental floss, slice the log into 12 equal pieces, about 1 ½ inches thick. Arrange the rolls in a lightly greased 9×13 inch baking pan, leaving a little space between each one.
Cover the pan loosely with plastic wrap or a clean towel and let the rolls rise again in a warm place for another 30-45 minutes, or until they look puffy and have nearly doubled in size. This second rise ensures a light, airy roll.
Step 6: Baking and the Final Cookie Butter Touch
Preheat your oven to 375°F (190°C). Once the oven is hot and the rolls have finished their second rise, remove the cover. If you want extra indulgence (and you do!), dollop a few spoonfuls of extra cookie butter on top of the rolls before baking. This will melt into glorious pockets of flavor.
Bake for 20-25 minutes, or until the rolls are golden brown on top and cooked through. The internal temperature should be around 200-205°F (93-96°C) if you have a thermometer. Keep an eye on them to prevent over-browning.

Step 7: Glaze and Serve!
While the rolls are still warm (but not piping hot), prepare the glaze. In a medium bowl, whisk together the sifted powdered sugar, melted cookie butter, milk or cream, and vanilla extract until smooth. If it’s too thick, add a tiny bit more milk; if too thin, a bit more powdered sugar.
Drizzle or spread the luscious cookie butter glaze generously over the warm rolls. The warmth of the rolls will slightly melt the glaze, allowing it to seep into every nook and cranny. Serve immediately and watch them disappear!
Frequently Asked Cookie Butter Roll Questions
Can I make these rolls ahead of time?
Absolutely! You have a couple of options. You can prepare the dough, roll it, slice it, and place the rolls in the baking pan. Cover tightly with plastic wrap and refrigerate overnight (up to 12-18 hours). In the morning, let them sit at room temperature for 1-1.5 hours to warm up and finish rising before baking as directed.
What if I don’t have Biscoff cookies for the filling?
While Biscoff cookies enhance the cookie butter flavor perfectly, you can omit them if you don’t have them. The rolls will still be delicious! Alternatively, you could use a similar spiced biscuit or even finely crushed graham crackers for a different but tasty crunch.
My dough isn’t rising! What went wrong?
The most common culprits for dough not rising are inactive yeast or milk that’s too hot or too cold. Make sure your yeast isn’t expired, and always check your milk temperature with a thermometer. If it’s too hot, it kills the yeast; too cold, it won’t activate it. Your rising environment also needs to be warm and draft-free.
How do I store leftover cookie butter rolls?
Store leftover rolls in an airtight container at room temperature for up to 2-3 days. For longer storage, you can refrigerate them for up to 5 days. To reheat, pop them in the microwave for 15-30 seconds or warm them gently in a low oven (300°F/150°C) until soft and warm again.
Can I freeze these rolls?
Yes, you can! You can freeze unbaked rolls (after the second rise) by wrapping the pan tightly in plastic wrap and then foil. Freeze for up to 1 month. When ready to bake, thaw overnight in the refrigerator, then let them come to room temperature and proof slightly before baking. You can also freeze baked and glazed rolls, individually wrapped, for up to 2-3 months. Thaw at room temperature and reheat gently.
Variations and Flavor Twists
While these cookie butter rolls are phenomenal as is, there’s always room to play! If you’re feeling adventurous, consider these delicious twists:
- Chocolate Drizzle: A swirl of melted dark or milk chocolate over the glaze would be an exquisite addition. The bitterness of dark chocolate would wonderfully complement the sweet cookie butter.
- Nutty Crunch: Add a handful of finely chopped pecans or walnuts to the cookie butter filling for an extra layer of texture and flavor.
- Cream Cheese Glaze: If you prefer a tangier topping, you could swap out a portion of the cookie butter glaze for a classic cream cheese frosting. Just imagine that rich, creamy tang with the spiced cookie butter!
- Pumpkin Spice Boost: For a seasonal touch, especially in autumn, add a teaspoon of pumpkin pie spice to the dough or the cookie butter filling.
- Espresso Kick: A tiny bit of espresso powder (¼ teaspoon) dissolved in the milk for the dough can deepen the flavor profile without making it taste overtly like coffee.
Serving Suggestions and Perfect Pairings
These cookie butter rolls are a showstopper on their own, but they also shine when paired with the right companions. They make an ideal weekend breakfast or brunch treat, especially with a hot cup of coffee or a tall glass of cold milk.
For a truly decadent dessert, serve them warm with a scoop of vanilla bean ice cream that melts into the warm glaze. They’re also fantastic as part of a holiday breakfast spread, alongside fresh fruit and perhaps a savory dish to balance the sweetness. Don’t forget, they’re always a hit at potlucks and gatherings – just be prepared for recipe requests!
The aroma alone will draw everyone to the kitchen. There’s something so inherently comforting about fresh-baked goods, and these cookie butter rolls take that comfort to a whole new, irresistible level. Enjoy every single bite!

Ultimate Cookie Butter Rolls
Indulge in these irresistible cookie butter rolls, featuring a soft dough swirled with creamy cookie butter and crunchy Biscoff cookies, topped with a luscious cookie butter glaze.
📝 Ingredients
👩🍳 Instructions
- 1In a large bowl or stand mixer, combine warm milk, yeast, and 1 tablespoon granulated sugar. Stir gently and let sit 5-10 minutes until foamy.
- 2Add remaining granulated sugar, egg, melted butter, and salt to the yeast mixture. Stir to combine.
- 3Gradually add flour, 1 cup at a time, mixing until a shaggy dough forms. Knead by hand or with a dough hook on low speed for 5-7 minutes until smooth and elastic. Add small amounts of flour if too sticky.
- 4Lightly grease a clean bowl. Place dough in the bowl, turning once to coat. Cover with plastic wrap or a kitchen towel and let rise in a warm, draft-free place for 1 to 1 ½ hours, or until doubled in size.
- 5Punch down the risen dough and turn it out onto a lightly floured surface. Roll into an 12x18 inch rectangle.
- 6Evenly spread 1 cup softened cookie butter over the dough, leaving a ½-inch border on one long edge. Sprinkle crushed Biscoff cookies over the cookie butter.
- 7Starting from the long edge opposite the border, tightly roll the dough into a log. Pinch the seam closed.
- 8Slice the log into 12 equal pieces, about 1 ½ inches thick. Arrange in a lightly greased 9x13 inch baking pan, leaving some space between rolls.
- 9Cover the pan and let rolls rise again in a warm place for 30-45 minutes, or until puffy and nearly doubled.
- 10Preheat oven to 375°F (190°C). If desired, dollop extra cookie butter on top of the rolls. Bake for 20-25 minutes, or until golden brown.
- 11While rolls are warm, prepare the glaze: whisk together sifted powdered sugar, ¼ cup melted cookie butter, milk/cream, and vanilla extract until smooth. Adjust consistency with more milk or sugar if needed.
- 12Drizzle or spread the glaze generously over the warm cookie butter rolls. Serve immediately.
💡 Notes
Ensure your milk temperature is accurate for yeast activation. For best results, use room temperature ingredients. Rolls are best served warm, but can be stored in an airtight container for 2-3 days at room temperature or frozen for longer storage.



