


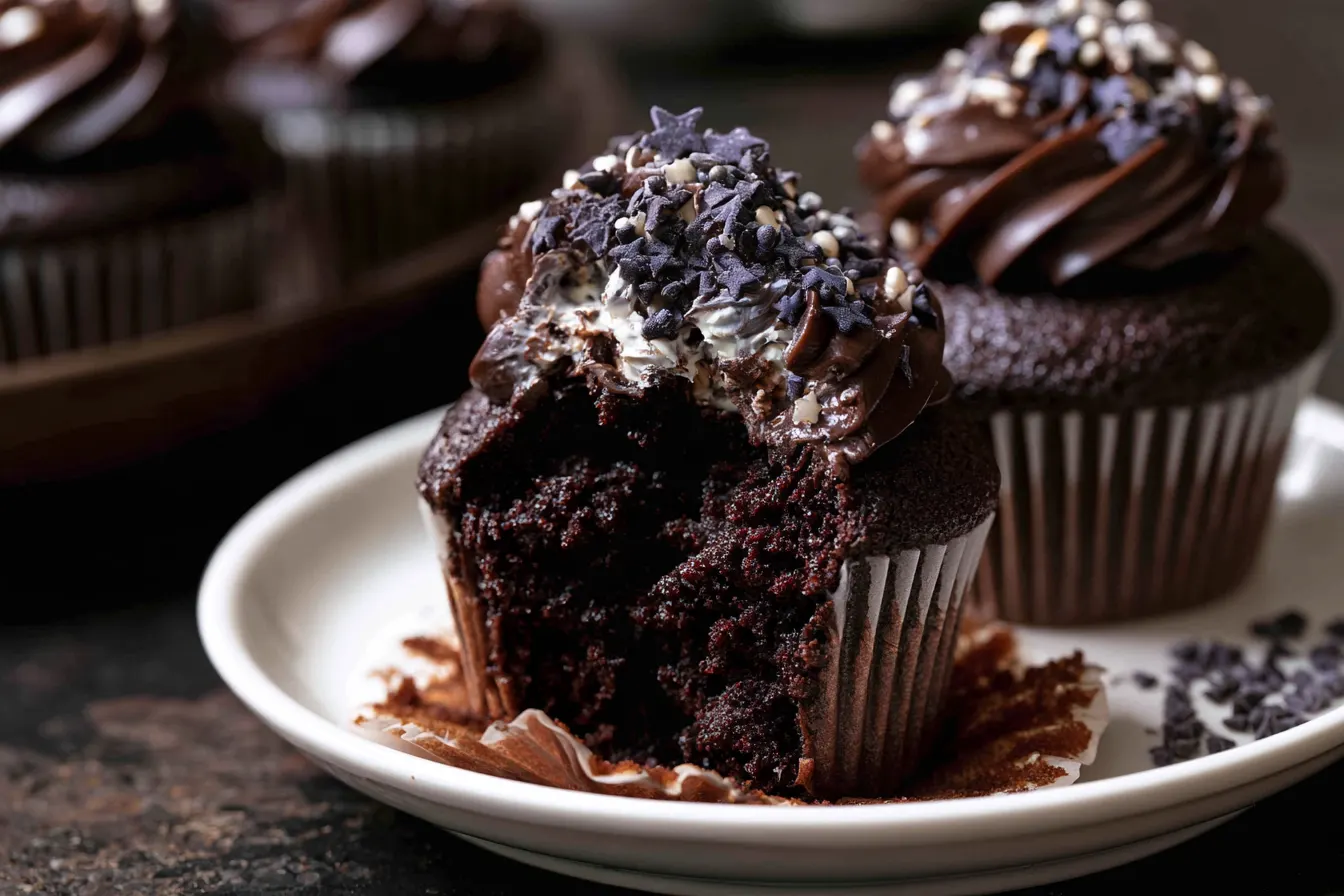
I used to think “black velvet” was just a fancy way of saying “chocolate.” Oh, how wrong I was! There’s a distinct, almost moody sophistication to these black velvet cupcakes that sets them apart from their cocoa-dusted cousins. This isn’t just about color; it’s about a deep, nuanced flavor profile that delivers an Oreo-like punch without being overly sweet.
- Cracking the Code: What Makes These Black Velvet Cupcakes Sing?
- Gathering Your Tools: What You’ll Need
- Creating the Magic: Step-by-Step Cupcake Assembly
- Crafting the Velvety Black Cocoa Buttercream
- Frosting and Serving Your Masterpieces
- Frequently Asked Questions About Black Velvet
- Flavor Twists and Creative Ideas
- Why You’ll Fall in Love with This Recipe

Cracking the Code: What Makes These Black Velvet Cupcakes Sing?
You might be wondering, “What’s the big deal? Aren’t these just really dark chocolate cupcakes?” And to that, I say, “My friend, prepare to have your dessert world rocked.” The difference is subtle yet profound, and it all comes down to a few key players.The Magic of Black Cocoa Powder
This isn’t your everyday cocoa. Black cocoa powder is ultra-Dutch-processed, meaning it’s been treated with an alkali solution to reduce its acidity significantly. This process results in its signature intense black color and a flavor that’s less bitter and more mellow than natural cocoa. Think of the dark, almost savory notes in an Oreo cookie – that’s black cocoa in action. It’s crucial for achieving that deep, alluring hue and the unique flavor profile that defines a true black velvet cupcake. Using natural cocoa here would give you brown cupcakes with a completely different taste.Buttermilk: The Unsung Hero of Moistness
If there’s one ingredient that consistently delivers tender, moist crumbs in baked goods, it’s buttermilk. Its acidity reacts with the baking soda, creating a light and airy texture while also breaking down gluten strands, preventing toughness. Don’t skip it! If you don’t have buttermilk on hand, you can make a quick substitute by adding a tablespoon of white vinegar or lemon juice to regular milk and letting it sit for five minutes before using. It’s a handy trick, but the real deal is always best for these particular cupcakes.A Touch of Coffee: Amplifying the Chocolate
You won’t taste coffee in these cupcakes, I promise. What it does, however, is enhance and deepen the chocolate (or in this case, black cocoa) flavor, making it richer and more robust. It’s a classic baker’s secret, and it works wonders here, adding another layer of complexity to the black velvet experience. Think of it like a flavor amplifier, making everything more intense without adding its own distinct taste.Gathering Your Tools: What You’ll Need
Before we get our hands delightfully messy, let’s make sure we have everything prepped and ready. Baking is so much more enjoyable when you’re not scrambling for ingredients mid-recipe.For the Ultra-Moist Black Velvet Cupcakes:
2 cups (240g) all-purpose flour 1 ½ cups (300g) granulated sugar ¾ cup (60g) black cocoa powder (don’t substitute with regular cocoa!) 1 ½ teaspoons baking soda 1 teaspoon salt 1 cup (240ml) buttermilk, at room temperature ½ cup (120ml) neutral oil (like canola or vegetable) 2 large eggs, at room temperature 1 teaspoon vanilla extract ½ cup (120ml) hot strong brewed coffee or hot waterFor the Velvety Black Cocoa Buttercream Frosting:
1 cup (226g) unsalted butter, softened 4 cups (480g) powdered sugar, sifted ½ cup (40g) black cocoa powder, sifted ¼ cup (60ml) heavy cream or milk 1 teaspoon vanilla extract Pinch of saltCreating the Magic: Step-by-Step Cupcake Assembly
This is where the transformation happens. Follow these steps carefully, and you’ll be rewarded with bakery-worthy black velvet cupcakes that will impress everyone fortunate enough to try them.First, Preheat and Prep
Get your oven humming! Preheat it to 350°F (175°C). Line a 12-cup muffin tin with paper liners. This recipe makes about 18 cupcakes, so you’ll likely need two tins or to bake in batches. I usually just grab a second tin – who wants to wait for more cupcakes?Whisking Dry Ingredients to Perfection
In a large bowl, combine the flour, granulated sugar, black cocoa powder, baking soda, and salt. Give them a good whisk to ensure everything is evenly distributed. You don’t want any pockets of unmixed baking soda! This step helps prevent lumps later on.Combining the Wet Elements
In a separate medium bowl, whisk together the buttermilk, oil, eggs, and vanilla extract until well combined and smooth. Ensure your eggs and buttermilk are at room temperature; this helps them emulsify better and creates a smoother batter.
The Great Merge: Wet Meets Dry
Pour the wet ingredients into the dry ingredients. Mix on low speed with an electric mixer, or by hand with a whisk, until just combined. Don’t overmix! Overmixing develops gluten, which can lead to tough cupcakes. A few small lumps are perfectly fine.Adding the Hot Coffee
With the mixer still on low, slowly pour in the hot coffee (or hot water). Mix until the batter is smooth and pourable. The batter will be quite thin – don’t worry, that’s exactly how it should be! It helps create that incredibly moist texture we’re aiming for. Tip: Make sure your coffee is hot, not just warm. The heat helps bloom the cocoa, intensifying its flavor and color even further.Filling the Liners
Divide the batter evenly among the prepared muffin cups, filling each about two-thirds full. An ice cream scoop or a measuring cup with a spout works wonderfully for this, keeping things tidy.Bake Until Done
Bake for 18-22 minutes, or until a wooden skewer inserted into the center of a cupcake comes out with only moist crumbs, not wet batter. The dark color makes it a bit harder to tell when they’re done, so the skewer test is key.Cooling Down
Let the cupcakes cool in the muffin tin for about 5 minutes before transferring them to a wire rack to cool completely. They must be completely cool before frosting, or your beautiful buttercream will melt into a sad, sugary puddle.
Crafting the Velvety Black Cocoa Buttercream
This frosting is the perfect complement to the rich cupcakes. It’s smooth, intensely flavored, and just as dark as the cupcakes themselves.Whipping the Butter
In a large bowl, using an electric mixer, beat the softened butter on medium speed until light and fluffy. This can take 2-3 minutes. Don’t rush this step; it incorporates air, making the frosting light.Adding Dry Ingredients
Gradually add the sifted powdered sugar and sifted black cocoa powder, beating on low speed until combined. Once incorporated, increase the speed to medium-high and beat until light and fluffy. You might need to scrape down the sides of the bowl a few times.Finishing Touches
With the mixer on low, slowly pour in the heavy cream (or milk), vanilla extract, and pinch of salt. Once combined, increase the speed to medium-high and beat for another 2-3 minutes until the frosting is incredibly light, fluffy, and smooth. If it’s too thick, add a tiny bit more cream; if too thin, a tablespoon more sifted powdered sugar.Frosting and Serving Your Masterpieces
Once the cupcakes are completely cool, pipe or spread the frosting generously on top. For a bakery-style finish, use a piping bag with a large star tip. You can garnish with some chocolate shavings, a single dark chocolate curl, or even some edible glitter if you’re feeling fancy. These black velvet cupcakes are best enjoyed fresh, though they’ll stay delicious for a couple of days.Frequently Asked Questions About Black Velvet
Got questions? I’ve got answers. Baking can throw curveballs, so here are some common queries about these dark delights.Can I use regular cocoa powder instead of black cocoa?
While you *can* use regular cocoa, the results will be significantly different. You won’t get the intense black color or the distinctive, deep flavor profile that defines black velvet cupcakes. They’ll taste more like traditional chocolate cupcakes, which are lovely, but not what we’re going for here. Black cocoa is what makes them “black velvet.”Why are my cupcakes dry?
There are a few culprits for dry cupcakes. Overmixing the batter is a common one, as it develops gluten and makes the texture tough. Overbaking is another major factor; keep a close eye on the baking time and use the skewer test. Also, ensure your ingredients (especially eggs and buttermilk) are at room temperature, which helps with proper emulsification and moisture.How do I make sure my frosting isn’t gritty?
The key to smooth, velvety buttercream is sifting your powdered sugar and black cocoa powder. Even if they look fine in the bag, sifting removes any lumps and ensures a silky-smooth texture. Also, make sure your butter is truly softened, not melted or hard, to incorporate air properly.Can I make these black velvet cupcakes ahead of time?
Absolutely! The unfrosted cupcakes can be stored in an airtight container at room temperature for up to 2 days, or frozen for up to 2 months. Thaw them at room temperature before frosting. The frosting can be made a day or two in advance and stored in the fridge; just bring it to room temperature and re-whip it briefly before using.What’s the best way to store leftover frosted cupcakes?
Store frosted cupcakes in an airtight container at room temperature for up to 2-3 days. If your kitchen is particularly warm, or if your frosting contains perishable ingredients beyond butter and cream (like fresh fruit purée), consider refrigerating them. Just bring them back to room temperature before serving for the best texture.Flavor Twists and Creative Ideas
While these black velvet cupcakes are perfect as-is, there’s always room for a little playful experimentation. Here are a few ideas to spark your culinary imagination:Minty Fresh Black Velvet
Add a few drops of peppermint extract to the cupcake batter and/or the frosting for a refreshing mint chocolate combo. Garnish with a small sprig of fresh mint or crushed peppermint candies. This is particularly delightful around the holidays.Spiced Black Velvet
Introduce a pinch of cayenne pepper or chili powder to the cupcake batter for a subtle, warming kick. It’s a surprising but delicious contrast to the deep cocoa flavor. Start small and taste before adding more!Raspberry Black Velvet
Fill the center of each cupcake with a spoonful of raspberry jam before baking, or swirl some raspberry purée into the buttercream. The tartness of the raspberry beautifully cuts through the richness of the black cocoa.Boozy Black Velvet
Replace a tablespoon or two of the coffee with a dark liqueur like Kahlua, Irish cream, or even a good quality stout beer for an adult twist. This adds depth and a hint of sophistication. Just be mindful of the alcohol content if serving to children.Oreo Overload
Crush some extra Oreo cookies and fold them into the buttercream, or sprinkle them liberally over the top of the frosted cupcakes. This amplifies that signature black cocoa flavor even further. A whole mini Oreo on top makes for a fun, playful garnish.Why You’ll Fall in Love with This Recipe
Beyond the dramatic appearance, these black velvet cupcakes are a testament to how good baking can be when you pay attention to the details. The interplay of the black cocoa’s unique flavor with the moist crumb and the velvety frosting creates a dessert that’s both comforting and exciting. It’s a cupcake that makes a statement, perfect for parties, celebrations, or just a Tuesday when you need a little extra indulgence. They’re a fantastic alternative to the more common chocolate or red velvet, offering something truly distinct. So, go ahead. Embrace the dark side. Your taste buds will thank you. There’s a particular satisfaction in creating something so visually striking that tastes even better than it looks. These aren’t just cupcakes; they’re conversation starters, mood elevators, and proof that sometimes, the best things in life are indeed black.
Ultra-Moist Black Velvet Cupcakes with Velvety Black Cocoa Frosting
Bakery-style black velvet cupcakes with deep Oreo-like flavor, topped with rich black cocoa frosting.
📝 Ingredients
👩🍳 Instructions
- 1Preheat your oven to 350°F (175°C). Line a 12-cup muffin tin with paper liners. This recipe makes about 18 cupcakes, so prepare a second tin or plan to bake in two batches.
- 2In a large bowl, whisk together the all-purpose flour, granulated sugar, black cocoa powder, baking soda, and salt. Make sure there are no lumps and ingredients are well distributed.
- 3In a separate medium bowl, whisk together the room temperature buttermilk, neutral oil, large eggs, and vanilla extract until the mixture is smooth and fully combined.
- 4Pour the wet ingredients into the dry ingredients. Mix on low speed with an electric mixer or by hand with a whisk until just combined. Be careful not to overmix the batter; a few small lumps are acceptable.
- 5Slowly pour the hot strong brewed coffee (or hot water) into the batter while mixing on low speed. Continue mixing until the batter is smooth and thin. The batter's thin consistency is normal for this recipe.
- 6Divide the cupcake batter evenly among the prepared muffin cups, filling each liner approximately two-thirds full. Use an ice cream scoop for easy and clean portioning.
- 7Bake for 18-22 minutes, or until a wooden skewer inserted into the center of a cupcake comes out with only moist crumbs attached, not wet batter. Due to the dark color, the skewer test is crucial for doneness.
- 8Allow the baked cupcakes to cool in the muffin tin for 5 minutes before carefully transferring them to a wire rack to cool completely. Ensure they are fully cooled before frosting to prevent the frosting from melting.
- 9To make the frosting, in a large bowl, beat the softened unsalted butter with an electric mixer on medium speed for 2-3 minutes until it becomes light and fluffy.
- 10Gradually add the sifted powdered sugar and sifted black cocoa powder to the butter, beating on low speed until fully incorporated. Increase the speed to medium-high and beat for another 2-3 minutes until the frosting is light and fluffy, scraping down the sides of the bowl as needed.
- 11With the mixer on low speed, slowly add the heavy cream (or milk), vanilla extract, and pinch of salt. Once combined, increase the speed to medium-high and beat for 2-3 more minutes until the buttercream is incredibly smooth, light, and velvety. If too thick, add a tiny bit more cream; if too thin, add more sifted powdered sugar.
- 12Once the cupcakes are completely cool, pipe or spread the black cocoa buttercream frosting generously on top. Serve immediately and enjoy your decadent black velvet cupcakes!
💡 Notes
Ensure all cold ingredients (buttermilk, eggs, butter) are at room temperature for the best texture and emulsification. Do not substitute black cocoa powder for regular cocoa if you want the distinct color and flavor. Cupcakes can be stored unfrosted in an airtight container at room temperature for up to 2 days, or frozen for up to 2 months. Frosted cupcakes keep well at room temperature for 2-3 days in an airtight container.



