


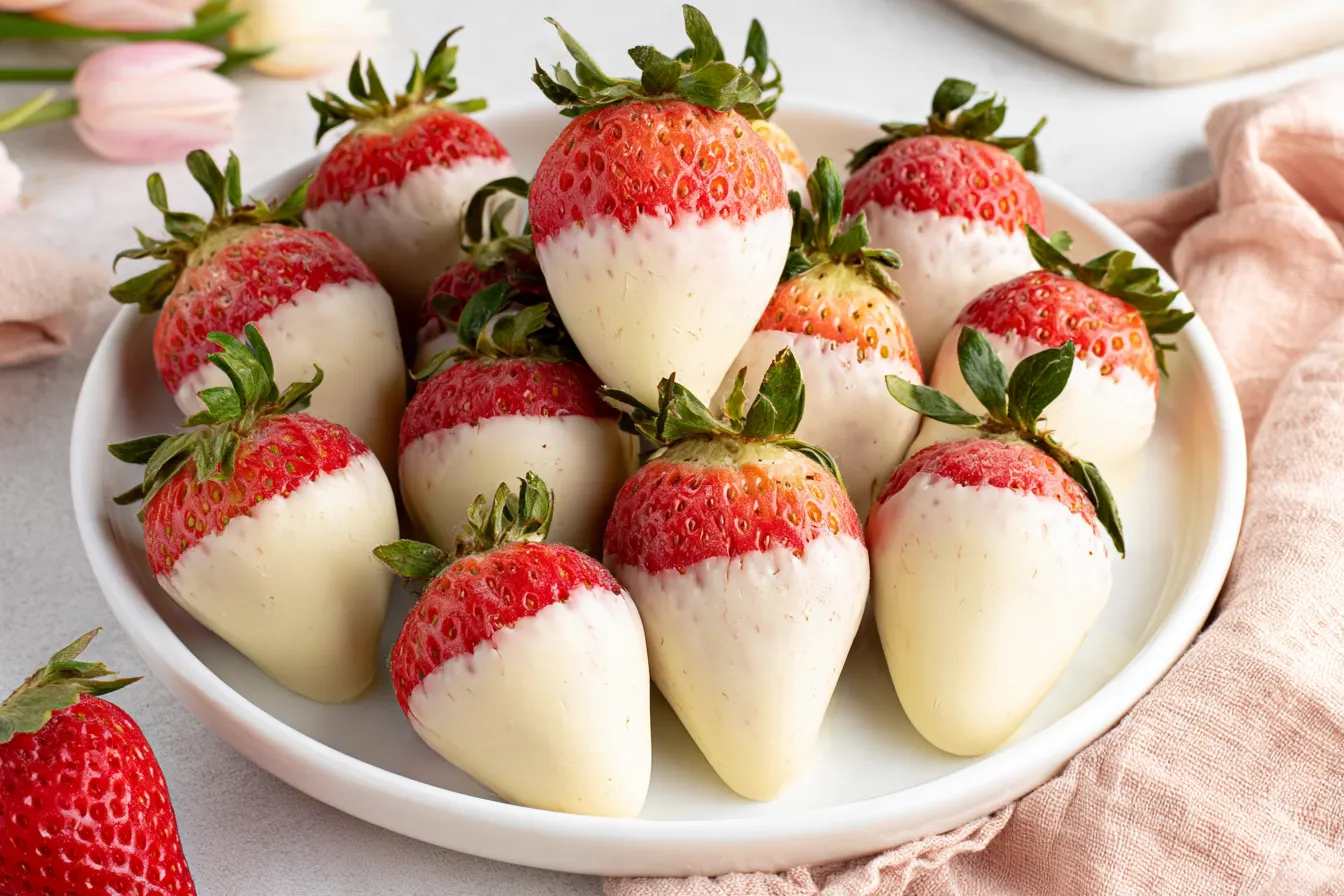
Have you ever bitten into a perfectly crisp, sweet, and slightly tart strawberry, only to find it enveloped in a smooth, creamy shell of white chocolate? That moment of pure bliss is precisely what we’re chasing today, and trust me, achieving those picture-perfect white chocolate covered strawberries at home is far easier than you might think.
Contents
- Gathering Your Supplies: What You’ll Need
- The Art of Melting White Chocolate Properly
- Preparing Your Strawberries for Dipping
- Dipping Techniques for Gorgeous Berries
- Elevating Your White Chocolate Covered Strawberries: Variations & Decor
- Storing Your Beautiful Berries
- Common Questions About Dipping Strawberries
- Why This Recipe Works Every Time

Gathering Your Supplies: What You’ll Need
Creating these delightful treats doesn’t require a specialty store run. In fact, you likely have some of these items already. The key is quality, especially when it comes to your star ingredients.The Essential Ingredients
- Fresh Strawberries: Aim for firm, vibrant red berries with green caps still attached. Medium to large size works best for dipping. Look for organic if possible, as they often have a more intense flavor.
- Good Quality White Chocolate: This is where you don’t want to skimp. Choose a bar or callets (wafers) specifically labeled “white chocolate” with cocoa butter as a primary ingredient, not “white confectionery coating.” Brands like Ghirardelli, Callebaut, or Valrhona make a huge difference in taste and melting consistency. White chocolate chips often contain stabilizers that make them harder to melt smoothly, so use them as a last resort.
- Coconut Oil or Vegetable Shortening (Optional, but Recommended): A tiny bit helps thin the chocolate slightly for a smoother dip and a glossier finish.
Helpful Tools for Dipping
- Baking Sheet Lined with Parchment Paper or Silicone Mat: This is crucial for cooling your dipped strawberries without them sticking.
- Double Boiler or Microwave-Safe Bowl: For melting the chocolate gently.
- Small, Deep Bowl: Ideal for dipping as it allows you to submerge more of the strawberry without needing excessive chocolate.
- Spoon or Fork: To help rotate the strawberry and remove excess chocolate.
- Paper Towels: For thoroughly drying your strawberries before dipping.
The Art of Melting White Chocolate Properly
Achieving that silky, pourable consistency for your white chocolate is perhaps the most critical step. White chocolate is more delicate than dark or milk chocolate due to its higher sugar and milk solid content, making it prone to seizing or scorching if overheated.Using a Double Boiler
This is my preferred method for melting white chocolate, as it provides gentle, indirect heat. Fill a saucepan with about an inch or two of water and bring it to a simmer. Place a heat-safe bowl (make sure it’s larger than the saucepan’s opening so it rests securely on top) over the simmering water, ensuring the bottom of the bowl does not touch the water. Add your chopped white chocolate or callets to the bowl. Stir continuously with a rubber spatula, allowing the steam to melt the chocolate slowly and evenly. Remove from heat as soon as it’s smooth, even if there are a few small lumps left; residual heat will melt them.Microwave Method
If you’re in a hurry, the microwave can work, but proceed with extreme caution. Place your chopped white chocolate in a microwave-safe bowl. Heat on 50% power for 30-second intervals, stirring thoroughly after each interval. White chocolate holds its shape even when melted, so it’s easy to overcook it. Stirring is key to distributing the heat. Continue until mostly melted, then stir until completely smooth. Tip: If your white chocolate seems too thick, or you want an even glossier finish, stir in 1/2 to 1 teaspoon of coconut oil or vegetable shortening per 8 ounces of chocolate after it’s melted. This thins it slightly and adds a lovely sheen.
Preparing Your Strawberries for Dipping
This step is quick but vital for success. Water is chocolate’s enemy, causing it to seize and become thick and grainy. First, gently wash your strawberries under cool running water. Leave the green caps on; they act as a convenient handle for dipping. Next, and this is crucial, thoroughly dry each strawberry. Pat them gently with paper towels until there’s no visible moisture. Any water droplets will cause your beautiful white chocolate to seize. Allow them to air dry for a few minutes on a clean towel if you have the time, just to be extra sure.Dipping Techniques for Gorgeous Berries
Now for the fun part! Get your melted white chocolate ready, have your parchment-lined baking sheet nearby, and clear some space in your fridge.The Dipping Process
Hold a strawberry by its green cap. Dip it into the melted white chocolate, rotating it to coat about two-thirds to three-quarters of the berry. You want to leave a little bit of the fresh red strawberry peeking out at the top – it looks beautiful and gives a hint of the juicy fruit inside. Lift the strawberry out of the chocolate and gently shake off any excess by tapping your wrist against the edge of the bowl. This helps create a smooth, even coating and prevents puddles at the bottom.Setting the Chocolate
Place the dipped strawberry onto your prepared baking sheet. If you’re adding sprinkles or other decorations, do it immediately while the chocolate is still wet. Repeat with the remaining strawberries. Once all your berries are dipped, transfer the baking sheet to the refrigerator for about 10-15 minutes, or until the white chocolate is completely set and firm to the touch. Don’t leave them in too long, as the strawberries can start to “sweat” in the cold.
Elevating Your White Chocolate Covered Strawberries: Variations & Decor
While a plain white chocolate coating is divine, you can easily jazz up your strawberries with extra flair.Drizzles and Swirls
Melt a small amount of dark chocolate or milk chocolate (using the same gentle melting methods). Drizzle it over the set white chocolate covered strawberries using a spoon or a piping bag with a very small hole. Create zigzags, stripes, or intricate patterns. For a professional touch, use a squeeze bottle.Sprinkles and Toppings
Immediately after dipping, before the white chocolate sets, roll or sprinkle your berries with various toppings. Think colorful sprinkles, finely chopped nuts (pistachios or almonds are lovely), shredded coconut, or even crushed freeze-dried raspberries for a pop of tartness and color.Tinted White Chocolate
Want pink or blue strawberries? Add a tiny drop of oil-based food coloring to your melted white chocolate. Water-based gel or liquid food colorings will cause the chocolate to seize, so ensure your coloring is specifically for chocolate.Storing Your Beautiful Berries
White chocolate covered strawberries are best enjoyed within 1-2 days of making them. The fresh fruit component means they don’t have a super long shelf life. Store them in a single layer in an airtight container in the refrigerator. If you must stack them, separate layers with parchment paper to prevent sticking. The chocolate can sometimes develop a white, powdery film known as “bloom” if subjected to drastic temperature changes. While harmless, it’s not as visually appealing. Try to keep their storage temperature consistent.Common Questions About Dipping Strawberries
Why did my white chocolate seize and become clumpy?
This is almost always due to moisture or overheating. Even a tiny drop of water (from wet strawberries, steam from a double boiler, or a water-based food coloring) can cause chocolate to seize. Overheating also changes the chocolate’s structure, making it thick and unusable. Stick to low, indirect heat and ensure everything is dry.Can I use white chocolate chips instead of a bar?
You can, but it’s not ideal. White chocolate chips contain stabilizers that help them keep their shape, which also makes them harder to melt smoothly. They often result in a thicker, less glossy coating. If you must use them, add a bit more coconut oil or shortening to help thin the mixture.How do I make the white chocolate really smooth and shiny?
Using good quality white chocolate with high cocoa butter content is the first step. Melting it gently over a double boiler or in short bursts in the microwave, stirring constantly, is key. Adding a tiny bit of coconut oil or shortening also helps with gloss and consistency. Ensuring your strawberries are perfectly dry is non-negotiable for a smooth finish.Can I prepare these ahead of time for a party?
They are best made the day they are to be served. While they’ll last a day or two in the fridge, the strawberries tend to “sweat” and can release moisture, which can affect the chocolate coating and the freshness of the berry. For optimal taste and appearance, aim to make them within a few hours of serving.What’s the best way to clean the strawberries?
Gently rinse them under cool running water. Avoid soaking them, as they can absorb water and become mushy. Leave the green caps on while washing and drying. After washing, pat them thoroughly dry with paper towels. You can even let them air dry on a clean kitchen towel for about 15-20 minutes to ensure they are completely free of moisture.Why This Recipe Works Every Time
The beauty of this recipe lies in its simplicity and the emphasis on quality ingredients and proper technique. We’re not reinventing the wheel, but rather refining the process to ensure a consistently perfect outcome. By focusing on high-quality white chocolate, you get that rich, creamy flavor that cheap coatings just can’t deliver. Gently melting the chocolate prevents scorching and ensures a silky texture, which is paramount for an even, glossy dip. The careful preparation of the strawberries – especially the drying step – is the unsung hero, preventing the chocolate from seizing and becoming a grainy mess. And let’s not forget the immediate chilling; this sets the chocolate quickly, locking in that beautiful shine and preventing streaks. It’s a method built on understanding the delicate nature of white chocolate and the freshness of the fruit, leading to an indulgent treat that tastes as good as it looks. These aren’t just snacks; they’re little moments of joy, easy enough for a beginner but elegant enough for any occasion. They prove that sometimes, the simplest combinations truly are the most delightful.
Perfect White Chocolate Covered Strawberries
Learn to make luxurious white chocolate covered strawberries at home with this easy, step-by-step DIY recipe for a perfect treat.
📝 Ingredients
👩🍳 Instructions
- 1Wash the strawberries gently under cool running water. Do not remove the green caps. Thoroughly pat each strawberry dry with paper towels. This step is crucial to prevent the chocolate from seizing. Set aside on a clean towel to air dry for a few minutes while you prepare the chocolate.
- 2Prepare your melting setup: Either set up a double boiler (a heat-safe bowl over a saucepan of simmering water, ensuring the bowl doesn't touch the water) or get a microwave-safe bowl ready.
- 3Melt the white chocolate: If using a double boiler, place the chopped white chocolate in the bowl and stir continuously until smooth and melted. If using a microwave, heat on 50% power in 30-second intervals, stirring well after each, until mostly melted, then stir until completely smooth. Avoid overheating.
- 4Stir in optional coconut oil/shortening: If using, add 1/2 to 1 teaspoon of coconut oil or vegetable shortening to the melted white chocolate and stir until fully incorporated. This helps thin the chocolate for a smoother dip and a glossier finish.
- 5Prepare dipping station: Line a baking sheet with parchment paper or a silicone mat. Pour the melted white chocolate into a small, deep bowl for easier dipping.
- 6Dip the strawberries: Holding a strawberry by its green cap, dip it into the melted white chocolate, rotating to coat about two-thirds to three-quarters of the berry. Lift the strawberry out and gently tap your wrist against the edge of the bowl to remove any excess chocolate.
- 7Place and set: Carefully place each dipped strawberry onto the prepared baking sheet. If adding sprinkles or other decorations, do so immediately while the chocolate is still wet.
- 8Chill to set: Once all strawberries are dipped, transfer the baking sheet to the refrigerator for 10-15 minutes, or until the white chocolate is completely firm. Do not chill for too long, as strawberries can 'sweat.'
- 9Serve immediately or store: Enjoy your white chocolate covered strawberries fresh. Store any leftovers in an airtight container in the refrigerator for up to 1-2 days.
💡 Notes
For best results, use high-quality white chocolate (not confectionery coating or chips with stabilizers). Ensure strawberries are completely dry before dipping. These are best enjoyed the day they are made for optimal freshness and appearance.
🥗 Nutrition (per serving)
Calories 180 kcal
Protein 2g
Total Fat 11g
Saturated Fat 7g
Carbs 20g
Fiber 1g
Sugar 17g
Sodium 25mg
Cholesterol 10mg
Rate This Recipe
☆ ☆ ☆ ☆ ☆



