


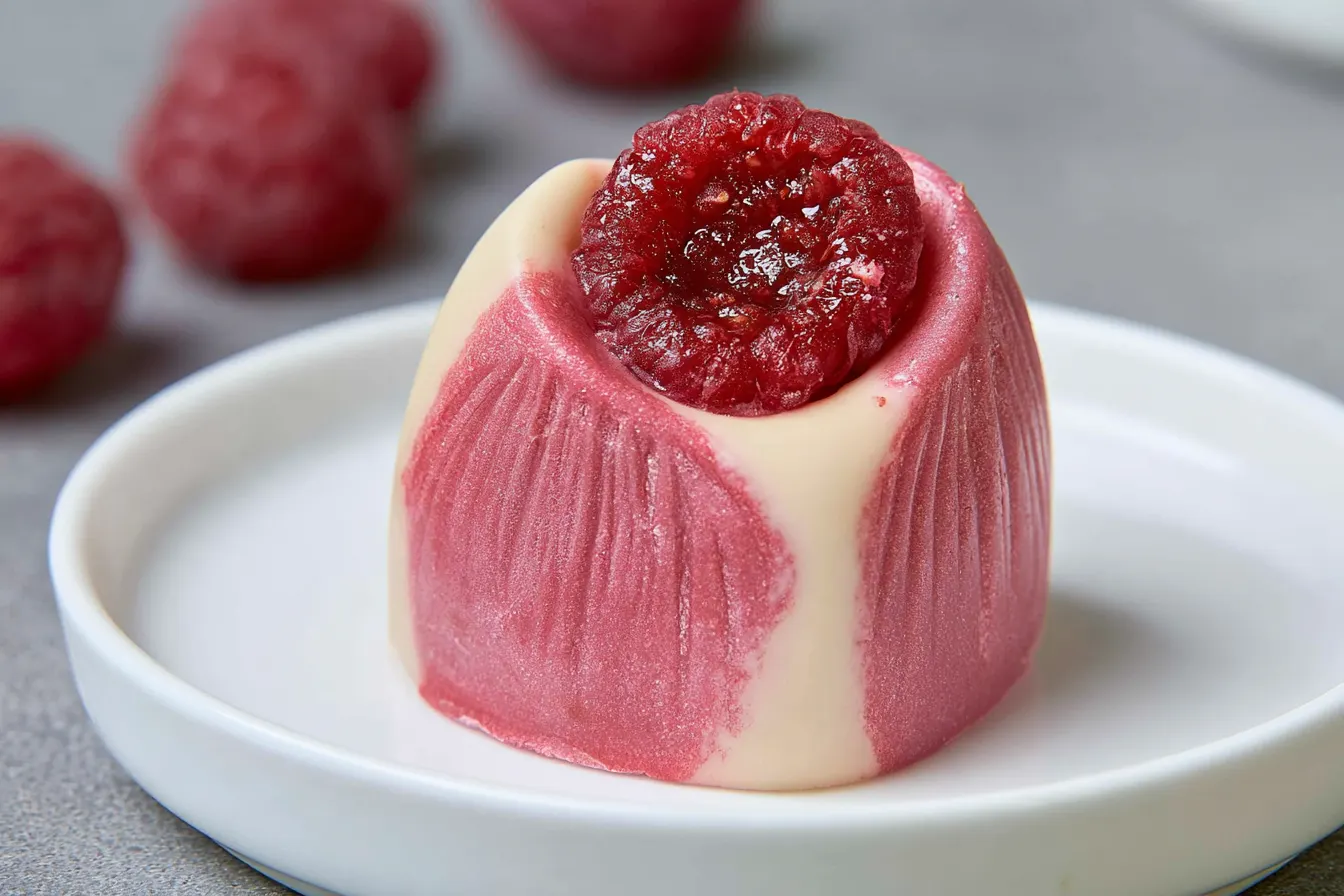
Have you ever wondered if chocolate could actually be… joyful? Not just delicious, but genuinely *joyful*? That’s precisely the feeling I get every single time I make these homemade Raspberry Ruby Chocolate Bonbons. They’re naturally pink, bursting with the tangy sweetness of raspberries, and surprisingly straightforward to create at home, even if you’ve never attempted bonbons before.
- What is Ruby Chocolate, Anyway?
- Gather Your Ingredients: The Heart of Our Raspberry Ruby Chocolate Bonbons
- Crafting Your Bonbons: Step-by-Step Indulgence
- Why These Bonbons Are Simply the Best
- Troubleshooting Your Bonbon Journey: FAQs
- Variations to Keep Things Exciting
- Serving Suggestions: A Touch of Elegance

What is Ruby Chocolate, Anyway?
Let’s talk about this magical ingredient for a moment. Ruby chocolate is the fourth type of chocolate, after dark, milk, and white. Its distinct pink hue comes entirely from the ruby cacao bean itself, without any added berries or colorants. The flavor is often described as fruity and slightly sour, with notes of berries, though it’s not overtly sweet like some milk chocolates. This unique profile makes it a fantastic partner for tart fruits. When you’re working with ruby chocolate, you’ll notice it has a slightly lower melting point than other chocolates, so tempering it requires a little extra care. Don’t worry, I’ll walk you through it. The result is worth every bit of attention – a glossy, snappy bonbon that’s as beautiful to look at as it is to eat.Gather Your Ingredients: The Heart of Our Raspberry Ruby Chocolate Bonbons
Making these bonbons requires a few key players, but nothing too exotic beyond the star of the show. Quality ingredients truly shine here, so opt for the best you can find.For the Raspberry Ganache Filling
- 1 cup fresh or frozen raspberries: If using frozen, there’s no need to thaw them first.
- 1/4 cup heavy cream: This provides the luscious, creamy base for our ganache.
- 2 tablespoons unsalted butter: Adds richness and helps create a smooth texture.
- 1 tablespoon granulated sugar: Just a touch to balance the tartness of the raspberries. You can adjust this to your taste.
- 1/2 teaspoon vanilla extract: A classic flavor enhancer that complements the fruit beautifully.
For the Ruby Chocolate Shells
- 10 oz (about 280g) ruby chocolate callets or finely chopped bar: Callets are easier to work with for melting and tempering. Ensure it’s a good quality brand for the best flavor and melting properties.
- 1-2 tablespoons freeze-dried raspberry powder (optional, for decoration): This adds a lovely visual pop and an extra layer of raspberry flavor.

Crafting Your Bonbons: Step-by-Step Indulgence
Creating beautiful bonbons might seem intimidating, but with a clear plan and a little patience, you’ll be amazed at what you can achieve. We’ll start with the vibrant raspberry ganache, then move on to tempering the ruby chocolate and assembling our treats.Step 1: Prepare the Raspberry Purée
Combine the fresh or frozen raspberries in a small saucepan over medium heat. Cook, stirring occasionally, until the raspberries break down and release their juices, about 5-7 minutes. Once softened, press the mixture through a fine-mesh sieve into a clean bowl, using the back of a spoon to extract as much purée as possible. Discard the seeds. You should have about 1/2 cup of smooth raspberry purée.
Step 2: Make the Raspberry Ganache
In the same saucepan (no need to wash it), combine the heavy cream, unsalted butter, and granulated sugar. Heat over medium-low heat, stirring constantly, until the butter is melted and the sugar is fully dissolved. Don’t let it boil vigorously. Remove from heat and stir in the vanilla extract and your prepared raspberry purée. Mix well until everything is combined and smooth. Let the ganache cool completely at room temperature, then transfer it to a piping bag fitted with a small round tip (or just snip the corner off a Ziploc bag).
Note: Cooling the ganache completely is crucial. If it’s warm, it will melt your chocolate shells. You can even pop it in the fridge for 30-60 minutes to speed up the process, but let it come back to a pipeable consistency before filling.
Step 3: Temper the Ruby Chocolate
This is where the magic (and a little science) happens for that beautiful shine and snap. You’ll need a food-grade thermometer. Place about two-thirds of your ruby chocolate callets in a heatproof bowl set over a saucepan of simmering water (a double boiler). Ensure the bottom of the bowl does not touch the water. Stir gently until the chocolate is melted and reaches 110-115°F (43-46°C). Remove the bowl from the heat.
Add the remaining one-third of the ruby chocolate callets to the melted chocolate. Stir continuously until all the chocolate is melted and the mixture cools down to 82-84°F (28-29°C). This process is called seeding and helps achieve proper temper. If it cools too much, you can briefly place it back over the warm (but not simmering) water for a few seconds, stirring constantly, until it reaches the correct working temperature. It should be fluid and smooth.
Step 4: Create the Bonbon Shells
Using a clean, dry silicone bonbon mold (or polycarbonate mold for a sharper finish), spoon a small amount of tempered ruby chocolate into each cavity. Use a small brush or the back of a spoon to spread the chocolate up the sides of each cavity, ensuring an even coating. Tap the mold gently on your counter a few times to release any air bubbles. Invert the mold over a piece of parchment paper and let any excess chocolate drip out. Scrape the top of the mold clean with an offset spatula. Place the mold in the refrigerator for 5-10 minutes to allow the shells to set.
Tip: For a slightly thicker shell, you can repeat this step once the first layer has set. Just ensure your chocolate is still in temper before adding the second coat.

Step 5: Fill the Bonbons
Once your chocolate shells are firm, retrieve them from the fridge. Pipe the cooled raspberry ganache into each chocolate shell, leaving a small space (about 1/8 inch) from the top edge. Don’t overfill, or you won’t be able to seal them properly.
Step 6: Seal and Finish
Re-temper any remaining ruby chocolate if it has cooled too much. Spoon tempered chocolate over the filled cavities, spreading it evenly with an offset spatula to seal the bottoms of the bonbons. Scrape off any excess chocolate from the surface of the mold. Tap the mold gently again to ensure an even seal and release any trapped air. Return the mold to the refrigerator for 15-20 minutes, or until the chocolate is fully set and easily releases from the mold. You’ll know they’re ready when you can see the bottoms of the bonbons lifting slightly from the mold cavities.
Step 7: Unmold and Decorate
Once thoroughly chilled and set, gently unmold your Raspberry Ruby Chocolate Bonbons by twisting the mold slightly and pressing lightly on the back of each cavity. If using freeze-dried raspberry powder, you can lightly dust the bonbons or use a small brush to paint designs with it. Store in an airtight container at cool room temperature or in the refrigerator.
Why These Bonbons Are Simply the Best
There are many chocolate treats out there, but these Raspberry Ruby Chocolate Bonbons stand out for a few key reasons. First, the ruby chocolate itself is a conversation starter; its unique flavor profile and natural pink hue are unlike anything else. Second, the homemade raspberry ganache is incredibly fresh and vibrant, a far cry from artificial fruit fillings. The combination of the snappy chocolate shell and the creamy, tangy center is a textural delight. Plus, the satisfaction of creating such elegant confections yourself is truly unparalleled!Troubleshooting Your Bonbon Journey: FAQs
Even experienced chocolatiers run into snags. Here are some common questions and solutions to help you succeed.How do I know if my ruby chocolate is properly tempered?
Properly tempered chocolate will be glossy, firm, and snap cleanly when broken. If it’s dull, streaky, or melts quickly in your hands, it’s likely not tempered correctly. The best way to check is to spread a thin smear on parchment paper; it should set within 3-5 minutes at room temperature with a good shine.
My bonbons are sticking to the mold. What went wrong?
This usually happens if the chocolate isn’t fully set, or if the mold wasn’t perfectly clean and dry. Ensure your mold is spotless before starting, and give the bonbons ample time to chill in the refrigerator until they pull away from the mold edges naturally.
Can I use white chocolate instead of ruby chocolate?
While you can certainly make a raspberry white chocolate bonbon, it won’t have the same unique flavor profile or natural pink color of ruby chocolate. If you do use white chocolate, consider adding a tiny drop of pink food coloring and possibly a touch more tartness to the ganache to mimic the ruby experience.
How long do these bonbons last?
Stored in an airtight container at cool room temperature (around 65-70°F or 18-21°C), they’ll keep for about a week. If stored in the refrigerator, they can last up to two weeks, but allow them to come to room temperature for 10-15 minutes before serving for the best texture and flavor.
Can I freeze Raspberry Ruby Chocolate Bonbons?
Yes, you can! Place them in a single layer on a baking sheet and freeze until solid. Then transfer them to an airtight, freezer-safe container, separating layers with parchment paper. They’ll keep for up to 1 month. Thaw in the refrigerator overnight, then bring to room temperature before enjoying.
Variations to Keep Things Exciting
While the classic Raspberry Ruby Chocolate Bonbon is divine, there’s always room to play!Consider adding a tiny pinch of chili powder to your ganache for a subtle, unexpected kick. Or, for a citrusy twist, fold in a teaspoon of finely grated orange zest into the raspberry purée. You could even swap out raspberries for strawberries or blackberries in the ganache, adjusting sugar to taste. A tiny drop of rosewater in the ganache also creates a wonderfully floral note that pairs beautifully with ruby chocolate.
Serving Suggestions: A Touch of Elegance
These bonbons are perfect on their own, perhaps with a cup of espresso or a delicate herbal tea. For a more elaborate dessert presentation, arrange them on a platter with fresh berries and a dusting of powdered sugar. They also make exquisite homemade gifts; package them in a small box lined with tissue paper, and you’ve got a thoughtful, gourmet present. They’re a fantastic finale to a romantic dinner or a sophisticated addition to a holiday dessert spread.
Homemade Raspberry Ruby Chocolate Bonbons
Indulge in these stunning homemade Raspberry Ruby Chocolate Bonbons, featuring a tangy raspberry ganache and a crisp, naturally pink ruby chocolate shell.
📝 Ingredients
👩🍳 Instructions
- 1Prepare the Raspberry Purée: In a small saucepan over medium heat, cook raspberries until broken down (5-7 mins). Press through a fine-mesh sieve into a bowl; discard seeds. You should have about 1/2 cup purée.
- 2Make the Raspberry Ganache: In the same saucepan, combine heavy cream, butter, and sugar. Heat over medium-low, stirring, until butter melts and sugar dissolves. Remove from heat, stir in vanilla extract and raspberry purée until smooth. Cool completely, then transfer to a piping bag.
- 3Temper the Ruby Chocolate: Melt two-thirds of the ruby chocolate in a double boiler to 110-115°F (43-46°C). Remove from heat, add remaining chocolate, and stir until melted and cooled to 82-84°F (28-29°C).
- 4Create the Bonbon Shells: Spoon tempered chocolate into a clean bonbon mold. Spread up the sides, tap to release bubbles, then invert to drain excess. Scrape mold clean. Chill for 5-10 minutes until set.
- 5Fill the Bonbons: Pipe cooled raspberry ganache into each chocolate shell, leaving a small gap at the top.
- 6Seal and Finish: Re-temper chocolate if needed. Spoon over filled cavities, spreading to seal. Scrape excess. Chill for 15-20 minutes until fully set and easily released.
- 7Unmold and Decorate: Gently unmold bonbons. Dust with freeze-dried raspberry powder if desired. Store in an airtight container.
💡 Notes
Ensure all equipment is completely dry before working with chocolate. For best results, use a quality food thermometer for tempering. Allow bonbons to come to room temperature for optimal flavor and texture before serving.



