


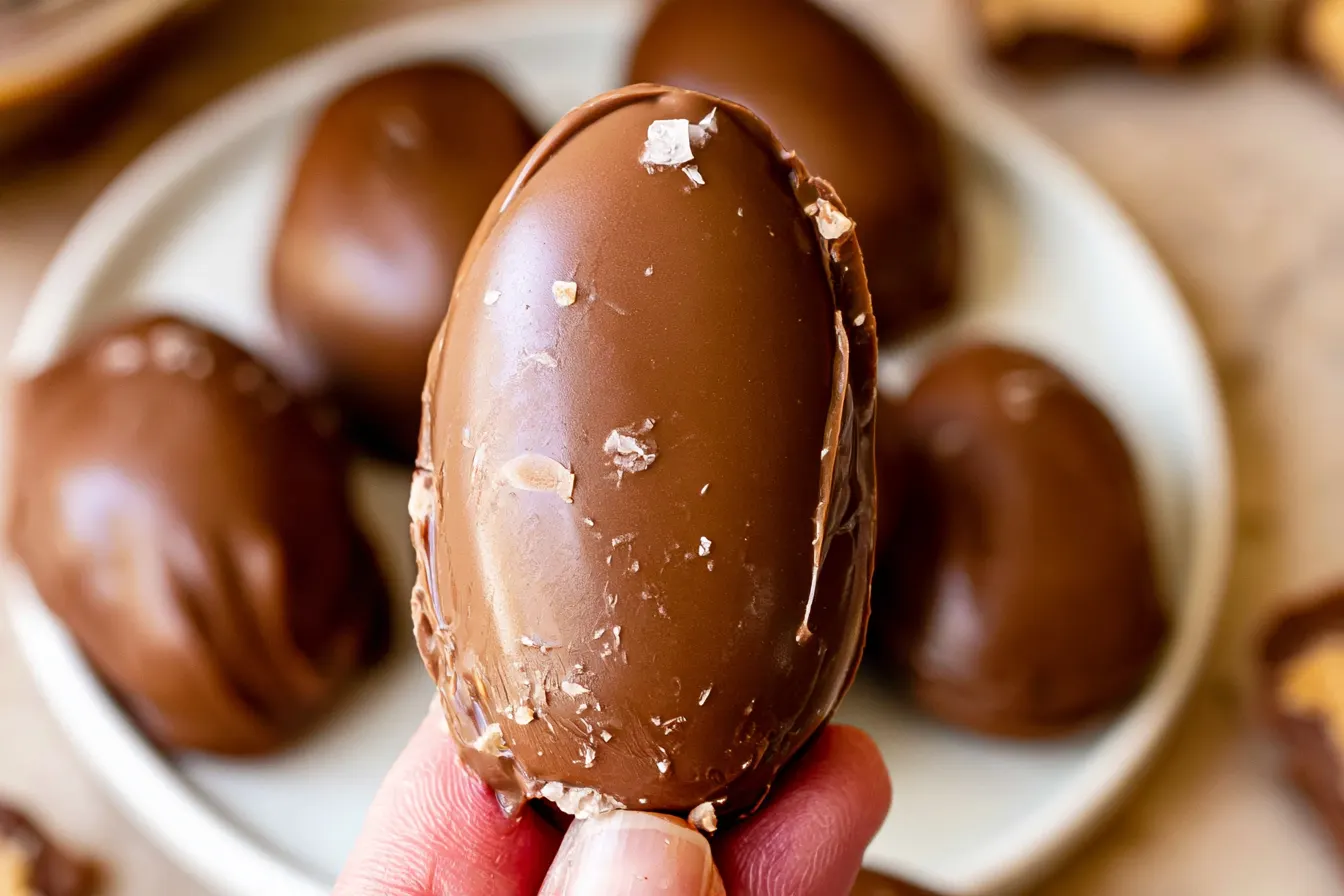
There’s something about the changing seasons that makes me crave specific treats, and when spring rolls around, my mind immediately goes to one thing: Reese’s Peanut Butter Eggs. Forget the cups; the eggs just hit differently. That perfect ratio of chocolate to peanut butter, the way the filling crumbles just so – it’s pure magic.

Cracking the Code: What Makes These Peanut Butter Eggs So Good?
You might be thinking, “Peanut butter and chocolate? How hard can it be?” And while the basic concept is simple, achieving that signature Reese’s texture and flavor takes a little finesse. It’s not just about mixing ingredients; it’s about the right ratios and the right technique to get that slightly dry, crumbly, yet melt-in-your-mouth peanut butter center. The key here lies in a few specific ingredients working together. Powdered sugar is essential for that fine, melt-away texture, while a touch of butter and vanilla extract really amplifies the flavor. Don’t skimp on quality chocolate for the coating – it makes a huge difference in the final product. We’re aiming for perfection, after all!Gathering Your Goodies: The Peanut Butter Egg Ingredients
You won’t need a pantry full of obscure ingredients for this one. Chances are, you already have most of these on hand, especially if you’re a fellow peanut butter enthusiast!For the Irresistible Peanut Butter Filling:
- Creamy Peanut Butter: The star of the show! Make sure it’s a standard, processed creamy peanut butter (like Jif or Skippy), not natural peanut butter, as the oils separate too much and will throw off the texture.
- Unsalted Butter: Softened to room temperature. This adds richness and helps bind the mixture without making it oily.
- Powdered Sugar (Confectioners’ Sugar): Absolutely crucial for that smooth, crumbly, melt-in-your-mouth texture. Don’t substitute granulated sugar!
- Vanilla Extract: Just a touch enhances all those sweet, nutty flavors.
- Salt: A pinch really balances the sweetness and makes the peanut butter flavor pop.
For the Perfect Chocolate Coating:
- Chocolate Chips or Melting Wafers: I prefer a mix of semi-sweet and milk chocolate for that classic Reese’s flavor, but use your favorite. High-quality melting wafers (like Ghirardelli or Guittard) make dipping much easier and give a smoother finish.
- Vegetable Shortening or Coconut Oil (optional): A tiny bit helps thin the chocolate slightly for easier dipping and a smoother coat, especially if you’re using chocolate chips.

Whipping Up Your Own Reese’s Magic: Step-by-Step
This recipe is far less intimidating than you might think. The hardest part is waiting for them to chill!1. Prepare the Peanut Butter Base
In a large mixing bowl, combine the softened butter and creamy peanut butter. Use an electric mixer (handheld or stand mixer) on medium speed to beat them together until they are light and fluffy. This usually takes about 2-3 minutes. Scrape down the sides of the bowl often to ensure everything is well incorporated.
2. Mix in the Sweetness and Flavor
Gradually add the powdered sugar, a cup at a time, mixing on low speed until combined. Once all the sugar is in, increase the speed to medium and beat until the mixture is uniform and crumbly. Stir in the vanilla extract and salt. The mixture should be firm enough to hold its shape but still slightly crumbly.
Tip: If your mixture seems too dry, add a tiny bit more peanut butter. If it’s too wet, add a tablespoon or two more powdered sugar until you reach the right consistency.3. Shape Your Eggs
Scoop out about 1 to 1.5 tablespoons of the peanut butter mixture for each egg. Roll it into a ball, then gently flatten and shape it into an oval or egg shape. Try to keep them relatively uniform in size for even coating. Place the shaped eggs on a baking sheet lined with parchment paper or a silicone mat.
4. Chill Out
Pop the baking sheet with your peanut butter eggs into the freezer for at least 30 minutes. This step is crucial! Chilling them thoroughly makes them firm and much easier to dip into chocolate without falling apart. Don’t skip it!

5. Melt the Chocolate
While the eggs are chilling, prepare your chocolate coating. In a microwave-safe bowl, combine your chocolate chips (or wafers) and, if using, the shortening or coconut oil. Microwave in 30-second intervals, stirring well after each, until the chocolate is smooth and completely melted. Alternatively, you can use a double boiler on the stovetop for a more controlled melt.
6. Dip and Coat
Remove the chilled peanut butter eggs from the freezer. Using a fork or a candy-dipping tool, carefully dip each egg into the melted chocolate, ensuring it’s fully coated. Lift it out, tap gently against the side of the bowl to remove excess chocolate, and then place it back on the parchment-lined baking sheet.
Note: If the chocolate starts to get too thick as you’re dipping, gently reheat it for 10-15 seconds in the microwave, stirring well.7. Set and Enjoy!
Once all the eggs are dipped, place the baking sheet back in the refrigerator for another 15-20 minutes, or until the chocolate is completely set. Once firm, they’re ready to devour!
Common Questions About Homemade Reese’s Peanut Butter Eggs
I get a lot of questions about making homemade chocolate and peanut butter treats. Here are some of the most frequent ones for these delectable eggs.Can I use natural peanut butter for this recipe?
Unfortunately, no. Natural peanut butter (the kind that separates) has a different consistency due to its higher oil content and lack of stabilizers. It will make your peanut butter filling too oily and soft, and it won’t hold its shape or give you that signature crumbly texture. Stick with creamy, processed peanut butter like Jif or Skippy for best results.
My chocolate seized! What went wrong?
Chocolate seizing (turning into a thick, gritty paste) usually happens for two main reasons: introducing even a tiny drop of water or overheating it. Make sure your bowl and utensils are completely dry. When melting, go slowly in short bursts, stirring frequently, to avoid overheating. If it seizes, sometimes adding a teaspoon of vegetable oil or shortening and stirring vigorously can save it, but it’s often best to start fresh.
How can I make these look extra fancy?
After dipping, while the chocolate is still wet, you can sprinkle them with sea salt flakes for a sweet and salty kick. Or, once the chocolate is set, you can melt a contrasting color of chocolate (like white chocolate) and drizzle it over the eggs for a decorative touch.
Can I make these ahead of time?
Absolutely! These peanut butter eggs are perfect for making in advance. They hold up beautifully in the refrigerator for up to 2 weeks in an airtight container. You can also freeze them for up to 2-3 months. Just thaw them in the fridge before serving.
Why is chilling the peanut butter mixture so important?
Chilling the peanut butter mixture until it’s very firm is key to preventing it from falling apart when you dip it into the warm melted chocolate. A well-chilled center will maintain its shape and allow the chocolate to set quickly around it, giving you a clean, smooth finish.
Storage Savvy: Keeping Your Eggs Fresh
Once your homemade Reese’s Peanut Butter Eggs are set, store them in an airtight container in the refrigerator. They’ll stay fresh and delicious for up to two weeks. If you prefer them at room temperature, they can sit out for a day or two, but refrigerating them helps keep the chocolate firm and prevents the peanut butter from getting too soft. For longer storage, they freeze wonderfully for up to 2-3 months. Just pull them out a few hours before you plan to indulge!
Homemade Reese's Peanut Butter Eggs
Recreate the iconic taste and crumbly texture of store-bought Reese's Peanut Butter Eggs with this easy, spot-on recipe.
📝 Ingredients
👩🍳 Instructions
- 1In a large bowl, beat the softened butter and creamy peanut butter with an electric mixer until light and fluffy, about 2-3 minutes. Scrape down the sides of the bowl.
- 2Gradually add the powdered sugar, one cup at a time, mixing on low speed until combined. Once all sugar is added, beat on medium until uniform and crumbly. Stir in vanilla extract and salt. The mixture should be firm enough to shape.
- 3Scoop 1 to 1.5 tablespoons of the mixture and shape into an egg or oval. Place on a parchment-lined baking sheet.
- 4Freeze the shaped peanut butter eggs for at least 30 minutes until firm.
- 5While eggs chill, melt the chocolate chips (and optional shortening/coconut oil) in a microwave-safe bowl in 30-second intervals, stirring after each, until smooth. Alternatively, use a double boiler.
- 6Using a fork or dipping tool, dip each frozen peanut butter egg into the melted chocolate, coating completely. Tap off excess chocolate and return to the parchment-lined baking sheet.
- 7Refrigerate for 15-20 minutes, or until the chocolate is completely set. Store in an airtight container in the refrigerator.
💡 Notes
Ensure you use creamy, processed peanut butter, not natural, for the best texture. Chilling the peanut butter eggs thoroughly before dipping is crucial for easy coating. If chocolate thickens, gently rewarm. Add a sprinkle of sea salt after dipping for a sweet and salty touch.



