


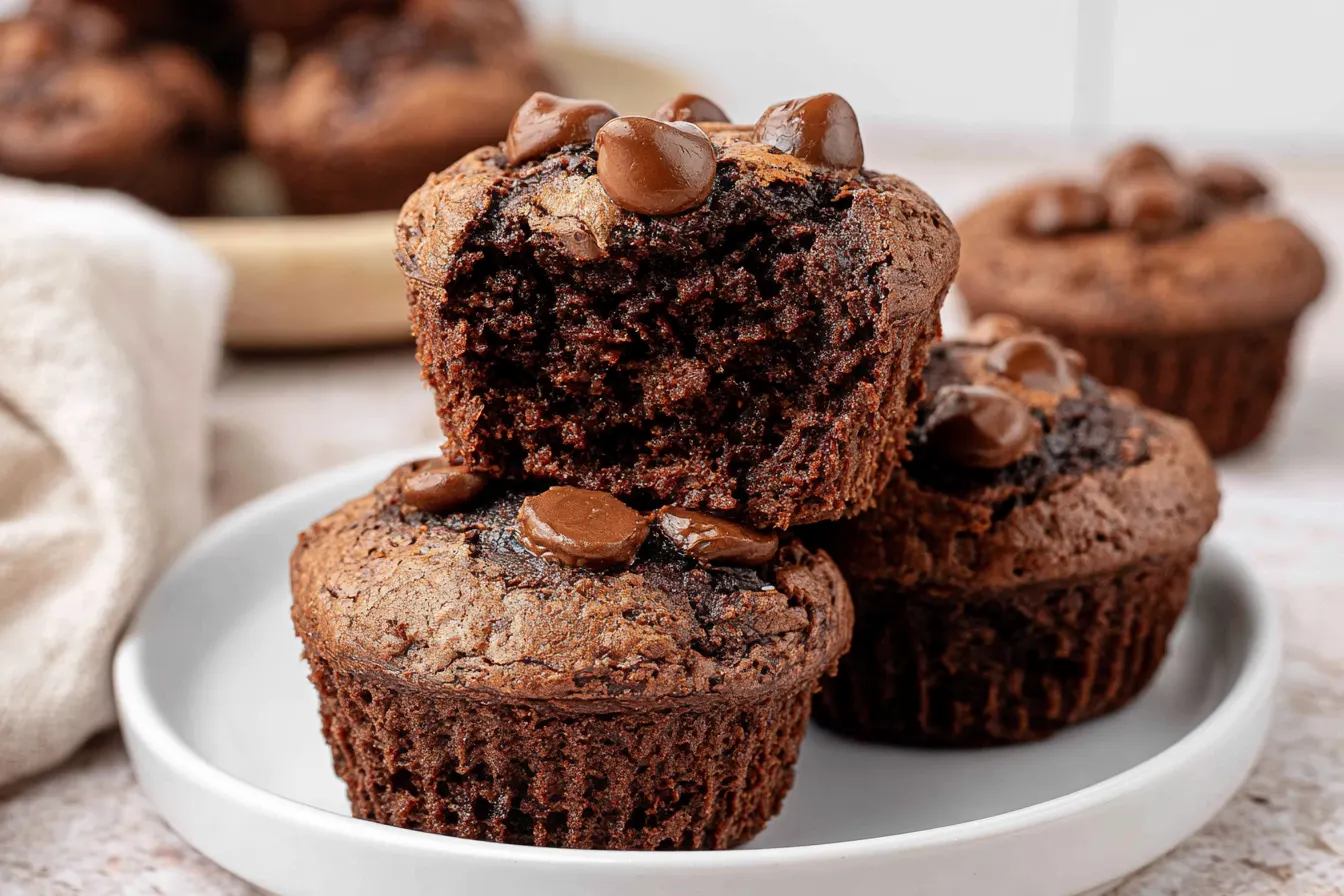
I once tried to pass off slightly overbaked brownies as “brownie cookies” to a group of friends. They were edible, sure, but they lacked that essential fudgy core that makes a brownie, well, a brownie. The quest for that perfect balance of crispy edge, chewy bite, and molten center has been a long one, and it led me straight to these incredible brownie muffins.

Why These Aren’t Just Brownies in a Muffin Tin
You might be thinking, “Can’t I just bake my regular brownie batter in a muffin tin?” And while, yes, you *could*, the results often aren’t quite the same. This recipe is specifically formulated to achieve that ideal brownie-muffin hybrid. We’re looking for a slightly more structured exterior to hold that muffin shape, but without sacrificing any of the gooey fudginess inside. It’s a delicate balance, and this recipe strikes it perfectly. The magic truly happens with the ratio of wet to dry ingredients and the specific type of fat we’re using. We’re leaning into melted butter and just enough flour to give it some lift without turning it cakey. This ensures those coveted chewy edges and that intensely rich, almost molten, center.Gather Your Simple Ingredients
One of the most beautiful things about these brownie muffins is how few ingredients you actually need. You probably have most of these in your pantry right now, which means you’re just a short mixing session away from chocolate heaven! We’re keeping things streamlined to let that deep chocolate flavor truly shine.For the Irresistible Brownie Batter:
- Unsalted Butter: The foundation of fudginess. Melted butter creates that dense, chewy texture we’re after.
- Granulated Sugar: Sweetness, of course, but also contributes to that gorgeous crackly top.
- Large Eggs: Binders and contributors to richness. Don’t skip them!
- Vanilla Extract: A crucial flavor enhancer that amplifies the chocolate.
- All-Purpose Flour: Just enough to provide structure without making these cake-like.
- Unsweetened Cocoa Powder: The star of the show. Use a good quality cocoa for the best flavor – Dutch-processed or natural will work, but Dutch-processed often gives a darker color.
- Salt: Essential for balancing sweetness and intensifying the chocolate notes.

Whipping Up a Batch of Chocolatey Goodness
The process for these brownie muffins is delightfully straightforward. No fancy equipment needed, just a couple of bowls and a whisk! You’ll be amazed at how quickly this comes together.Step 1: Melt and Combine the Wet Ingredients
Start by melting your unsalted butter. You can do this gently on the stovetop or in the microwave. Once melted, pour it into a large mixing bowl. Whisk in the granulated sugar until it’s well combined and the mixture looks smooth and glossy. This initial step helps dissolve the sugar, contributing to that desirable texture.
Note: Don’t let the butter get too hot; we just want it melted, not boiling. If it’s too hot, let it cool for a minute before adding the eggs to prevent them from scrambling.
Step 2: Incorporate Eggs and Vanilla
Next, crack in your two large eggs, one at a time, whisking well after each addition. The mixture will lighten slightly and become even glossier. This is where we start building that rich, emulsified base. Stir in the vanilla extract until it’s fully incorporated. The aroma starting to waft up is always a good sign!
Step 3: Fold in the Dry Ingredients
In a separate medium bowl, whisk together the all-purpose flour, unsweetened cocoa powder, and salt. Make sure there are no lumps of cocoa powder. Gradually add this dry mixture to your wet ingredients, folding gently with a spatula or wooden spoon until just combined. Be careful not to overmix; overmixing can develop the gluten in the flour too much, leading to tougher muffins.
Tip: Stop mixing as soon as you no longer see streaks of dry flour. A few small lumps are perfectly fine!

Step 4: Prepare Muffin Tin and Bake
Preheat your oven to 350°F (175°C). Line a standard 12-cup muffin tin with paper liners or grease it really well. Divide the brownie batter evenly among the cups, filling each about two-thirds full. The batter will be thick, so use a spoon or a small cookie scoop to help. Bake for 18-22 minutes, or until the tops look set and a toothpick inserted into the center comes out with moist crumbs attached, but not wet batter. The centers should still be fudgy.
Step 5: Cool and Enjoy
Once baked, let the brownie muffins cool in the muffin tin for about 5-10 minutes before transferring them to a wire rack to cool completely. This cooling period helps them set up and makes them easier to handle. While tempting, resist the urge to dive in immediately if you want that perfect fudgy texture. They’re truly best once they’ve had a chance to cool down.
Troubleshooting Common Brownie Muffin Conundrums
Even simple recipes can sometimes throw a curveball. Here are a few common questions and solutions to ensure your brownie muffins turn out perfectly every time.Why are my brownie muffins dry and cakey?
This is usually a sign of overmixing the batter or overbaking. Overmixing develops too much gluten, leading to a tougher, cake-like texture. Overbaking dries them out. Keep an eye on the oven, and remember that fudgy brownies are better slightly underbaked than overbaked.
My brownie muffin tops aren’t crackly. What went wrong?
The crackly top comes from the sugar dissolving and then recrystallizing as it bakes. Ensure you’ve whisked the sugar thoroughly into the melted butter and eggs until the mixture is glossy. Also, make sure your oven temperature is accurate; a slightly lower temperature might not achieve that desired crust.
Can I add mix-ins to the brownie muffins?
Absolutely! This recipe is a fantastic base for customization. Chocolate chips (milk, dark, or white), chopped nuts (walnuts, pecans), or even a swirl of peanut butter can be folded into the batter just before baking. Just don’t go overboard, or it can affect the structure.
How do I store leftover brownie muffins?
Once completely cooled, store your brownie muffins in an airtight container at room temperature for up to 3-4 days. For longer storage, they freeze beautifully. Wrap individual muffins tightly in plastic wrap, then place them in a freezer-safe bag for up to 3 months. Thaw at room temperature when ready to enjoy.
Can I make these ahead of time?
Yes, these are a fantastic make-ahead treat! They taste just as good, if not better, the next day once the flavors have had a chance to meld. Simply store them as directed above.
Variations to Keep Things Exciting
While these brownie muffins are perfect as they are, sometimes it’s fun to play around with flavors. Here are a few ideas to get your creative juices flowing: Mint Chocolate: Add 1/2 teaspoon of pure peppermint extract along with the vanilla. You can also fold in some Andes mint chips. Espresso Boost: Dissolve 1 teaspoon of instant espresso powder in the melted butter to deepen the chocolate flavor without making them taste like coffee. Nutty Crunch: Fold in 1/2 cup of chopped walnuts or pecans for added texture and a lovely nutty note. Toasting the nuts lightly before adding them enhances their flavor. Salted Caramel Swirl: Before baking, drop small dollops of thick caramel sauce onto the batter in each muffin cup and swirl gently with a toothpick. A sprinkle of flaky sea salt on top before baking is a must! Double Chocolate: Stir in 1/2 cup of chocolate chips (milk, semi-sweet, or dark) into the batter for an extra chocolatey punch.The Perfect Treat for Any Occasion
Whether you’re looking for a simple dessert to satisfy a chocolate craving, a portable treat for a potluck, or something special for a bake sale, these brownie muffins fit the bill. Their individual serving size makes them incredibly convenient, and their rich, fudgy texture makes them utterly irresistible. Serve them warm with a scoop of vanilla ice cream, or simply enjoy them on their own with a cup of coffee. They’re guaranteed to put a smile on everyone’s face. So go ahead, whip up a batch, and let me know how much you love them!
Fudgy Brownie Muffins
Rich, fudgy brownie muffins with crackly tops and chewy edges—a brownie lover's dream in a portable package.
📝 Ingredients
👩🍳 Instructions
- 1Preheat your oven to 350°F (175°C). Line a standard 12-cup muffin tin with paper liners or grease thoroughly.
- 2In a large bowl, combine the melted butter and granulated sugar. Whisk together until smooth and well combined.
- 3Add the eggs one at a time, whisking well after each addition, until the mixture is lightened and glossy. Stir in the vanilla extract.
- 4In a separate medium bowl, whisk together the all-purpose flour, unsweetened cocoa powder, and salt.
- 5Gradually add the dry ingredients to the wet ingredients, folding gently with a spatula until just combined. Be careful not to overmix; a few small lumps are fine.
- 6Divide the batter evenly among the 12 muffin cups, filling each approximately two-thirds full.
- 7Bake for 18-22 minutes, or until the tops are set and a toothpick inserted into the center comes out with moist crumbs attached but no wet batter. The centers should still be fudgy.
- 8Let the brownie muffins cool in the muffin tin for 5-10 minutes before transferring them to a wire rack to cool completely. Enjoy!
💡 Notes
For an extra chocolatey treat, fold in 1/2 cup of chocolate chips with the dry ingredients. Store cooled muffins in an airtight container at room temperature for up to 4 days or freeze for longer storage.



