


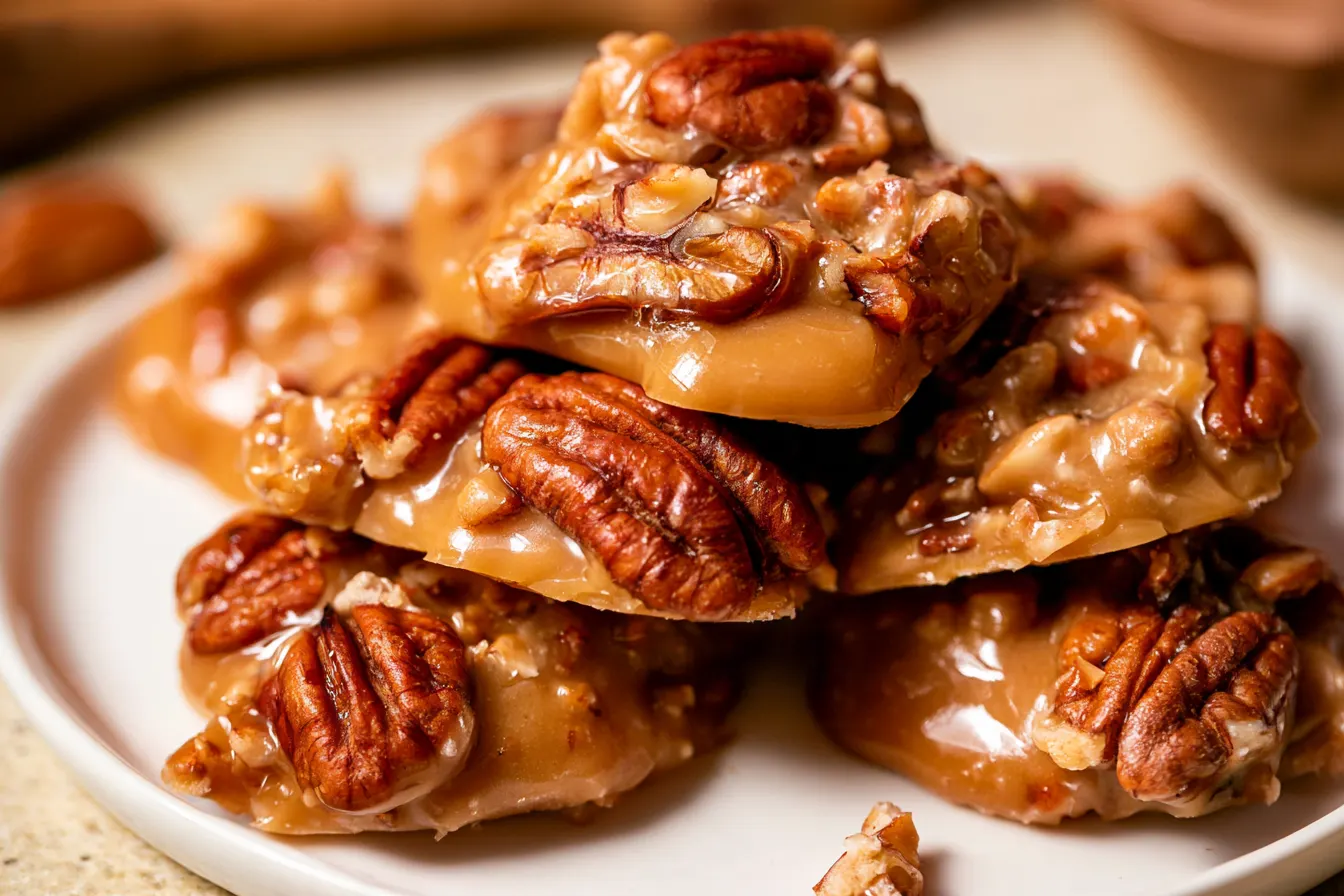
The first time I tasted a truly perfect pecan praline, I think my eyes rolled back in my head a little. It was in Savannah, Georgia, years ago, on a sweltering August afternoon, and the little confectioner’s shop smelled like pure heaven – butter, sugar, and toasted nuts all mingling in a warm, sweet haze. One bite and I was done for. It wasn’t just candy; it was an experience, a creamy, crunchy, caramel-laced cloud that simply dissolved on the tongue.
- What Makes These Pralines So Unforgettable?
- Gather Your Praline Pantry Essentials
- Crafting Your Perfect Pecan Pralines: A Step-by-Step Guide
- Common Praline Pitfalls and How to Dodge Them
- Frequently Asked Questions About Pralines
- Serving Suggestions and Gift-Giving Ideas
- A Little Bit of Southern Charm in Every Bite

What Makes These Pralines So Unforgettable?
Let’s be real, there are a lot of praline recipes out there. But what sets this one apart, and why do I keep coming back to it? It’s all about achieving that perfect trifecta: a tender, creamy base, deeply toasted pecans, and just the right amount of caramelization without any graininess. I’ve found that a specific ratio of sugars, plus a crucial moment of vigorous stirring, makes all the difference. Many recipes can lean too sugary, almost like fudge with nuts. My goal here was to capture that quintessential praline texture – a soft, slightly crumbly, yet ultimately melt-in-your-mouth experience that’s distinct from fudge. The key is in the cook time and the way the sugar crystals are handled. It’s a delicate dance, but one that yields truly spectacular results.Gather Your Praline Pantry Essentials
Good news: you likely have most of these ingredients on hand already! The quality of your pecans really shines through here, so opt for fresh, plump halves if you can.For the Irresistible Praline Base:
- Granulated Sugar: The backbone of our candy.
- Light Brown Sugar: Adds a beautiful depth of flavor and a hint of molasses, contributing to that classic caramel note.
- Heavy Cream: This is where the luscious creaminess comes from. Don’t skimp or substitute!
- Unsalted Butter: Good quality butter makes a huge difference in the final taste and texture. Cut into pieces for easier melting.
- Light Corn Syrup: Our secret weapon against crystallization. It helps keep the pralines smooth and prevents them from becoming grainy.
- Vanilla Extract: Pure vanilla is essential here. It rounds out all the sweet flavors beautifully.
- Salt: Just a pinch to balance the sweetness and enhance all the other flavors.
For the Nutty Heart:
- Pecan Halves: The star of the show! Toasting them beforehand is non-negotiable for maximum flavor.

Crafting Your Perfect Pecan Pralines: A Step-by-Step Guide
Making pralines is more about timing and technique than it is about a long list of complicated steps. Here’s how we bring it all together.Step 1: Toast Those Pecans
Preheat your oven to 300°F (150°C). Spread your pecan halves in a single layer on a baking sheet. Toast them for 8-10 minutes, stirring halfway through, until they’re fragrant and lightly golden. Keep a close eye on them; nuts can go from perfectly toasted to burnt in a flash! Let them cool slightly while you prepare the candy base. This step is crucial for unlocking their full, rich flavor.Step 2: Combine the Base Ingredients
In a heavy-bottomed saucepan (at least 3-quart capacity), combine the granulated sugar, light brown sugar, heavy cream, butter, corn syrup, and salt. Choose a pan that’s larger than you think you’ll need, as the mixture will bubble up quite a bit.Step 3: Bring to a Boil
Place the saucepan over medium heat. Stir constantly with a wooden spoon or heat-proof spatula until the butter is melted and the sugars are fully dissolved. Once everything is smooth, stop stirring. Bring the mixture to a rolling boil.Step 4: Cook to Temperature
Insert a candy thermometer into the mixture, making sure it doesn’t touch the bottom of the pan. Continue to boil, without stirring, until the mixture reaches 238°F (114°C). This is the “soft-ball” stage. This usually takes about 10-15 minutes, but it can vary depending on your stove and humidity. Tip: If any sugar crystals form on the sides of the pan, you can gently brush them down with a pastry brush dipped in water.
Step 5: The Crucial Stirring Phase
Once the mixture hits 238°F, immediately remove the saucepan from the heat. Stir in the vanilla extract. Now, here’s the magic: let the mixture cool, undisturbed, for about 5-7 minutes. This cooling period is vital for achieving that creamy texture. After cooling, begin to stir vigorously with your wooden spoon. You’ll notice the mixture will start to thicken, lose its glossy sheen, and become opaque. It will go from a thin syrup to a thick, almost fudgy consistency. This usually takes 3-5 minutes of continuous stirring.Step 6: Add the Pecans and Drop
As soon as the mixture starts to thicken and lose its shine, quickly stir in the toasted pecans. Work fast here! The mixture will set up quickly. Drop spoonfuls (about 1.5 to 2 tablespoons each) onto parchment paper or a silicone baking mat. If the mixture starts to harden in the pan, you can gently warm it over very low heat for a few seconds to make it pliable again, but be careful not to overcook it.Step 7: Let Them Set
Allow the pralines to cool completely and set, which usually takes about 30-60 minutes at room temperature. Once firm, they’re ready to enjoy!Common Praline Pitfalls and How to Dodge Them
Candy making can feel a bit like a science experiment, and sometimes things don’t go exactly as planned. Here are a few common issues and how to troubleshoot them:Why are my pralines grainy?
This is usually due to sugar crystallization. Make sure all the sugar is dissolved before the mixture comes to a boil, avoid stirring once it’s boiling (unless you’re gently brushing down the sides), and use corn syrup as directed. Also, ensure you let the mixture cool slightly *before* you start stirring vigorously in Step 5.My pralines are too hard/brittle. What happened?
They were likely cooked to too high a temperature. A candy thermometer is your best friend here! Even a few degrees too high can make a big difference. Make sure your thermometer is accurate.My pralines didn’t set up and are too soft.
Conversely, if they’re too soft, they didn’t reach the correct temperature (238°F). Or, you might not have stirred them long enough in Step 5 to initiate crystallization. The stirring is what transforms the liquid sugar into a solid, creamy candy.The mixture hardened in the pan before I could drop them all.
This happens! Pralines set up fast. Work quickly once you start stirring in the pecans. If it gets too stiff, you can place the pan back on very low heat for just a few seconds, stirring constantly, to loosen it up. Don’t let it get hot again, just warm enough to be scoopable.Frequently Asked Questions About Pralines
Can I make these pecan pralines ahead of time?
Absolutely! Pralines are excellent make-ahead treats. They actually benefit from a little time to fully set and for the flavors to meld. They’re perfect for holiday gift-giving or just having on hand for a sweet craving.How should I store homemade pralines?
Store them in an airtight container at room temperature for up to 1-2 weeks. Layer them between sheets of parchment paper to prevent sticking. In very humid environments, you might find they get a little sticky, but they’ll still taste delicious.Can I use different nuts instead of pecans?
While classic pralines feature pecans, you could certainly experiment! Walnuts or even almonds could be interesting, though the flavor profile would be different. Just make sure to toast them properly for the best taste.What’s the difference between pralines and fudge?
While both are sweet confections, pralines typically have a distinct texture. They’re often described as creamy, slightly crumbly, and melt-in-your-mouth, with whole nuts suspended throughout. Fudge tends to be denser, smoother, and more uniform in texture, often without whole nuts. The cooking process and final stirring technique also differ.Do I really need a candy thermometer?
Yes, for consistent results, a candy thermometer is highly recommended. It takes the guesswork out of reaching the precise temperature needed for the perfect texture. If you don’t have one, you can try the cold water test (dropping a small amount of hot candy into cold water to see if it forms a soft ball), but a thermometer is much more reliable.Serving Suggestions and Gift-Giving Ideas
These pecan pralines are fantastic on their own, perhaps with a cup of coffee or a glass of milk. But don’t stop there! Dessert Topper: Crumble a praline over a scoop of vanilla ice cream or a slice of apple pie for an extra layer of texture and flavor. Holiday Treat: They make a stunning addition to any holiday dessert platter, especially around Thanksgiving and Christmas. Edible Gifts: Wrap individual pralines in cellophane bags and tie with a pretty ribbon for a thoughtful homemade gift. They’re always a hit! Coffee Companion: Enjoy one with your morning coffee or as an afternoon pick-me-up. The sweetness pairs wonderfully with a rich brew.A Little Bit of Southern Charm in Every Bite
There’s something truly special about making candy from scratch. It feels a little old-fashioned, a little magical, and incredibly rewarding. These pecan pralines are more than just a sweet treat; they’re a taste of Southern hospitality, a moment of pure indulgence, and a testament to the simple joy of butter, sugar, and nuts coming together in perfect harmony. I hope you enjoy making (and eating!) them as much as I do.
Classic Southern Pecan Pralines
Indulge in creamy, crunchy Southern pecan pralines: toasted pecans in a rich, buttery, brown sugar caramel candy. Perfect for gifts or a sweet treat!
📝 Ingredients
👩🍳 Instructions
- 1Preheat oven to 300°F (150°C). Spread pecan halves in a single layer on a baking sheet. Toast for 8-10 minutes, stirring halfway through, until fragrant and lightly golden. Set aside to cool slightly.
- 2Line two baking sheets with parchment paper or silicone baking mats. Set aside.
- 3In a heavy-bottomed 3-quart saucepan, combine granulated sugar, light brown sugar, heavy cream, butter pieces, corn syrup, and salt. Place over medium heat.
- 4Stir constantly with a wooden spoon or heat-proof spatula until butter is melted and sugars are completely dissolved. Once smooth, stop stirring.
- 5Insert a candy thermometer into the mixture, ensuring it does not touch the bottom of the pan. Bring the mixture to a rolling boil and continue to cook, without stirring, until it reaches 238°F (114°C) (soft-ball stage). This typically takes 10-15 minutes.
- 6Immediately remove the saucepan from the heat. Stir in the vanilla extract. Let the mixture cool, undisturbed, for 5-7 minutes.
- 7After cooling, begin to stir the mixture vigorously with your wooden spoon. Continue stirring for 3-5 minutes, or until the mixture thickens, loses its glossy sheen, and becomes opaque and fudgy.
- 8Quickly stir in the toasted pecan halves. Working quickly, drop spoonfuls (about 1.5 to 2 tablespoons each) of the mixture onto the prepared baking sheets. If the mixture hardens in the pan, you can gently warm it over very low heat for a few seconds to make it pliable again.
- 9Allow the pralines to cool completely and set, about 30-60 minutes, before handling. Once firm, they are ready to enjoy.
💡 Notes
For best results, use a reliable candy thermometer. Store cooled pralines in an airtight container at room temperature for up to 1-2 weeks, layered with parchment paper to prevent sticking. Do not make pralines on a very humid day, as humidity can affect setting.



