


There’s something inherently joyful about rainbow sherbet, isn’t there? That vibrant swirl of orange, lime, and raspberry isn’t just a treat for your taste buds; it’s a tiny, edible celebration. One particularly sweltering afternoon last summer, I found myself staring into the freezer, a tub of sherbet in hand, and thought, “Why can’t this feeling last longer than a melting scoop?”

The Magic Behind the Swirl: What Makes These Cupcakes Special
You might be thinking, “Sherbet in a cupcake? How does that even work?” And it’s a fair question! The secret lies in a few clever techniques that infuse every element with that unmistakable sherbet zing. We’re not just adding food coloring here; we’re building layers of flavor. First, we’re using actual sherbet in the cupcake batter itself. As it melts and bakes, it contributes moisture and a subtle, tangy fruitiness that’s hard to replicate with extracts alone. This keeps the cake incredibly tender and light. Then, we amplify those fruit notes with a touch of zest and a hint of fruit puree, ensuring each color truly pops with its intended flavor. The Swiss meringue buttercream is another star of the show. It’s light, not overly sweet, and provides the perfect canvas for those vibrant sherbet colors. Plus, its silky texture melts in your mouth, creating a delightful contrast with the tender cake. It’s a little more involved than a basic American buttercream, but the results are absolutely worth the extra few minutes. You’ll be amazed at how professional your cupcakes look and taste!Gather Your Rainbow: Ingredients You’ll Need
Creating these vibrant rainbow sherbet cupcakes requires a few key players. Don’t worry, most of these are standard pantry staples, with a couple of fun additions to get that authentic sherbet flavor.For the Sherbet Cupcakes:
- All-purpose flour: The backbone of our tender cake.
- Granulated sugar: For sweetness and moisture.
- Baking powder & baking soda: Our leavening agents for a light, airy crumb.
- Salt: Just a pinch to balance the sweetness.
- Unsalted butter: Softened to room temperature for smooth mixing.
- Large eggs: Also at room temperature, they bind everything together and add richness.
- Vanilla extract: A classic flavor enhancer.
- Rainbow sherbet: The star! Let it soften slightly at room temperature before using. This is where the magic happens.
- Whole milk: To adjust batter consistency.
- Orange zest, lime zest, raspberry puree (or extract): For boosting those individual fruit flavors in each colored batter.
- Gel food coloring: Orange, green, and pink/red for those brilliant sherbet hues. Gels provide concentrated color without thinning the batter.
For the Dreamy Swiss Meringue Buttercream:
- Large egg whites: Crucial for the stable meringue base.
- Granulated sugar: Sweetens and stabilizes the meringue.
- Unsalted butter: Softened, but still cool to the touch. This is key for a smooth buttercream.
- Vanilla extract: Adds a lovely depth of flavor.
- Pinch of salt: To balance the sweetness.
- Gel food coloring: Matching orange, green, and pink/red for the swirled frosting.

Crafting Your Colorful Creation: Step-by-Step Baking Guide
Let’s get baking! This process might look like a few steps, but each one is straightforward and leads to incredibly rewarding results.Step 1: Prep Your Workspace
Preheat your oven to 350°F (175°C). Line a 12-cup muffin tin with paper liners. Having everything ready before you start mixing makes the whole process so much smoother. Ensure your butter, eggs, and sherbet are all at room temperature.
Step 2: Dry Ingredients Unite
In a medium bowl, whisk together the all-purpose flour, granulated sugar, baking powder, baking soda, and salt. Give it a good whisk to ensure everything is evenly distributed. This prevents pockets of leavening agents in your baked goods.
Step 3: Cream the Butter and Sugar
In a large mixing bowl, using an electric mixer (stand or hand-held), cream together the softened unsalted butter and granulated sugar on medium speed until light and fluffy. This usually takes about 2-3 minutes. This step incorporates air, which contributes to a tender cupcake.
Step 4: Add Eggs and Vanilla
Beat in the eggs one at a time, mixing well after each addition until just combined. Scrape down the sides of the bowl as needed. Stir in the vanilla extract. Don’t overmix here; just combine until smooth.
Step 5: Incorporate Wet and Dry
With the mixer on low speed, gradually add the dry ingredients to the wet ingredients, alternating with the slightly softened rainbow sherbet and whole milk. Begin and end with the dry ingredients. Mix until just combined; be careful not to overmix, as this can lead to tough cupcakes.
Step 6: Divide and Conquer the Colors
Divide the cupcake batter evenly into three separate bowls. In the first bowl, gently fold in the orange zest and a few drops of orange gel food coloring until you reach your desired vibrant shade. For the second bowl, mix in the lime zest and green gel food coloring. In the third bowl, incorporate the raspberry puree (or a few drops of raspberry extract) and pink or red gel food coloring.
Tip: Start with a small amount of gel coloring, as it’s highly concentrated, and add more until you achieve the desired hue. You can always add more, but you can’t take it away!
Step 7: Fill Those Liners
Spoon alternating dollops of each colored batter into the prepared muffin liners. You don’t need to be too precise; the beauty is in the marbled effect. Fill each liner about two-thirds full.
Step 8: Bake to Perfection
Bake for 18-22 minutes, or until a wooden skewer inserted into the center of a cupcake comes out clean. The exact baking time can vary depending on your oven. Once baked, remove the cupcakes from the oven and let them cool in the muffin tin for a few minutes before transferring them to a wire rack to cool completely. They must be entirely cool before frosting.

Whipping Up the Silky Swiss Meringue Buttercream
This frosting is a game-changer. It’s incredibly stable, not too sweet, and has the most luxurious texture.Step 9: Create the Meringue Base
Combine the egg whites and granulated sugar in a heatproof bowl set over a saucepan of simmering water (make sure the bottom of the bowl doesn’t touch the water). Whisk constantly until the sugar has dissolved and the mixture reaches 160°F (71°C) on an instant-read thermometer. It should feel smooth between your fingers, not gritty.
Step 10: Whip It Good!
Carefully remove the bowl from the heat and transfer it to a stand mixer fitted with the whisk attachment. Beat on high speed until the meringue is thick, glossy, and has cooled to room temperature (the bowl should feel cool to the touch). This can take 8-10 minutes. You’ll have beautiful, stiff peaks.
Step 11: Add the Butter
Switch to the paddle attachment. With the mixer on medium-low speed, add the softened butter one tablespoon at a time, allowing each addition to incorporate before adding the next. The mixture might look curdled or soupy at some point – don’t panic! Keep mixing, and it will eventually come together into a smooth, creamy buttercream.
Note: If it still looks curdled after a few minutes, it might be too warm or too cold. If too warm, pop the bowl in the fridge for 10-15 minutes, then continue mixing. If too cold, gently warm the bottom of the bowl with a kitchen torch or over the simmering water for a few seconds, then continue mixing.
Step 12: Flavor and Color the Frosting
Beat in the vanilla extract and a pinch of salt. Once smooth, divide the buttercream into three separate bowls. Tint each bowl with orange, green, and pink/red gel food coloring, just like you did with the cupcake batter. Mix until the colors are vibrant and evenly distributed.
Step 13: The Grand Swirl
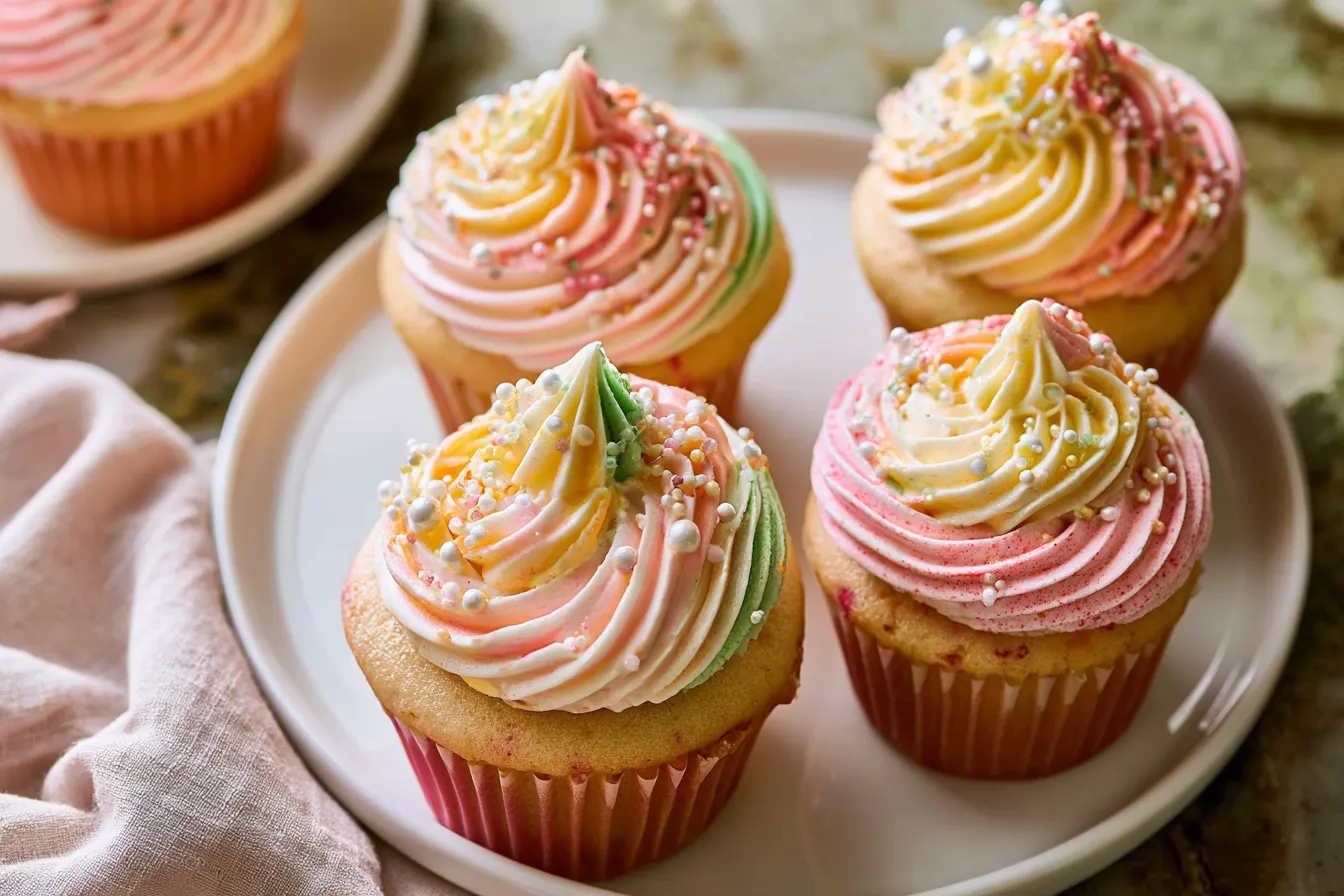
Prepare a piping bag fitted with a large star tip (like a Wilton 1M). Using a spoon, carefully add alternating stripes of each colored buttercream into the piping bag. Don’t mix them too much. Gently push the frosting down to the tip. Pipe a beautiful swirl onto each completely cooled cupcake. Voila! Your rainbow sherbet cupcakes are ready for their close-up!
Frequently Asked Questions About These Colorful Treats
Got questions? I’ve got answers! Here are some common queries that pop up when making these delightful rainbow sherbet cupcakes.Can I use regular ice cream instead of sherbet?
While you certainly *can* use regular ice cream, the flavor profile will be different. Sherbet has a higher fruit content and less dairy fat, which contributes to its distinct tangy and bright flavor that we’re aiming for here. Using regular ice cream will likely result in a richer, creamier cupcake, but you might lose some of that signature sherbet zing. If you do use ice cream, choose a fruity flavor like orange or raspberry.
My Swiss meringue buttercream looks curdled! What went wrong?
This is a super common concern, and usually, nothing has gone wrong! It almost always means your butter is either too cold or too warm relative to your meringue. If it looks soupy, it’s likely too warm; pop the bowl in the fridge for 10-15 minutes, then continue beating. If it looks clumpy and curdled, it might be too cold; gently warm the bottom of the bowl over a double boiler for a few seconds, then beat again. Keep beating, and it will eventually come together into a smooth, luscious buttercream. Patience is key!
Can I make these cupcakes ahead of time?
Absolutely! The unfrosted cupcakes can be stored in an airtight container at room temperature for up to 2 days, or frozen for up to 2 months. The Swiss meringue buttercream can be made a day or two in advance and stored in the refrigerator. Before using, let it come to room temperature and then re-whip it in your stand mixer until it’s light and fluffy again. Assemble the cupcakes with frosting just before serving for the best presentation and texture.
What if I don’t have fresh fruit for the zest/puree?
No problem! While fresh zest adds a wonderful brightness, you can certainly use high-quality fruit extracts to enhance the flavors. For the raspberry, a good quality raspberry extract will work perfectly. For the orange and lime, you can either omit the zest or use a tiny drop of pure orange/lime oil (food grade) if you have it, though extracts are more commonly available. Just remember extracts are potent, so start with a small amount and add more to taste.
How do I get the colors so vibrant?
The secret is gel food coloring! Unlike liquid food coloring, gels are highly concentrated and won’t thin out your batter or buttercream. They provide intense, vibrant colors with just a tiny amount. Brands like Wilton, Americolor, or Chefmaster are excellent choices. Avoid liquid food colorings if you want those truly eye-popping sherbet shades.
Storing Your Leftover Cupcakes
If you happen to have any of these delightful rainbow sherbet cupcakes left (a rare occurrence in my house!), proper storage will keep them tasting fresh. Store frosted cupcakes in an airtight container in the refrigerator for up to 3-4 days. The buttercream will firm up in the fridge, so it’s best to let them sit at room temperature for about 15-20 minutes before serving to allow the frosting to soften slightly and the cake to become more tender. Unfrosted cupcakes can be stored at room temperature in an airtight container for up to 2 days. For longer storage, you can freeze unfrosted cupcakes. Wrap them individually in plastic wrap, then place them in a freezer-safe bag or container for up to 2 months. Thaw them at room temperature before frosting and serving. These rainbow sherbet cupcakes are more than just a dessert; they’re a little burst of happiness on a plate. The vibrant colors and tangy-sweet flavors are perfect for birthdays, summer gatherings, or simply to brighten up a regular Tuesday. So go ahead, whip up a batch, and watch the smiles appear!
Rainbow Sherbet Cupcakes with Swiss Meringue Buttercream
Vibrant rainbow sherbet cupcakes bursting with fruity flavor, topped with silky Swiss meringue buttercream. A joyful treat!
📝 Ingredients
👩🍳 Instructions
- 1Preheat oven to 350°F (175°C). Line a 12-cup muffin tin with paper liners.
- 2In a medium bowl, whisk together flour, baking powder, baking soda, and salt. Set aside.
- 3In a large bowl, cream softened butter and sugar with an electric mixer until light and fluffy, about 2-3 minutes.
- 4Beat in eggs one at a time, mixing well after each. Stir in vanilla extract.
- 5Gradually add dry ingredients to wet ingredients, alternating with softened rainbow sherbet and whole milk. Begin and end with dry ingredients. Mix until just combined; do not overmix.
- 6Divide batter evenly into three bowls. In the first, mix orange zest and orange food coloring. In the second, mix lime zest and green food coloring. In the third, mix raspberry puree (or extract) and pink/red food coloring.
- 7Spoon alternating dollops of each colored batter into prepared muffin liners, filling each about two-thirds full.
- 8Bake for 18-22 minutes, or until a wooden skewer inserted into the center comes out clean. Let cool in the tin for a few minutes, then transfer to a wire rack to cool completely.
- 9FOR SWISS MERINGUE BUTTERCREAM: Combine egg whites and sugar in a heatproof bowl set over simmering water. Whisk constantly until sugar dissolves and mixture reaches 160°F (71°C).
- 10Remove from heat. Transfer mixture to a stand mixer with the whisk attachment. Beat on high speed until thick, glossy, and cooled to room temperature (8-10 minutes).
- 11Switch to the paddle attachment. With mixer on medium-low, add butter one tablespoon at a time, allowing each to incorporate. Mixture may look curdled; keep mixing until smooth and creamy.
- 12Beat in vanilla extract and salt. Divide buttercream into three bowls and color with orange, green, and pink/red gel food coloring.
- 13Fit a piping bag with a large star tip. Spoon alternating stripes of each colored buttercream into the bag. Pipe swirls onto completely cooled cupcakes. Serve immediately or store as directed.
💡 Notes
Ensure all dairy and eggs are at room temperature for best results. For a less sweet frosting, you can slightly reduce the sugar in the Swiss meringue buttercream. Cupcakes can be made a day ahead and stored unfrosted at room temperature. Frost just before serving.



