


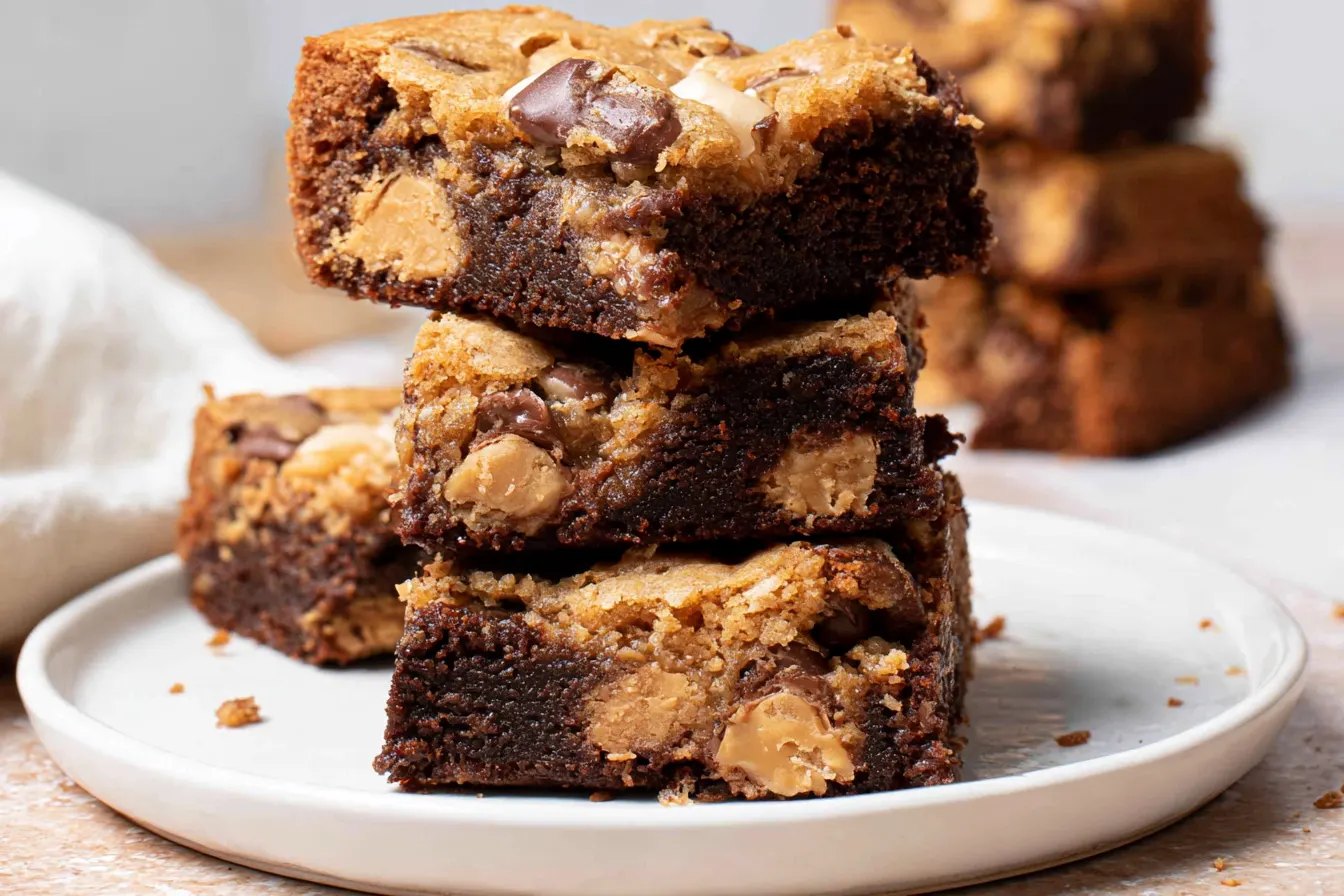
Have you ever found yourself in that delightful, yet utterly perplexing, dessert dilemma: brownie or blondie? It’s a real first-world problem, I know, but a problem nonetheless! Some days you crave the deep, fudgy chocolate intensity of a classic brownie, while others call for the rich, buttery, vanilla-caramel notes of a perfectly chewy blondie. Well, friends, I’m here to tell you that you no longer have to choose. This ultimate Brownie Blondies recipe delivers the absolute best of both worlds in one gloriously marbled square.

Why These Brownie Blondies Are a Total Game-Changer
Let’s be honest, there are a lot of “swirled” bar recipes out there. But what makes *these* Brownie Blondies truly exceptional? It all comes down to a few key details that elevate them from good to absolutely unforgettable. First, the brownie base isn’t just a standard brownie; it’s specifically formulated to be incredibly fudgy and rich, with just the right amount of chew to contrast the blondie layer. We’re talking about using both cocoa powder and melted chocolate for that deep, complex chocolate flavor that sings. Then there’s the blondie layer. Oh, the blondie layer! It’s butter-forward, packed with brown sugar for that signature caramel-like depth, and boasts a vanilla punch that makes your taste buds happy. The secret to its incredible chewiness? A precise ratio of brown sugar to white sugar and just the right amount of flour to keep it dense without being cakey. When these two distinct batters meet in the pan, a little magic happens. The way they bake together creates these stunning swirls and pockets of flavor, ensuring that each square offers a delightful journey between dark chocolate indulgence and buttery, sweet bliss. It’s truly a textural and flavor masterpiece.Gather Your Kitchen Arsenal: The Ingredients You’ll Need
Good news! You probably have most of these staples in your pantry already. Fresh, quality ingredients make all the difference here, so grab your best butter and your favorite vanilla.For the Fudgy Brownie Batter:
- Unsalted Butter: The foundation of fudginess. Make sure it’s good quality.
- Granulated Sugar: For sweetness and that shiny crackle top.
- Light Brown Sugar: Adds moisture and a hint of molasses.
- Large Eggs: Binds everything together and contributes to richness.
- Vanilla Extract: A touch of warmth that enhances chocolate.
- All-Purpose Flour: Just enough to hold it all together without drying it out.
- Unsweetened Cocoa Powder: For deep chocolate flavor. Dutch-processed is great here.
- Salt: Essential for balancing sweetness and enhancing flavor.
- Semi-Sweet Chocolate Chips or Chunks: Melts into glorious pockets of chocolate.
For the Chewy Blondie Batter:
- Unsalted Butter: Provides that classic rich, buttery flavor.
- Light Brown Sugar: The star of the blondie, giving it chew and caramel notes.
- Granulated Sugar: For structure and a bit of crispness.
- Large Egg + Egg Yolk: The extra yolk adds richness and chewiness.
- Vanilla Extract: Crucial for that warm, sweet blondie essence.
- All-Purpose Flour: The structure of our chewy blondie.
- Baking Powder: A tiny bit for lift, but not too much to keep it dense.
- Salt: Balances the sweetness beautifully.
- White Chocolate Chips (Optional): For an extra layer of sweetness and texture.

Let’s Get Baking! Crafting Your Brownie Blondies
Don’t be intimidated by making two batters! Each one comes together quickly, and the process of swirling them is actually quite fun. Precision in measuring is your best friend here.Step 1: Prep Your Pan and Preheat
First things first, preheat your oven to 350°F (175°C). Line a 9×13 inch baking pan with parchment paper, leaving an overhang on the sides. This little trick makes lifting the cooled bars out a breeze, minimizing mess and maximizing ease. Give the parchment a light spray with non-stick cooking spray for good measure.
Step 2: Start the Fudgy Brownie Batter
In a medium microwave-safe bowl, melt 1/2 cup (113g) unsalted butter. Once melted, stir in 1 cup (200g) granulated sugar and 1/2 cup (100g) light brown sugar until combined. It doesn’t need to be perfectly smooth yet. Crack in 2 large eggs and add 1 teaspoon vanilla extract. Whisk vigorously for about 1-2 minutes until the mixture is glossy and lightened in color. This aeration step is key for that lovely crackly top!
Step 3: Fold in the Brownie Dry Ingredients
In a separate small bowl, whisk together 3/4 cup (90g) all-purpose flour, 1/2 cup (45g) unsweetened cocoa powder, and 1/2 teaspoon salt. Gradually add the dry ingredients to the wet ingredients, mixing gently with a spatula until just combined. Be careful not to overmix; overmixing develops gluten, which can lead to tough brownies. Finally, fold in 1 cup (170g) semi-sweet chocolate chips or chunks. Set this rich brownie batter aside.
Step 4: Whip Up the Chewy Blondie Batter
Now for the blondie! In another medium microwave-safe bowl, melt 1/2 cup (113g) unsalted butter. Stir in 1 cup (200g) light brown sugar and 1/4 cup (50g) granulated sugar until well combined. Add 1 large egg and 1 egg yolk, along with 2 teaspoons vanilla extract. Whisk until smooth and creamy, about 1 minute. The mixture should be light in color and slightly thickened.
Step 5: Combine Blondie Dry Ingredients
In a separate small bowl, whisk together 1 1/2 cups (180g) all-purpose flour, 1 teaspoon baking powder, and 1/2 teaspoon salt. Gradually add these dry ingredients to the wet blondie mixture, mixing with a spatula until just combined. Again, avoid overmixing. If you’re using them, gently fold in 1/2 cup (85g) white chocolate chips now.

Step 6: Assemble and Swirl Your Masterpiece
Pour about two-thirds of the brownie batter into your prepared baking pan and spread it evenly. Then, dollop spoonfuls of the blondie batter over the brownie layer. Follow that with the remaining brownie batter, dolloping it in the empty spaces. Now for the fun part: take a butter knife or a skewer and gently swirl the two batters together. Don’t overdo it; you want distinct swirls, not a fully mixed-up mess. A few gentle passes are all you need to create those beautiful marbled patterns.
Tip: For extra visual appeal and a little textural crunch, sprinkle a few extra chocolate chips (both dark and white!) over the top before baking. A tiny pinch of flaky sea salt on top also works wonders to enhance the flavors!
Step 7: Bake to Perfection
Place the pan in your preheated oven and bake for 30-35 minutes. The edges should be set, and a toothpick inserted into the center should come out with moist crumbs, but not wet batter. Remember, these are fudgy bars, so they’ll continue to set as they cool. Overbaking is the enemy of fudgy brownies and chewy blondies!
Step 8: Cool and Enjoy
This is arguably the hardest part: letting them cool! Allow the Brownie Blondies to cool completely in the pan on a wire rack before attempting to cut them. This can take at least 2 hours, or even longer. Cooling allows them to firm up properly, ensuring clean cuts and the perfect fudgy-chewy texture. Once cool, use the parchment paper overhang to lift them out of the pan, slice into squares, and prepare for pure dessert bliss.
Common Questions About Brownie Blondies
You’ve got questions, I’ve got answers! Here are some of the most frequent queries I hear about making these delightful swirled bars.Can I make these Brownie Blondies ahead of time?
Absolutely! These bars actually taste even better the next day as the flavors meld and deepen. You can bake them a day in advance, let them cool completely, and then store them at room temperature in an airtight container. They’ll be perfect for serving.
What’s the best way to store leftover Brownie Blondies?
Once completely cooled, store your Brownie Blondies in an airtight container at room temperature for up to 3-4 days. If you live in a very warm or humid climate, or want to extend their life, you can store them in the refrigerator for up to a week. Just let them come to room temperature for about 15-20 minutes before serving for the best texture.
Can I freeze Brownie Blondies?
Yes, these freeze beautifully! Once completely cooled, cut them into individual squares. Wrap each square tightly in plastic wrap, then place them in a freezer-safe bag or container. They can be frozen for up to 3 months. Thaw individual bars at room temperature for a few hours, or pop them in the microwave for 15-20 seconds for a warm, gooey treat.
My brownies came out too cakey, what went wrong?
A cakey texture in brownies or blondies is usually due to overmixing the batter or using too much flour. When you add the dry ingredients, mix only until no streaks of flour remain. Overmixing develops gluten, leading to a tougher, more cake-like crumb. Also, ensure you’re measuring your flour correctly, preferably by weight with a kitchen scale.
Can I use different types of chocolate?
Definitely! Feel free to experiment with the chocolate. For the brownie layer, dark chocolate chips or even chopped bittersweet chocolate bars would be fantastic. In the blondie, milk chocolate chips, butterscotch chips, or even chopped nuts (like pecans or walnuts) would add another layer of flavor and texture. Just keep the total quantity of mix-ins roughly the same.
Variations to Keep Things Exciting
While the classic Brownie Blondie is pure perfection, sometimes it’s fun to shake things up! Here are a few ideas to customize your next batch:- Nutty Remix: Fold 1/2 cup of chopped walnuts, pecans, or even macadamia nuts into either the brownie or blondie batter (or both!). The crunch adds a wonderful contrast to the fudgy chew.
- Salted Caramel Swirl: After swirling the batters, drizzle a few tablespoons of your favorite store-bought or homemade salted caramel sauce over the top and give it one last gentle swirl.
- Peanut Butter Dream: Swirl in some melted peanut butter! You could melt about 1/2 cup of creamy peanut butter and drizzle it over the brownie layer before adding the blondie, or even swirl it directly into the blondie batter.
- Espresso Kick: Dissolve 1 teaspoon of instant espresso powder into the melted butter for the brownie layer. This will deepen the chocolate flavor without making it taste overtly like coffee.
- Mint Chocolate Swirl: Add 1/2 teaspoon of peppermint extract to the brownie batter and use mint chocolate chips instead of semi-sweet for a festive twist.

Ultimate Brownie Blondies
The perfect combination of fudgy brownies and chewy blondies swirled together for an irresistible dessert bar. Get the best of both worlds!
📝 Ingredients
👩🍳 Instructions
- 11. Preheat oven to 350°F (175°C). Line a 9x13 inch baking pan with parchment paper, leaving an overhang on the sides. Lightly spray with non-stick spray.
- 22. Prepare Brownie Batter: In a medium bowl, combine melted butter, granulated sugar, and light brown sugar. Whisk in eggs and vanilla extract until glossy and lightened (1-2 minutes).
- 33. In a separate small bowl, whisk together flour, cocoa powder, and salt. Add dry ingredients to wet, mixing gently with a spatula until just combined. Fold in semi-sweet chocolate chips. Set aside.
- 44. Prepare Blondie Batter: In another medium bowl, combine melted butter, light brown sugar, and granulated sugar. Whisk in the egg, egg yolk, and vanilla extract until smooth and creamy (about 1 minute).
- 55. In a separate small bowl, whisk together flour, baking powder, and salt. Add dry ingredients to wet, mixing gently with a spatula until just combined. Fold in white chocolate chips, if using.
- 66. Assemble: Pour about two-thirds of the brownie batter into the prepared pan and spread evenly. Dollop spoonfuls of blondie batter over the brownie layer, then dollop the remaining brownie batter in the empty spaces. Use a butter knife or skewer to gently swirl the batters together, creating a marbled effect. Do not overmix.
- 77. Bake: Bake for 30-35 minutes, or until the edges are set and a toothpick inserted into the center comes out with moist crumbs (not wet batter).
- 88. Cool: Let cool completely in the pan on a wire rack for at least 2 hours before lifting out with parchment paper and cutting into squares. Enjoy!
💡 Notes
For extra flavor, sprinkle a tiny pinch of flaky sea salt over the top before baking. These bars are excellent made a day ahead as flavors deepen overnight. Store leftovers in an airtight container at room temperature for up to 4 days or freeze for longer storage.



