


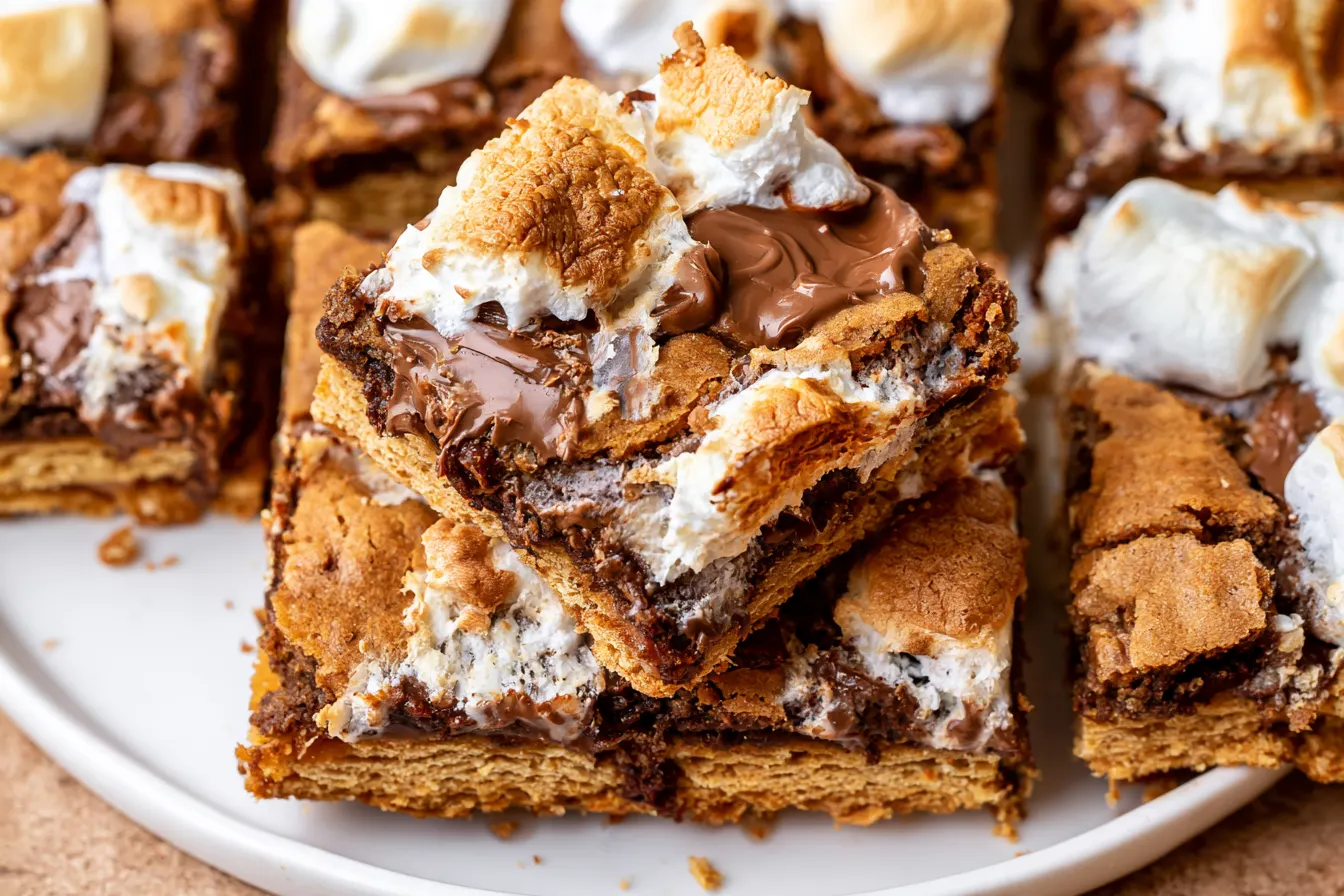
Growing up, summer nights meant sticky fingers and smoky clothes, thanks to countless s’mores sessions around the campfire. There’s just something magical about that perfectly toasted marshmallow, melting into chocolate between crisp graham crackers. But let’s be honest, building a bonfire for every s’mores craving isn’t exactly practical. That’s why I poured my heart into perfecting these truly epic S’mores Cookie Bars, bringing all that nostalgic flavor indoors, no smoke alarms required.
- What Makes These S’mores Cookie Bars Stand Out?
- Gathering Your Ingredients for Ultimate S’mores Bars
- Crafting Your Perfect S’mores Cookie Bars: Step-by-Step
- Troubleshooting Common S’mores Bar Woes
- FAQ: All Your S’mores Cookie Bar Questions Answered
- Make-Ahead Magic and Storage Wisdom
- Variations to Keep Things Exciting
These aren’t your average cookie bars. We’re talking layers, people! A buttery, chewy chocolate chip cookie base gets topped with a genuine graham cracker layer, then piled high with Hershey’s chocolate and giant, puffy marshmallows. It’s an ode to the original, reimagined for easy crowd-pleasing (or just a Tuesday night indulgence).
The best part? The sheer joy of watching those marshmallows puff up and turn golden under the broiler. It’s almost as satisfying as a real campfire, and definitely less fuss. Get ready for some serious ooey-gooey goodness!

Every summer, the internet is flooded with s’mores-themed desserts. You see cakes, cupcakes, even elaborate trifles. But for me, the true essence of a s’more is its simplicity: the trio of graham, chocolate, and marshmallow. Many bar recipes out there skip the critical graham cracker layer, opting for a graham cracker *crust* instead. While delicious, it misses that textural contrast of a whole cracker. My mission was to keep that integrity.
This recipe was born out of a desire to have that distinct graham cracker snap and crumble right in the middle of all that chocolatey, marshmallowy goodness. It’s a game-changer. The cookie base needed to be sturdy enough to hold everything, yet soft and chewy. The chocolate had to be classic Hershey’s – no fancy stuff needed here – because that’s the authentic s’mores experience. And the marshmallows? Big, fluffy, and ready to toast.
What Makes These S’mores Cookie Bars Stand Out?
It all comes down to the layers, my friends. We start with an incredibly rich, buttery chocolate chip cookie dough. It’s designed to bake up soft and chewy, providing the perfect foundation for everything that comes next. This isn’t just any cookie dough; it’s got just the right amount of flour and leavening to create a substantial base that won’t get lost.
Then comes the star: actual graham cracker squares. Instead of crushing them into a crust, we lay them whole or in large pieces right on top of the par-baked cookie dough. This provides that satisfying, slightly crisp texture that’s so essential to a traditional s’more. It’s a simple technique that makes all the difference in achieving that authentic flavor and mouthfeel.
Finally, we pile on the chocolate – classic Hershey’s milk chocolate bars, broken into pieces. And of course, the marshmallows. Large, fluffy marshmallows are key here, not minis. They create that beautiful, bubbly, golden-brown top when broiled, mimicking the campfire experience perfectly. The combination of these distinct layers creates a dessert that’s familiar yet elevated, satisfying every s’mores craving.
Gathering Your Ingredients for Ultimate S’mores Bars
You probably have most of these staples in your pantry already! Freshness matters, especially for baking powder, so double-check those dates.
For the Chewy Chocolate Chip Cookie Base:
- Unsalted Butter: Softened to room temperature. This helps create a tender, rich cookie.
- Granulated Sugar & Brown Sugar: The combination gives us both sweetness and that signature chewiness.
- Large Egg: At room temperature for better emulsification.
- Vanilla Extract: Pure vanilla is always best for depth of flavor.
- All-Purpose Flour: Measured correctly (spooned and leveled!) to prevent dense bars.
- Baking Soda: Our leavening agent for that perfect rise.
- Salt: Essential for balancing sweetness and enhancing all the other flavors.
- Semi-Sweet Chocolate Chips: Good quality chips will melt beautifully.
For the S’mores Topping:
- Graham Crackers: Full sheets, or broken into large squares. The classic honey flavor is a must.
- Hershey’s Milk Chocolate Bars: The quintessential s’mores chocolate. Break them into smaller pieces.
- Large Marshmallows: Cut them in half horizontally for even toasting and coverage.

Crafting Your Perfect S’mores Cookie Bars: Step-by-Step
This recipe comes together in three main phases: making the cookie base, assembling the layers, and then the magical toasting of the marshmallows. Don’t rush the baking steps!
Prepare Your Baking Vessel
Preheat your oven to 350°F (175°C). Line a 9×13 inch baking pan with parchment paper, leaving an overhang on the sides. This “sling” will make it super easy to lift the bars out once they’re cooled. Give the parchment a light spray with non-stick cooking spray for extra insurance.
Whip Up the Cookie Dough
In a large bowl, using an electric mixer, cream together the softened butter, granulated sugar, and brown sugar until light and fluffy, about 2-3 minutes. Scrape down the sides of the bowl. Beat in the egg and vanilla extract until well combined and smooth. In a separate, smaller bowl, whisk together the all-purpose flour, baking soda, and salt. Gradually add the dry ingredients to the wet ingredients, mixing on low speed until just combined. Don’t overmix! Gently fold in the semi-sweet chocolate chips by hand.
Bake the Base (Partially!)
Press the cookie dough evenly into the bottom of your prepared 9×13 inch baking pan. It might seem like a lot of dough, but trust the process. Bake for 18-20 minutes, or until the edges are lightly golden and the center is set but still looks a little soft. This par-baking is crucial so the cookie base doesn’t get soggy later. Remove the pan from the oven and let it cool for about 5 minutes.

Layer Up the Goodness
While the cookie base is still warm, arrange the graham cracker squares (or large pieces) evenly over the top, covering as much surface as possible. Don’t worry if there are small gaps. Next, scatter the broken Hershey’s milk chocolate bar pieces over the graham crackers. Finally, place the halved marshmallows cut-side down on top of the chocolate. Try to get them relatively close together to create an even marshmallow layer.
Broil to Golden Perfection
Note: This step requires vigilance! Turn your oven broiler to high. Place the baking pan on the top rack, keeping a very close eye on it. Broil for 1-3 minutes, or until the marshmallows are puffed, golden brown, and slightly toasted. They can go from perfect to burnt in seconds, so do not walk away! Once they reach your desired level of toastiness, remove the pan from the oven.
Cool and Slice
Allow the S’mores Cookie Bars to cool completely in the pan on a wire rack before attempting to cut them. This is probably the hardest step, but essential! The chocolate needs time to set, and the marshmallows will firm up as they cool, making for clean slices. Cooling can take 1-2 hours. Once cooled, use the parchment paper overhang to lift the entire slab out of the pan. Place it on a cutting board and slice into 12-16 squares. A sharp, warm knife can help with cleaner cuts.
Troubleshooting Common S’mores Bar Woes
Even the simplest recipes can sometimes throw a curveball. Here are some common issues and how to tackle them.
Why are my bars too crumbly?
This usually comes down to flour measurement or overbaking the cookie base. Make sure you’re spooning flour into your measuring cup and then leveling it off, rather than scooping directly, which can compact the flour and add too much. Also, don’t overbake the initial cookie layer; it should still look a little soft in the center when you pull it out.
My marshmallows burned under the broiler! What happened?
Ah, the broiler is a powerful beast! The key here is constant supervision. Every oven’s broiler is different, and even placing the pan an inch higher or lower can drastically change the outcome. Stand right there, door slightly ajar if your oven allows, and watch like a hawk. They toast quickly, so 30-second increments can be useful.
My bars are hard to cut cleanly. Any tips?
Patience, young grasshopper! Seriously, these bars need to cool completely. The melted chocolate and marshmallows need to firm up. If you’re still struggling after a full cool-down, try chilling the bars in the fridge for 30 minutes before cutting. A hot, dry knife (run under hot water and wiped clean) can also make a big difference.
FAQ: All Your S’mores Cookie Bar Questions Answered
Can I use different types of chocolate?
Absolutely! While Hershey’s milk chocolate is classic for s’mores, you can experiment. Dark chocolate chips, chopped chocolate bars, or even chocolate-hazelnut spread could work. Just be aware that the flavor profile will shift from the traditional s’mores experience.
How do I store leftover S’mores Cookie Bars?
Store these bars in an airtight container at room temperature for up to 3-4 days. While they’re best enjoyed the day they’re made, they’re still delicious on subsequent days. If you want to warm them slightly, a quick zap in the microwave (5-10 seconds) or a few minutes in a low oven can bring back some of that gooeyness.
Can I make these ahead of time?
You can prepare the cookie base dough a day in advance and store it in the fridge. Let it come to room temperature for about 30 minutes before pressing into the pan and baking. The fully assembled and baked bars are best eaten within a day or two for optimal texture, but they hold up well for a few days.
What if I don’t have a broiler?
If your oven doesn’t have a broiler, or if you’re nervous about using it, you can achieve a similar effect with a kitchen torch! Assemble the bars with the marshmallows, and then use the torch to toast them evenly until golden. This gives you excellent control over the browning.
Can I add nuts or other mix-ins to the cookie base?
Certainly! A handful of chopped pecans or walnuts would be a delicious addition to the chocolate chip cookie base. You could also try a sprinkle of toffee bits for extra crunch and flavor. Just be mindful not to overcrowd the dough.
Make-Ahead Magic and Storage Wisdom
Life gets busy, but that doesn’t mean you can’t have these incredible bars ready for a spontaneous gathering or a quiet evening treat. Planning ahead is your secret weapon.
Prepping the Cookie Dough
You can mix the chocolate chip cookie dough up to 2 days in advance. Simply wrap it tightly in plastic wrap and store it in the refrigerator. When you’re ready to bake, let it sit out on the counter for about 30 minutes to soften slightly, making it easier to press into the pan. This step can shave off significant time on baking day.
Freezing Baked Bars
These S’mores Cookie Bars freeze surprisingly well! Once they are completely cooled and cut into squares, arrange them in a single layer on a baking sheet and freeze until solid. Then, transfer the frozen bars to an airtight freezer-safe container or a heavy-duty freezer bag. They’ll keep for up to 1-2 months. Thaw them at room temperature, or warm them gently in the microwave or a low oven for a fresh-baked feel.
Best Freshness
While they store well, there’s no denying that the peak experience of these bars is within the first 24 hours. The marshmallows are still perfectly soft and pillowy, and the chocolate is just set. If you’re making them for an event, plan to bake them the same day or the evening before.
Variations to Keep Things Exciting
Once you’ve mastered the classic, don’t be afraid to put your own spin on these S’mores Cookie Bars! A little creativity can go a long way.
Caramel Drizzle
For an extra layer of decadence, drizzle a little store-bought or homemade caramel sauce over the chocolate layer before adding the marshmallows. The caramel will get warm and gooey under the broiler, adding a fantastic richness.
Peanut Butter Swirl
Who doesn’t love peanut butter and chocolate? Before adding the marshmallows, dollop small spoonfuls of peanut butter over the chocolate layer and swirl it gently with a knife. This adds a salty, nutty counterpoint that’s absolutely irresistible.
Dark Chocolate & Sea Salt
If you prefer a less sweet s’more, swap the Hershey’s milk chocolate for good quality dark chocolate chips or chopped dark chocolate bars. After broiling, sprinkle a tiny pinch of flaky sea salt over the warm marshmallows. The salt enhances the chocolate and cuts through the sweetness.
Candy Bar Mash-Up
Feeling really wild? Chop up your favorite mini candy bars (think Snickers, Milky Way, or Reese’s Peanut Butter Cups) and scatter them over the graham cracker layer along with the chocolate pieces. This turns your s’mores bars into an even more indulgent treat.
No matter how you customize them, these S’mores Cookie Bars are destined to become a summer favorite. They capture all the joy of a campfire classic without the hassle, making them perfect for potlucks, parties, or simply satisfying that sweet tooth craving. Happy baking!

The Best S'mores Cookie Bars (with Real Graham Cracker Layers)
Chewy chocolate chip cookie bars with a distinct graham cracker layer, Hershey's chocolate, and perfectly toasted marshmallows.
📝 Ingredients
👩🍳 Instructions
- 1Preheat oven to 350°F (175°C). Line a 9x13 inch baking pan with parchment paper, leaving an overhang on the sides. Lightly spray parchment with non-stick spray.
- 2In a large bowl, cream together the softened butter, granulated sugar, and brown sugar with an electric mixer until light and fluffy, 2-3 minutes. Scrape down the sides.
- 3Beat in the egg and vanilla extract until well combined.
- 4In a separate bowl, whisk together the flour, baking soda, and salt. Gradually add the dry ingredients to the wet ingredients, mixing on low speed until just combined. Fold in the chocolate chips.
- 5Press the cookie dough evenly into the bottom of the prepared pan. Bake for 18-20 minutes, until edges are lightly golden and the center is set but still soft. Remove from oven.
- 6While the cookie base is still warm, arrange the graham cracker pieces evenly over the top. Scatter the broken Hershey's chocolate bar pieces over the graham crackers.
- 7Place the halved marshmallows (cut-side down) on top of the chocolate.
- 8Turn your oven broiler to high. Place the baking pan on the top rack. Broil for 1-3 minutes, watching constantly, until marshmallows are puffed and golden brown. Do NOT walk away, as they can burn quickly.
- 9Remove from oven and let cool completely in the pan on a wire rack for 1-2 hours before lifting out with the parchment paper and slicing into squares. Cooling completely is crucial for clean cuts.
💡 Notes
For easier cutting, chill the bars in the refrigerator for 30 minutes after cooling. If you don't have a broiler, use a kitchen torch to toast the marshmallows. Store leftover bars in an airtight container at room temperature for up to 3-4 days.



