


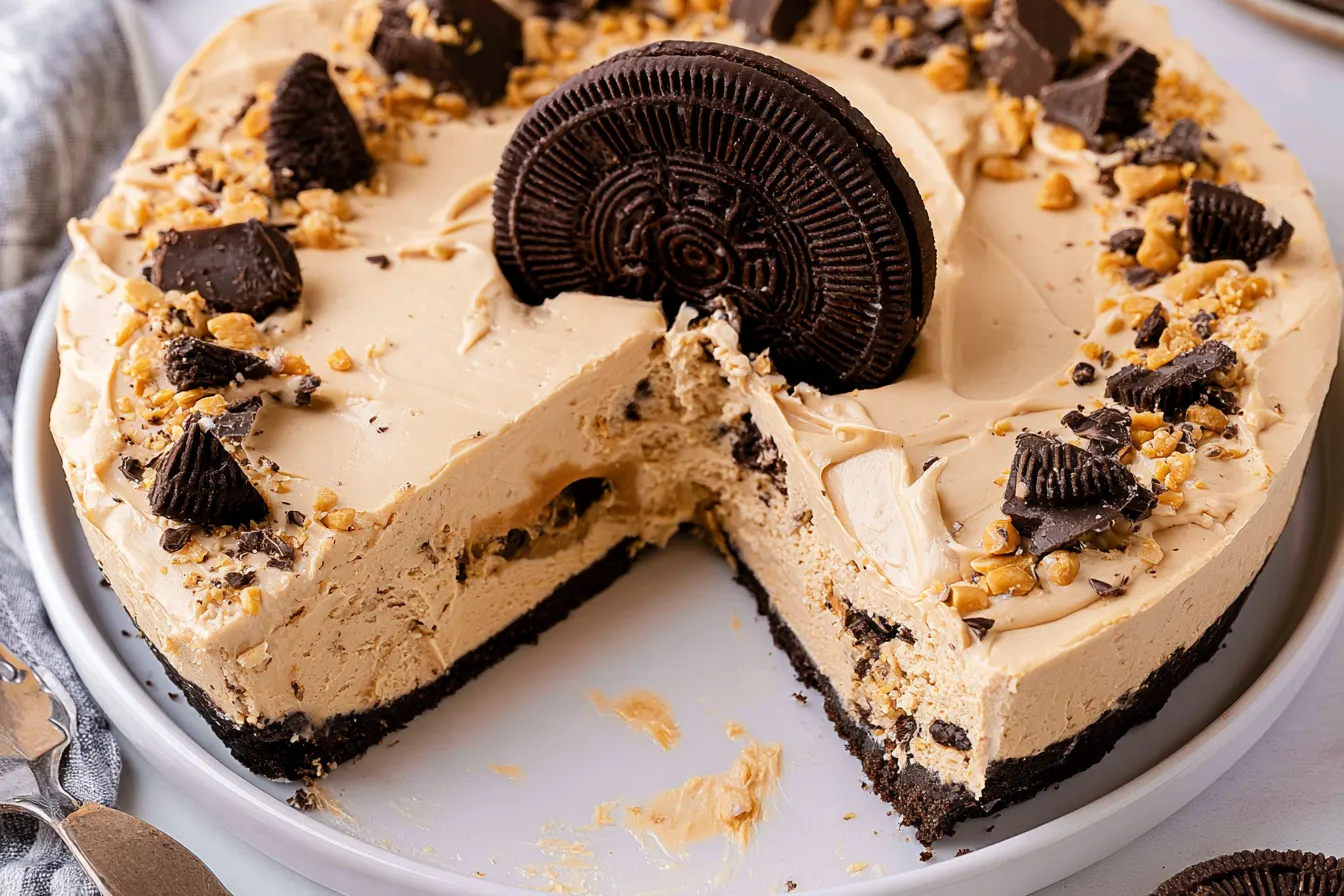
I still remember the first time I tasted a truly incredible no-bake peanut butter pie. It wasn’t at some fancy restaurant or a bustling bakery, but right in my grandmother’s slightly cluttered, always-smelling-of-something-delicious kitchen. One sweltering summer afternoon, she pulled this creamy, dreamy confection from her fridge, its dark cookie crust a stark contrast to the pale, luscious filling. One bite, and I was utterly hooked.

Crust & Filling: What You’ll Need
Gathering your ingredients for this pie is straightforward. You’ll find most of these items are probably already lurking in your pantry, making it a fantastic last-minute dessert option. We’re breaking it down into two main components: that irresistible Oreo crust and the impossibly smooth peanut butter filling.For the Decadent Oreo Crust
This crust is so simple, yet it forms the perfect dark, slightly bitter counterpoint to the sweet filling.- Oreo Cookies: About 36 whole cookies (the standard family-size package). You’ll want to crush these finely, filling about 3 cups.
- Unsalted Butter: ½ cup (1 stick), melted. This binds the crumbs together to form that sturdy base.
For the Dreamy Peanut Butter Filling
This is where the magic happens. The combination of cream cheese, peanut butter, and whipped cream creates a texture that’s light, yet incredibly rich.- Cream Cheese: 8 ounces, full-fat, softened. Make sure it’s at room temperature for a smooth, lump-free filling.
- Creamy Peanut Butter: 1 cup. Use a good quality, commercial creamy peanut butter like Jif or Skippy for the best texture and flavor. Natural peanut butter can sometimes separate and make the filling less stable.
- Powdered Sugar: 1 ½ cups. This dissolves easily and adds sweetness without graininess.
- Vanilla Extract: 1 teaspoon. A splash of vanilla always enhances the overall flavor profile.
- Heavy Cream: 1 ½ cups, chilled. This will be whipped into a fluffy cloud to lighten the filling.
- Powdered Sugar (for cream): 2 tablespoons (optional, for extra sweetness in the whipped cream).
Optional Toppings for Extra Pizzazz
While delicious on its own, a few garnishes can elevate this pie even further.- Extra crushed Oreos
- Mini chocolate chips or chopped peanut butter cups
- Chocolate syrup or a drizzle of melted peanut butter

Crafting Your Crowd-Pleasing Peanut Butter Dream Pie
This is where we bring it all together. The beauty of a no-bake dessert is how quickly it comes together, and this pie is no exception. Just a few steps, and then the hardest part is waiting for it to chill!Step 1: Crushing the Cookies and Forming the Base
The foundation of any great pie is its crust. For this no-bake wonder, we’re starting with those glorious Oreos.- Get Crushing: Take your Oreo cookies and crush them until they resemble fine crumbs. You can do this in a food processor for speed and consistency, or place them in a large zip-top bag and smash them with a rolling pin – a great stress reliever!
- Melt the Butter: In a small, microwave-safe bowl, melt your ½ cup of unsalted butter.
- Combine & Press: Pour the melted butter over the Oreo crumbs in a medium bowl. Mix thoroughly until all the crumbs are moistened and resemble wet sand. Press this mixture firmly and evenly into the bottom and up the sides of a 9-inch pie plate. Use the back of a spoon or the bottom of a flat-bottomed glass to get it really compact.
- Chill Out: Place the prepared crust in the refrigerator for at least 15-20 minutes to firm up while you prepare the filling. This helps prevent it from crumbling when you slice into the pie.
Step 2: Whipping Up the Peanut Butter Filling
Now for the star of the show – that creamy, dreamy filling. Getting the cream cheese softened is key here for a silky-smooth texture.- Cream the Cheese: In a large mixing bowl, beat the softened cream cheese with an electric mixer on medium speed until it’s smooth and creamy, about 1-2 minutes. There should be no lumps.
- Add the Peanut Butter: Incorporate the creamy peanut butter into the cream cheese, beating until well combined and smooth.
- Sweeten the Deal: Gradually add the 1 ½ cups of powdered sugar, beating until fully incorporated and the mixture is light and fluffy. Stir in the vanilla extract.
- Whip the Cream: In a separate, clean, and chilled bowl, pour the 1 ½ cups of cold heavy cream. Beat on high speed until soft peaks form. If you’re using it, add the 2 tablespoons of powdered sugar and continue beating until stiff peaks form. Tip: For best results, chill your mixing bowl and whisk attachment in the freezer for 10-15 minutes before whipping cream. This helps the cream whip faster and hold its shape better.
- Fold it In: Gently fold about one-third of the whipped cream into the peanut butter mixture to lighten it. Then, carefully fold in the remaining whipped cream until no streaks remain. Be gentle to maintain the airy texture.
Step 3: Assembling and Chilling Your Masterpiece
The final steps are quick, leading to the glorious waiting game.- Fill ‘er Up: Spoon the luscious peanut butter filling into the chilled Oreo crust, spreading it evenly with an offset spatula or the back of a spoon. Create a nice, smooth dome.
- The Hard Part: Cover the pie loosely with plastic wrap and refrigerate for a minimum of 4-6 hours, or preferably overnight. This chilling time is crucial for the pie to set properly and for the flavors to meld beautifully.
- Garnish & Serve: Once thoroughly chilled, remove from the fridge. If desired, sprinkle with extra crushed Oreos, mini chocolate chips, or a drizzle of chocolate syrup just before serving. Slice with a sharp knife (you might want to run it under hot water between slices for cleaner cuts) and enjoy!

What Makes This Version Absolutely Irresistible
You might be thinking, “Another peanut butter pie recipe? What makes this one stand out?” And I get it, there are a lot of recipes out there. But this particular rendition holds a special place for a few key reasons, drawing from decades of family baking insights. First off, the Oreo crust. Many no-bake peanut butter pies opt for a standard graham cracker crust, which is fine, but the deep, slightly bitter cocoa notes of the Oreo cookies provide a far more sophisticated and balanced counterpoint to the sweet, rich peanut butter filling. It’s a flavor pairing that just *works*. Then there’s the texture of the filling. We’re not using any condensed milk here, which can sometimes lead to an overly sweet, almost cloying result. Instead, the combination of full-fat cream cheese, creamy peanut butter, and freshly whipped heavy cream creates a filling that is incredibly smooth, airy, and rich without being overwhelmingly heavy. It melts in your mouth with a delightful lightness. The careful balance of powdered sugar ensures sweetness without any graininess. This pie truly showcases the peanut butter, letting its nutty, salty-sweet character shine through.Common Questions About This Perfect Peanut Butter Pie
Even the simplest recipes can spark a few questions. Here are some of the most common ones I hear about this no-bake peanut butter pie.Can I make this pie ahead of time?
Absolutely! In fact, this pie is even better when made a day in advance. The flavors have more time to meld, and the filling sets up beautifully, making for cleaner slices. Just keep it covered loosely in the refrigerator.What kind of peanut butter works best?
For this recipe, I highly recommend using a commercial creamy peanut butter like Jif, Skippy, or Peter Pan. Natural peanut butter (the kind that separates) can sometimes make the filling less stable and prone to separating. The emulsifiers in commercial brands help create that perfectly smooth, consistent texture we’re after.My cream cheese isn’t soft enough – what should I do?
Softened cream cheese is crucial for a lump-free filling. If you forget to take it out ahead of time, you can unwrap the block and microwave it on low power (around 20-30% power) for 15-30 seconds, checking and flipping it halfway, until it’s pliable but not melted. Don’t overheat it!Can I use a different type of cookie for the crust?
While the Oreo crust is fantastic, you absolutely can experiment! Graham crackers are a classic alternative. Chocolate wafer cookies or even Nutter Butter cookies (for an extra peanut butter punch) would also be delicious. Just ensure you have about 3 cups of fine crumbs and adjust the melted butter as needed to get that “wet sand” consistency.How long does no-bake peanut butter pie last?
When stored properly, covered tightly in the refrigerator, this pie will stay delicious for 3-4 days. After that, while still safe to eat, the crust can start to soften, and the filling might lose some of its fresh texture.Storing Your Leftover Slices
If you miraculously have any leftovers (it’s rare, I warn you!), proper storage is key to maintaining that delightful texture and flavor. To keep your pie fresh, cover the pie plate tightly with plastic wrap or aluminum foil. You can also transfer individual slices into airtight containers. Store it in the refrigerator for up to 3-4 days. The crust will soften slightly over time, but the filling will remain creamy and delicious. You can also freeze this pie! Wrap individual slices or the entire pie (if well-chilled and firm) tightly in plastic wrap, then again in aluminum foil. It will keep well in the freezer for up to 1 month. Thaw overnight in the refrigerator before serving. This is a fantastic option for meal prepping dessert for future gatherings!Variations to Keep Things Exciting
While this classic no-bake peanut butter pie is perfect as is, sometimes it’s fun to play around with flavors. Here are a few ideas to get your creative juices flowing: Chocolate Drizzle Delight: Before serving, warm some chocolate syrup or melt a bit of your favorite chocolate and drizzle it artfully over the top. A sprinkle of mini chocolate chips never hurts either! Peanut Butter Cup Extravaganza: Chop up some mini Reese’s Peanut Butter Cups and fold them into the filling before spreading it into the crust, or use them generously as a topping. Salty Caramel Swirl: Add a swirl of salted caramel sauce (homemade or store-bought) over the top of the pie just before serving. The salty-sweet combination is divine. Espresso Kick: For a subtle depth, dissolve 1 teaspoon of instant espresso powder in 1 tablespoon of hot water, then cool it completely and mix it into the peanut butter filling along with the vanilla extract. It enhances the chocolate and peanut butter notes. Banana Boost: Layer thin slices of fresh banana on the bottom of the Oreo crust before adding the peanut butter filling. Banana and peanut butter are a match made in heaven! This no-bake peanut butter pie isn’t just a recipe; it’s an experience. It’s the taste of summer afternoons, family gatherings, and effortless indulgence. I hope it becomes a beloved tradition in your home, just as it has in mine. Happy baking (or rather, no-baking)!
No-Bake Peanut Butter Pie with Oreo Crust
A smooth, creamy, and undeniably delicious no-bake peanut butter pie with a crunchy Oreo cookie crust. An ultimate crowd-pleaser!
📝 Ingredients
👩🍳 Instructions
- 1Prepare the Oreo Crust: Crush the Oreo cookies finely in a food processor or by hand in a zip-top bag until they resemble fine crumbs. Transfer crumbs to a medium bowl.
- 2Melt ½ cup of unsalted butter. Pour the melted butter over the Oreo crumbs and mix thoroughly until all crumbs are moistened.
- 3Press the mixture firmly and evenly into the bottom and up the sides of a 9-inch pie plate. Use the back of a spoon or a flat-bottomed glass to compact it well. Refrigerate for at least 15-20 minutes while you prepare the filling.
- 4Make the Peanut Butter Filling: In a large mixing bowl, beat the softened cream cheese with an electric mixer on medium speed until smooth and creamy, about 1-2 minutes.
- 5Add the 1 cup of creamy peanut butter to the cream cheese mixture and beat until well combined and smooth.
- 6Gradually add 1 ½ cups of powdered sugar, beating until fully incorporated and the mixture is light and fluffy. Stir in the vanilla extract.
- 7In a separate, clean, and chilled mixing bowl, pour the 1 ½ cups of cold heavy cream. Beat on high speed until soft peaks form. If desired, add the 2 tablespoons of powdered sugar and continue beating until stiff peaks form.
- 8Gently fold about one-third of the whipped cream into the peanut butter mixture to lighten it. Then, carefully fold in the remaining whipped cream until no streaks remain. Be gentle to maintain the airy texture.
- 9Assemble and Chill: Spoon the peanut butter filling into the chilled Oreo crust, spreading it evenly with an offset spatula or the back of a spoon.
- 10Cover the pie loosely with plastic wrap and refrigerate for a minimum of 4-6 hours, or preferably overnight, until thoroughly set.
- 11Serve: Once chilled, remove from the fridge. Garnish with extra crushed Oreos, mini chocolate chips, or a drizzle of chocolate syrup if desired, then slice and serve.
💡 Notes
Ensure cream cheese is at room temperature for a lump-free filling. For best results, use commercial creamy peanut butter. Chilling the mixing bowl and whisk for the heavy cream helps it whip faster and hold its shape. The pie can be made a day in advance for enhanced flavor and setting.



