


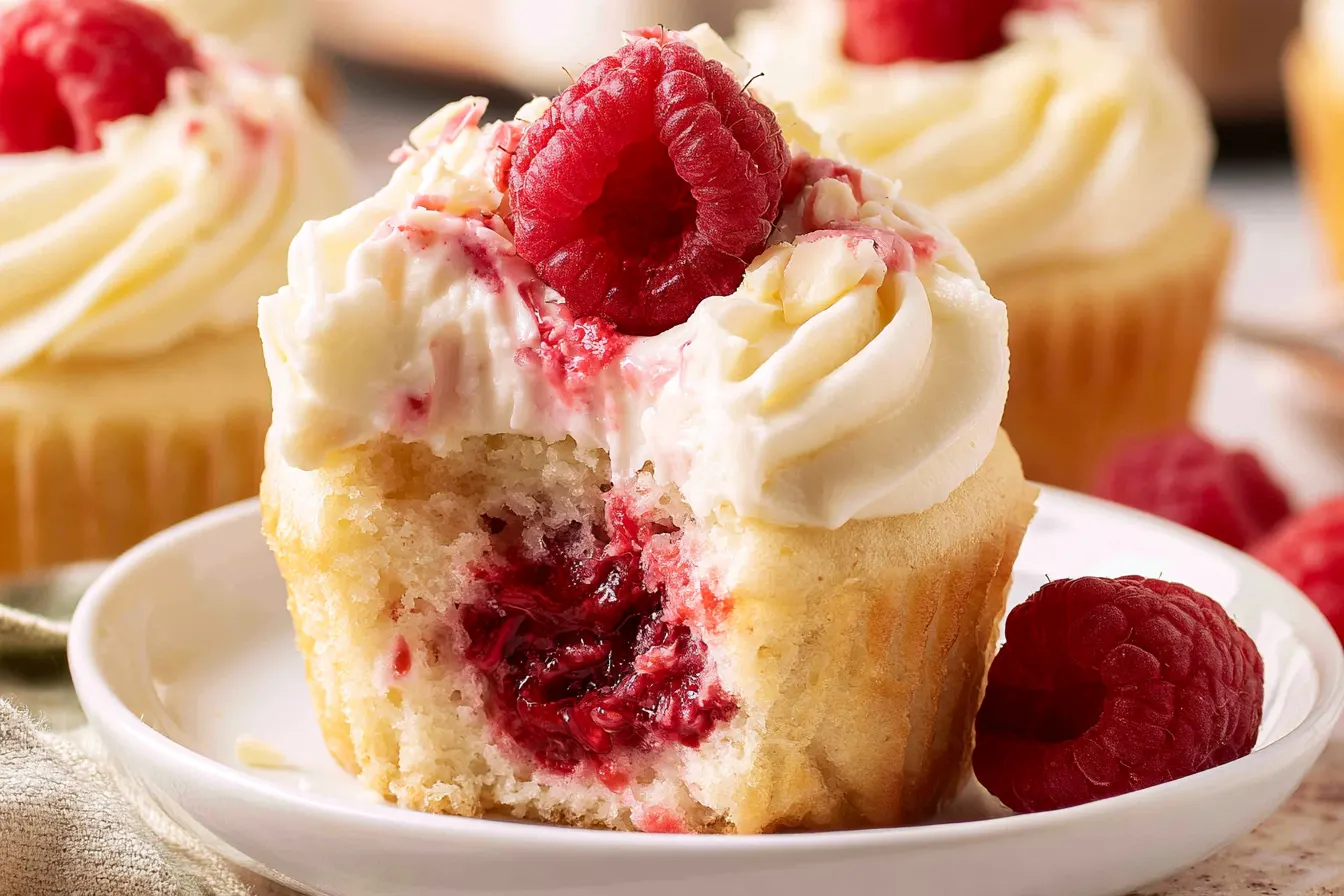
Have you ever baked something, taken a bite, and instantly felt like a culinary genius? That’s exactly how I felt the first time I perfected these White Chocolate Raspberry Cupcakes. It wasn’t just good; it was a revelation – a fluffy vanilla cupcake with a hidden burst of tart raspberry, all crowned with a cloud of silky white chocolate raspberry frosting. Truly, a moment of pure dessert bliss.

Why These White Chocolate Raspberry Cupcakes Are an Absolute Must-Bake
So, what makes *this* particular White Chocolate Raspberry Cupcake recipe stand out in a sea of delicious desserts? It’s all about the layers of experience. First, you get an incredibly tender, moist vanilla cupcake base that’s just sweet enough to complement the other elements. No dry crumbs here, folks! This cupcake is built on a foundation of buttermilk and cake flour, which are secret weapons for that perfect texture. Then comes the *surprise* – a vibrant, tangy raspberry filling nestled right in the center. It’s not just a dollop of jam; it’s a burst of fresh fruit flavor that cuts through the sweetness beautifully. This little secret pocket of ruby red goodness is what elevates these from “nice cupcakes” to “oh-my-goodness-what-is-this?!” status. And finally, the grand finale: a whipped white chocolate raspberry frosting that’s light as air, intensely flavorful, and not overly sweet. We’re not talking about heavy, buttercream here. This frosting is fluffy, creamy, and melts in your mouth, leaving a delicate white chocolate and raspberry aftertaste. It’s the perfect crown for our cupcake king (or queen!).Behind the Batter: A Symphony of Ingredients
Every great performance needs a stellar cast, and these cupcakes are no exception. Let’s talk about the key players that make these White Chocolate Raspberry Cupcakes sing. You might notice some familiar faces, but it’s how they come together that truly matters.For the Fluffy Vanilla Cupcakes:
- All-Purpose Flour & Cake Flour: Using a blend gives you structure from the all-purpose flour and an incredibly tender crumb from the cake flour. It’s a texture game-changer.
- Granulated Sugar: Sweetness, of course, but also helps with moisture and browning.
- Baking Powder & Baking Soda: Our leavening agents! The baking soda reacts with the acid in the buttermilk, giving us that beautiful rise.
- Salt: Essential for balancing flavors and enhancing sweetness. Don’t skip it!
- Unsalted Butter: Room temperature butter creams beautifully with sugar, creating air pockets for a light texture.
- Large Eggs: Binders, moisteners, and structure providers. Again, room temperature is key.
- Vanilla Extract: Pure vanilla is non-negotiable here. It’s the soul of the cupcake.
- Buttermilk: The magic ingredient for moisture and tenderness. Its acidity also helps activate the baking soda. If you don’t have buttermilk, you can make your own by adding a tablespoon of lemon juice or white vinegar to regular milk and letting it sit for 5-10 minutes.

For the Zesty Raspberry Filling:
- Fresh or Frozen Raspberries: Both work wonderfully. If using frozen, no need to thaw!
- Granulated Sugar: To sweeten the berries and create a syrupy consistency.
- Lemon Juice: A splash of fresh lemon juice brightens the raspberry flavor and adds a touch of necessary acidity.
- Cornstarch: Our thickening agent. It ensures the filling stays put in the cupcake and doesn’t make it soggy.
For the Whipped White Chocolate Raspberry Frosting:
- Good Quality White Chocolate: This is crucial. Use a baking bar or high-quality chips, not candy melts. It makes a huge difference in flavor and texture.
- Heavy Cream: The base for our whipped frosting. Make sure it’s cold!
- Powdered Sugar: For sweetness and to stabilize the whipped cream. Sifting it prevents lumps.
- Raspberry Puree: Made from fresh or frozen raspberries, strained to remove seeds. This is where we get that gorgeous pink hue and delicate raspberry flavor.
- Vanilla Extract: A touch enhances the overall sweetness and complexity.
Crafting Your Raspberry Masterpiece: Step-by-Step
Alright, let’s get down to business! Making these cupcakes is a fun process, and breaking it down into components makes it super manageable. Remember, baking is a science, but it’s also an art – enjoy the journey!Part 1: The Tender Vanilla Cupcakes
Preheat your oven to 350°F (175°C) and line a 12-cup muffin tin with paper liners. This ensures even baking and easy cleanup.
- Combine Dry Ingredients: In a medium bowl, whisk together the all-purpose flour, cake flour, granulated sugar, baking powder, baking soda, and salt. Give it a good whisk to ensure everything is evenly distributed.
- Cream Butter and Sugar: In a large bowl, using an electric mixer, cream together the softened unsalted butter and sugar on medium speed until light and fluffy, about 2-3 minutes. Scrape down the sides of the bowl often. This step incorporates air, making your cupcakes light.
- Add Eggs and Vanilla: Beat in the eggs, one at a time, mixing well after each addition. Stir in the vanilla extract. The mixture might look a little curdled at this point, but don’t worry, it’ll come together.
- Alternate Dry and Wet: With the mixer on low speed, gradually add about one-third of the dry ingredients to the butter mixture, mixing until just combined. Pour in half of the buttermilk and mix until just incorporated. Repeat this process, ending with the last third of the dry ingredients. Be careful not to overmix! Overmixing develops gluten, leading to tough cupcakes.
- Fill and Bake: Divide the batter evenly among the 12 cupcake liners, filling each about two-thirds full. Bake for 18-22 minutes, or until a wooden skewer inserted into the center comes out clean.
- Cool Down: Let the cupcakes cool in the muffin tin for 5 minutes before transferring them to a wire rack to cool completely. They must be completely cool before filling and frosting.

Part 2: The Bright Raspberry Filling
This simple filling adds such a dynamic burst of flavor.
- Cook Raspberries: In a small saucepan, combine the raspberries, granulated sugar, and lemon juice. Cook over medium heat, stirring occasionally, until the raspberries break down and the mixture begins to simmer, about 5-7 minutes.
- Thicken the Filling: In a tiny bowl, whisk together the cornstarch with 1 tablespoon of cold water until smooth. Pour this cornstarch slurry into the simmering raspberry mixture, stirring constantly. Continue to cook for another 1-2 minutes, until the filling thickens. It should coat the back of a spoon.
- Cool and Chill: Remove the saucepan from the heat and transfer the raspberry filling to a small bowl. Cover it with plastic wrap, pressing the wrap directly onto the surface to prevent a skin from forming. Chill in the refrigerator for at least 1 hour, or until completely cold and firm.
- Prepare for Filling: Once chilled, give the filling a good stir. If it’s too thick, you can add a tiny splash of water to loosen it up.
Part 3: The Whipped White Chocolate Raspberry Frosting
This frosting is light, airy, and oh-so-delicious!
- Melt White Chocolate: Gently melt the white chocolate. You can do this in a microwave in 30-second intervals, stirring after each, or over a double boiler. Be careful not to overheat it, as white chocolate can seize easily. Let it cool slightly but remain liquid.
- Make Raspberry Puree: If you haven’t already, puree fresh or thawed frozen raspberries in a blender or food processor. Strain the puree through a fine-mesh sieve to remove all the seeds. You’ll want about 1/4 cup of strained puree.
- Whip Cream: In a large, chilled bowl (using a cold bowl helps the cream whip better!), combine the cold heavy cream, powdered sugar, and vanilla extract. Beat on medium-high speed with an electric mixer until soft peaks form.
- Fold in Flavors: With the mixer on low speed, slowly pour in the cooled, melted white chocolate until just combined. Then, gently fold in the strained raspberry puree with a spatula until streaks of pink are just incorporated. Be careful not to overmix, or the frosting can become grainy. Tip: If your frosting seems too thin, pop the bowl into the fridge for 10-15 minutes, then give it another quick whip. The white chocolate will firm up slightly, helping to stabilize it.
Part 4: Assembling Your Cupcakes
This is where the magic truly happens!
- Core the Cupcakes: Once the cupcakes are completely cool, use a cupcake corer, a small knife, or the back of a piping tip to remove a small cone from the center of each cupcake. Don’t go all the way to the bottom! Save the little cupcake tops.
- Fill ‘Em Up: Spoon or pipe about 1-2 teaspoons of the chilled raspberry filling into each cored cupcake. You can either place the small cupcake top back on, or simply discard it and cover with frosting.
- Frost Away: Transfer the whipped white chocolate raspberry frosting to a piping bag fitted with your favorite decorative tip (or just use a spoon for a rustic look). Pipe a generous swirl of frosting onto each filled cupcake.
- Garnish and Serve: Garnish with a fresh raspberry or a tiny white chocolate curl, if desired. Serve immediately or store in the refrigerator.
Your Burning Questions, Answered!
Even seasoned bakers have questions. Here are some of the most common queries I get about these berry beauties.Can I use frozen raspberries for the filling and puree?
Absolutely! Frozen raspberries work perfectly for both the filling and the frosting puree. Just use them directly from frozen for the filling. For the puree, you might want to thaw them slightly first, or just give your blender a bit more time to work its magic.My white chocolate seized when melting. What happened?
White chocolate is notoriously finicky. It seizes (becomes thick and grainy) if it gets too hot too quickly, or if even a tiny drop of water gets into it while melting. To avoid this, melt it slowly over a double boiler, or in short bursts in the microwave, stirring often. If it does seize, sometimes you can rescue it by stirring in a tablespoon of vegetable oil or melted butter, but it’s often best to start over.How do I prevent my cupcakes from drying out?
Several factors contribute to moist cupcakes! First, don’t overmix the batter – this develops gluten and makes them tough. Second, don’t overbake them. Start checking for doneness at the lower end of the baking time. Finally, ensure all your cold ingredients (eggs, buttermilk) are at room temperature before mixing, as this helps them emulsify better with the fat.Can I make these White Chocolate Raspberry Cupcakes ahead of time?
You absolutely can! The cupcakes themselves can be baked a day in advance and stored in an airtight container at room temperature. The raspberry filling can be made 2-3 days ahead and stored in the fridge. The white chocolate raspberry frosting is best made the day you plan to serve, as whipped cream-based frostings tend to lose a bit of their fluffiness over time. Assemble the cupcakes a few hours before serving for the best texture and appearance.What if I don’t have cake flour?
No problem! You can make a substitute for cake flour at home. For every cup of all-purpose flour, remove 2 tablespoons of flour, and then replace those 2 tablespoons with 2 tablespoons of cornstarch. Sift it together a few times to ensure it’s well combined. This DIY version will give you a very similar tender crumb.The Sweet Science: What Makes Them So Good?
It’s easy to say a recipe is delicious, but it’s more satisfying to understand *why* it works so well. For these White Chocolate Raspberry Cupcakes, it’s a brilliant interplay of contrasting elements that elevate them beyond the ordinary. The richness of the white chocolate is balanced by the tart, bright flavor of the raspberries. This isn’t just about sweetness; it’s about a dynamic flavor profile. The texture is another key player. You have the soft, airy crumb of the cupcake, the slight chew and burst of the raspberry filling, and then the ethereal lightness of the whipped white chocolate frosting. Each bite offers a multi-faceted experience, keeping your taste buds engaged and delighted. It’s a masterclass in balancing sweet, tart, rich, and light – all in one perfect little package.Tips for Picture-Perfect Presentation
Let’s be honest, half the joy of baking is showing off your beautiful creations! Here are a few pointers to make your White Chocolate Raspberry Cupcakes look as good as they taste. Choose Your Liners Wisely: Opt for sturdy cupcake liners that won’t peel away from the cupcake once baked. White or pink liners would complement the colors perfectly. Even Scooping: Use an ice cream scoop to portion your batter evenly into the cupcake liners. This ensures all your cupcakes bake uniformly and look consistent. Neat Coring: When coring, don’t dig too deep. You want a pocket for the filling, not a gaping hole. A small melon baller or a sharp paring knife works wonders. Piping Prowess: Invest in a basic piping bag and a large star tip (like a Wilton 1M or 2D). Even a simple swirl can make your cupcakes look professionally decorated. If you’re new to piping, practice on a plate first! Garnish with Flair: A single fresh raspberry on top of each cupcake is simple, elegant, and instantly tells people what flavors to expect. A sprinkle of white chocolate shavings or a tiny edible flower can also add a nice touch. For a little sparkle, a dusting of powdered sugar over the berries is also charming.Storage Solutions: Keeping Them Fresh
So you’ve baked a batch of these beauties, but you can’t eat them all at once (or maybe you can, no judgment here!). Knowing how to store them properly ensures they stay delicious. These White Chocolate Raspberry Cupcakes, due to their whipped cream and fresh fruit filling, are best stored in an airtight container in the refrigerator. They will keep well for up to 3 days. The frosting might lose a tiny bit of its fluffiness over time, but the flavor will still be fantastic. For optimal enjoyment, I recommend letting them sit at room temperature for about 15-20 minutes before serving. This allows the frosting to soften slightly and the flavors to truly sing. If you’re planning a party, assemble them a few hours beforehand and keep them chilled until it’s time to serve.Freezing for Later Indulgence
Want to save some for a rainy day? You can freeze the unfrosted cupcakes! Once completely cooled, wrap each cupcake individually in plastic wrap, then place them in a freezer-safe bag or container. They’ll keep in the freezer for up to 2-3 months. Thaw them at room temperature, then fill and frost as directed. The raspberry filling can also be frozen in an airtight container for up to 1 month. Thaw in the refrigerator before using.
White Chocolate Raspberry Cupcakes
Fluffy vanilla cupcakes with a surprise raspberry filling and silky white chocolate raspberry whipped frosting. A perfect balance of sweet and tart.
📝 Ingredients
👩🍳 Instructions
- 1Prepare the Cupcakes: Preheat oven to 350°F (175°C). Line a 12-cup muffin tin with paper liners.
- 2In a medium bowl, whisk together all-purpose flour, cake flour, 1½ cups granulated sugar, baking powder, baking soda, and ½ tsp salt.
- 3In a large bowl, cream softened butter and 1½ cups granulated sugar with an electric mixer until light and fluffy (2-3 minutes).
- 4Beat in eggs one at a time, mixing well after each. Stir in 1 tsp vanilla extract.
- 5Gradually add one-third of the dry ingredients to the butter mixture, mixing on low speed until just combined. Add half of the buttermilk and mix until incorporated. Repeat, ending with the last third of dry ingredients. Do not overmix.
- 6Divide batter evenly among liners, filling two-thirds full. Bake 18-22 minutes, or until a wooden skewer comes out clean. Cool in tin for 5 minutes, then transfer to a wire rack to cool completely.
- 7Prepare the Raspberry Filling: In a small saucepan, combine 1½ cups raspberries, ¼ cup granulated sugar, and lemon juice. Cook over medium heat, stirring, until raspberries break down and simmer (5-7 minutes).
- 8Whisk 1 tbsp cornstarch with 1 tbsp cold water until smooth. Stir into simmering raspberry mixture. Cook 1-2 minutes until thickened. Transfer to a bowl, cover surface with plastic wrap, and chill for at least 1 hour.
- 9Prepare the Frosting: Gently melt chopped white chocolate in a microwave (30-second intervals) or double boiler until smooth. Let cool slightly but remain liquid.
- 10Puree ½ cup raspberries and strain through a fine-mesh sieve to get ¼ cup raspberry puree.
- 11In a large, chilled bowl, combine cold heavy cream, sifted powdered sugar, and 1 tsp vanilla extract. Beat on medium-high speed until soft peaks form.
- 12On low speed, slowly pour in cooled melted white chocolate until just combined. Gently fold in raspberry puree with a spatula until streaks are incorporated. Do not overmix.
- 13Assemble the Cupcakes: Once cupcakes are completely cool, use a cupcake corer or knife to remove a small cone from the center of each. Fill with 1-2 teaspoons of chilled raspberry filling. Replace cupcake tops or discard.
- 14Transfer frosting to a piping bag fitted with a decorative tip. Pipe a generous swirl onto each filled cupcake. Garnish with a fresh raspberry or white chocolate curl, if desired. Serve immediately or store in the refrigerator.
💡 Notes
Ensure all cold ingredients are at room temperature for the cupcakes. For the best frosting texture, make sure your heavy cream is very cold and your white chocolate is cooled (but still liquid) before adding. Cupcakes can be made a day ahead, and filling 2-3 days ahead. Store assembled cupcakes in an airtight container in the refrigerator for up to 3 days. Let them sit at room temperature for 15-20 minutes before serving.



