


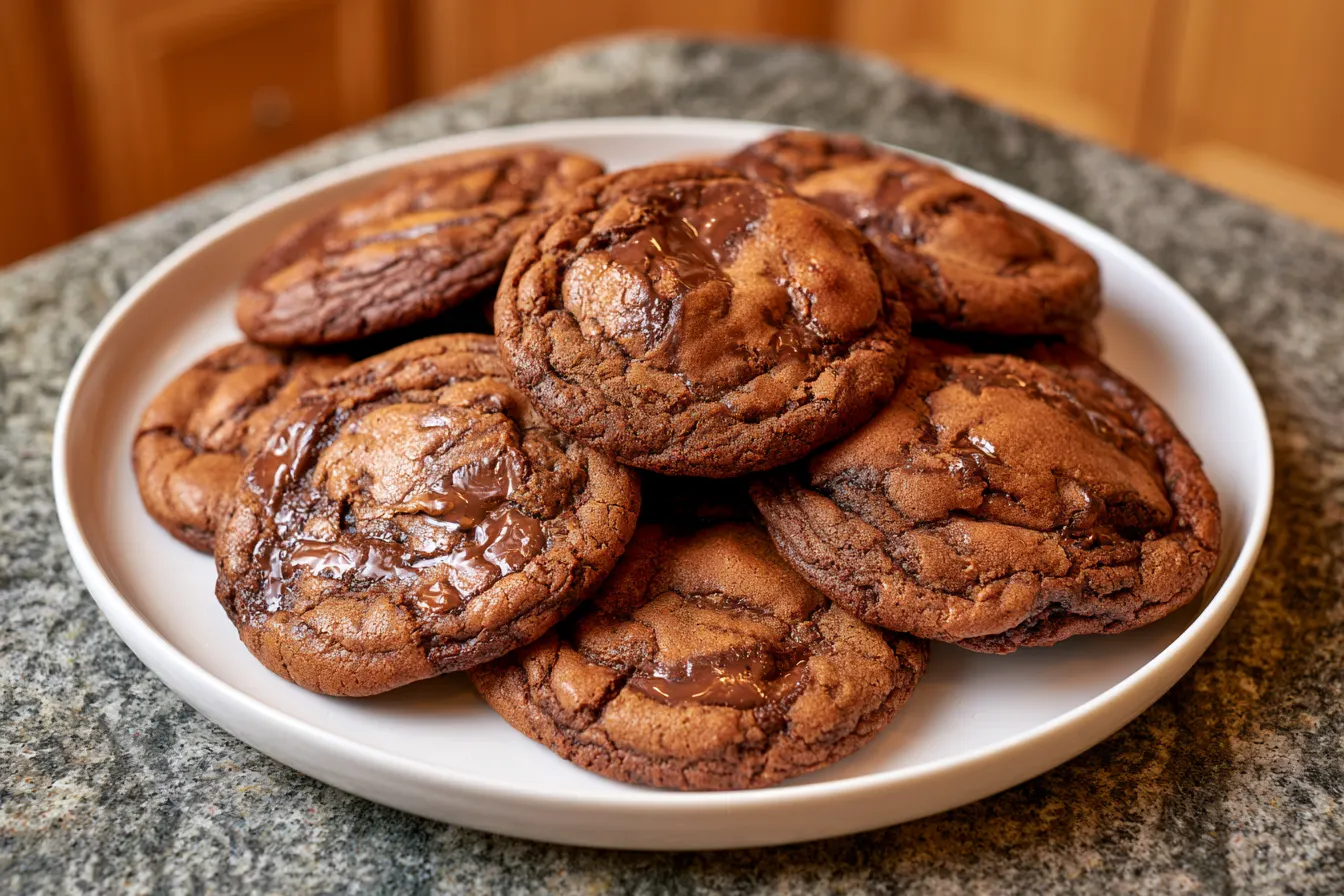
Ever pulled a batch of “soft-baked” cookies from the oven, only to find them turn into crunchy hockey pucks by morning? Yeah, me too. For years, my quest for truly soft chocolate chip cookies felt like a never-ending battle against the forces of stale air and crumbly textures. It was disheartening, especially when a recipe promised that coveted chewiness but delivered anything but. This recipe, my friends, is the culmination of countless experiments, a few baking flops, and an unwavering determination to crack the code. It delivers on its promise: easy and soft cookies that genuinely remain that way, even days later.

Why These Soft Chocolate Chip Cookies Are Different (and Better!)
You might be thinking, “Another chocolate chip cookie recipe? What makes this one special?” And that’s a fair question! The internet is swimming in them. But what sets this particular recipe apart is its meticulous attention to texture and longevity. We’re not just aiming for soft *out of the oven*, but soft *tomorrow* and even the day after. The magic truly happens with a few key players. First, the balance of both brown sugar and granulated sugar. Brown sugar brings moisture and a delightful chew, while granulated sugar contributes to spread and that classic cookie crispness around the edges. It’s a delicate dance, and we’ve perfected the ratio. Second, melted butter. While creamed butter can make for a cakier cookie, melted butter ensures a denser, chewier texture that resists drying out. And finally, a slightly lower baking temperature for a touch longer, allowing the cookies to cook through without over-browning or becoming rigid. This careful combination means you get consistently delightful results every single time.Gather Your Baking Arsenal: Ingredients for Irresistible Soft Cookies
Before we get our hands sticky, let’s make sure our kitchen is stocked. One of the joys of baking these easy and soft cookies is that you likely have most of these ingredients already on hand. Quality matters here, especially with your chocolate. Don’t skimp!The Dry Mix
- 2 ¼ cups (270g) all-purpose flour, spooned and leveled
- 1 teaspoon baking soda
- ½ teaspoon salt
The Wet Wonders
- ¾ cup (1 ½ sticks or 170g) unsalted butter, melted
- ¾ cup (150g) packed light brown sugar
- ½ cup (100g) granulated sugar
- 1 large egg + 1 egg yolk, at room temperature
- 1 teaspoon vanilla extract
The Chocolatey Goodness
- 1 ½ cups (about 250g) semi-sweet chocolate chips or chopped chocolate bars (I love a mix of chips and chunks!)

Step-by-Step: Crafting Your Chewy Masterpiece
Baking is a science, but it should feel like an art. Follow these steps, and you’ll be well on your way to cookie perfection. Don’t rush, enjoy the process, and soon your kitchen will be filled with the most inviting aroma.Step 1: Prep Your Workspace & Dry Ingredients
Preheat your oven to 350°F (175°C). Line two large baking sheets with parchment paper or silicone baking mats. This is key for easy cleanup and preventing sticking. In a medium bowl, whisk together the flour, baking soda, and salt. Set this aside for now.
Step 2: The Butter & Sugar Foundation
In a large bowl, pour your melted butter. Add both the packed light brown sugar and the granulated sugar. Whisk these together until they’re thoroughly combined and smooth. This should take about 1-2 minutes. The mixture will look glossy and thick.
Tip: Ensure your butter isn’t sizzling hot when you add the sugars; let it cool for a few minutes after melting. Too hot butter can “cook” the sugars slightly, affecting the final texture.
Step 3: Eggs & Vanilla
Add the large egg, the extra egg yolk, and the vanilla extract to the butter and sugar mixture. Whisk vigorously for about 1 minute until the mixture is lighter in color and looks creamy. The extra egg yolk is one of our secret weapons for that incredible chewiness!
Step 4: Combine Wet and Dry
Gradually add the dry ingredient mixture to the wet ingredients. Start by adding about half, mix until just combined, then add the remaining half. Mix on low speed (if using a stand mixer) or with a spatula until *just* combined. Overmixing develops gluten, which can lead to tougher cookies, and we’re aiming for soft, remember?
Step 5: Fold in the Chocolate
Now for the best part! Gently fold in your chocolate chips and/or chunks. Distribute them evenly throughout the dough. Don’t be shy here; more chocolate is almost always better.
Step 6: Scoop & Chill (Optional, But Recommended!)
Using a 1.5-tablespoon cookie scoop, drop rounded balls of dough onto your prepared baking sheets, leaving about 2 inches between each cookie. For the absolute best texture and to prevent excessive spreading, cover the baking sheets with plastic wrap and chill the dough for at least 30 minutes, or even up to 24 hours. Chilling allows the flavors to meld and the butter to firm up, resulting in a thicker, chewier cookie.

Step 7: Bake to Perfection
Bake one sheet at a time in your preheated oven for 10-12 minutes. The edges should be lightly golden, but the centers should still look slightly soft and even a little underbaked. This is exactly what we want for that soft, chewy interior!
Note: Ovens vary, so keep a close eye on your first batch. If you prefer a crispier edge, bake for an extra minute or two, but remember our goal is ultimate softness!
Step 8: Cool & Enjoy
Remove the baking sheets from the oven and let the cookies cool on the sheets for 5-10 minutes. They’re very delicate when warm. After a brief rest, transfer them to a wire rack to cool completely. Or, if you’re like me, snatch one while it’s still warm and gooey. You earned it!
Common Cookie Conundrums: Solved!
Even with the best recipe, sometimes things go awry in the kitchen. Here are some of the most frequently asked questions I get about achieving perfect soft-baked cookies.Why are my cookies spreading too much and turning flat?
There are a few culprits here. Your butter might have been too warm when you mixed it, your oven temperature could be off (a common issue!), or you might not have used enough flour (make sure you’re spooning and leveling, not scooping directly from the bag). Chilling the dough also helps immensely with preventing spread.
Can I make these cookies ahead of time?
Absolutely! You can prepare the dough, scoop it into balls, and then freeze the raw dough balls in a single layer on a baking sheet. Once frozen solid, transfer them to a freezer-safe bag for up to 3 months. When you’re ready to bake, you can bake them straight from frozen, adding an extra 2-4 minutes to the baking time.
What’s the deal with the extra egg yolk?
Ah, the secret weapon! The extra egg yolk adds fat without adding extra liquid (like a whole egg would), which contributes significantly to the richness, chewiness, and overall tenderness of the cookie. It helps prevent them from becoming dry and crumbly.
My cookies are hard after cooling. What went wrong?
This usually means they were overbaked. Remember, we’re looking for slightly underbaked centers when you pull them from the oven. They will continue to cook slightly on the hot baking sheet. Also, ensure you’re storing them correctly (see storage tips below!).
Can I use different types of chocolate?
Definitely! While semi-sweet is classic, feel free to experiment with milk chocolate, dark chocolate, white chocolate, or even a blend of several. Chocolate chunks from a chopped bar often create more pockets of melted chocolate goodness than standard chips.
Keeping Them Fresh: Storage & Reheating
These soft-baked chocolate chip cookies are at their absolute peak within the first day or two, but with proper storage, they’ll retain their delightful texture for longer.Storage
Once completely cooled, store your cookies in an airtight container at room temperature. To help them stay extra soft, you can add half a slice of bread (any kind, even stale) to the container. The cookies will absorb moisture from the bread, keeping them moist and chewy for up to 5 days. Just replace the bread slice every day or two.
Reheating for That “Just Baked” Feel
If you want to recapture that warm, gooey, just-out-of-the-oven experience, pop a cookie or two into the microwave for 10-15 seconds. Be careful not to overheat, or they’ll become tough. Alternatively, you can warm them in a preheated oven at 275°F (135°C) for about 5 minutes.
Variations to Keep Things Exciting
Once you’ve mastered the basic recipe, the world of cookie customization is your oyster! Here are a few ideas to get you started:Nutty Delights
Fold in ½ cup of chopped toasted pecans, walnuts, or macadamia nuts with the chocolate chips for added crunch and flavor.
Salted Caramel Swirl
After scooping the dough onto the baking sheet, make a small indentation in each cookie and dollop a tiny bit of store-bought or homemade salted caramel sauce. Swirl gently with a toothpick before baking.
Double Chocolate Indulgence
Reduce the all-purpose flour by ¼ cup and replace it with ¼ cup of unsweetened cocoa powder for a rich, dark chocolate cookie base. Then proceed with the chocolate chips as directed.
Holiday Spice
Add ½ teaspoon of ground cinnamon and ¼ teaspoon of ground nutmeg to the dry ingredients for a warm, spiced twist, especially lovely during the cooler months.
These easy and soft cookies aren’t just a recipe; they’re a promise of pure, unadulterated cookie joy. They’re the kind of treat that makes you want to share (or maybe just hoard them all for yourself, no judgment here!). So go ahead, preheat that oven, gather your ingredients, and prepare to bake the best chocolate chip cookies you’ve ever tasted. Your taste buds—and anyone lucky enough to snag one—will thank you!
Soft-Baked Chocolate Chip Cookies with Extra Chew
Achieve ultimate cookie softness and chewiness that lasts for days with this perfected chocolate chip cookie recipe.
📝 Ingredients
👩🍳 Instructions
- 1Preheat your oven to 350°F (175°C). Line two large baking sheets with parchment paper or silicone baking mats.
- 2In a medium bowl, whisk together the flour, baking soda, and salt. Set aside.
- 3In a large bowl, combine the melted butter, packed light brown sugar, and granulated sugar. Whisk thoroughly for 1-2 minutes until smooth and glossy.
- 4Add the large egg, the extra egg yolk, and the vanilla extract to the butter-sugar mixture. Whisk vigorously for about 1 minute until the mixture is lighter in color and creamy.
- 5Gradually add the dry ingredient mixture to the wet ingredients. Mix on low speed or with a spatula until just combined. Avoid overmixing.
- 6Gently fold in the chocolate chips or chopped chocolate until evenly distributed.
- 7Using a 1.5-tablespoon cookie scoop, drop rounded balls of dough onto your prepared baking sheets, ensuring about 2 inches between each cookie. For best results, chill the dough balls for at least 30 minutes, or up to 24 hours.
- 8Bake one sheet at a time in the preheated oven for 10-12 minutes. The edges should be lightly golden, but the centers should still appear soft and slightly underbaked.
- 9Remove the baking sheets from the oven and let the cookies cool on the sheets for 5-10 minutes. Then, transfer them to a wire rack to cool completely before storing or serving.
💡 Notes
For extra soft cookies that stay that way, add half a slice of bread to the airtight storage container. Replace the bread every day or two. For a 'just baked' experience, microwave a cookie for 10-15 seconds.



