


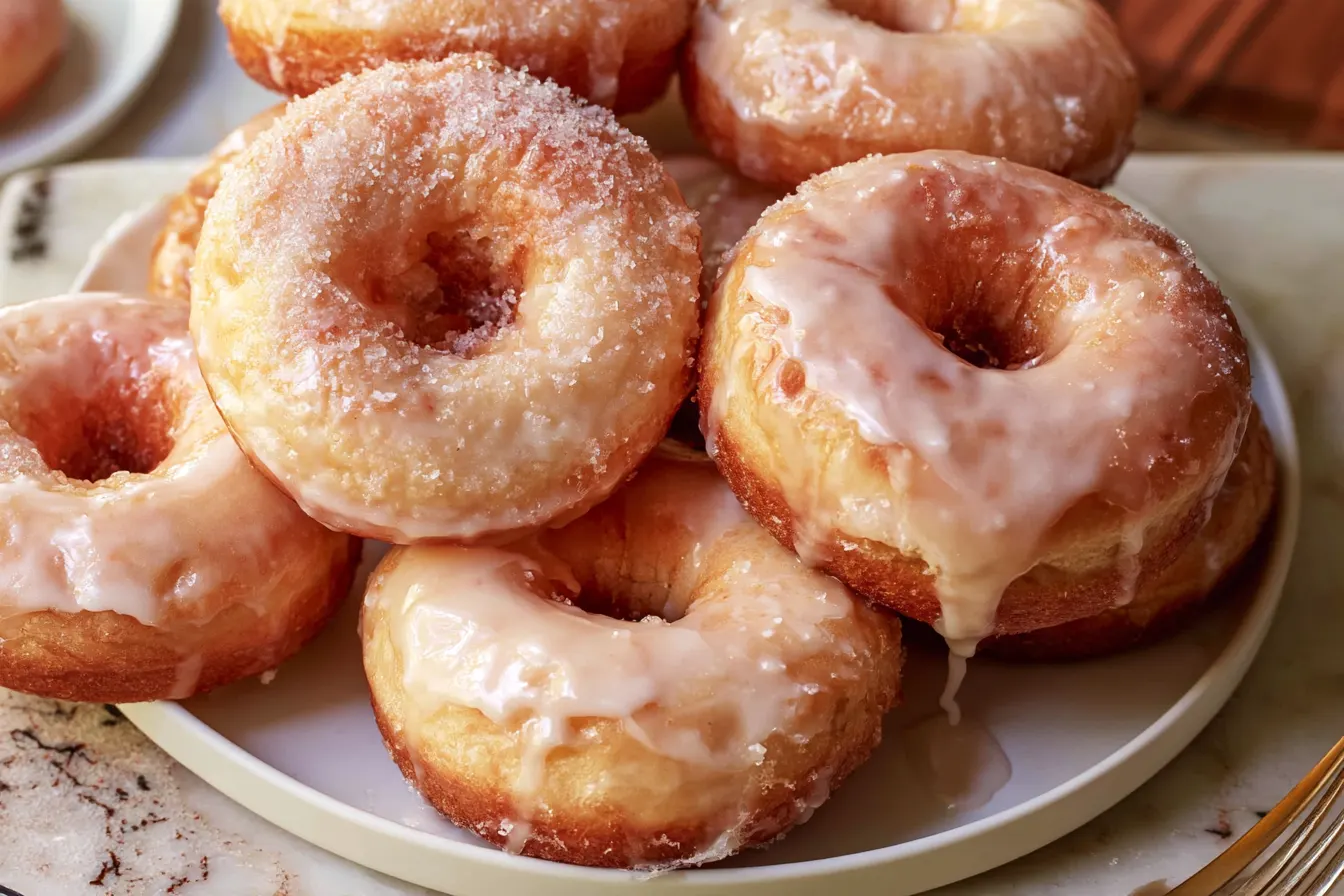
Ever tried to recreate that perfect donut shop experience at home, only to end up with something that feels… off? Maybe too dense, too greasy, or just lacking that melt-in-your-mouth tenderness? I’ve been there, countless times. But after years of tweaking, testing, and a few slightly sad, hockey-puck-like results, I’ve finally cracked the code to making glazed donuts that are utterly indistinguishable from your favorite bakery’s best batch.
The secret, as it turns out, isn’t some fancy equipment or a rare ingredient. It’s all about the dough. Specifically, a milk bread dough base. If you’ve ever had Japanese milk bread, you know its signature is an incredible softness and a delicate, almost cloud-like texture. Translating that to a fried donut results in a pastry that’s light, airy, and incredibly tender, holding up beautifully to a thin, crackly vanilla bean glaze.
This recipe transforms a humble yeasted dough into something truly magical. Prepare yourself for a kitchen filled with the intoxicating aroma of frying dough and vanilla, and a tray of homemade glazed donuts so good, you might just open your own shop.

When I first started experimenting with homemade donuts, I tried every recipe under the sun. Standard brioche, potato flour doughs, even a few vegan versions. They were good, don’t get me wrong, but they never quite hit that transcendent level of airy lightness that makes a donut truly addictive. Then, a few years ago, I started baking a lot of milk bread, and a lightbulb went off.
The tangzhong method, which is the cornerstone of milk bread, involves cooking a small portion of flour and liquid into a paste before adding it to the main dough. This gelatinizes the starches, allowing the dough to absorb more moisture. More moisture means a softer crumb, a longer shelf life, and a texture that resists drying out. For donuts, this translates to an unparalleled tenderness and a delicate chewiness that regular doughs just can’t achieve. It’s a game-changer.
The beauty of this method is that while it sounds a bit fancy, it’s actually quite simple to execute. It adds only a few minutes to your prep time but makes all the difference in the final product. Trust me, once you try these milk bread glazed donuts, you’ll never go back to any other recipe.
Gathering Your Goodies: What You’ll Need
Making these glorious glazed donuts requires a few key players. Don’t be intimidated by the list; most are pantry staples. Quality ingredients really shine through here, especially when it comes to vanilla.
For the Tangzhong Starter
- 1/4 cup (30g) all-purpose flour
- 1/2 cup (120ml) whole milk
For the Milk Bread Dough
- 1 cup (240ml) whole milk, warmed to 105-115°F (40-46°C)
- 2 1/4 teaspoons (7g) active dry yeast (one standard packet)
- 1/4 cup (50g) granulated sugar, plus a pinch for the yeast
- 1 large egg, plus 1 large egg yolk, at room temperature
- 1 teaspoon pure vanilla extract
- 3 1/2 cups (420g) all-purpose flour, plus more for dusting
- 1 teaspoon salt
- 6 tablespoons (85g) unsalted butter, softened
For Frying
- 6-8 cups neutral oil, such as vegetable, canola, or sunflower, for deep frying
For the Vanilla Bean Glaze
- 2 cups (240g) powdered sugar, sifted
- 1/4 cup (60ml) whole milk
- 1/2 teaspoon pure vanilla extract
- 1/4 teaspoon vanilla bean paste or seeds from 1/2 vanilla bean (optional, but highly recommended)
- Pinch of salt

Crafting Your Cloud-Like Glazed Donuts
Patience is a virtue when working with yeast, but the steps themselves are straightforward. Take your time, enjoy the process, and you’ll be rewarded with bakery-quality treats.
Step 1: The Tangzhong Tango
In a small saucepan, whisk together the 1/4 cup flour and 1/2 cup milk until no lumps remain. Cook over medium-low heat, stirring constantly with a whisk or rubber spatula, until the mixture thickens to a paste-like consistency, resembling wallpaper paste. This usually takes 3-5 minutes. It should register 149°F (65°C) on an instant-read thermometer. Remove from heat, transfer to a small bowl, cover with plastic wrap pressed directly onto the surface to prevent a skin from forming, and let it cool to room temperature. This can be done ahead of time and refrigerated for up to 24 hours.
Step 2: Activating the Yeast
In the bowl of a stand mixer, combine the warmed milk, a pinch of granulated sugar, and the active dry yeast. Give it a gentle stir. Let it sit for 5-10 minutes until foamy. This confirms your yeast is alive and ready to work its magic. If it doesn’t foam, your yeast might be old, or your milk wasn’t the right temperature; you’ll need to start this part over.
Step 3: Building the Dough
To the yeast mixture, add the remaining 1/4 cup granulated sugar, the egg, egg yolk, vanilla extract, the cooled tangzhong, 3 1/2 cups all-purpose flour, and salt. Attach the dough hook to your stand mixer and mix on low speed until a shaggy dough forms, about 2-3 minutes. Scrape down the sides of the bowl as needed.
Step 4: Kneading to Perfection
Increase the mixer speed to medium-low and knead for 5 minutes. The dough will still be sticky. Now, add the softened butter, one tablespoon at a time, allowing each piece to incorporate before adding the next. Continue to knead for another 10-15 minutes on medium speed, until the dough is smooth, elastic, and pulls away from the sides of the bowl. It should pass the windowpane test – you can stretch a small piece thin enough to see light through it without tearing. Tip: If your dough feels too sticky after 15 minutes of kneading with the butter, add a tiny sprinkle of flour (1/2 teaspoon at a time), but be careful not to add too much. The goal is a soft, slightly tacky dough.
Step 5: First Rise
Lightly grease a large bowl with a little oil. Transfer the dough to the bowl, turning it once to coat. Cover the bowl tightly with plastic wrap or a damp kitchen towel. Let it rise in a warm, draft-free place for 1.5 to 2 hours, or until doubled in size. This can also be done in the refrigerator overnight for a slower, more flavorful rise.
Step 6: Shaping Your Donuts
Gently punch down the risen dough to release the air. Turn it out onto a lightly floured surface. Roll the dough to about 1/2-inch thickness. Using a 3-inch round cutter, cut out as many circles as possible. Use a 1-inch cutter for the donut holes. Gather the scraps, gently knead them together, let them rest for 10 minutes, then re-roll and cut more donuts. You should get about 12-15 donuts and a similar number of holes.
Step 7: Second Rise
Place the cut donuts and holes on lightly floured parchment paper squares or baking sheets. Cover loosely with plastic wrap or a light kitchen towel. Let them rise again in a warm spot for 30-45 minutes, or until noticeably puffy and slightly jiggly when gently nudged. This second rise is crucial for light, airy donuts.

Step 8: Fry Time!
Pour 3-4 inches of neutral oil into a large heavy-bottomed pot or Dutch oven. Heat the oil over medium heat until it reaches 350°F (175°C) on a deep-fry thermometer. Carefully slide 2-3 donuts (or more holes) into the hot oil, ensuring not to overcrowd the pot. Fry for 1-2 minutes per side, until golden brown. Use a spider or slotted spoon to carefully flip them. Once golden on both sides, transfer the fried donuts to a wire rack set over a baking sheet lined with paper towels to drain excess oil. Continue frying in batches, ensuring the oil temperature stays consistent between 325-350°F (160-175°C).
Step 9: Glaze Away
While the donuts are cooling slightly (they should still be warm), prepare the glaze. In a shallow bowl, whisk together the sifted powdered sugar, milk, vanilla extract, vanilla bean paste (if using), and a pinch of salt until smooth. The glaze should be thick enough to coat a spoon but thin enough to drip easily. If it’s too thick, add more milk 1/2 teaspoon at a time; if too thin, add more sifted powdered sugar.
Step 10: The Grand Finale
Dip each warm donut into the glaze, turning to coat evenly. Let any excess drip off. Place the glazed donuts back on the wire rack to allow the glaze to set. Serve immediately for the best experience. They’re utterly irresistible when fresh.
Common Questions About Homemade Donuts
New to deep frying or working with yeast? Don’t worry, here are some common queries answered to help you achieve donut perfection.
How can I tell if my oil is the right temperature without a thermometer?
While a thermometer is highly recommended for best results, you can test the oil by dropping a small piece of dough into it. If it sizzles gently and turns golden in about 60 seconds, your oil is ready. If it browns too quickly, the oil is too hot; if it just sits there, it’s not hot enough. Adjust the heat accordingly.
Why are my donuts dense instead of fluffy?
Density usually comes from two main issues: not enough kneading or not enough rising time. Ensure your dough passes the windowpane test, indicating proper gluten development. Also, don’t rush the first or second rise; the dough needs to be truly puffy. Overworking the dough scraps can also lead to tough donuts.
Can I make these donuts ahead of time?
Yes! You can let the dough do its first rise in the refrigerator overnight (8-12 hours). Punch it down, shape the donuts, then let them come to room temperature and do their second rise for about 45-60 minutes before frying. Glazed donuts are best eaten the same day they’re made, but they’re still delicious the next day.
What’s the best way to store leftover donuts?
Store any leftover glazed donuts in an airtight container at room temperature for up to 2 days. The glaze will soften a bit over time, but they’ll still be tasty. Avoid refrigerating, as this can dry them out.
Can I bake these instead of frying?
While you *can* bake them, they won’t have the same light, airy texture as fried donuts. Frying creates that distinctive crisp exterior and soft interior. If you prefer a baked donut, I recommend finding a recipe specifically designed for baking, as the dough composition will be different.
Why This Milk Bread Dough Makes the Best Glazed Donuts
The difference is truly palpable. Traditional donut recipes often rely solely on butter and eggs for richness, which can sometimes lead to a slightly heavier texture. The tangzhong in this milk bread dough locks in moisture in a way that’s unique. It creates a dough that’s not just soft, but also incredibly resilient.
This resilience means the donuts hold their shape beautifully during frying and maintain their tender crumb even after cooling. You get a delicate chew without any rubberiness, and a richness that’s balanced, not overwhelming. It’s the kind of donut that makes you close your eyes and savor every single bite.
Flavor Twists and Variations
Once you master the classic vanilla bean glazed donuts, the world of flavor is your oyster! Here are a few ideas to get you started:
- Chocolate Glaze: Whisk 1/4 cup unsweetened cocoa powder into the powdered sugar for the glaze.
- Maple Bacon: Replace some of the milk in the glaze with maple syrup and top with crispy crumbled bacon.
- Lemon Poppy Seed: Add 1-2 tablespoons of fresh lemon zest and 1 teaspoon of poppy seeds to the dough. Make a lemon glaze by replacing some of the milk with fresh lemon juice.
- Cinnamon Sugar: Skip the glaze entirely and toss the warm donuts in a bowl of granulated sugar mixed with cinnamon.
- Filled Donuts: Before the second rise, you can pipe jams, creams, or custards into the center of the dough circles. Just be careful not to overfill!
Experimentation is part of the fun of baking. Don’t be afraid to try new things and make these donuts your own.
Quick Note on Deep Frying at Home
Deep frying can seem intimidating, but with a few safety precautions, it’s perfectly manageable. Always use a heavy-bottomed pot and never fill it more than halfway with oil. Keep a lid nearby to smother any potential oil fires (though hopefully, you won’t need it!). Always keep children and pets away from the hot oil.
Maintaining the right oil temperature is key. Too cold, and your donuts will be greasy; too hot, and they’ll burn on the outside before cooking through. A good deep-fry thermometer is your best friend here. Don’t overcrowd the pot, as this will drop the oil temperature too quickly.
Finally, dispose of used oil properly. Let it cool completely, then pour it back into its original container or an old milk carton and discard it with your regular trash. Never pour it down the drain.
With these tips, you’ll be frying up perfect glazed donuts like a pro in no time. Enjoy the process and the delicious reward!

Ultra-Soft Glazed Donuts with Milk Bread Dough
Experience bakery-quality glazed donuts at home with this tender milk bread dough recipe, topped with a delicate vanilla bean glaze.
📝 Ingredients
👩🍳 Instructions
- 1Prepare the Tangzhong: In a small saucepan, whisk 1/4 cup flour and 1/2 cup milk until smooth. Cook over medium-low heat, stirring constantly, until thickened to a paste (149°F/65°C). Transfer to a bowl, cover with plastic wrap pressed onto the surface, and cool completely.
- 2Activate Yeast: In a stand mixer bowl, combine warmed milk, a pinch of sugar, and yeast. Let sit 5-10 minutes until foamy.
- 3Make the Dough: Add remaining 1/4 cup sugar, egg, egg yolk, vanilla, cooled tangzhong, 3 1/2 cups flour, and 1 teaspoon salt to the yeast mixture. Mix on low with a dough hook until shaggy.
- 4Knead Dough: Increase speed to medium-low and knead for 5 minutes. Add softened butter one tablespoon at a time, kneading for 10-15 more minutes until the dough is smooth, elastic, and passes the windowpane test.
- 5First Rise: Lightly grease a large bowl, transfer dough, turn to coat. Cover tightly and let rise in a warm place for 1.5-2 hours, or until doubled. (Can refrigerate overnight for slow rise).
- 6Shape Donuts: Gently punch down dough on a lightly floured surface. Roll to 1/2-inch thickness. Cut out circles with a 3-inch cutter and donut holes with a 1-inch cutter. Place on floured parchment squares.
- 7Second Rise: Cover donuts loosely and let rise in a warm place for 30-45 minutes, until puffy.
- 8Fry Donuts: Heat 3-4 inches of oil in a heavy-bottomed pot to 350°F (175°C). Carefully place 2-3 donuts into the oil; fry 1-2 minutes per side until golden brown. Transfer to a wire rack lined with paper towels to drain. Maintain oil temperature.
- 9Make Glaze: While donuts cool slightly, whisk powdered sugar, 1/4 cup milk, 1/2 teaspoon vanilla extract, vanilla bean paste (if using), and a pinch of salt in a shallow bowl until smooth.
- 10Glaze Donuts: Dip warm donuts into the glaze, turning to coat. Place back on the wire rack to set. Serve immediately.
💡 Notes
Ensure your tangzhong is completely cool before adding to the dough. For the best texture, always use a thermometer for oil temperature. Glazed donuts are best enjoyed the day they are made but can be stored in an airtight container at room temperature for up to 2 days. Do not refrigerate.



