


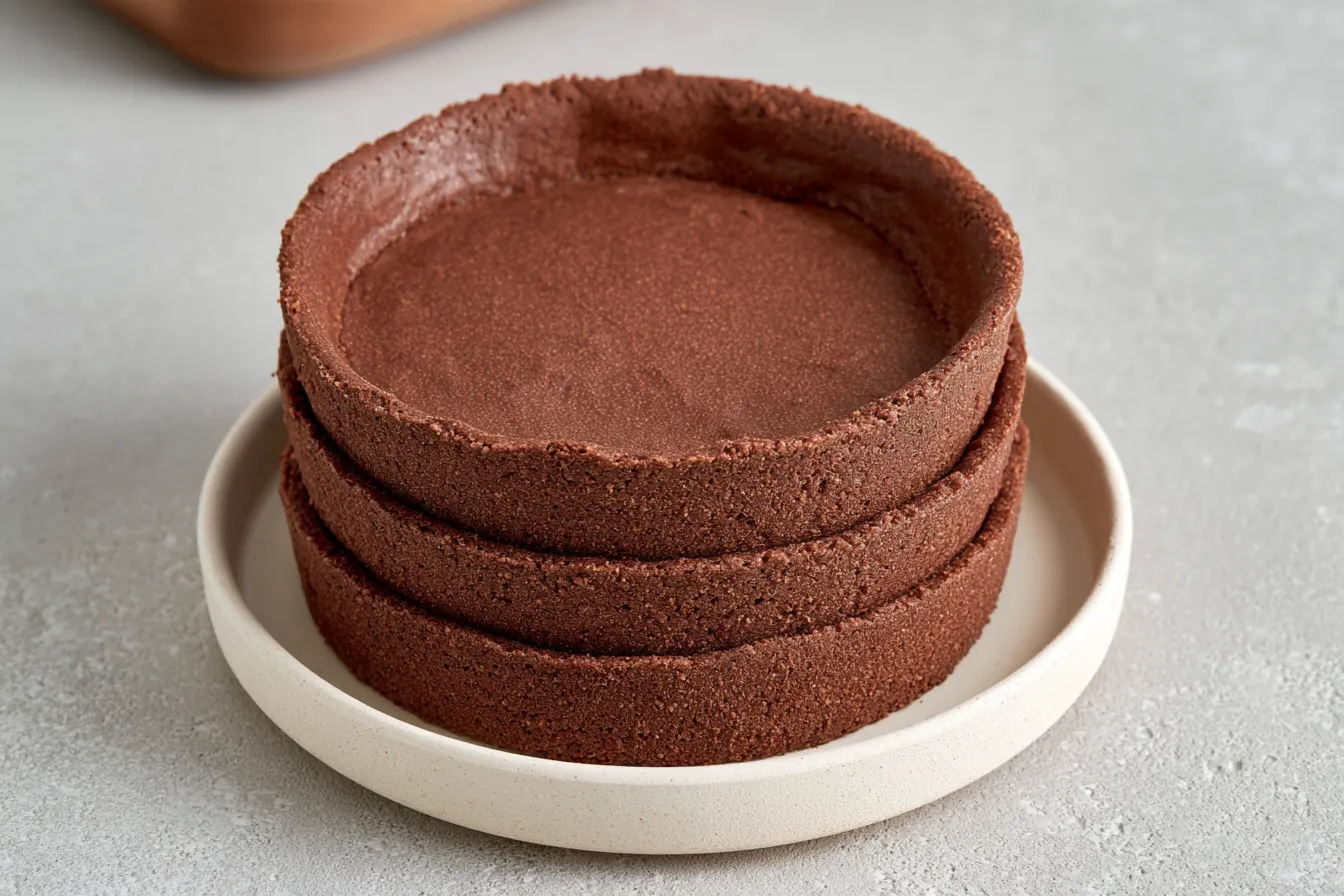
Have you ever marveled at those impossibly elegant, perfectly crisp tart shells in French patisseries, wondering how on earth they achieve such a delicate, melt-in-your-mouth texture? Well, let me tell you, the secret often lies in one glorious pastry: the chocolate pâte sablée tart crust. It’s not just a vehicle for your filling; it’s an integral part of the dessert, a rich, crumbly canvas that elevates everything it holds.

Cracking the Code: What Makes Chocolate Pâte Sablée So Special?
So, what’s the magic behind this particular pastry? Unlike traditional pie crusts that rely on flaky layers, pâte sablée is all about that delicate, sandy texture. This is achieved by working the butter into the flour until it resembles fine breadcrumbs before adding any liquid. This method minimizes gluten development, resulting in a tender, crumbly finish rather than a chewy one. The addition of cocoa powder isn’t just for color; it deepens the flavor profile, making it less sweet and more robust, which is perfect for balancing out rich fillings like custards, caramels, or fresh fruit. It’s a pastry that feels incredibly luxurious and yet, with a few simple techniques, is entirely achievable in your home kitchen. You’ll be amazed at how a relatively small effort yields such a professional-looking and tasting result.The Art of the “Sabler” Method
The term “sabler” in French translates to “to sand,” and that’s precisely what you’re doing with the butter and flour. Instead of cutting in cold butter in larger chunks, here we’re aiming for a very fine, uniform mixture. This can be done by hand, rubbing the butter into the flour between your fingertips, or more efficiently with a food processor. The goal is to coat every tiny particle of flour with butter, preventing extensive gluten formation and setting the stage for that signature crumbly texture. Don’t skip this step; it’s the foundation of a perfect pâte sablée.Gathering Your Pantry Essentials: What You’ll Need
Creating this exquisite chocolate pâte sablée tart crust doesn’t require an extensive shopping list. In fact, you likely have most of these ingredients on hand already. Quality does matter here, though, especially for your butter and cocoa, as they’re the stars of the show.For the Decadent Chocolate Pastry
Unsalted Butter, Cold and Cubed: This is crucial. Cold butter helps create that sandy texture. Using unsalted gives you control over the overall saltiness. All-Purpose Flour: Standard plain flour works perfectly. No need for anything fancy here. Powdered Sugar (Confectioners’ Sugar): This contributes to the tender texture and prevents the crust from becoming too hard. Granulated sugar can make it gritty. Unsweetened Cocoa Powder (Dutch-processed preferred): Dutch-processed cocoa gives a darker color and a smoother, less acidic chocolate flavor. Egg Yolk, Large: The yolk acts as a binder, adding richness and helping the dough come together without making it tough. Pinch of Salt: Even in a sweet crust, salt is essential to balance the flavors and enhance the chocolate. Vanilla Extract (optional, but recommended): A touch of vanilla always complements chocolate beautifully.
Crafting Your Chocolate Tart Shell: A Step-by-Step Guide
Don’t be intimidated by the fancy French name! Making chocolate pâte sablée is quite straightforward. Follow these steps, and you’ll have a gorgeous tart crust ready for any filling.Step 1: Preparing Your Dry Ingredients
In a large bowl, whisk together the all-purpose flour, powdered sugar, unsweetened cocoa powder, and salt. Make sure there are no lumps, especially in the cocoa powder, as this can be tricky to break up later. A good whisk ensures everything is evenly distributed.Step 2: Incorporating the Cold Butter
Add the cold, cubed unsalted butter to the dry ingredients. Using your fingertips or a pastry blender, quickly rub the butter into the flour mixture until it resembles coarse sand with a few pea-sized pieces remaining. If using a food processor, pulse the ingredients until the mixture looks like fine crumbs. The key is to work quickly so the butter doesn’t get too warm.Step 3: Bringing the Dough Together
In a small separate bowl, lightly whisk the egg yolk with the vanilla extract (if using). Create a well in the center of your sandy flour mixture and pour in the egg yolk. Gently mix with your hands or a spatula, bringing the dough together until it just forms a cohesive ball. Be careful not to overwork the dough; this is vital for tenderness. It might seem dry at first, but it will come together.Step 4: Chilling the Dough
Flatten the dough into a disc, wrap it tightly in plastic wrap, and refrigerate for at least 30 minutes, or up to 2 days. This chilling period is non-negotiable. It allows the butter to firm up, prevents shrinkage during baking, and makes the dough much easier to roll out.Step 5: Rolling and Lining Your Tart Pan
On a lightly floured surface (or between two sheets of parchment paper for easier handling), roll out the chilled dough to an even thickness of about 1/8 to 1/4 inch (3-5mm). Carefully transfer the dough to a 9-inch tart pan with a removable bottom. Gently press the dough into the bottom and up the sides of the pan, ensuring it’s snug against the fluted edges. Trim any excess dough from the edges using a sharp knife or by rolling your pin over the top of the pan. Patch any small cracks or tears with leftover dough.Step 6: The Second Chill
Once the tart shell is formed in the pan, return it to the refrigerator for another 20-30 minutes. This second chill is another critical step to prevent the crust from slumping down the sides during baking. Don’t skip it!
Step 7: Blind Baking for Perfection
Preheat your oven to 375°F (190°C). Line the chilled tart shell with parchment paper or foil, then fill it with pie weights, dried beans, or uncooked rice. Make sure the weights extend up the sides of the crust to support them. Bake for 15 minutes. Note: Blind baking ensures a crisp crust that won’t get soggy once filled. It also helps set the shape of the tart shell.Step 8: Finishing the Bake
Carefully remove the parchment paper and pie weights. Return the tart shell to the oven and bake for another 8-12 minutes, or until the crust looks dry, matte, and firm. Keep a close eye on it to prevent burning, especially with the dark cocoa. Let it cool completely in the pan on a wire rack before filling.Troubleshooting Your Tart Crust: Common Questions Answered
Even experienced bakers have questions. Here are some common queries about chocolate pâte sablée and how to tackle them.Can I make chocolate pâte sablée dough ahead of time?
Absolutely! The dough is very forgiving and can be made up to 2-3 days in advance and stored tightly wrapped in the refrigerator. You can also freeze the dough for up to 3 months. Just be sure to thaw it in the fridge overnight before rolling.Why did my tart crust shrink in the oven?
Shrinkage is usually due to insufficient chilling or overworking the dough. When you overwork dough, gluten develops, causing it to contract when exposed to heat. Ensure you chill the dough thoroughly twice (before rolling and after lining the pan) and handle it as little as possible.My crust is crumbly and hard to roll. What went wrong?
This often means the dough is too cold or hasn’t been allowed to soften slightly before rolling. Let it sit at room temperature for 10-15 minutes if it’s too stiff. Alternatively, it might be a bit too dry; next time, try adding a tiny splash of ice water (1/2 teaspoon at a time) if it’s still too crumbly after the egg yolk.Can I make this crust gluten-free?
Yes, you can! Substitute the all-purpose flour with a good quality 1:1 gluten-free baking flour blend that contains xanthan gum. The texture might be slightly different, but it will still be delicious.What kind of fillings work best with a chocolate pâte sablée crust?
This crust is incredibly versatile! It pairs beautifully with fruit tarts (especially berries or cherries), chocolate ganache, pastry cream, salted caramel, or even a rich cheesecake filling. The slightly bitter notes of the chocolate complement sweet, creamy, and tangy flavors perfectly.Flavor Twists and Creative Variations
While this classic chocolate pâte sablée tart crust is perfect as is, there’s always room for a little creativity! Here are a few ideas to make it your own: Espresso Boost: Add 1 teaspoon of instant espresso powder to the dry ingredients along with the cocoa. It won’t make it taste like coffee, but it will deepen and intensify the chocolate flavor beautifully. Citrus Zest: For a brighter note, add 1-2 teaspoons of finely grated orange or lemon zest to the dry ingredients. This is especially lovely if you’re pairing the tart with a citrus curd or berry filling. Nutty Depth: Replace 1/4 cup of the all-purpose flour with finely ground almond flour or hazelnut flour. This adds a subtle nutty flavor and an even more delicate crumb. Just be careful not to over-process if using a food processor, as nut flours can release their oils quickly. Spice It Up: A pinch of cayenne pepper or chili powder can add a surprising and delightful kick to the chocolate. Start with 1/4 teaspoon and adjust to your taste. This works wonderfully with dark chocolate ganache fillings. Mini Tartlets: Instead of a large tart, divide the dough to make individual mini tart shells. Adjust baking times accordingly – they’ll bake faster. These are fantastic for parties or individual desserts.Storage and Make-Ahead Tips
One of the great things about this chocolate pâte sablée tart crust is its flexibility. You can prepare it in stages, which is a huge help when planning for a special dessert. Dough: As mentioned, the raw dough can be refrigerated for up to 2-3 days or frozen for up to 3 months. Thaw frozen dough in the refrigerator overnight before use. Blind-Baked Shell: A fully blind-baked and cooled tart shell can be stored at room temperature, loosely covered, for 1-2 days. If you need to store it longer, wrap it tightly and freeze for up to 2 weeks. Thaw at room temperature before filling. Filled Tart: Once filled, the storage depends entirely on your filling. A fruit tart might last a day or two in the fridge, while a ganache tart could last 3-4 days. Always refer to the specific filling’s storage instructions. Generally, tarts are best enjoyed within 1-2 days of being filled for optimal freshness and texture. This chocolate pâte sablée tart crust is more than just a recipe; it’s a foundation for countless dessert possibilities. Master this, and you’ll unlock a whole new level of home baking, creating patisserie-quality tarts that will impress everyone who tries them. Happy baking!
Chocolate Pâte Sablée Tart Crust
A rich, tender, and crumbly chocolate tart crust, perfect for elevating any dessert filling with its sophisticated, melt-in-your-mouth texture.
📝 Ingredients
👩🍳 Instructions
- 1In a large bowl, whisk together the flour, powdered sugar, cocoa powder, and salt until well combined and lump-free.
- 2Add the cold, cubed butter to the dry ingredients. Using your fingertips or a pastry blender, quickly work the butter into the flour mixture until it resembles coarse sand with a few pea-sized pieces of butter remaining. Alternatively, pulse in a food processor until fine crumbs form.
- 3In a small bowl, lightly whisk the egg yolk with the vanilla extract (if using). Create a well in the center of the flour mixture and pour in the egg yolk. Mix gently with your hands or a spatula until the dough just comes together into a cohesive ball. Do not overwork the dough.
- 4Flatten the dough into a disc, wrap it tightly in plastic wrap, and refrigerate for at least 30 minutes, or up to 2 days.
- 5Preheat your oven to 375°F (190°C). On a lightly floured surface or between two sheets of parchment paper, roll out the chilled dough to an even thickness of about 1/8 to 1/4 inch (3-5mm).
- 6Carefully transfer the rolled dough to a 9-inch tart pan with a removable bottom. Gently press the dough into the bottom and up the sides of the pan, ensuring it’s snug against the fluted edges. Trim any excess dough from the edges.
- 7Return the tart pan with the dough to the refrigerator for another 20-30 minutes.
- 8Line the chilled tart shell with parchment paper or foil, then fill with pie weights, dried beans, or uncooked rice, making sure they extend up the sides to support the crust. Bake for 15 minutes.
- 9Carefully remove the parchment paper and pie weights. Return the tart shell to the oven and bake for another 8-12 minutes, or until the crust looks dry, matte, and firm. Watch carefully to prevent burning.
- 10Let the chocolate pâte sablée tart crust cool completely in the pan on a wire rack before filling and serving.
💡 Notes
For best results, ensure all butter is very cold. Dutch-processed cocoa powder yields a darker color and smoother chocolate flavor. This crust can be made ahead and stored in the fridge for up to 2 days or frozen for longer. It pairs wonderfully with fruit fillings, ganache, or pastry cream.



