


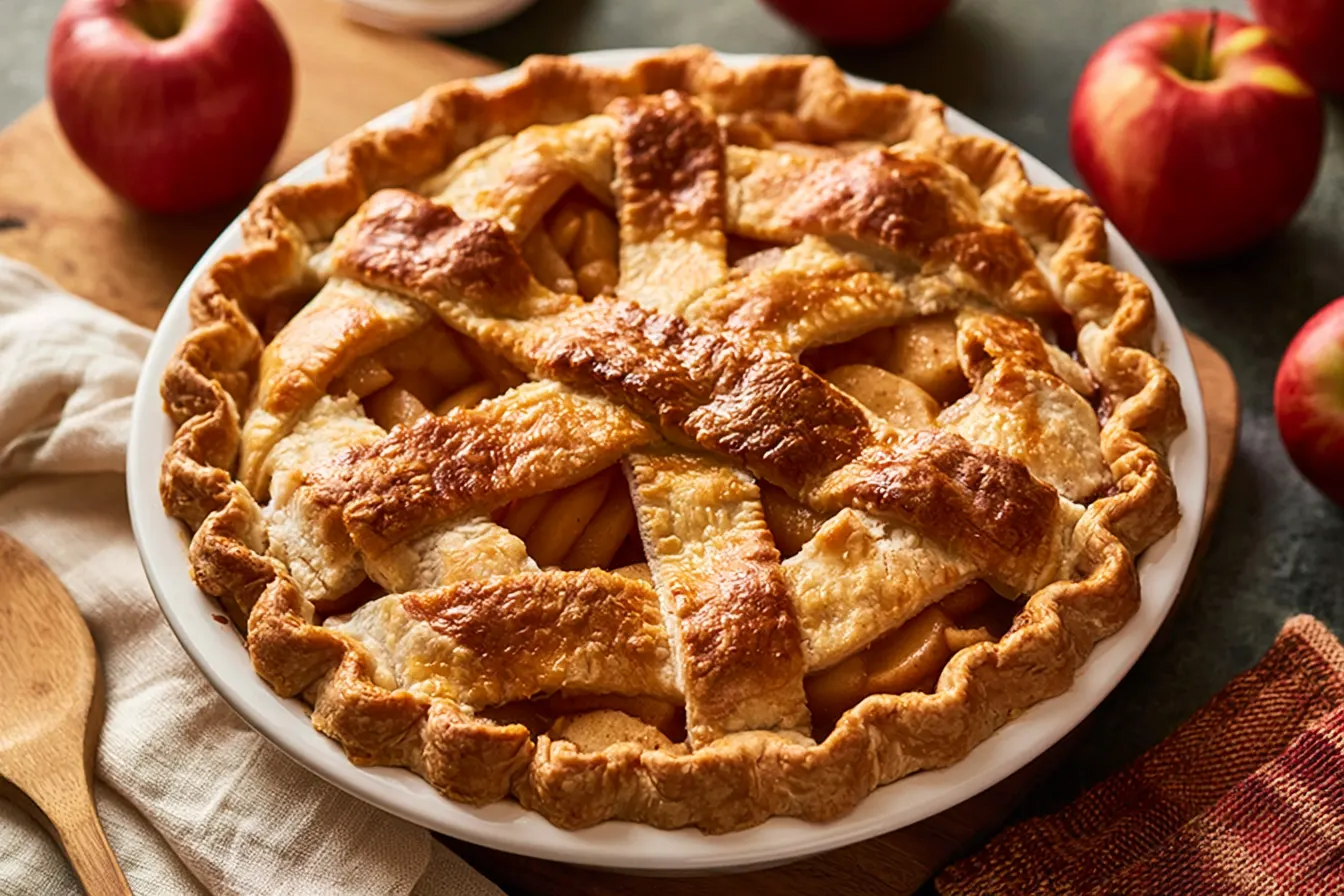
There’s a smell, a truly unmistakable aroma, that takes me straight back to my grandmother’s kitchen every single autumn. It’s the scent of cinnamon, nutmeg, and warm, cooked apples, mingling with melting butter and toasted flour. That, my friends, is the smell of a truly classic apple pie emerging from the oven. For me, Thanksgiving just isn’t complete without one, golden and bubbling, cooling on the counter, filling the whole house with its irresistible promise.

Mastering the Flaky Crust: The Foundation of a Great Apple Pie
Let’s be honest, the crust makes or breaks an apple pie. A truly exceptional pie begins and ends with a spectacular pastry. Forget those pre-made, cardboard-like discs; you deserve better, and making your own isn’t nearly as intimidating as it sounds. The secret lies in cold butter, minimal handling, and a touch of patience. When you cut that butter into the flour, you’re creating tiny pockets of fat that, when they melt in the oven, release steam and push apart the layers of dough, resulting in that coveted flakiness.Ingredients for the Perfect Pie Dough
- 2 ½ cups all-purpose flour, plus extra for dusting
- 1 teaspoon salt
- 1 cup (2 sticks) unsalted butter, very cold and cut into ½-inch cubes
- ½ cup ice water, plus more if needed
- 1 tablespoon granulated sugar (optional, for a slightly sweeter crust)
Crafting the Irresistible Apple Filling
Now for the star of the show: the apples! The choice of apple can dramatically impact your pie’s flavor and texture. For a classic apple pie, you want a mix of apples that hold their shape well when baked and offer a balance of sweet and tart. My go-to combination usually involves Granny Smiths for their tartness and firm texture, paired with a sweeter, slightly softer apple like Honeycrisp, Fuji, or Braeburn. This blend ensures a complex flavor profile and a filling that’s not mushy.What You’ll Need for the Spiced Apple Heart
- 6-8 medium apples (about 3 pounds), a mix of Granny Smith and Honeycrisp/Fuji
- ½ cup granulated sugar (adjust based on apple sweetness)
- ¼ cup packed light brown sugar
- 2 tablespoons all-purpose flour or cornstarch (cornstarch if you prefer a glossy finish)
- 1 teaspoon ground cinnamon
- ½ teaspoon ground nutmeg
- ¼ teaspoon ground cloves or allspice (optional, for deeper spice)
- 2 tablespoons fresh lemon juice
- 2 tablespoons unsalted butter, cut into small pieces
- 1 egg, whisked with 1 tablespoon water (for egg wash)
- 1 tablespoon coarse sugar (for sprinkling)

Assembling Your Masterpiece: The Lattice Crust
This is where the magic truly comes alive. Laying out that bottom crust, mounding it high with fragrant apples, and then weaving the lattice top is incredibly satisfying. It’s a bit like culinary origami, and the result is not just beautiful but also functional, allowing steam to escape and preventing a soggy top crust.Step-by-Step Pie Construction
Roll Out the Bottom Crust
On a lightly floured surface, roll out one disc of pie dough into a 12-inch circle. Carefully transfer it to a 9-inch pie plate, letting the excess dough hang over the edges. Don’t stretch the dough; just gently ease it in. Trim the edges to about a 1-inch overhang.
Fill ‘Er Up
Pour your apple filling into the prepared pie shell. Mound it high in the center; the apples will cook down significantly. Dot the top of the apples with those small pieces of butter. This adds richness and helps create that wonderful, bubbling sauce.
Weave the Lattice Top
Roll out the second disc of dough into another 12-inch circle. Using a sharp knife or a pastry wheel, cut the dough into 1-inch wide strips. Lay 5-6 strips evenly across the top of the pie, parallel to each other, leaving about an inch between each. Fold back every other strip about halfway. Take a new strip of dough and lay it perpendicular over the unfolded strips, then unfold the folded strips over the new one. Now, fold back the *other* set of parallel strips and repeat the process. Continue this weaving pattern until the entire pie is covered in a beautiful lattice. Tip: If your dough strips become too warm and soft, pop them in the freezer for 5-10 minutes before weaving. Cold dough is much easier to handle!
Seal and Crimp
Once your lattice is complete, trim any excess strips, leaving about a 1-inch overhang. Fold the overhang of the top crust under the overhang of the bottom crust. Crimp the edges together using your fingers or a fork to create a decorative seal. This not only looks pretty but also helps prevent the filling from bubbling out too much.
Egg Wash and Sugar Sparkle
Brush the entire lattice crust with the egg wash (whisked egg and water). This will give your pie that gorgeous golden-brown sheen. Sprinkle generously with coarse sugar for an extra touch of sweetness and crunch.

Baking to Golden Perfection
Getting the bake just right is critical for that flaky crust and tender, bubbly filling. You want the crust to be deeply golden brown, not just lightly toasted, and the filling to be visibly bubbling through the lattice openings. This bubbling indicates that the starches have thickened properly, and the apples are tender.Baking Instructions
Preheat your oven to 425°F (220°C). Place the pie on a baking sheet (this catches any drips and makes for easier cleanup). Bake for 15-20 minutes at 425°F, then reduce the oven temperature to 375°F (190°C) and continue baking for another 40-50 minutes, or until the crust is deeply golden brown and the filling is bubbling enthusiastically. If the edges of your crust start to brown too quickly, you can loosely cover them with aluminum foil.
Once baked, let the pie cool on a wire rack for at least 2-3 hours before slicing. This cooling time is absolutely essential! It allows the filling to set properly, preventing a runny slice. I know, I know, it’s hard to wait, especially with that aroma wafting through the house, but trust me, it’s worth every minute.
Frequently Asked Questions About Apple Pie
Can I make the pie dough ahead of time?
Absolutely! You can make the pie dough up to 2-3 days in advance. Wrap the discs tightly in plastic wrap and store them in the refrigerator. Let them sit at room temperature for about 15-20 minutes before rolling to make them more pliable.
What’s the best way to prevent a soggy bottom crust?
Several factors contribute to a soggy bottom. First, ensure your butter is very cold when making the crust. Second, bake the pie at a higher temperature initially to shock the bottom crust and help it crisp up. Third, ensure your filling isn’t too watery; the flour or cornstarch helps absorb excess moisture. Lastly, don’t forget to cool the pie completely before slicing!
Which apples are best for apple pie?
A mix is always best for a balanced flavor and texture. My top picks are Granny Smith for tartness and firmness, combined with Honeycrisp, Fuji, or Braeburn for sweetness and a slightly softer bite. Avoid Red Delicious or McIntosh, as they tend to become too mushy.
How do I store leftover apple pie?
Leftover apple pie can be stored at room temperature, loosely covered, for up to 2 days. If you still have some after that, transfer it to the refrigerator for up to 2-3 more days. For longer storage, see the freezing tips below.
Can I freeze apple pie?
Yes, you can! You can freeze an unbaked pie (wrapped tightly) for up to 3 months. When ready to bake, place it directly from the freezer into a preheated oven (you may need to add 15-20 minutes to the baking time). Alternatively, you can freeze a baked and cooled pie. Wrap it tightly in plastic wrap and then foil. Thaw overnight in the refrigerator and reheat gently in a 300°F (150°C) oven until warmed through.
Serving Suggestions and Pairing Ideas
A slice of warm classic apple pie is truly perfect on its own, but there are a few additions that elevate it to an even higher level of indulgence. A scoop of good quality vanilla bean ice cream is, of course, a timeless pairing. The cold, creamy ice cream melting into the warm, spiced apples is pure heaven. Another fantastic option is a dollop of freshly whipped cream, perhaps lightly sweetened with a touch of maple syrup or a dash of bourbon. And if you’re feeling particularly fancy, a drizzle of homemade caramel sauce over the top adds a layer of rich, buttery sweetness that complements the apples beautifully. A cup of strong coffee or a spiced chai tea is also wonderful alongside a slice.Why This Apple Pie Reigns Supreme
What makes this particular apple pie so special? It’s the balance. The filling isn’t cloyingly sweet; the tartness of the Granny Smiths shines through, brightened by the lemon juice. The spice blend is warm and comforting, but never overwhelming. And the crust… oh, the crust! It’s rich and buttery, with distinct layers that practically explode in your mouth. It provides the perfect counterpoint to the soft, tender apples. Many recipes either focus too much on a fancy crust or a complex filling, but this recipe aims for harmony between the two. Each component supports the other, creating a cohesive, delicious experience. It’s the kind of pie that earns murmurs of appreciation around the holiday table, the kind that disappears quickly, leaving behind just a few crumbs and a lot of happy memories. It’s truly the ultimate Thanksgiving dessert, but honestly, it’s perfect any time of year you crave a taste of comforting nostalgia.
Classic Lattice Crust Apple Pie
The ultimate classic apple pie featuring a buttery, flaky homemade crust and a perfectly spiced, sweet apple filling – ideal for Thanksgiving!
📝 Ingredients
👩🍳 Instructions
- 11. Prepare the Pie Dough: In a large bowl or food processor, combine flour, salt, and optional sugar. Add the cold butter cubes and cut into the flour until the mixture resembles coarse crumbs with some pea-sized butter pieces remaining. Gradually add ice water, 1 tablespoon at a time, mixing just until the dough comes together. Do not overmix. Divide the dough into two discs, flatten slightly, wrap tightly in plastic wrap, and refrigerate for at least 30 minutes (or up to 2 days).
- 22. Prepare the Apple Filling: Peel, core, and slice apples into ¼-inch thick pieces. In a large bowl, combine the apple slices with granulated sugar, brown sugar, flour (or cornstarch), cinnamon, nutmeg, cloves (if using), and lemon juice. Toss gently until the apples are evenly coated. Set aside.
- 33. Assemble the Pie: On a lightly floured surface, roll out one disc of chilled pie dough into a 12-inch circle. Carefully transfer it to a 9-inch pie plate. Trim the edges, leaving about a 1-inch overhang. Pour the apple filling into the pie shell, mounding it slightly in the center. Dot the top of the apples with the small pieces of butter.
- 44. Create the Lattice Top: Roll out the second disc of dough into another 12-inch circle. Cut the dough into 1-inch wide strips. Lay 5-6 strips parallel across the pie, about 1 inch apart. Fold back every other strip. Place a new strip perpendicularly over the unfolded strips, then unfold the folded strips over the new one. Repeat this weaving pattern until the lattice is complete. Trim excess strips, leaving a 1-inch overhang.
- 55. Finish the Crust: Fold the overhang of the top crust under the overhang of the bottom crust. Crimp the edges together using your fingers or a fork to seal. Brush the entire lattice crust with the egg wash and sprinkle generously with coarse sugar.
- 66. Bake the Pie: Preheat oven to 425°F (220°C). Place the pie on a baking sheet. Bake for 15-20 minutes at 425°F. Reduce oven temperature to 375°F (190°C) and continue baking for another 40-50 minutes, or until the crust is deeply golden brown and the filling is visibly bubbling. If crust edges brown too quickly, loosely tent with foil.
- 77. Cool and Serve: Remove pie from oven and let cool on a wire rack for at least 2-3 hours before slicing and serving. This allows the filling to set properly.
💡 Notes
For best results, use a mix of firm, tart, and sweet apples. Ensure butter is very cold for a flaky crust. Letting the pie cool completely before slicing is crucial for a set filling. Leftovers can be stored at room temperature for 2 days, or refrigerated for up to 5 days.



