


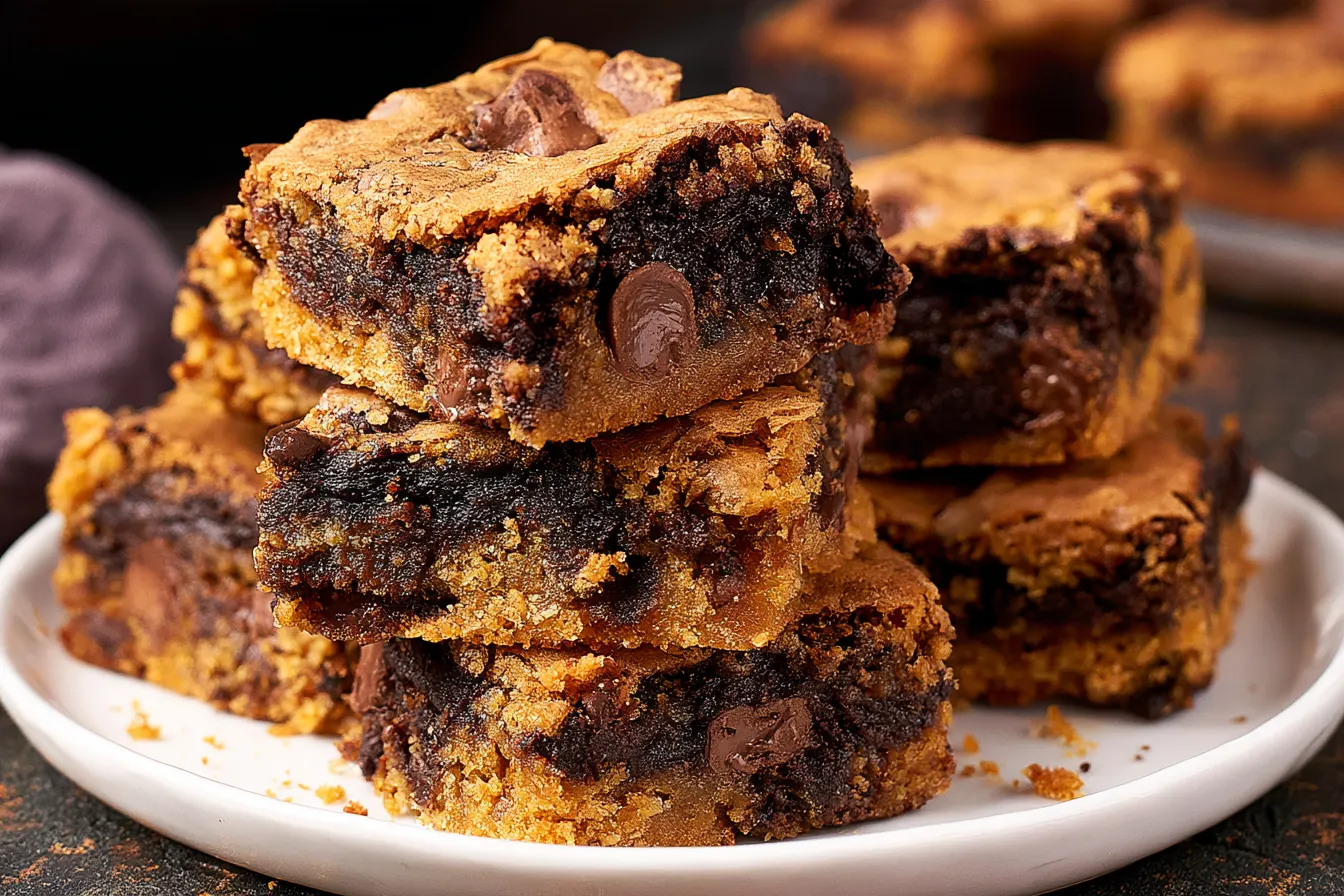
Have you ever stared at a dessert menu, torn between the rich, fudgy embrace of a brownie and the chewy, chocolate-studded comfort of a cookie? You’re not alone. That agonizing moment of indecision is precisely why the Brookie Bar exists, and trust me, it’s a culinary stroke of genius. This isn’t just two desserts smashed together; it’s a harmonious marriage of textures and flavors that will redefine your dessert experience.
- Crafting the Perfect Swirl: What Makes These Brookies Sing
- Gathering Your Goodies: Ingredients for Irresistible Brookies
- Whipping Up the Magic: Step-by-Step Brookie Bar Assembly
- All Your Brookie Bar Burning Questions, Answered!
- Why These Brookies Are a Cut Above
- More Sweet Ideas for Your Brookie Bars
- Common Pitfalls to Sidestep for Brookie Success
- Storage & Keeping Your Brookies Fresh

Crafting the Perfect Swirl: What Makes These Brookies Sing
So, what elevates a good Brookie Bar to a truly unforgettable one? It’s all in the balance and the technique. We’re not just layering two separate batters. The magic happens when you get that beautiful swirl, allowing the distinct personalities of the brownie and cookie to shine, yet meld together in each glorious mouthful. This recipe focuses on creating both a deeply fudgy brownie layer and a perfectly chewy, buttery chocolate chip cookie dough that holds its own.The Brownie Base: Fudgy Perfection
For the brownie component, we’re aiming for fudgy, not cakey. This means a higher fat-to-flour ratio, melted butter, and a good amount of quality cocoa powder, plus a touch of espresso powder to deepen that chocolate flavor without making it taste like coffee. It’s a foundational layer that needs to be robust enough to support the cookie dough but still melt-in-your-mouth tender. Getting the right consistency for this brownie batter is key – it should be thick but spreadable.The Cookie Top: Chewy & Golden
The chocolate chip cookie dough needs to be sturdy enough to be dolloped and swirled without completely sinking into the brownie. We’re using a classic brown sugar-heavy recipe here, which lends itself to that signature chewiness and a lovely caramel note. Don’t skimp on the chocolate chips! A mix of milk and semi-sweet creates a more complex flavor profile. When baking, the cookie layer gets wonderfully golden brown around the edges, providing a delightful textural contrast to the soft brownie.Gathering Your Goodies: Ingredients for Irresistible Brookies
Before we dive into the delicious details, let’s make sure our pantry is stocked. Using quality ingredients truly makes a difference in the final product of these Brookie Bars. Fresh butter, good vanilla extract, and your favorite chocolate chips will pay dividends in flavor.
For the Fudgy Brownie Layer:
- ½ cup (113g) unsalted butter, melted
- 1 cup (200g) granulated sugar
- 2 large eggs
- 1 teaspoon vanilla extract
- ½ cup (45g) unsweetened cocoa powder (Dutch-processed for darker brownies)
- ½ cup (60g) all-purpose flour
- ¼ teaspoon baking powder
- ¼ teaspoon salt
- 1 teaspoon instant espresso powder (optional, but highly recommended for depth)
- ½ cup (85g) chocolate chips or chopped chocolate (semi-sweet or dark)
For the Chewy Chocolate Chip Cookie Layer:
- ½ cup (113g) unsalted butter, softened
- ½ cup (100g) granulated sugar
- ½ cup (110g) packed light brown sugar
- 1 large egg
- 1 teaspoon vanilla extract
- 1½ cups (180g) all-purpose flour
- ½ teaspoon baking soda
- ¼ teaspoon salt
- 1 cup (170g) chocolate chips (a mix of milk and semi-sweet is divine)
Whipping Up the Magic: Step-by-Step Brookie Bar Assembly
Creating these Brookie Bars is surprisingly straightforward, even though you’re essentially making two different batters. The key is to prepare each component separately before bringing them together for that show-stopping swirl. Don’t worry about perfection; the beauty is in the rustic, marbled effect!Step 1: Prep Your Pan and Preheat
Preheat your oven to 350°F (175°C). Lightly grease a 9×13 inch baking pan with butter or cooking spray. Line it with parchment paper, leaving an overhang on two sides to easily lift the bars out later. This makes cleanup and slicing a breeze. Set aside.
Step 2: Start the Brownie Batter
In a medium microwave-safe bowl, melt the ½ cup unsalted butter. Pour the melted butter into a large mixing bowl. Add the granulated sugar and whisk until well combined. Stir in the eggs one at a time, mixing well after each addition, then add the vanilla extract. The mixture should be glossy.
Tip: Don’t overmix the eggs. Just combine until they’re incorporated to prevent too much air, which can lead to a more cake-like brownie.
Step 3: Combine Dry Brownie Ingredients
In a separate small bowl, whisk together the cocoa powder, all-purpose flour, baking powder, salt, and instant espresso powder (if using). Gradually add the dry ingredients to the wet ingredients, mixing with a spatula or wooden spoon until just combined. Be careful not to overmix, as this can develop the gluten and make your brownies tough. Fold in the ½ cup chocolate chips for extra chocolatey goodness. Set this glorious brownie batter aside.
Step 4: Prepare the Cookie Dough
In a large mixing bowl, using an electric mixer, cream together the softened ½ cup unsalted butter, granulated sugar, and light brown sugar on medium speed until light and fluffy, about 2-3 minutes. Beat in the egg and vanilla extract until well combined.
Step 5: Add Dry Cookie Ingredients
In a separate small bowl, whisk together the 1½ cups all-purpose flour, baking soda, and salt. Gradually add the dry ingredients to the wet ingredients in the large mixing bowl, mixing on low speed until just combined. Fold in the 1 cup chocolate chips with a spatula. This cookie dough will be thick.

Step 6: Assemble Your Brookie Masterpiece
Spoon about two-thirds of the brownie batter evenly into the prepared 9×13 inch baking pan. It might be thick, so use an offset spatula or the back of a spoon to gently spread it. Next, dollop spoonfuls of the cookie dough over the brownie layer. Don’t try to spread it perfectly – the beauty is in the unevenness. Then, dollop the remaining brownie batter into the gaps between the cookie dough. Take a butter knife or a skewer and gently swirl the two batters together to create a beautiful marbled effect. Don’t overdo it, or the colors will blend too much. You want distinct swirls.
Step 7: Bake to Perfection
Place the pan in the preheated oven and bake for 30-35 minutes, or until the edges are set and a toothpick inserted into the brownie portion comes out with moist crumbs, but not wet batter. The cookie layer should be golden brown. Baking time can vary, so keep an eye on it. Let the Brookies cool completely in the pan on a wire rack before attempting to lift them out by the parchment paper. This is crucial for clean cuts!
Note: Cooling completely ensures the Brookies set properly, preventing them from falling apart when you cut them. Patience is a virtue here!
Step 8: Slice and Serve
Once completely cool, lift the Brookies out of the pan using the parchment paper overhangs. Transfer to a cutting board and slice into squares or bars of your desired size. These Brookies are fantastic on their own, but a scoop of vanilla bean ice cream or a drizzle of warm caramel sauce takes them over the top!
All Your Brookie Bar Burning Questions, Answered!
You’ve got questions about these delightful Brookies, and I’ve got answers. Let’s tackle some common queries to ensure your baking success.Can I make these Brookies ahead of time?
Absolutely! Brookies are fantastic for making ahead. They actually get even fudgier and chewier the next day as the flavors meld. Store them in an airtight container at room temperature for up to 3-4 days. You can also refrigerate them for up to a week, but let them come to room temperature or warm them slightly before serving for the best texture.
What’s the best way to cut Brookie Bars cleanly?
The secret to clean cuts is patience and a sharp knife. Ensure the Brookies are completely cooled – this is non-negotiable! For the cleanest cuts, you can even chill the bars in the refrigerator for about 30 minutes before slicing. Use a large, sharp chef’s knife, wiping the blade clean with a damp cloth between each cut to prevent sticking and smudging.
Can I freeze Brookies?
Yes, Brookies freeze beautifully! Once completely cooled, slice them into individual bars. Wrap each bar tightly in plastic wrap, then place them in a freezer-safe bag or container. They’ll keep in the freezer for up to 3 months. Thaw at room temperature or gently warm in the microwave for a quick treat.
Can I use a different size pan?
While a 9×13 inch pan is ideal for the proportions in this recipe, you could use an 8×8 or 9×9 inch pan for thicker bars. However, if you do, you’ll need to increase the baking time significantly (likely 10-15 minutes more) and keep a close eye on doneness to avoid overbaking. The bars will be much thicker, so the center will take longer to cook through.
My brownie layer is too dry/cakey. What happened?
A dry or cakey brownie layer often comes from overbaking or overmixing the batter. Ensure you’re pulling the Brookies from the oven when a toothpick comes out with moist crumbs, not completely clean. Also, when combining the dry and wet ingredients for the brownie, mix only until just combined – overmixing develops gluten, leading to a tougher, more cake-like texture.
Why These Brookies Are a Cut Above
You might have seen other Brookie recipes out there, but this one brings a certain je ne sais quoi to the table. The specific ratio of brownie to cookie dough, along with the precise baking times, ensures a harmonious blend rather than two distinct layers competing for attention. We’re chasing that perfect textural experience: the fudgy melt of the brownie against the tender chew of the cookie. It’s a balance of rich chocolate and buttery sweetness that makes each bite utterly addictive. Plus, the hint of espresso powder in the brownie really amplifies the chocolate, making it sing without being overtly coffee-flavored. It’s a little secret weapon for all chocolate-based treats!More Sweet Ideas for Your Brookie Bars
While these Brookies are incredible on their own, there are so many ways to elevate them or simply enjoy them in new ways. Think of them as a versatile canvas for dessert creativity.Serving Suggestions:
- A la Mode: A scoop of vanilla bean, coffee, or even salted caramel ice cream on top of a warm Brookie is pure bliss.
- Sauce It Up: Drizzle with warm chocolate fudge, caramel sauce, or a raspberry coulis for an extra touch of decadence.
- Whipped Cream Dream: A dollop of freshly whipped cream can lighten the richness beautifully.
- With a Drink: Pair a Brookie with a tall glass of cold milk, a hot cup of coffee, or even a shot of espresso for a delightful after-dinner treat.
Flavor Twists & Variations:
- Nutty Brookies: Fold chopped walnuts, pecans, or almonds into either the brownie or cookie dough for added crunch.
- Peppermint Bliss: During the holidays, add a teaspoon of peppermint extract to the brownie layer and sprinkle crushed candy canes on top before baking.
- White Chocolate Dream: Swap some or all of the semi-sweet chocolate chips for white chocolate chips in the cookie layer for a different flavor profile.
- S’mores Inspired: Press mini marshmallows and graham cracker pieces on top of the Brookies during the last 10 minutes of baking for a gooey, toasted s’mores vibe.
Common Pitfalls to Sidestep for Brookie Success
Even seasoned bakers can run into snags. Here are a few common issues to watch out for when making Brookies, and how to avoid them, ensuring your bars turn out perfectly every time.Overmixing the Batters:
This is a cardinal sin for both brownies and cookies. Overmixing develops gluten, leading to a tough, dry texture. Mix just until the ingredients are combined. A few streaks of flour are better than an overmixed, dry product.
Overbaking:
It’s so tempting to leave them in “just a little longer” for fear of underbaked centers, but overbaking is the quickest way to dry out your Brookies. Start checking at the lower end of the baking time. Remember, residual heat will continue to cook them slightly as they cool.
Not Cooling Completely:
I know, I know, the smell is intoxicating, and you want to dive in! But cutting warm Brookies is a recipe for a crumbly, messy disaster. The bars need time to set up and firm completely. This can take a couple of hours, or even longer. Pop them in the fridge for a bit if you’re in a hurry to slice.
Uneven Spreading of Batter:
While the swirl is meant to be rustic, try to get a relatively even base layer of brownie and distributed dollops of cookie dough. If one side is much thicker, it might bake unevenly, leaving some parts undercooked and others dry.
Storage & Keeping Your Brookies Fresh
Once you’ve baked these beauties, you’ll want to ensure they stay fresh and delicious for as long as possible. Proper storage is key!At Room Temperature:
Store cooled Brookie Bars in an airtight container at room temperature for up to 3-4 days. Keep them away from direct sunlight or heat, as this can affect their texture.
In the Refrigerator:
For extended freshness, you can store Brookies in an airtight container in the refrigerator for up to a week. They tend to firm up a bit when chilled, which some people prefer. You can enjoy them cold or let them come to room temperature before serving. A quick 10-15 second zap in the microwave can also bring back that warm, gooey texture.
Freezing for Later:
As mentioned, Brookies freeze wonderfully. Wrap individual bars tightly in plastic wrap, then place them in a freezer-safe bag or container. Label with the date. They’ll be delicious for up to 3 months. Thaw at room temperature or warm gently in the oven (300°F/150°C for about 10-15 minutes) or microwave until heated through.
These Brookie Bars truly embody the spirit of indulgence. They solve the age-old dessert dilemma with grace and deliciousness, offering a textural journey that satisfies every craving. Whether you’re making them for a crowd or just for yourself, prepare to fall in love with this ultimate hybrid treat. Happy baking!
Ultimate Brookie Bar (Brownie + Chocolate Chip Cookie)
Indulge in the best of both worlds with these Brookie Bars, featuring a fudgy brownie base swirled with a chewy chocolate chip cookie topping.
📝 Ingredients
👩🍳 Instructions
- 1Preheat oven to 350°F (175°C). Line a 9x13 inch baking pan with parchment paper, leaving an overhang on two sides.
- 2For the brownie layer: In a large bowl, whisk melted butter and 1 cup granulated sugar until combined. Whisk in 2 eggs one at a time, then 1 teaspoon vanilla extract.
- 3In a separate small bowl, whisk together cocoa powder, ½ cup all-purpose flour, baking powder, ¼ teaspoon salt, and espresso powder (if using). Add dry ingredients to wet, mixing until just combined. Fold in ½ cup chocolate chips. Set aside.
- 4For the cookie layer: In another large bowl, cream softened butter, ½ cup granulated sugar, and brown sugar with an electric mixer until light and fluffy (2-3 minutes). Beat in 1 egg and 1 teaspoon vanilla extract.
- 5In a separate small bowl, whisk together 1½ cups all-purpose flour, baking soda, and ¼ teaspoon salt. Gradually add dry ingredients to wet, mixing on low speed until just combined. Fold in 1 cup chocolate chips.
- 6Spread about two-thirds of the brownie batter evenly into the prepared pan. Dollop spoonfuls of cookie dough over the brownie layer, then dollop the remaining brownie batter in the gaps. Gently swirl the batters with a knife or skewer for a marbled effect.
- 7Bake for 30-35 minutes, or until edges are set and a toothpick inserted into the brownie comes out with moist crumbs. The cookie layer should be golden brown.
- 8Cool completely in the pan on a wire rack before lifting out by the parchment paper and slicing into bars. Cooling completely is essential for clean cuts.
💡 Notes
Store Brookies in an airtight container at room temperature for up to 4 days, or refrigerate for up to a week. For clean cuts, ensure bars are completely cooled before slicing. You can freeze individual bars for up to 3 months; thaw at room temperature or warm gently.



