


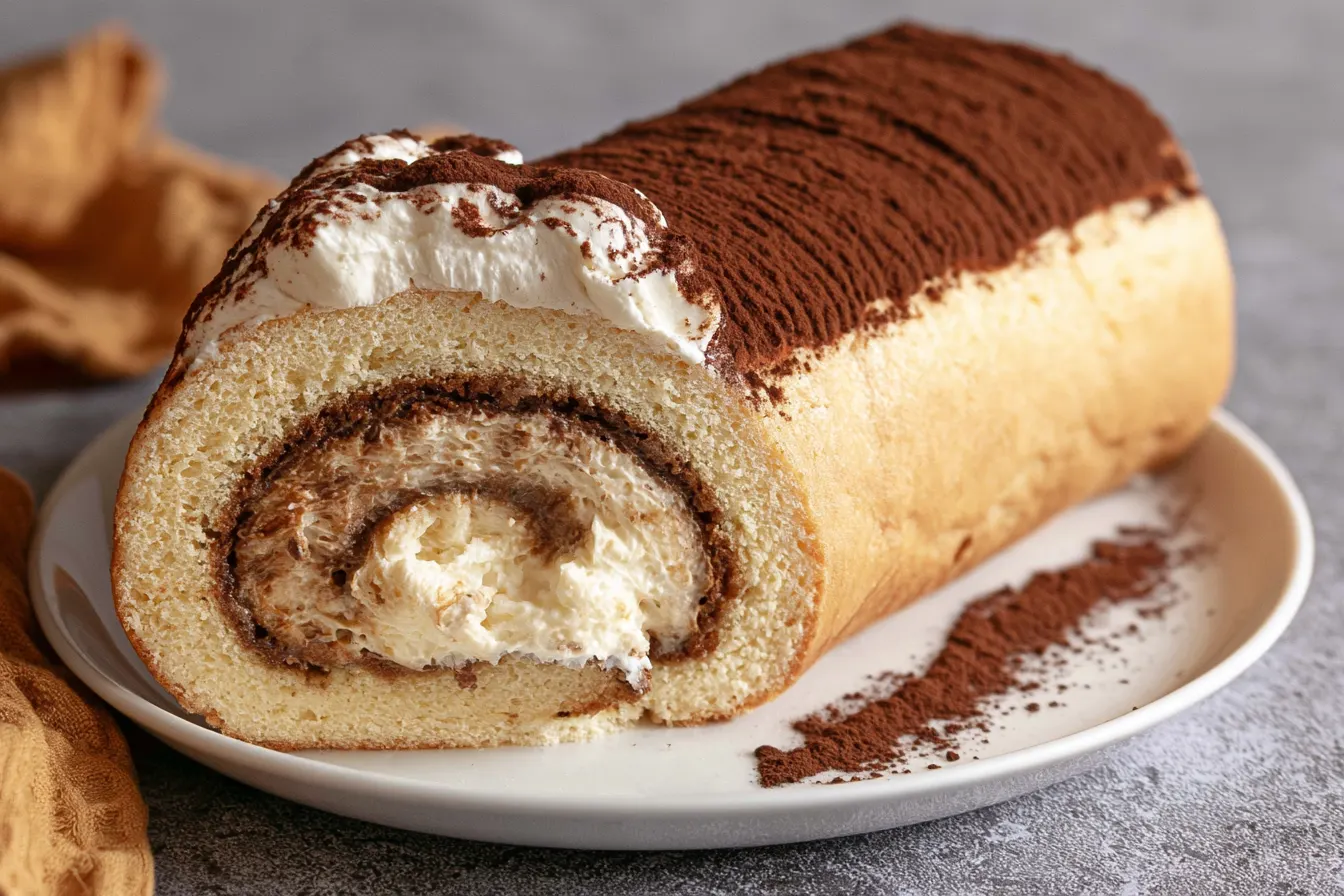
Have you ever had one of those days where only something truly indulgent will do? Something that wraps you in a hug, takes you back to cozy cafes, and just makes everything feel right? For me, that’s almost always tiramisu. But sometimes, a classic layered tiramisu feels a little… expected. That’s where this incredible tiramisu cake roll comes in. It’s all the rich, coffee-soaked goodness you adore, but in a beautifully elegant, sliceable format that’s surprisingly fun to make.
- Why This Tiramisu Roll Will Be Your New Favorite
- The Essential Ingredients for Your Tiramisu Cake Roll
- Crafting Your Perfect Tiramisu Cake Roll: Step-by-Step
- Step 1: Prepare Your Pan and Preheat Oven
- Step 2: Mix the Wet Ingredients for the Cake
- Step 3: Combine Dry Ingredients
- Step 4: Whip the Egg Whites
- Step 5: Fold the Meringue into the Batter
- Step 6: Bake the Sponge
- Step 7: Prepare for Rolling
- Step 8: Make the Mascarpone Cream Filling
- Step 9: Assemble the Tiramisu Cake Roll
- Step 10: Chill and Decorate
- Common Missteps and How to Sidestep Them
- Make-Ahead and Storage Tips
- Frequently Asked Questions About Tiramisu Cake Rolls

Why This Tiramisu Roll Will Be Your New Favorite
What sets this tiramisu cake roll apart from the rest? It’s a combination of thoughtful techniques and a deep understanding of what makes tiramisu so beloved. We’re not just making a vanilla sponge and calling it a day; this cake truly embodies the spirit of tiramisu from its very foundation. The sponge itself is light, airy, yet robust enough to be soaked in espresso without falling apart. The filling is another star. It’s not just whipped cream and mascarpone thrown together. We’re building a stable, intensely flavored mascarpone cream that mimics the richness of traditional tiramisu custard without the fuss of raw eggs or tempering. This means you get that signature tangy, creamy sweetness that perfectly balances the bitter coffee and cocoa. It’s a modern take that respects the classics. Then there’s the presentation. A cake roll, by its very nature, looks impressive. The swirl of cake and cream, dusted with cocoa, makes for an elegant dessert that’s perfect for dinner parties or a special weekend treat. It looks like you spent hours slaving away, but I promise, it’s our little secret how straightforward it actually is.The Essential Ingredients for Your Tiramisu Cake Roll
Creating this delightful dessert requires a handful of quality ingredients. Don’t skimp on the good stuff here; each component plays a crucial role in the final flavor and texture.For the Espresso Sponge Cake
- All-Purpose Flour: The backbone of our cake. Sift it for the lightest texture.
- Granulated Sugar: Sweetens the cake and helps with tenderness.
- Eggs: Large eggs, separated. The yolks add richness, and the whites provide structure and lift when whipped.
- Strong Brewed Espresso: This is non-negotiable for that authentic tiramisu flavor. Make it strong and let it cool.
- Vegetable Oil: Keeps the cake moist and pliable, helping it roll without cracking.
- Baking Powder: Our leavening agent for a light, airy crumb.
- Salt: Just a pinch to balance the sweetness.
For the Mascarpone Cream Filling
- Mascarpone Cheese: The star of the filling! Ensure it’s cold and good quality for the best texture.
- Heavy Cream: Needs to be very cold to whip up properly into stiff peaks.
- Powdered Sugar: Sweetens the cream and dissolves easily, preventing graininess.
- Vanilla Extract: Pure vanilla extract amplifies all the other flavors.
- Optional: Coffee Liqueur (like Kahlúa) or Rum: A little splash adds depth and classic tiramisu notes. Completely optional, but highly recommended for adults.
For Soaking and Dusting
- Strong Brewed Espresso: Again, let it cool completely.
- Unsweetened Cocoa Powder: For dusting, choose a good quality Dutch-processed cocoa for a richer color and smoother flavor.

Crafting Your Perfect Tiramisu Cake Roll: Step-by-Step
Let’s get baking! Don’t be intimidated by the rolling; I’ll walk you through each step. Precision here leads to perfection.Step 1: Prepare Your Pan and Preheat Oven
Preheat your oven to 350°F (175°C). Line a 10×15-inch (25×38 cm) jelly roll pan with parchment paper, leaving an overhang on the sides. Lightly grease the parchment paper. This parchment overhang will be your best friend when lifting the baked cake.
Step 2: Mix the Wet Ingredients for the Cake
In a large bowl, whisk together the egg yolks, half of the granulated sugar, cooled espresso, and vegetable oil until thoroughly combined and slightly pale. This mixture will be the base of our tender sponge.
Step 3: Combine Dry Ingredients
In a separate medium bowl, whisk together the all-purpose flour, baking powder, and salt. Gradually add the dry ingredients to the wet ingredients, mixing just until no lumps remain. Be careful not to overmix; overmixing develops gluten and can make your cake tough.
Step 4: Whip the Egg Whites
In a very clean, grease-free bowl (preferably metal or glass), beat the egg whites with an electric mixer on medium speed until soft peaks form. Gradually add the remaining granulated sugar, increasing the speed to high, and continue beating until stiff, glossy peaks form. The meringue should hold its shape when you lift the beaters.
Step 5: Fold the Meringue into the Batter
Gently fold about one-third of the whipped egg whites into the cake batter to lighten it. Then, carefully fold in the remaining egg whites in two additions. Use a spatula and a gentle hand, cutting down the center and folding over, rotating the bowl. The goal is to incorporate the air without deflating the whites. Tip: This step is crucial for an airy sponge! Be patient and gentle.
Step 6: Bake the Sponge
Pour the batter evenly into your prepared jelly roll pan. Spread it gently with an offset spatula to reach all corners. Bake for 12-15 minutes, or until the cake springs back when lightly touched and the edges are lightly golden. Don’t overbake, or it will be dry and prone to cracking.
Step 7: Prepare for Rolling
As soon as the cake comes out of the oven, immediately dust a clean kitchen towel (one that doesn’t shed lint!) with powdered sugar. Invert the hot cake onto the sugared towel. Carefully peel off the parchment paper. Trim any crisp edges of the cake if necessary. Starting from one short end, tightly roll the cake and the towel together. Place the rolled cake (still in the towel) seam-side down on a wire rack and let it cool completely to room temperature. This “trains” the cake to roll without cracking.
Step 8: Make the Mascarpone Cream Filling
While the cake cools, prepare the filling. In a large bowl, whisk together the cold mascarpone cheese, cold heavy cream, powdered sugar, and vanilla extract (and coffee liqueur/rum, if using) until stiff peaks form. Be careful not to overbeat, or the mascarpone can curdle. It should be thick, creamy, and spreadable.

Step 9: Assemble the Tiramisu Cake Roll
Once the cake is completely cool, gently unroll it from the towel. Brush the inside of the cake evenly with about half of the cooled strong espresso. Spread the mascarpone cream filling evenly over the entire surface of the cake, leaving a small border (about 1/2 inch) around the edges. Carefully re-roll the cake, starting from the same short end you started with. Roll it tightly but gently. Place the finished roll seam-side down on a serving platter.
Step 10: Chill and Decorate
Cover the cake roll loosely with plastic wrap and refrigerate for at least 2 hours, or preferably overnight. This allows the flavors to meld and the cake to firm up, making it easier to slice. Just before serving, dust generously with unsweetened cocoa powder. You can also pipe additional cream on top for a decorative touch if you like.
Common Missteps and How to Sidestep Them
Even experienced bakers can run into snags with cake rolls. Here are a few common issues and how to ensure your tiramisu cake roll turns out perfectly every time.Cracked Cake
This is the most common fear! The main culprits are overbaking (which dries out the cake) or not rolling it while hot. Make sure your cake is baked just until it springs back, and roll it immediately after removing it from the oven with the towel. Letting it cool completely before the initial roll will lead to cracks.
Soggy Cake
Too much espresso soak can make your cake fall apart. Brush the espresso on, don’t drench it. You want it moist, not saturated. A pastry brush helps control the amount.
Runny Filling
Ensure your mascarpone and heavy cream are very cold when you start whipping. Overwhipping can also cause the mascarpone to separate and become grainy or runny. Stop as soon as stiff peaks form.
Flavor Falls Flat
Use good quality ingredients, especially the espresso and mascarpone. Don’t skip the optional coffee liqueur if you enjoy the classic tiramisu depth. Also, make sure to chill the cake roll long enough; flavors deepen and meld beautifully with time.
Make-Ahead and Storage Tips
This tiramisu cake roll is a fantastic make-ahead dessert, which makes it perfect for entertaining! You can bake the sponge cake a day in advance. Once cooled, keep it rolled in the sugared towel, wrapped in plastic, at room temperature. The mascarpone cream filling can be made up to a day ahead and stored in an airtight container in the refrigerator. Give it a quick whisk before assembling if it seems a little firm. Once assembled, the cake roll needs at least 2 hours to chill, but it’s even better made the day before serving. The flavors really meld beautifully overnight. Store any leftover tiramisu cake roll in an airtight container in the refrigerator for up to 3-4 days. It doesn’t freeze well due to the delicate nature of the cream filling.Frequently Asked Questions About Tiramisu Cake Rolls
Can I make this tiramisu cake roll without alcohol?
Absolutely! The recipe is delicious without it. Simply omit the coffee liqueur or rum from the mascarpone cream filling. The espresso provides plenty of authentic tiramisu flavor.
What kind of coffee should I use for the espresso soak?
Use strong brewed espresso or very strong coffee. Instant espresso powder dissolved in hot water also works well in a pinch. The key is intensity of flavor to really shine through the cream and cake.
My cake cracked when I unrolled it. What went wrong?
Most likely, the cake was either overbaked, making it dry and brittle, or it wasn’t rolled while still hot. Make sure to bake it just until done, and roll it immediately with the towel. A little crack isn’t the end of the world, though; the filling and cocoa dusting can hide minor imperfections!
How far in advance can I make this cake roll?
You can assemble the entire tiramisu cake roll up to 2 days in advance. It actually tastes better after a day in the fridge as the flavors deepen and the cake has time to fully absorb the espresso. Dust with cocoa just before serving.
Can I use cream cheese instead of mascarpone?
While you technically *can* substitute cream cheese, it will significantly change the flavor and texture. Mascarpone is much richer, less tangy, and has a smoother consistency than cream cheese. For an authentic tiramisu flavor, mascarpone is essential.

Elegant Tiramisu Cake Roll
A delightful tiramisu cake roll featuring a tender espresso sponge and a rich mascarpone cream filling, dusted with cocoa.
📝 Ingredients
👩🍳 Instructions
- 1Preheat oven to 350°F (175°C). Line a 10x15-inch (25x38 cm) jelly roll pan with parchment paper, leaving an overhang on the sides. Lightly grease the parchment.
- 2In a small bowl, whisk together flour, baking powder, and salt.
- 3In a large bowl, whisk egg yolks with 1/4 cup (50g) granulated sugar, 1/4 cup cooled espresso, and vegetable oil until pale and combined.
- 4Gradually add the dry ingredients to the yolk mixture, mixing until just combined. Do not overmix.
- 5In a very clean, separate bowl, beat egg whites until soft peaks form. Gradually add the remaining 1/4 cup (50g) granulated sugar and beat until stiff, glossy peaks form.
- 6Gently fold one-third of the whipped egg whites into the batter to lighten it. Then, carefully fold in the remaining egg whites in two additions until no streaks remain.
- 7Pour batter into the prepared pan and spread evenly. Bake for 12-15 minutes, or until the cake springs back when lightly touched. Do not overbake.
- 8Immediately invert the hot cake onto a clean kitchen towel dusted with powdered sugar. Carefully peel off the parchment paper. Starting from a short end, roll the cake and towel together tightly. Let cool completely on a wire rack, seam-side down.
- 9For the filling: In a large bowl, whisk cold mascarpone cheese, cold heavy cream, powdered sugar, vanilla extract, and optional coffee liqueur/rum until stiff peaks form. Be careful not to overbeat.
- 10Once the cake is completely cool, gently unroll it. Brush evenly with the remaining 1/4 cup cooled espresso. Spread the mascarpone cream filling over the cake, leaving a small border.
- 11Carefully re-roll the cake, starting from the short end. Place seam-side down on a serving platter. Cover loosely and refrigerate for at least 2 hours, or overnight.
- 12Before serving, dust generously with unsweetened cocoa powder. Slice and enjoy!
💡 Notes
Ensure all dairy ingredients for the filling are very cold. Do not overbake the cake, as it will crack when rolled. For best results, chill overnight to allow flavors to meld.



