


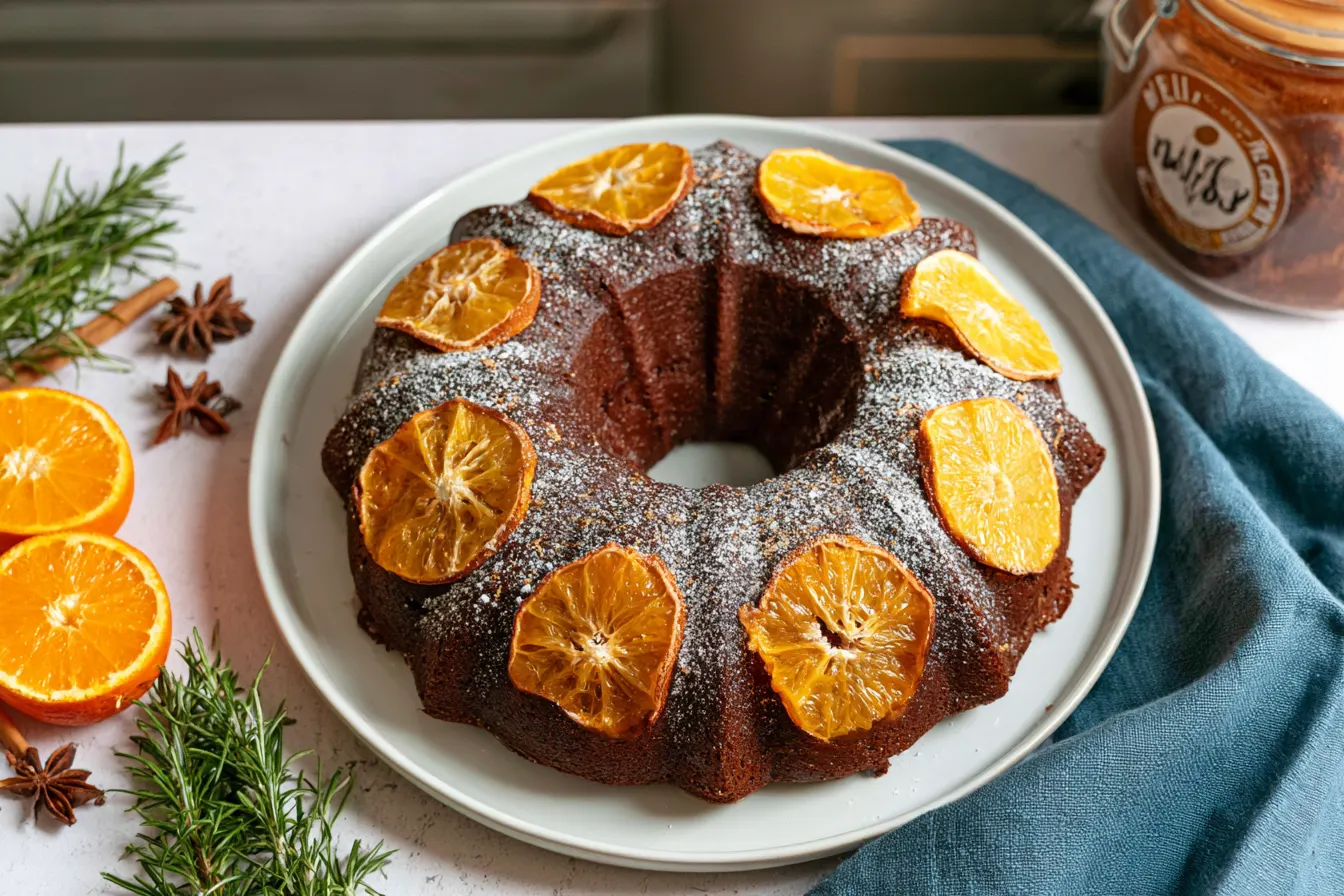
A few weeks ago, I was rummaging through my pantry, trying to figure out what to bake for a holiday gathering. My eyes landed on a bag of navel oranges and a bar of dark chocolate, and a little spark ignited – the classic combination of chocolate and orange, but elevated. I wanted something more festive than just cookies, something that would truly stand out, and that’s how this incredibly moist and flavourful Chocolate Orange Bundt cake was born.

Why This Chocolate Orange Bundt Cake Will Be Your New Obsession
There’s a subtle magic that happens when you combine chocolate and orange. The acidity and brightness of the orange cut through the richness of the chocolate, creating a flavor profile that’s both indulgent and refreshing. But beyond that perfect pairing, this particular Bundt cake recipe has a few secret weapons up its sleeve. First, we’re not just throwing in a splash of orange extract. Oh no. We’re using fresh orange zest and juice, which infuses every single crumb with an authentic, vibrant citrus aroma. You can smell it baking from down the hall, and that’s a promise. The natural oils in the zest are incredibly potent and carry so much of that characteristic orange flavour. Secondly, the texture. This cake is unbelievably moist. We’re talking melt-in-your-mouth tender, thanks to a thoughtful combination of ingredients that keep it from drying out. No one wants a crumbly, dry Bundt cake, especially during the holidays! It’s dense enough to feel substantial, but light enough not to be overly heavy after a big meal. And finally, that glaze. It’s not just an afterthought; it’s an integral part of the experience. A glossy, decadent chocolate glaze that drips beautifully down the fluted sides of the Bundt, adding another layer of deep chocolate flavour and a touch of elegance. It’s simple to make, but looks incredibly impressive.Unlocking the Zest: The Magic of Fresh Oranges
When it comes to citrus in baking, fresh is always best. Orange extract can sometimes taste artificial or overpowering. For this Chocolate Orange Bundt cake, we’re relying heavily on the natural oils found in the zest and the bright acidity of freshly squeezed juice. The zest contains aromatic compounds that are far more potent and nuanced than anything you’ll find in a bottle. When you grate the zest, those oils are released, permeating the batter with their intoxicating fragrance. It’s what gives this cake its signature “zing.” Always make sure to zest your oranges before you juice them – it’s much easier that way!Gathering Your Baking Arsenal: Ingredients for Success
Before you preheat your oven and grab your Bundt pan, let’s make sure we have all our players lined up. High-quality ingredients truly make a difference in the final taste and texture of your cake. Think of it as assembling a dream team for your dessert.For the Orange Bundt Cake
- All-Purpose Flour: The backbone of our cake. Make sure it’s fresh!
- Granulated Sugar: Sweetness and contributes to moisture.
- Baking Powder & Baking Soda: Our leavening agents, giving the cake its beautiful rise. Don’t skip either!
- Salt: A pinch enhances all the other flavors.
- Unsalted Butter: Softened to room temperature. This is crucial for a light, airy crumb.
- Large Eggs: Also at room temperature. They bind everything together and add richness.
- Sour Cream: The secret weapon for moisture and a tender crumb. Don’t substitute with yogurt unless you absolutely have to.
- Milk: Any kind works – whole milk is my preference for richness.
- Fresh Orange Zest: From about 2-3 large navel oranges. This is where most of our orange flavor comes from.
- Fresh Orange Juice: About 1/4 cup, also from those lovely navel oranges.
- Vanilla Extract: A touch of warmth and sweetness.
For the Silky Chocolate Glaze
- Dark Chocolate: High quality, around 60-70% cacao. Chocolate chips or a chopped bar work well.
- Heavy Cream: For a rich, pourable glaze.
- Powdered Sugar: To sweeten and thicken the glaze.
- Butter: A small knob adds shine and a silky texture.
- Vanilla Extract: Just a touch.

The Craft of Baking: Step-by-Step Bundt Brilliance
Baking a Bundt cake might seem intimidating because of its elaborate shape, but I promise you, it’s quite straightforward. The key is in the preparation of the pan and careful mixing. Let’s walk through it together.Preparing Your Bundt Pan for Perfection
This is probably the most critical step for a successful Bundt cake. Nothing is more heartbreaking than a cake stuck in the pan! My go-to method ensures a clean release every time.
- Grease Generously: Use a pastry brush or your fingers to really get into all the nooks and crannies of your Bundt pan. I prefer a baking spray with flour (like Baker’s Joy), or you can make your own paste with equal parts softened butter, flour, and vegetable shortening.
- Flour Thoroughly: Once greased, sprinkle a tablespoon or two of flour into the pan. Rotate and tap the pan until every surface is lightly coated. Tap out any excess flour. This creates a non-stick barrier.
- Preheat Power: Preheat your oven to 350°F (175°C). Having your oven at the correct temperature before the cake goes in is essential for even baking and a good rise.
Crafting the Orange Cake Batter
The batter comes together quickly once your ingredients are prepped. Remember, room temperature ingredients are your friend here.
- Combine Dry Ingredients: In a medium bowl, whisk together your all-purpose flour, granulated sugar, baking powder, baking soda, and salt. Set aside. This ensures the leavening is evenly distributed.
- Cream the Butter and Zest: In a large mixing bowl (or the bowl of a stand mixer fitted with the paddle attachment), cream the softened unsalted butter with the fresh orange zest until light and fluffy. This step infuses the butter with intense orange flavor right from the start. Scrape down the sides of the bowl.
- Add Eggs and Vanilla: Beat in the large eggs one at a time, mixing well after each addition. Then stir in the vanilla extract. The mixture might look a little curdled, but don’t worry, it will come together.
- Alternate Wet and Dry: With the mixer on low speed, gradually add the dry ingredients to the wet ingredients, alternating with the sour cream, milk, and fresh orange juice. Begin and end with the dry ingredients (e.g., 1/3 dry, 1/2 wet, 1/3 dry, 1/2 wet, 1/3 dry). Mix until *just* combined. Overmixing develops gluten, which can lead to a tough cake.
Tip: For the most tender cake, stop mixing as soon as you no longer see streaks of flour. A few small lumps are perfectly fine.
Baking Your Beautiful Bundt
Now for the main event – getting that cake into the oven!
- Fill the Pan: Pour the batter evenly into your prepared Bundt pan. Gently tap the pan on the counter a few times to release any large air bubbles and help the batter settle.
- Bake to Golden: Bake for 45-55 minutes, or until a wooden skewer inserted into the center of the cake comes out clean. Baking times can vary slightly depending on your oven.
- Cooling Act: Once baked, let the cake cool in the pan on a wire rack for 10-15 minutes. This cooling period allows the cake to firm up slightly, making it less prone to breaking when inverted.
- Invert and Cool Completely: After the initial cooling, carefully place your wire rack over the Bundt pan and, holding both firmly, invert the cake. Lift the pan off gently. Let the cake cool completely on the wire rack before glazing. This prevents the glaze from melting right off.
Note: Don’t leave it in the pan too long, or it might stick! The sweet spot is around 10-15 minutes.

Whipping Up the Velvety Chocolate Glaze
This glaze is incredibly easy and adds that perfect finishing touch. It’s rich, shiny, and sets beautifully.
- Melt Chocolate and Cream: In a small saucepan over low heat, or in a microwave-safe bowl in 30-second intervals, gently heat the heavy cream, chopped dark chocolate, and butter. Stir until completely melted and smooth. Be careful not to scorch the chocolate.
- Whisk in Sugar and Vanilla: Remove from heat and whisk in the powdered sugar and vanilla extract until the glaze is smooth and free of lumps. If it’s too thick, add a tiny splash more cream. If too thin, add a bit more powdered sugar.
- Glaze Away: Once your cake is completely cool, place it on a serving plate. Pour the warm (but not hot) glaze over the top, letting it drip artfully down the sides. You can use the back of a spoon to guide the glaze if needed.
- Set and Serve: Allow the glaze to set for about 15-20 minutes before slicing and serving. This gives it a beautiful sheen and prevents it from being too messy.
Common Bundt Cake Conundrums Solved
Baking a Bundt cake can sometimes throw a curveball, but most issues are easily preventable or fixable. Here are some of the most common questions I get asked about Bundt cakes, especially this Chocolate Orange Bundt cake.Why did my Bundt cake stick to the pan?
This is the number one fear of all Bundt bakers! Most often, it’s due to insufficient greasing and flouring, or not letting the cake cool for the right amount of time in the pan. Ensure you generously grease *every* crevice and dust thoroughly with flour. Don’t use non-stick spray without flour, as sometimes it can leave a sticky residue. Also, allow the cake to cool in the pan for exactly 10-15 minutes – too short and it’s too fragile, too long and it can sweat and stick.
Can I use orange extract instead of fresh zest and juice?
While you *can* use extract, I strongly advise against it for this specific recipe. The fresh orange zest provides a depth of flavor and a natural aroma that extract simply cannot replicate. Extract often tastes more artificial. If you absolutely must, start with 1/2 teaspoon of good quality orange extract in the batter and adjust to taste, but you’ll miss out on the vibrant freshness.
My cake sank in the middle – what happened?
A few culprits here:
- Oven temperature: An oven that’s too cool or too hot can affect the rise. Make sure your oven is properly calibrated.
- Expired leavening agents: Baking powder and soda lose their potency over time. Check their freshness!
- Too much liquid/not enough flour: Ensure you’re measuring accurately, especially with wet ingredients.
- Opening the oven door too early: Resist the urge to peek during the first 3/4 of the baking time.
How do I store leftover Chocolate Orange Bundt cake?
This cake keeps beautifully! Store any leftover slices in an airtight container at room temperature for up to 3-4 days. If your kitchen is very warm, or if you prefer, you can store it in the refrigerator for up to a week. Just bring it back to room temperature before serving for the best texture and flavor. It also freezes well (see next question!).
Can I freeze this Bundt cake?
Absolutely! This Chocolate Orange Bundt cake freezes wonderfully, making it perfect for making ahead. Once the cake has completely cooled and the glaze has fully set, wrap individual slices or the entire cake tightly in plastic wrap, then an additional layer of aluminum foil. Freeze for up to 2-3 months. Thaw overnight in the refrigerator, then bring to room temperature before serving. The texture remains surprisingly moist.
Serving Suggestions & The Perfect Pairing
This Chocolate Orange Bundt cake is a showstopper all on its own, but a few thoughtful additions can elevate the experience even further. It’s particularly splendid as a holiday dessert, but honestly, it’s a treat any time of year. For a simple, elegant presentation, a dusting of powdered sugar over the set glaze adds a lovely snowy effect. If you’re feeling a bit fancy, a few candied orange slices or a scattering of fresh orange segments around the base of the cake look absolutely stunning and reinforce that beautiful orange flavour. When it comes to beverages, a strong cup of coffee is always a classic companion to chocolate cake. For something a little more festive, a glass of sparkling wine or a good quality Earl Grey tea with its bergamot notes would complement the orange beautifully. For the non-alcoholic crowd, a spiced apple cider or even a simple glass of milk is delightful. Consider serving it alongside a scoop of vanilla bean ice cream or a dollop of freshly whipped cream. The coolness and creaminess offer a lovely contrast to the dense, moist cake and rich glaze. It’s especially nice if the cake is still slightly warm from setting.A Little History: The Bundt Pan’s Journey
Did you ever wonder where that iconic Bundt shape came from? The Bundt pan, with its distinctive fluted design, is actually an American invention, though its inspiration comes from Europe. The name “Bundt” is derived from the German word “Bundkuchen,” which refers to a ring-shaped cake often made with yeast and dried fruit. In the 1950s, Nordic Ware co-founder H. David Dalquist was approached by members of a Jewish women’s organization who wanted to recreate the traditional European Bundkuchen in a modern, lightweight pan. Dalquist designed the aluminum Bundt pan, and while it was initially slow to take off, its popularity exploded after a Bundt cake won a national baking contest in 1966. Since then, the Bundt pan has become a staple in kitchens worldwide, prized for its ability to bake evenly and create beautifully shaped cakes that need little more than a simple glaze or dusting of sugar to look impressive. It’s a testament to good design and a clever adaptation that continues to delight bakers to this day. This Chocolate Orange Bundt cake is just one more delicious chapter in its storied history.
Decadent Chocolate Orange Bundt Cake
A super moist and flavourful orange Bundt cake with a rich, silky chocolate glaze, perfect for holiday gatherings or any special occasion.
📝 Ingredients
👩🍳 Instructions
- 1Preheat your oven to 350°F (175°C). Generously grease and flour a 10-12 cup Bundt pan, ensuring every crevice is coated. Tap out any excess flour.
- 2In a medium bowl, whisk together the all-purpose flour, granulated sugar, baking powder, baking soda, and salt. Set aside.
- 3In a large mixing bowl or the bowl of a stand mixer fitted with the paddle attachment, cream the softened unsalted butter with the orange zest until light and fluffy, about 2-3 minutes. Scrape down the sides of the bowl.
- 4Beat in the eggs one at a time, mixing well after each addition. Stir in 2 teaspoons of vanilla extract. The mixture might look slightly curdled, which is normal.
- 5In a separate small bowl, whisk together the sour cream, milk, and fresh orange juice.
- 6With the mixer on low speed, gradually add the dry ingredients to the wet ingredients, alternating with the sour cream mixture. Begin and end with the dry ingredients (e.g., 1/3 dry, 1/2 wet, 1/3 dry, 1/2 wet, 1/3 dry). Mix until just combined. Do not overmix.
- 7Pour the batter evenly into your prepared Bundt pan. Gently tap the pan on the counter a few times to release any large air bubbles.
- 8Bake for 45-55 minutes, or until a wooden skewer or toothpick inserted into the center of the cake comes out clean.
- 9Let the cake cool in the pan on a wire rack for 10-15 minutes. This allows it to firm up before inverting.
- 10Carefully invert the cake onto the wire rack and lift the pan off. Allow the cake to cool completely before glazing.
- 11TO MAKE THE CHOCOLATE GLAZE: In a small saucepan over low heat, combine the chopped dark chocolate, heavy cream, and butter. Stir constantly until completely melted and smooth. Alternatively, microwave in 30-second intervals, stirring after each, until smooth.
- 12Remove from heat and whisk in the powdered sugar and 1 teaspoon of vanilla extract until the glaze is smooth and silky. If it's too thick, add a tiny splash more cream; if too thin, add a bit more powdered sugar.
- 13Once the cake is completely cool, place it on a serving plate. Pour the warm (but not hot) glaze over the top, letting it drip down the sides. Allow the glaze to set for about 15-20 minutes before slicing and serving.
💡 Notes
For best results, ensure all cold ingredients (butter, eggs, sour cream, milk) are at room temperature. This helps create a smooth batter and a tender crumb. Store leftover cake in an airtight container at room temperature for 3-4 days, or in the refrigerator for up to a week. This cake freezes wonderfully for up to 2-3 months.



