


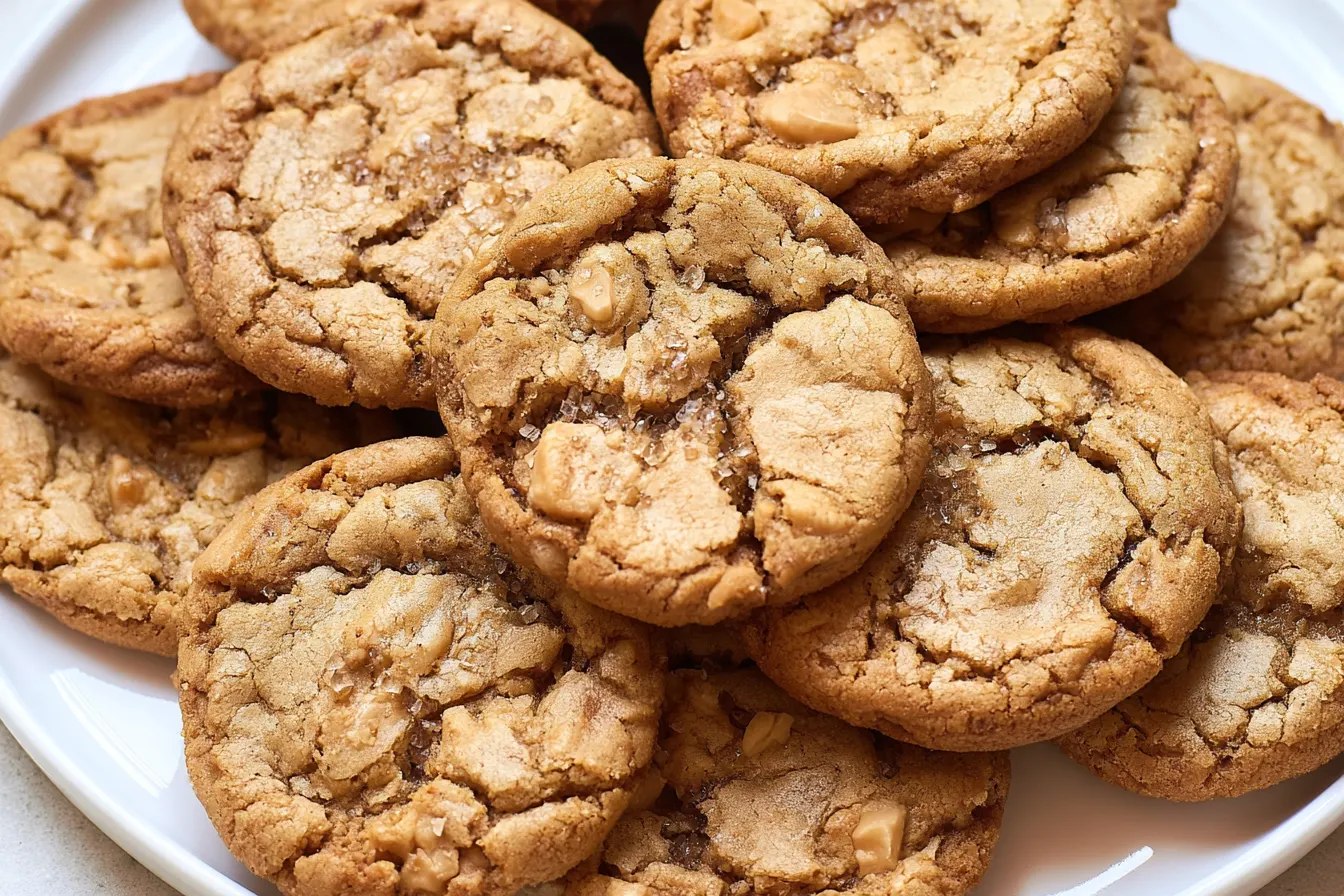
The scent of warm vanilla and melting chocolate wafting from the oven? That’s my ultimate comfort signal. It instantly takes me back to my grandmother’s kitchen, where a batch of chewy chocolate chip cookies was always just emerging from the oven, promising a moment of pure bliss.
There’s something truly magical about homemade cookies. They don’t just fill your belly; they fill your home with an aroma that speaks of warmth, happiness, and a little bit of indulgence. My kitchen, thanks to these cookies, almost always smells like a bakery, and I wouldn’t have it any other way.
This isn’t just any chocolate chip cookie recipe, though. We’re talking about that perfect balance: crispy edges, a delightfully gooey center, and chocolate in every single bite. It’s the kind of cookie that makes you close your eyes and savor each chew. Ready to make your kitchen the coziest spot on the block?

The Quest for the Perfect Chewy Chocolate Chip Cookie
For years, I tinkered. I tried recipes with melted butter, with cold butter, with different ratios of brown to white sugar. I experimented with chilling dough for days, baking immediately, and even varying oven temperatures. My goal? That elusive, perfect chewy texture that yields slightly when you break it open, revealing pockets of molten chocolate.
What I discovered along the way is that a few subtle tweaks can make all the difference. It’s not about complex techniques or obscure ingredients, but rather understanding how each component plays its part in the final cookie architecture. This recipe is the culmination of countless batches, all leading to this moment of cookie perfection.
Why This Recipe Stands Out
Many recipes promise chewiness, but often deliver a cookie that’s either too cakey or too thin and crispy. Our approach focuses on specific ingredient ratios and a couple of key steps that guarantee that desirable bend and softness. We’re aiming for a cookie that holds its shape but practically melts in your mouth.
The combination of brown and white sugars is crucial here. Brown sugar contributes moisture and chewiness, while white sugar aids in spread and crispness around the edges. It’s a delicate dance, but when done right, the results are simply irresistible. Plus, we’re generous with the chocolate, because what’s a chocolate chip cookie without plenty of chips?
Gather Your Ingredients: What You’ll Need
Before we dive into the baking magic, let’s make sure you have everything ready. Good ingredients are the foundation of great cookies, so opt for quality where you can. Fresh butter and good chocolate chips will truly elevate your bake.
Dry Ingredients
- 2 ¼ cups (270g) All-Purpose Flour
- 1 teaspoon Baking Soda
- ½ teaspoon Salt
Wet Ingredients & Flavor
- 1 cup (226g) Unsalted Butter, softened to room temperature
- ¾ cup (150g) Granulated Sugar
- 1 cup (200g) Packed Light Brown Sugar
- 2 large Eggs
- 2 teaspoons Pure Vanilla Extract
The Chocolate
- 2 cups (340g) Semi-Sweet Chocolate Chips or Chunks (a mix is even better!)

Baking Up Bliss: Step-by-Step Instructions
Ready to transform simple ingredients into glorious cookies? Follow these steps carefully, and you’ll be enjoying warm, chewy goodness in no time. Precision matters, but don’t forget to have fun with it!
Step 1: Prep Your Workspace
Preheat your oven to 375°F (190°C). Line two large baking sheets with parchment paper or silicone baking mats. This prevents sticking and ensures even baking, plus makes cleanup a breeze.
Step 2: Combine the Dry Elements
In a medium bowl, whisk together the flour, baking soda, and salt. Make sure these are thoroughly combined. This ensures the leavening agent and salt are evenly distributed throughout your dough.
Step 3: Cream the Butter and Sugars
In a large bowl, using an electric mixer (handheld or stand mixer with paddle attachment), cream together the softened butter, granulated sugar, and light brown sugar until light and fluffy. This usually takes about 2-3 minutes. This step incorporates air, which is vital for a tender cookie.
Step 4: Add Eggs and Vanilla
Beat in the eggs one at a time, mixing well after each addition. Then, stir in the pure vanilla extract. Don’t overmix here; just combine until smooth.
Step 5: Incorporate Dry into Wet
Gradually add the dry ingredient mixture to the wet ingredients, mixing on low speed until just combined. Be careful not to overmix the dough once the flour is added, as this can develop the gluten too much, leading to tougher cookies. Stop as soon as no dry streaks of flour remain.
Step 6: Stir in the Chocolate
Fold in the chocolate chips or chunks by hand using a spatula. Distribute them evenly throughout the dough. I like to save a few extra chips to press onto the tops of the cookie dough balls just before baking for a picture-perfect finish.
Step 7: Portion and Bake
Drop rounded tablespoons of dough onto the prepared baking sheets, leaving about 2 inches between each cookie. A cookie scoop works wonders for consistent sizing, which means consistent baking.

Tip: For extra chewiness and depth of flavor, consider chilling your dough for at least 30 minutes, or even overnight. This allows the flavors to meld and the butter to firm up, resulting in less spread and a richer taste. If chilling, you might need to add a minute or two to the baking time.
Step 8: Cool and Enjoy
Remove the baking sheets from the oven and let the cookies cool on the sheets for 2-3 minutes before transferring them to a wire rack to cool completely. This brief cooling period helps them set up and prevents them from breaking apart when moved.
Frequently Asked Questions About Chewy Chocolate Chip Cookies
Even seasoned bakers have questions! Here are some common queries I get about achieving the best chewy chocolate chip cookies.
How do I prevent my cookies from spreading too much?
Several factors can cause excessive spreading. Ensure your butter isn’t too soft – room temperature is key, not melted. Chilling the dough before baking also helps significantly. Lastly, make sure your oven temperature is accurate; a too-low oven can contribute to over-spreading.
Can I use different types of chocolate?
Absolutely! While semi-sweet is classic, feel free to experiment. Dark chocolate chunks will give a more intense, less sweet cookie. Milk chocolate will make them sweeter and creamier. A mix of different chocolates (like semi-sweet and milk chocolate chips, or even some chopped white chocolate) can create wonderful complexity.
What’s the best way to store these cookies to keep them chewy?
Once completely cooled, store your chewy chocolate chip cookies in an airtight container at room temperature. For maximum chewiness, you can even place a slice of bread in the container; the cookies will absorb moisture from the bread, keeping them soft for longer. They typically stay fresh for up to 3-4 days.
Can I freeze the cookie dough?
Yes, you definitely can! Scoop the dough into individual balls and place them on a parchment-lined baking sheet. Freeze until solid, then transfer the frozen dough balls to a freezer-safe bag or container. They can be stored for up to 3 months. When you’re ready to bake, place them on a baking sheet and bake from frozen, adding a few extra minutes to the baking time.
My cookies turned out cakey, what went wrong?
Cakiness often comes from too much flour or overmixing the dough once the flour is added. Using too much baking powder instead of baking soda can also lead to a cake-like texture. Make sure to measure your flour accurately, preferably by weight, and mix until just combined.
Variations to Keep Things Exciting
While the classic chewy chocolate chip cookie is perfect in its own right, sometimes it’s fun to mix things up. Here are a few ideas to get your creative juices flowing:
- Nutty Affair: Add ½ cup of chopped walnuts or pecans to the dough along with the chocolate chips for a delightful crunch and earthy flavor.
- Salted Caramel Swirl: Drizzle some homemade or store-bought caramel sauce over the dough before baking, or add small caramel bits to the mix. A sprinkle of sea salt on top before baking really makes the flavors pop.
- Spice It Up: For a warmer, cozier cookie, add ½ teaspoon of ground cinnamon or a pinch of nutmeg to your dry ingredients.
- Espresso Kick: Dissolve 1 teaspoon of instant espresso powder in the vanilla extract before adding it to the wet ingredients. This enhances the chocolate flavor without making the cookies taste overtly like coffee.
Serving Suggestions
These chewy chocolate chip cookies are perfect on their own, still warm from the oven with a glass of cold milk. But if you’re feeling a little extra, here are some ways to serve them:
- Ice Cream Sandwiches: Sandwich a scoop of your favorite vanilla bean or coffee ice cream between two cookies.
- Cookie Crumble: Crumble cooled cookies over ice cream sundaes, yogurt parfaits, or even as a topping for cheesecake.
- Dipped in Chocolate: Melt some extra chocolate and dip half of a cooled cookie into it, then sprinkle with sea salt before the chocolate sets. Pure decadence!
No matter how you enjoy them, these chewy chocolate chip cookies are sure to bring a smile to your face and fill your home with the most inviting aromas. Happy baking!

Ultimate Chewy Chocolate Chip Cookies
Craft the perfect chewy chocolate chip cookies with crispy edges and a gooey center. This recipe guarantees that delightful texture and rich chocolate flavor.
📝 Ingredients
👩🍳 Instructions
- 1Preheat oven to 375°F (190°C). Line two large baking sheets with parchment paper or silicone baking mats.
- 2In a medium bowl, whisk together the flour, baking soda, and salt. Set aside.
- 3In a large bowl, cream together the softened butter, granulated sugar, and light brown sugar with an electric mixer until light and fluffy (2-3 minutes).
- 4Beat in the eggs one at a time, mixing well after each addition. Stir in the vanilla extract.
- 5Gradually add the dry ingredient mixture to the wet ingredients, mixing on low speed until just combined. Do not overmix.
- 6Fold in the chocolate chips or chunks by hand until evenly distributed.
- 7Drop rounded tablespoons of dough onto the prepared baking sheets, leaving 2 inches between each cookie.
- 8Bake for 9-11 minutes, or until the edges are golden brown and the centers are still slightly soft. They will continue to set as they cool.
- 9Remove from oven and let cool on the baking sheets for 2-3 minutes before transferring to a wire rack to cool completely.
💡 Notes
For best results, use good quality chocolate chips. For an even chewier cookie, chill the dough for at least 30 minutes (or up to 24 hours) before baking. Store cooled cookies in an airtight container at room temperature for up to 3-4 days.



